We'll take you through setting up your Denon AVR-S530BT Home Theater System starting with teaching you the terminology, going through requirements and software, all the way to setting up your remote.
Tools You'll Need:
You may need a television stand or a shelf.
-->
Supplies You'll Need:
Batteries for your remote.
Cables for your television connections (these will most likely be HDMI).
Each individual prereq should have its own box like this. Not all will contain multiple links.
Comment out prerequisites section if no prereqs are necessary
-->
2. Home Theater Terminology
Like any hobby or job, there's a lot of very technical terms used to describe the various elements of a home theater system. Because of this, this guide cannot be exhaustive, but we'll be focused on a few, common terms you'll be encountering throughout this process.
Source
Something that generates audio or video. Your Blu-Ray player is a source of audio and video for the movies you play on it. Your cable box is a source of audio and video for television, and so on.
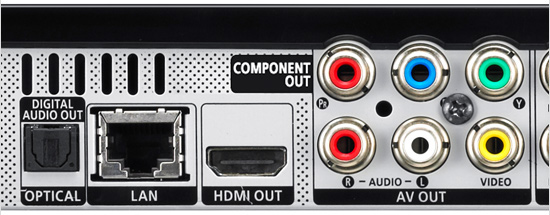
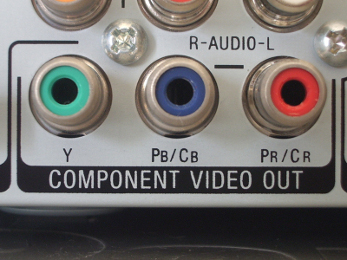
Output
This is where the device creates signal to go to another device. For example, the HDMI port on the back of your Blu-Ray player is an output that sends its picture to whatever it is plugged into.
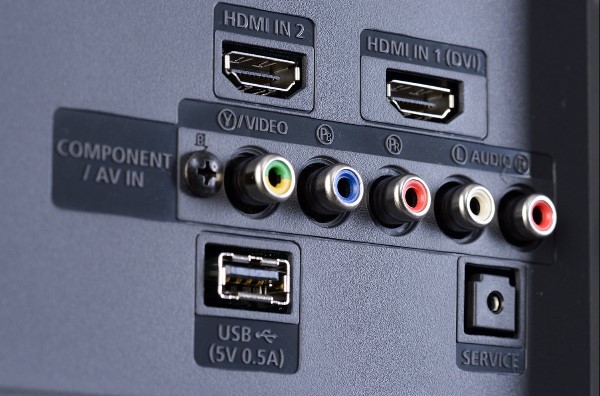
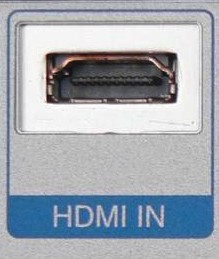
Input
This is where a device accepts signal from another device. For example, the HDMI ports on the back of your television are inputs that accept the signal your Blu-Ray player is sending to it.
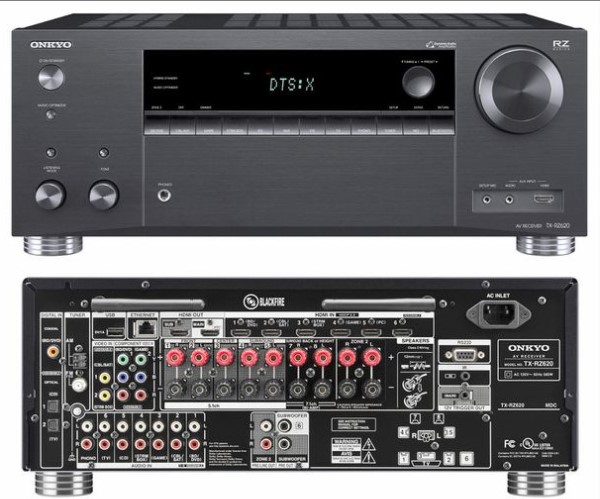
Receiver or Tuner
This is the 'hub', or the central point all of your equipment connects to. Your Receiver will take in inputs from various sources, and route them to various outputs. For example, you connect your game console to your receiver, and your receiver plays the sound through the speakers connected to it, and displays the video on the television which is also connected to it.
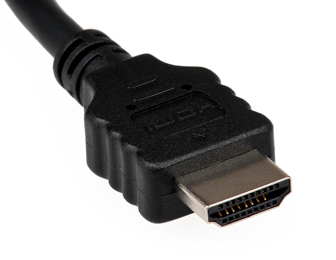
HDMI
Common type of cable used to connect home theater equipment. Stands for "High Definition Multimedia Interface"
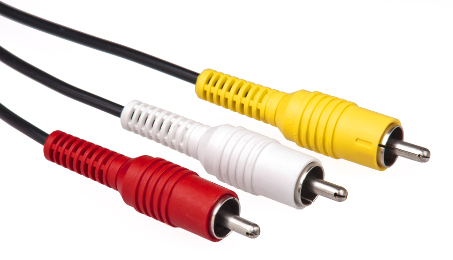
RCA or Composite
Common type of cable used to connect home theater equipment. Named after the Radio Corporation of America. Used mostly for audio, and older video equipment.
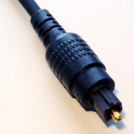
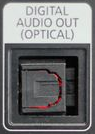
Optical
Common type of cable and connection for home theater equipment. Sometimes called TOSLINK or Digital Optical. It is a fiber-optic cable for audio.
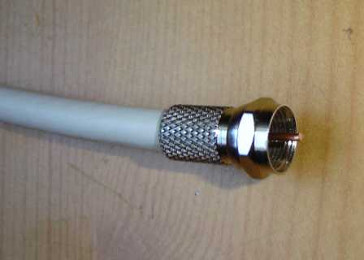
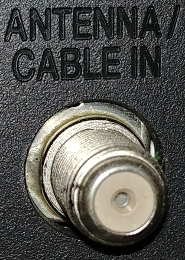
Coax
Common type of cable to connect from your antenna, satellite dish, or cable provider to your decoder box.
3. Home Theater Documentation
At first, setting up a home theater can be daunting, but a little careful planning can go a very long way in making it a fun, easy, and rewarding experience.
Write down what you have
To start, make a list of every device you have that you'd like to get connected to your home theater system. While this seems silly at first, it keeps things very organized for later, making this an invaluable step.
It's also helpful if you run into problems. If your Smart TV starts having problems, and you need to call someone for help, moving things around to look behind is a hassle. Simply glancing at a single sheet of paper with everything written down makes it a lot easier.
For each device, you'll want the following information:
What the device is, its make and model, and the types of connections it uses (both inputs and outputs). You can then highlight the connection you decide to use within your setup. For example:
This lets you easily take stock of what you have, determine the number and types of cables you'll need, decide what is going where when it's time to connect everything, and generally organize your setup.
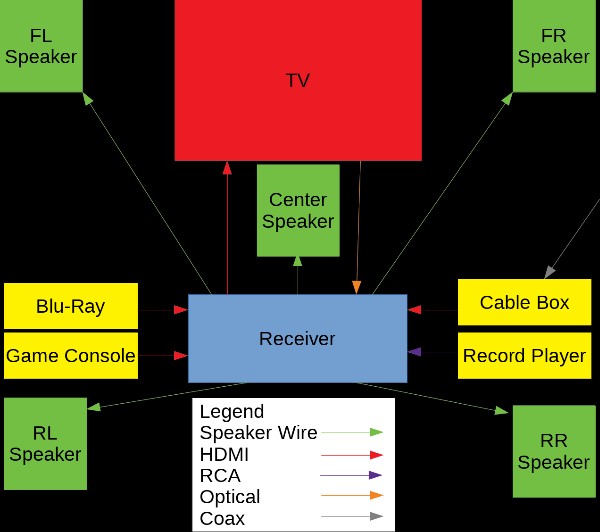
Draw a diagram
While this, too, can seem silly at first, it is key to understanding how everything connects. The best installers at movie theaters all have a 'map' drawn up simply showing where each part is, where it goes, and how it connects. When it comes to troubleshooting, adding a new device, or taking one away later, this will be the single most helpful document you have.
It can be as simple or as complex as you feel you need. In most cases, for a home theater, a simple diagram with your receiver in the center, and each device around it with colored, labeled lines indicating the type of connection used, arrows for inputs and outputs, and speakers involved is more than adequate.
4. Home Theater Power Requirements
While you simply need to power every device in your home theater setup, thinking about how to protect your investment from power surges is also something to consider.
This is an area where a little planning goes a very long way:
How many devices will you be connecting?
If you have six total devices, a small four plug power strip will not suffice.
Will you want to expand and add more devices later?
Most people will end up adding to and expanding with more devices in the future. You'll want to have extra outlets available to accommodate your future needs.
Do you want an easy way to turn on and off your whole setup?
Some power delivery devices will have front-facing power switches, or readouts for how power delivery is happening.
What shape of plugs do you have?
While most devices have moved away from the large, boxy AC to DC adapters that stick out of the wall or hang off the socket, they can still pose a problem. Depending on the type of power delivery accessory you choose, these types of plugs might interfere with neighboring outlets. Some power delivery device manufacturers have taken this into account, and rotated the plugs to make it less of an issue.
All power delivery devices wear out over time. Some may wear out more slowly, but expect to have to replace this part of your system every couple of years to avoid problems.
Different types of Power Protection
There are 3 different types of power distribution and protection devices.
It can be extremely dangerous to connect one power delivery device to another, or 'daisy-chain' them. Always plug these devices directly into a wall outlet, and not into another power delivery device.
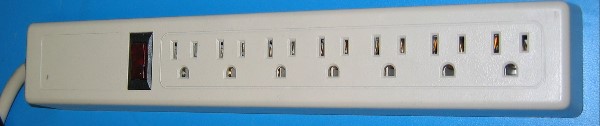
Outlet Duplicator / Power Strip
Very low cost.
Minimal, if any, protection. Most power surges are just passed through to your equipment which can damage or ultimately destroy them. Some models have a small fuse in them which is destroyed when a particularly strong surge occurs.
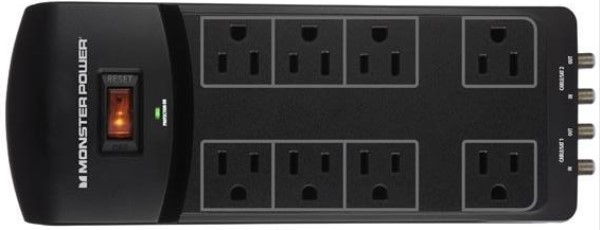
Surge Protectors
Average cost.
Provides decent protection to your devices. Some of these types tend to offer some extra protection as well for cable lines or networking lines. Many come with simple warranties that protect against power surge damage should your devices incur any while connected to one of these.
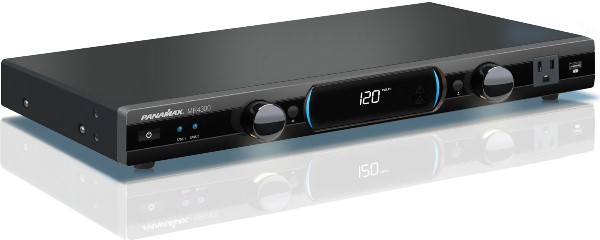
Power Conditioners
Very high cost.
Provides not only decent protection, but also 'conditions' the power, so there's little if any noise or power fluctuations introduced to your equipment. While subjective and very dependent on what is coming to your equipment in the first place, some people feel it can help with picture and sound quality.
These tend to be aesthetically pleasing, and integrate well with modern home theater and surround sound setups.
5. Denon AVRS530BT Display Setup
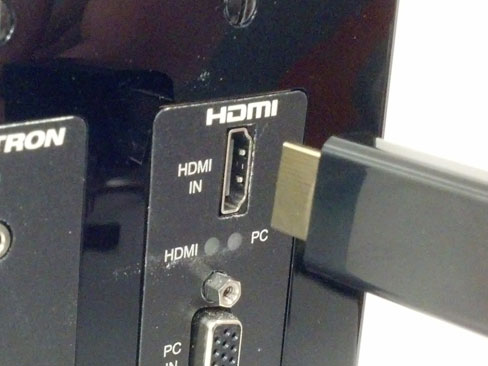
In most cases, most people prefer to use the simple, excellent HDMI connection between their home theater receiver and their TV. Plug one end into the back of your TV.
Many TVs have multiple HDMI ports. Your receiver is going to control all of this, now. Just use the port for HDMI 1.
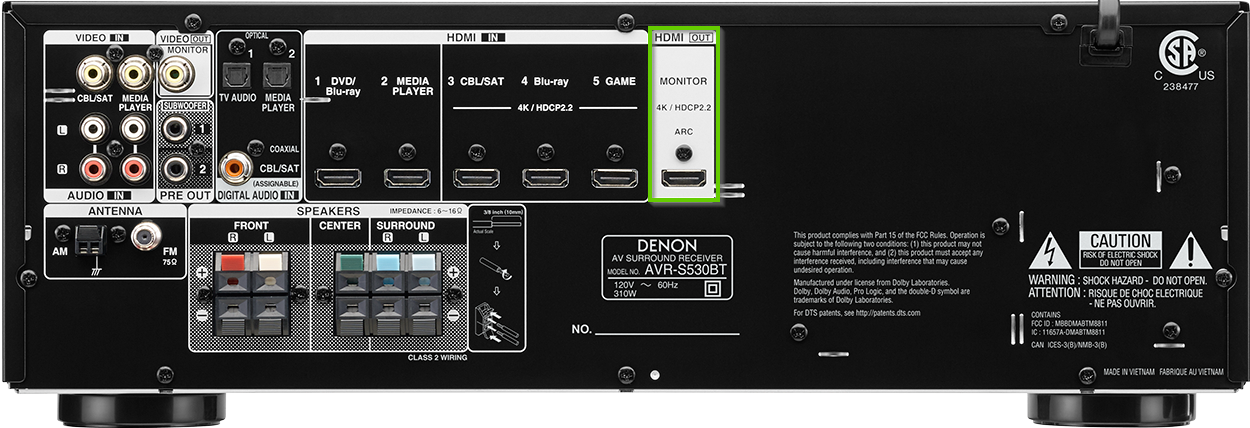
Connect the other end of the cable to your receiver. You're looking for something labeled HDMI Out; it's usually a different color.
With both your TV and Denon Receiver powered on, a Setup Wizard will appear on your TV.
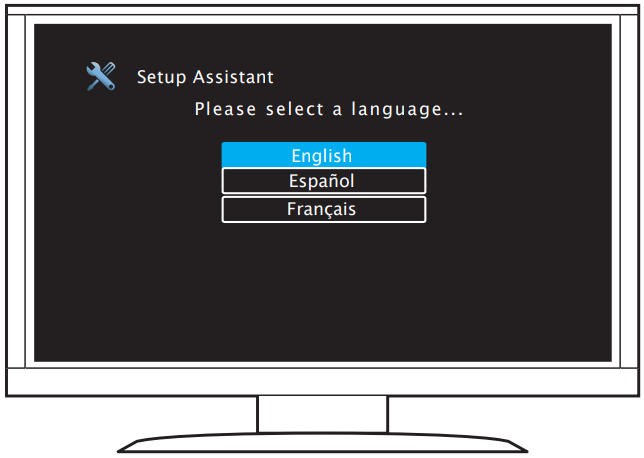
6. Denon AVRS530BT Setup Wizard Language Selection
Select your preferred language.
7. Home Theater Speaker Setup
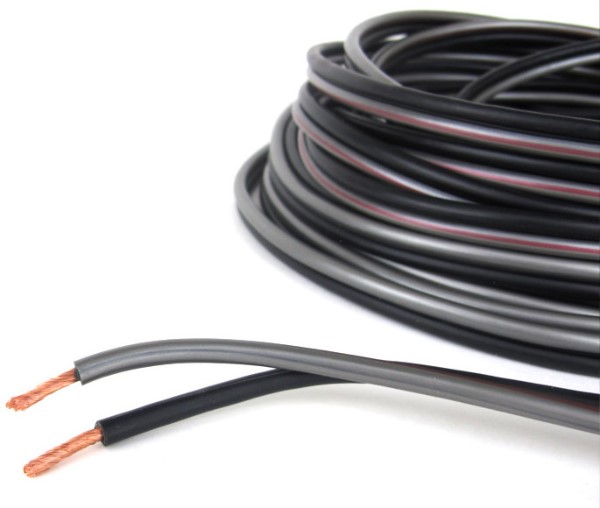
Most speakers will use very standard, simple 2-wire cables to connect them to your receiver.
Speaker wire has a polarity. In other words, it matters which side plugs in where. Most speaker wire will already be in a bundle of 2, and one of the cables will be a different color, or have a stripe of color or a label of some sort so you can identify them easily.
You will need one 'run' of cable (both wires) for each speaker. Make sure it is long enough to not only reach, but follow the contours of your room, and some extra for slack. This keeps them from being accidentally pulled out.
Depending on the model of the receiver you are using, the type of terminal you will plug your speaker wire into may vary.
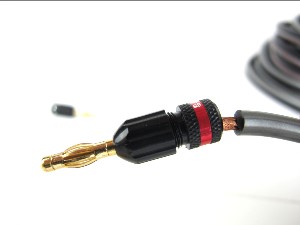
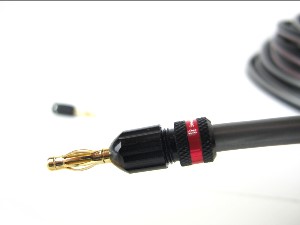
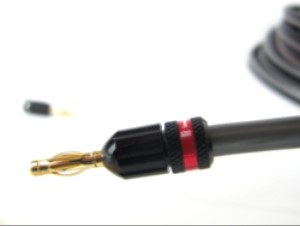
Many receivers and speakers may allow for you to use something called banana plugs, which can be attached to the speaker wires before plugging them in to give a cleaner, easier to use, and more permanent solution for connecting your speakers to your receiver.
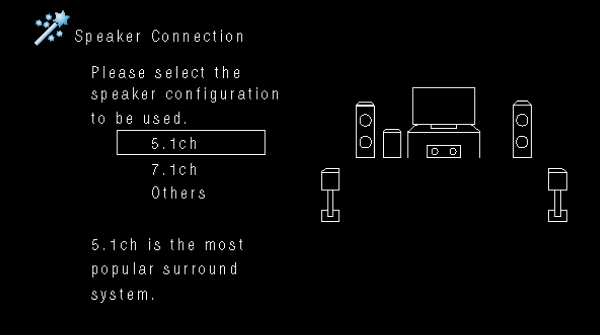
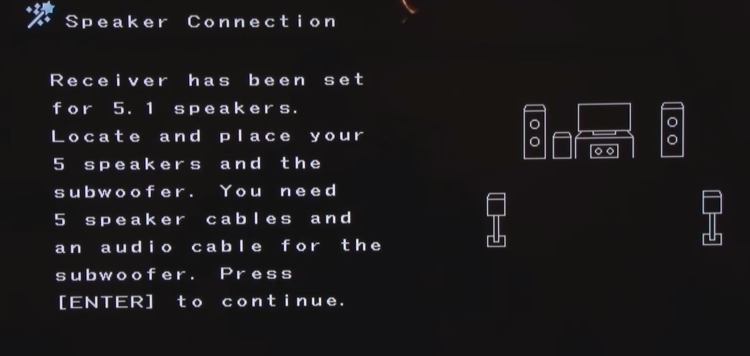
8. Denon AVRS530BT Setup Speaker Connection and Calibration
Select your speaker configuration.
The Wizard will then walk you through where to place your speakers.
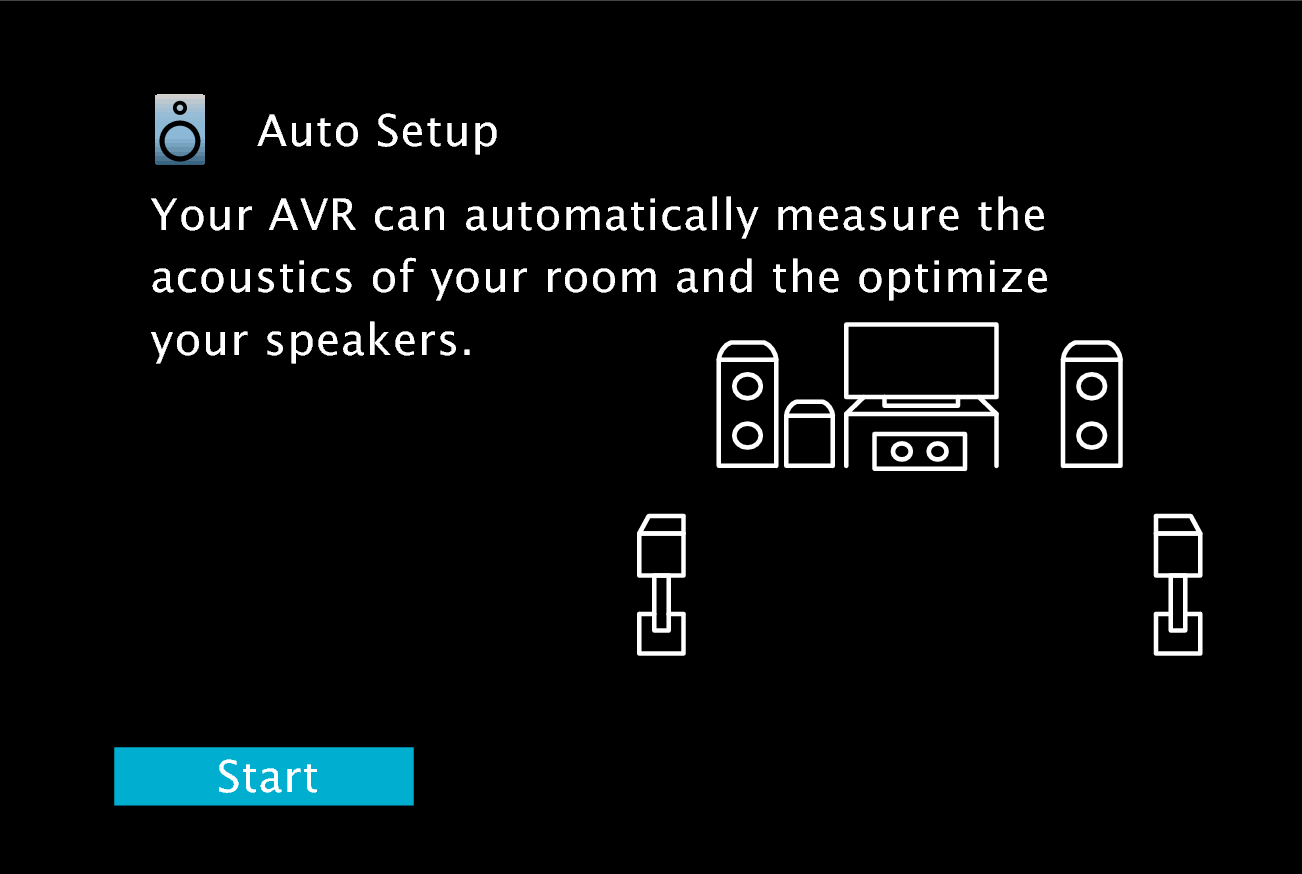
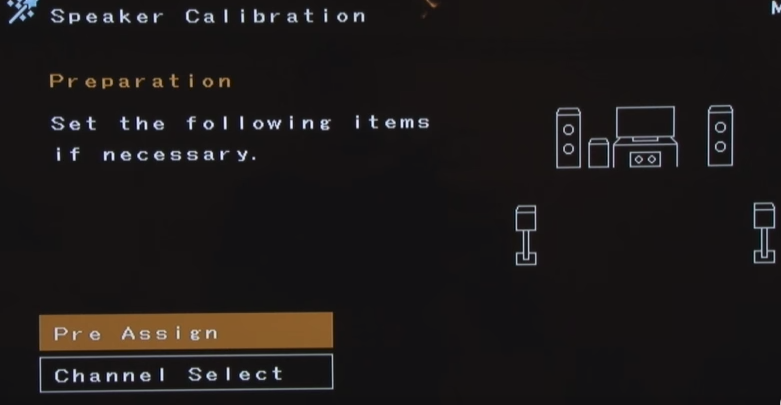
Next, the Wizard will start to calibrate your speakers. Place the provided microphone where you will be viewing the television from.
Select Start to begin calibration.
You can select whether to let your AVR decide your levels or assign them yourself.
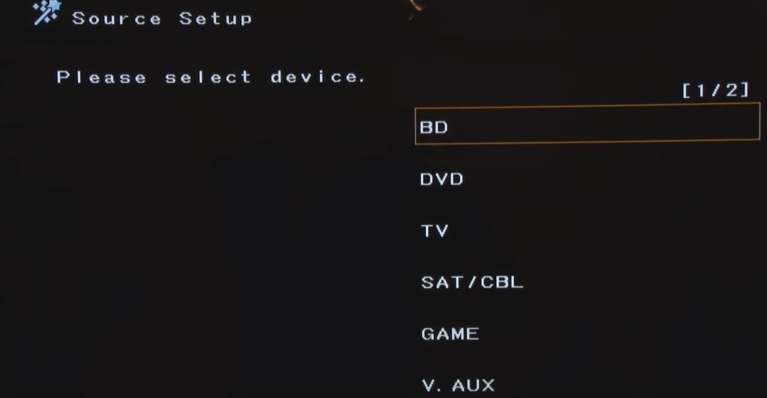
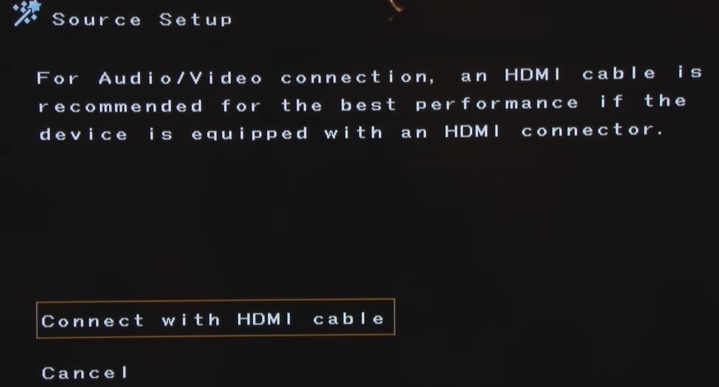
9. Denon AVRS530BT Connect to Your Source
Select SourceSetup.
Select the Source.
Follow the on-screen instructions to connect your Sources.
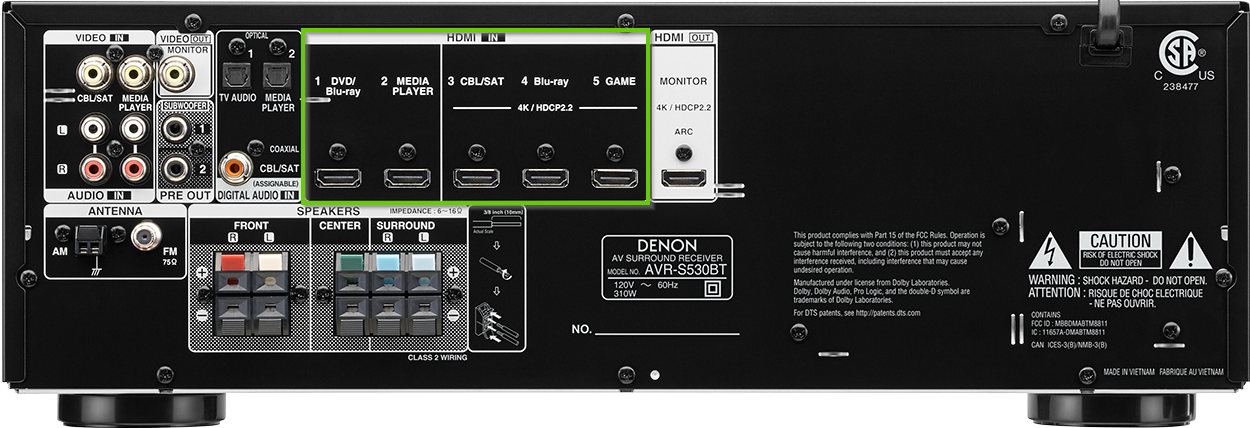
Connect each of your sources (Blu-ray, cable box, game console, etc.) to the appropriate connector on the back of your receiver.
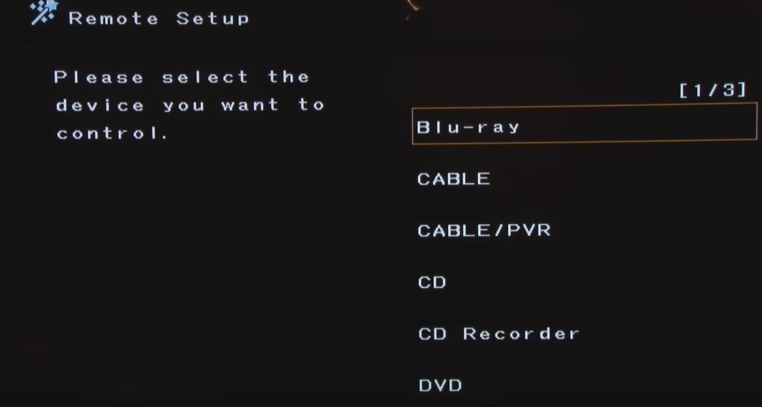
10. Denon AVRS530BT Remote Setup
Select the RemoteSetup.
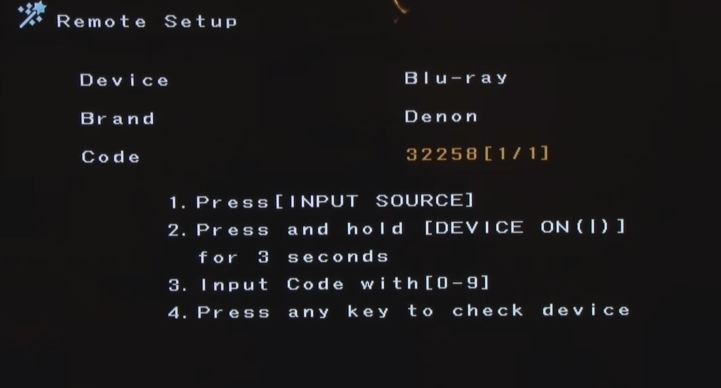
Select the Source you want your Denon remote to control.
Turn on your home theater devices, and test them out.
Make sure you can watch premium TV.
Make sure you can watch a Blu-ray movie.
Make sure your game console works.
Make sure any audio devices, such as a record player, work.
Make sure the speakers are in the correct locations.
Test any other device you have setup as part of your home theater.
It is critical to perform this step before moving forward, as we will be cleaning up the cables behind, next. After this, while it is entirely possible to make changes, it is a much greater hassle.
12. Learn About Cable Management
We can now begin bundling together and making the cables behind your system neat and tidy.
You can use one, or multiple different methods to give the look, and accessibility you want to the wiring of your home theater system.
Cable bundling
Cable bundling will most likely be the first step in cleaning up the cables from your home theater installation.
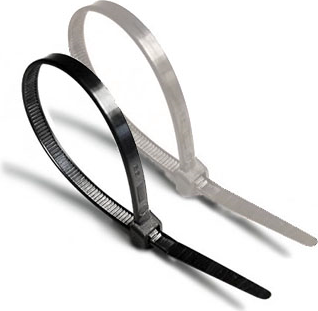
Cable Ties
Sometimes called zip ties, these are plastic, with a groove on one side, and a simple locking mechanism on the other. After securing the cables, cut off the remaining end of the cable tie. Given their incredibly low price, they are disposable. When you need to add another cable, you cut the old one off, and just use a new one.
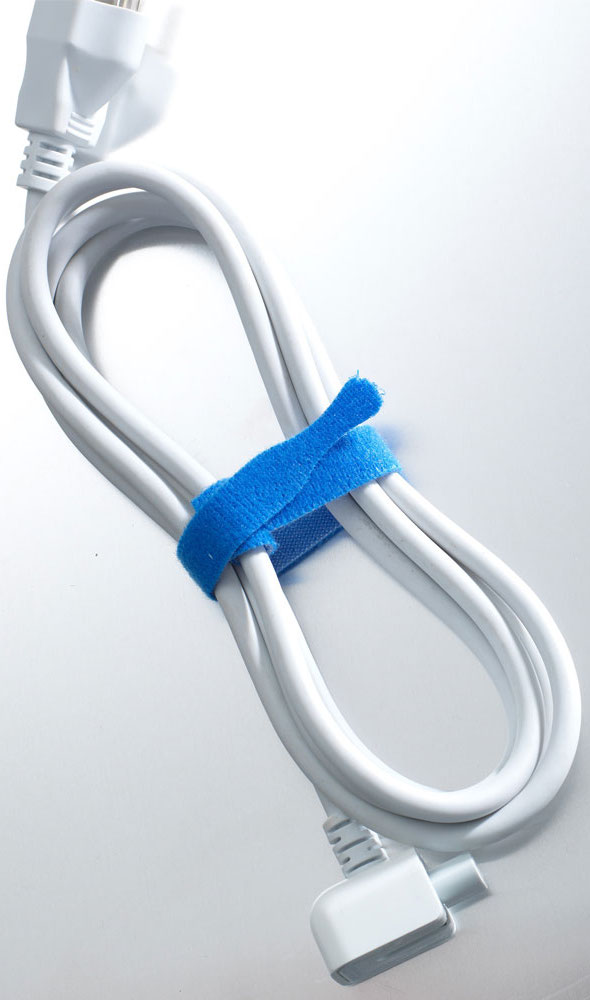
Velcro Straps
Much like cable ties, a simple Velcro strap has hooks on one side, felt on the other. The benefit is they can be easily un-bundled or added to, without cutting the strip and having to use another.
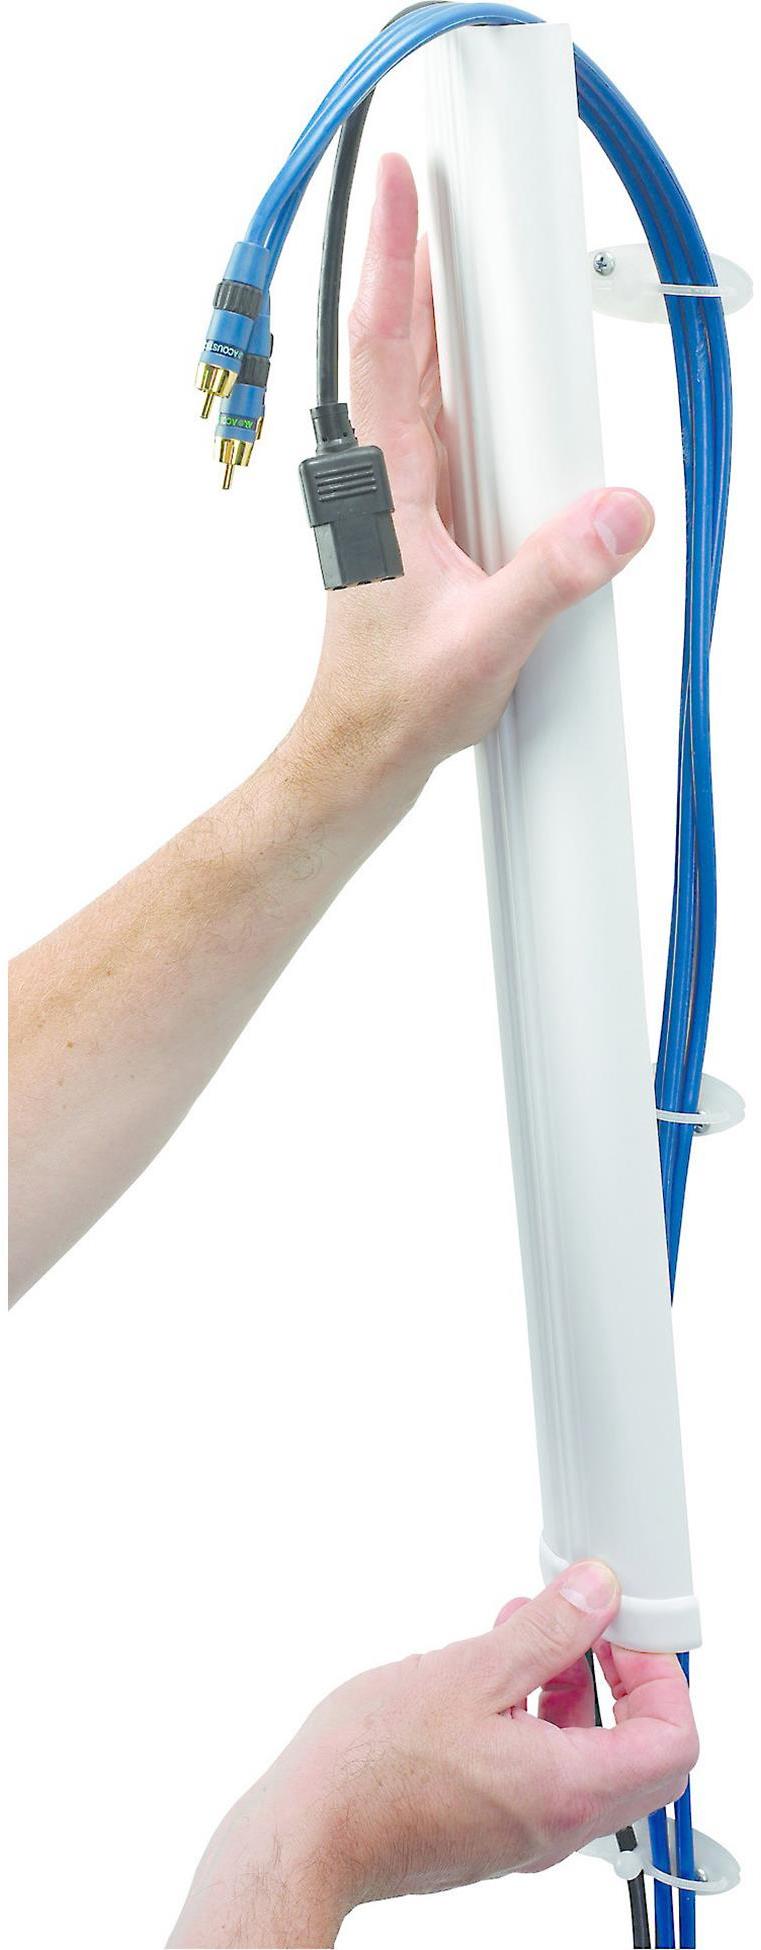
Raceways
Sometimes called cable tunnels, these are for where cables are exposed, such as between your television and receiver, or going to your speakers. They place a cover over your cables to hide them in an aesthetically pleasing way. Many have little notches to lock your cables into.
Leave slack at your bundle points. Do not tighten down any strap too much, you want some give and movement in case something shifts, and you don't want to accidentally cut, bend, crimp, or otherwise damage your cables.
Adhesive Pads Small, sticky pads to attach your bundles to. Some come built into various straps or ties, some are reusable, such as adhesive putty.
Do not bundle power cables with any other cables. Power, by its very nature, creates an electromagnetic field when flowing through a cable. This can severely degrade quality for other cables they are bundled with, especially speaker wire. It's best to keep these as far away from other cables as possible, in their own bundle, for example.
Label Everything
During your bundling process, it's often a good idea to use small labels near the ends of each cable, just in case you need to disconnect something in the future. You can use a label printer to make these, but a small strip of masking tape works just as well.
For example, on your Blu-ray player's HDMI cable, a little loop of tape saying "Blu-ray" where it connects to your Blu-ray player, and where it connects to the receiver, can help you immensely should you replace the player, or the receiver, somewhere down the line. Likewise for power cables.
Remove Hidden Spyware In Minutes For Free
Detect and remove spyware, keyloggers, tracking cookies, and other
threats that slow down your PC or steal your data.
65+ Million Downloads
Spyware scanner with AI-powered detection engine + database
.png)