The DJI Mavic Air is an ultraportable and foldable drone featuring high-end flight performance and functionality for limitless exploration and adventure. This guide will assist you with the basic setup of the drone and will cover the following:
Charging the batteries for your drone and remote control
Installing the companion app onto your mobile device
Unfolding the drone and connecting the remote control to your mobile device
Activating the drone and updating the firmware to the latest version
2. Safety First
As with all Drone flying, please keep the following in mind:
Make sure you are properly registered with the Federal Aviation Administration, or qualify to fly without registration.
Make sure you have permission to fly from the person or group that owns the land you'll be over.
Make sure you are in-touch with the control tower before flying near an airport.
Make sure there's no obstructions, such as power lines or trees, above your flight area that could cause problems.
Make sure there's no one below your flight area that could be hurt.
Make sure you are not near government infrastructure or other sensitive properties.
Make sure the weather is safe to fly in.
Make sure you keep your drone in your sight at all times, and get help from an observer if necessary.
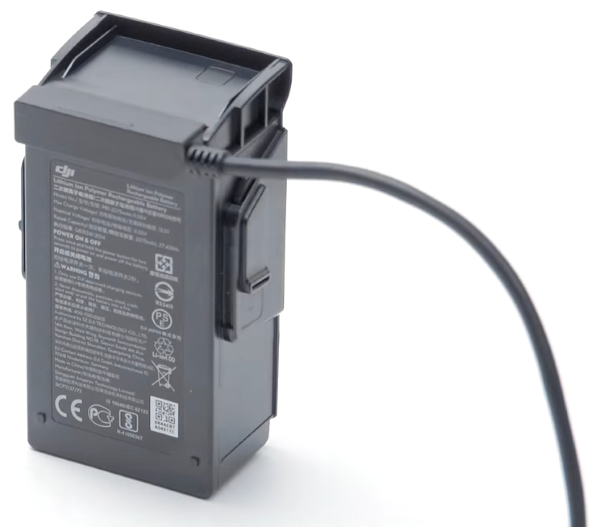
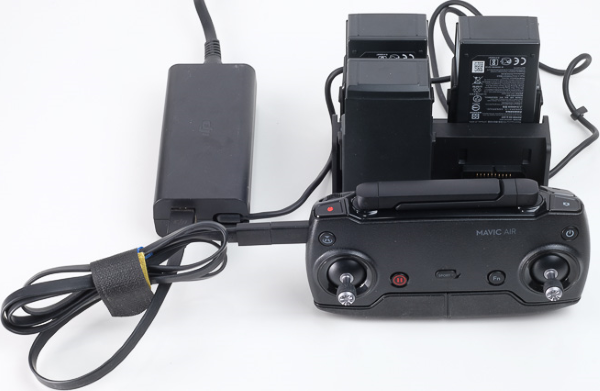
Plug one end of the charging cable into the battery.
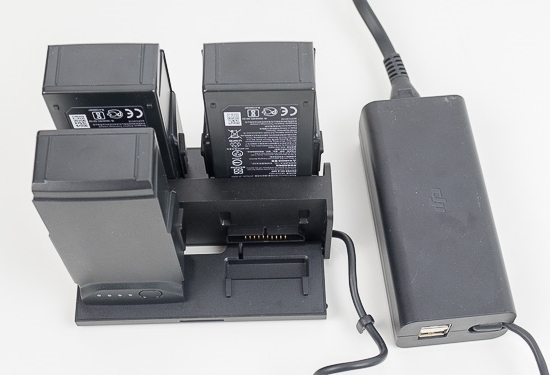
If you have more than one battery, plug them all into the charging hub.
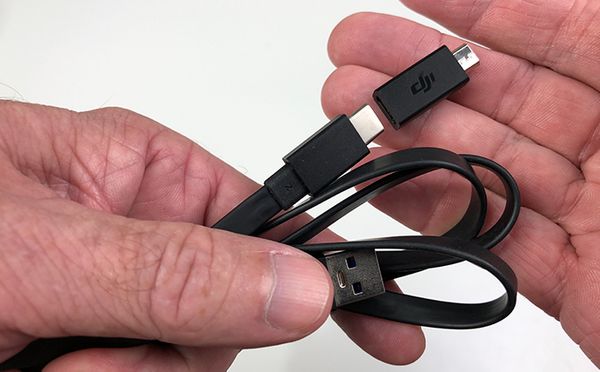
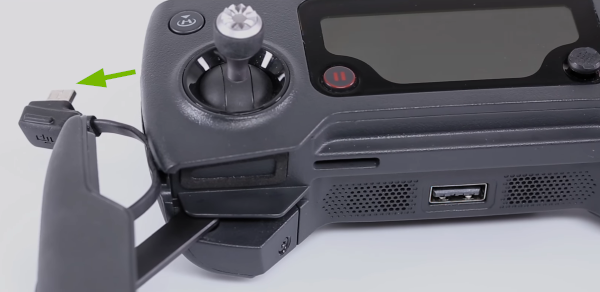
Attach the Micro USB adapter to the provided USB cable.
Plug the small connector of the USB cable into the left side of the remote control.
Connect everything to the charging adapter and plug the adapter into a power outlet.
You will see the lights on the batteries and remote control scrolling until they will turn off meaning they are fully charged.
4. OS Choice
To continue, we need to know what Operating System your smartphone or tablet has.
There are 2 main Operating Systems for smartphones currently available, Android and iOS.
Android SmartphoneiOS SmartphoneAndroid smartphones are produced by multiple companies, such as Samsung, LG, Motorola, HTC, and OnePlus.Apple is the only company that makes iOS smartphones.
5. Check Wi-Fi
Depending on what device (Smartphone or Tablet) and which generation you have, the menu theme and options might look slightly different on your screen. However, the steps should be similar across all Android devices and generations.
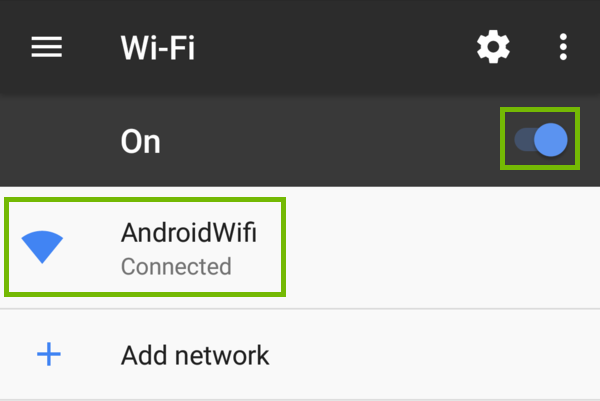
To check if your Android mobile device is connected to Wi-Fi:
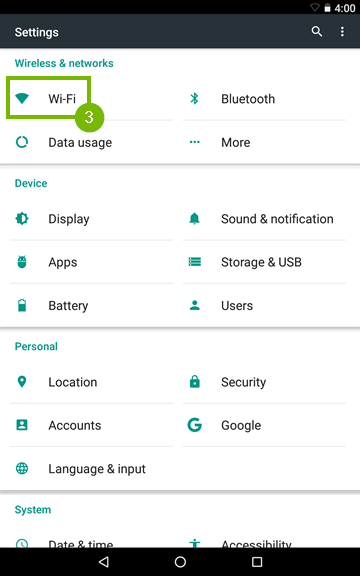
Open Settings on your phone or tablet.
Select Wi-Fi.
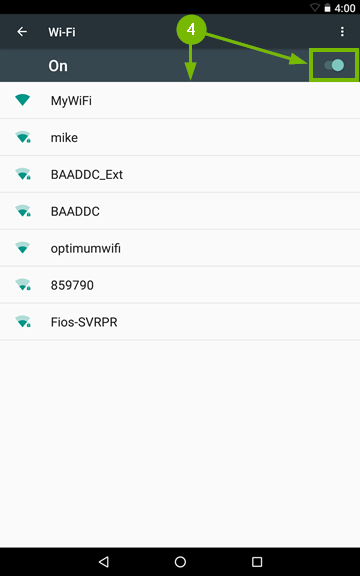
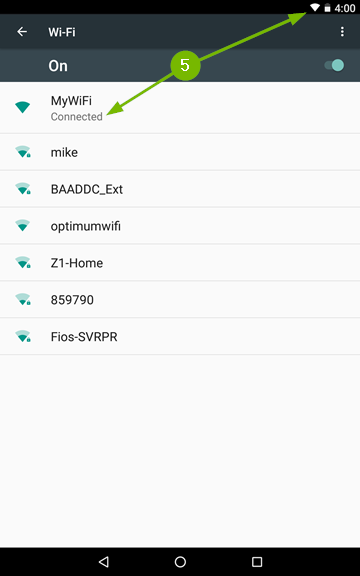
Make sure Wi-Fi is turned On, then select the Wi-Fi network that says Connected under it.
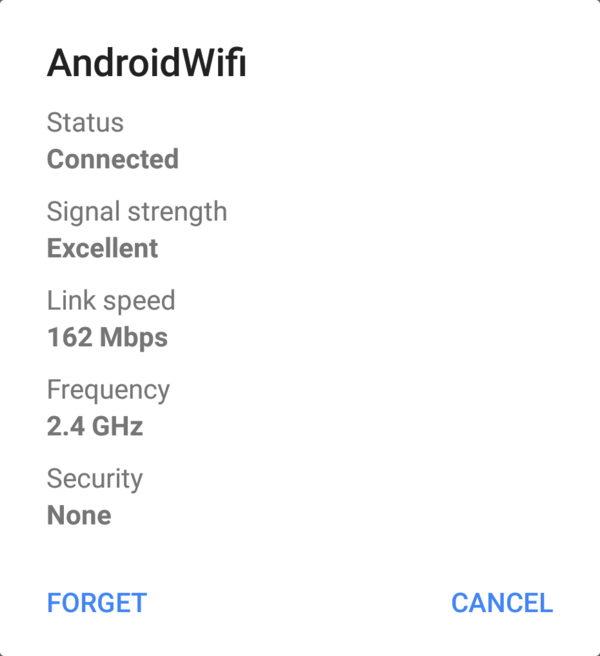
Here, you'll see the basics of your Wi-Fi connection, with the Wi-Fi network name at the top, and other information such as Signal Strength, Link Speed and the Frequency you're connected at and the Security type of the network.
More Details
To see more information about your connection, select Cancel.
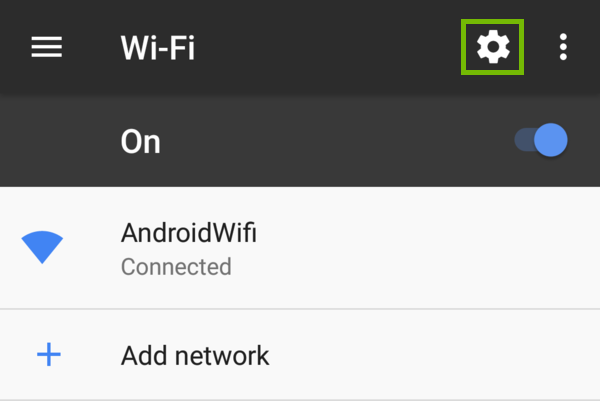
Select the Settings gear in the top right corner.
Here, you'll see a variety of information related to your connection at the bottom, such as the MAC (Media Access Control) address and IP addresses your Android device has been given.
6. Install Android App
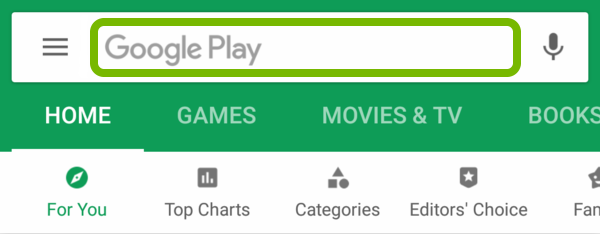
Launch the PlayStore app on your Android device.
Tap in the search box at the top of the screen.
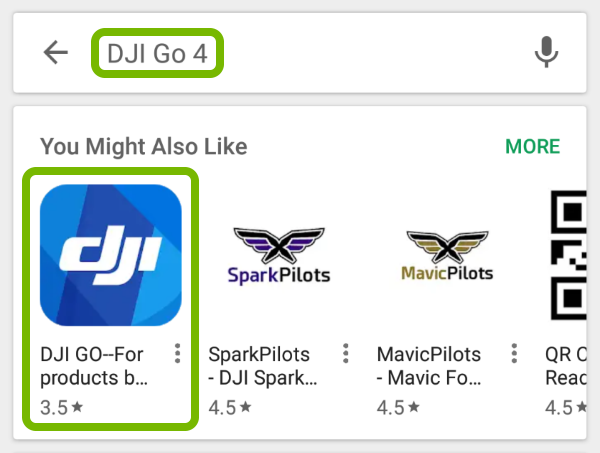
Search for "DJI GO 4" and tap on the found app.
Tap Install and then Open to use it.
7. First Launch
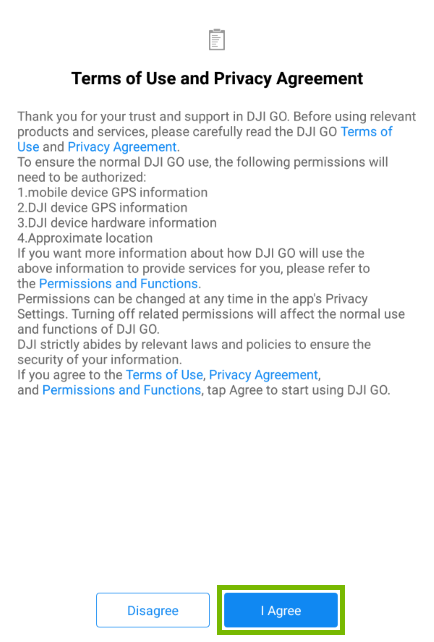
Launch the DJ GO 4 app on your mobile device.
Read through the Terms of Use and Privacy Agreement then tap I Agree when you're ready to continue.
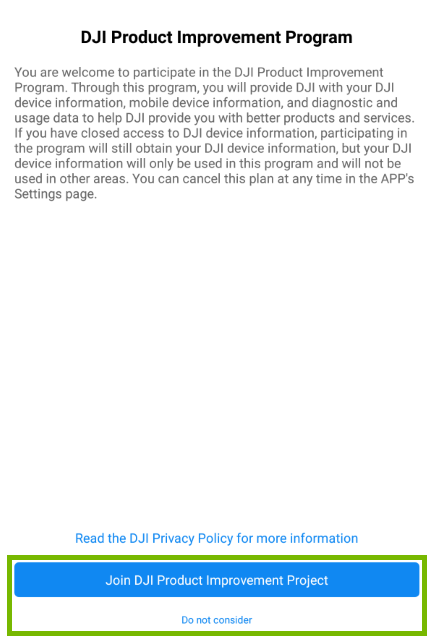
Choose whether you want to Join or Not Consider the DJI Product Improvement Plan.
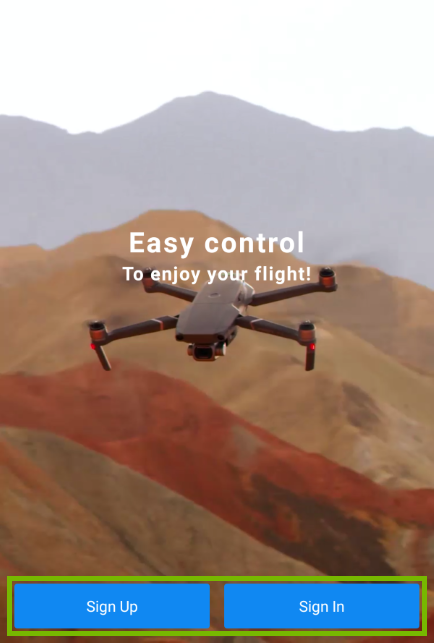
Choose how you want to login to the app:
If you want to use a new DJI account or don't have one, choose Sign Up and fill in your new account information.
If you want to use an existing DJI account, choose Sign In and fill in your login information.
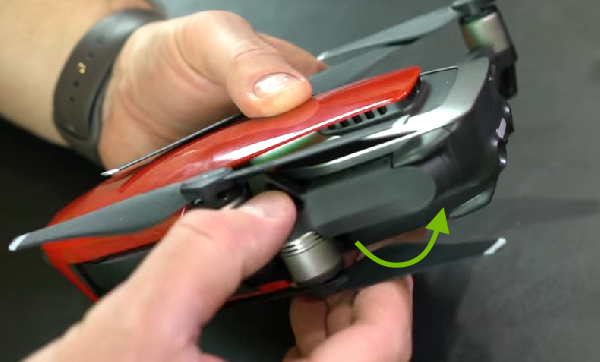
8. Unfold Drone
Hold the drone top side up and start with the rear arms.
Push the rear arms downwards and they will twist outwards ending with the propellers on top.
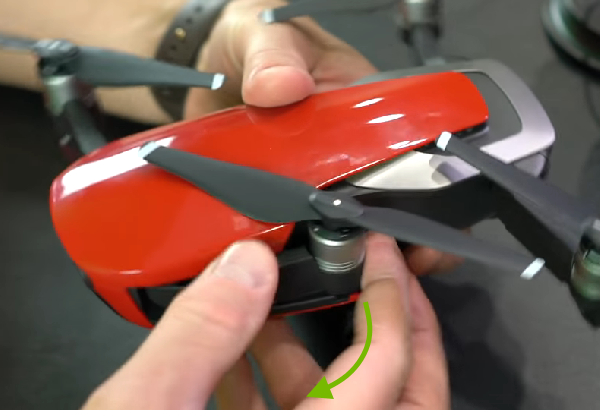
Pull the front arms outwards.
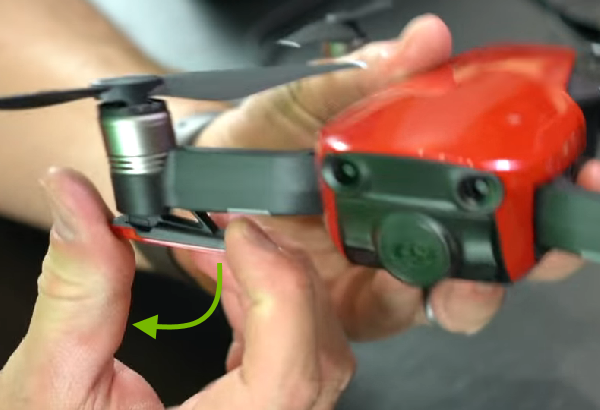
Pull the landing gears (antennas) downwards.
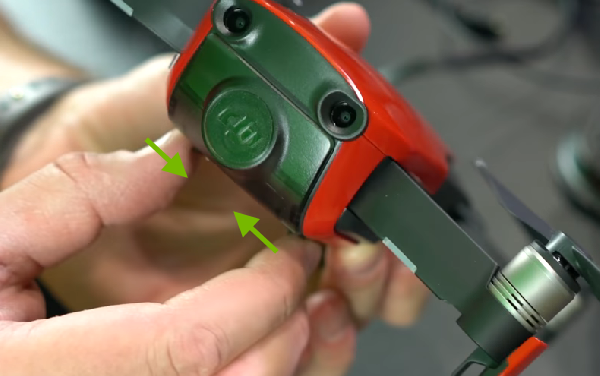
Squeeze the locking tabs of the gimbal cover and pull the cover outwards then towards the front of the drone.
9. Connect Mobile Device to RC
Depending on the size of your mobile device and where the connection port is located on it, there are two ways to connect it to the remote control:
Using the Clamp Connector
Unfold the mobile device clamps.
Align the side connector on the left clamp with the port on the mobile device.
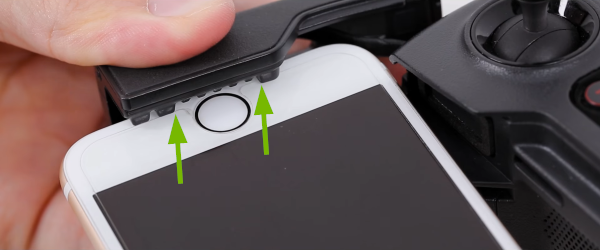
If your mobile device has a home button in the middle, make sure it's positioned between the bigger teeth of the clamp.
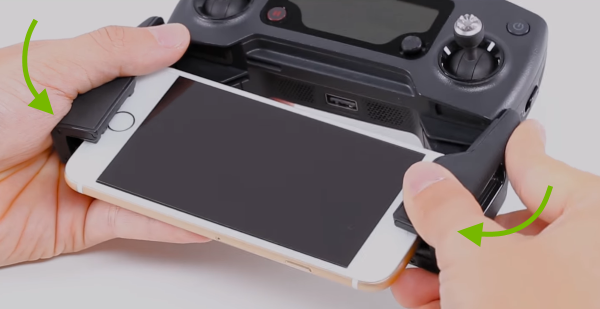
Insert the mobile device into the left clamp first, then into the right clamp to secure it.
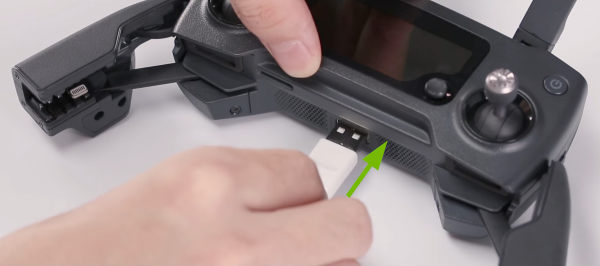
Using the Extension Cable
Unfold the mobile device clamps.
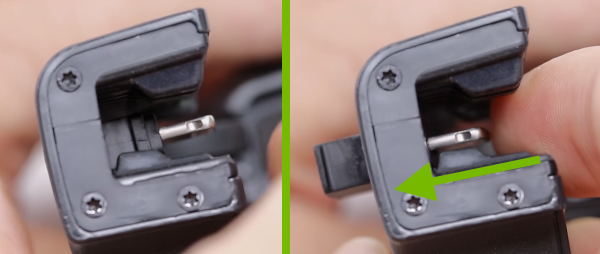
Push the side connector into the outward position on the left clamp.
Disconnect side cable from the remote controller.
Connect the provided USB cable into the bottom port of the remote controller.
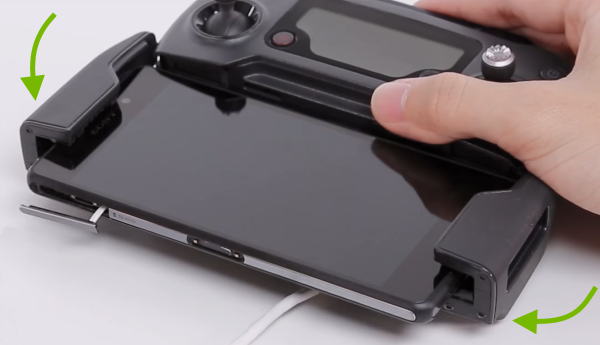
Insert the mobile device into one of the clamps first, then into the other one to secure it.
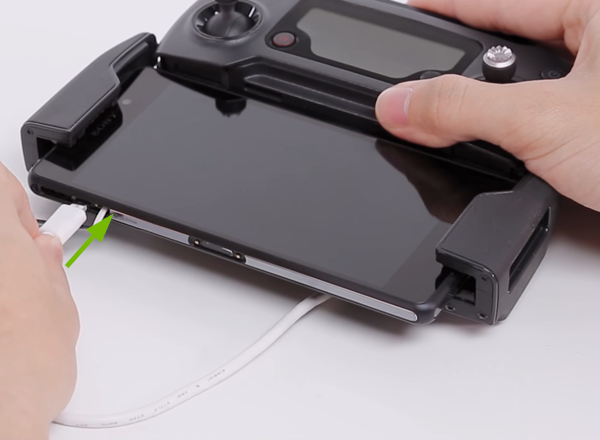
Connect the Micro USB end of the cable into the side port of the mobile device.
10. Turn On RC & Drone
To complete the following steps, you will need both your remote control and drone handy.
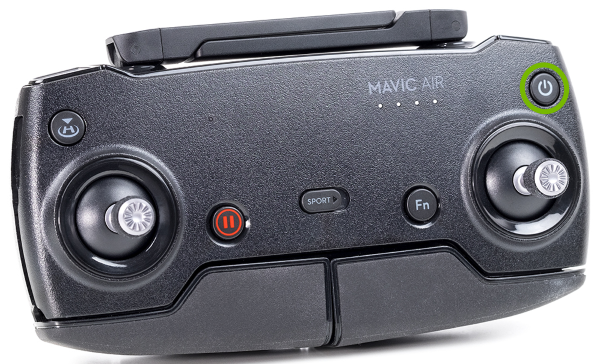
On the Remote Control
Press and release the power button, then press it again quickly and hold it until you hear it make the initialization sound.
On the Drone
Make sure the drone is unfolded and gimbal cover is removed so the propellers and gimbal can move freely during the warm-up process.
Press and release the power button, then press it again quickly and hold it until you hear it make the initialization sound.
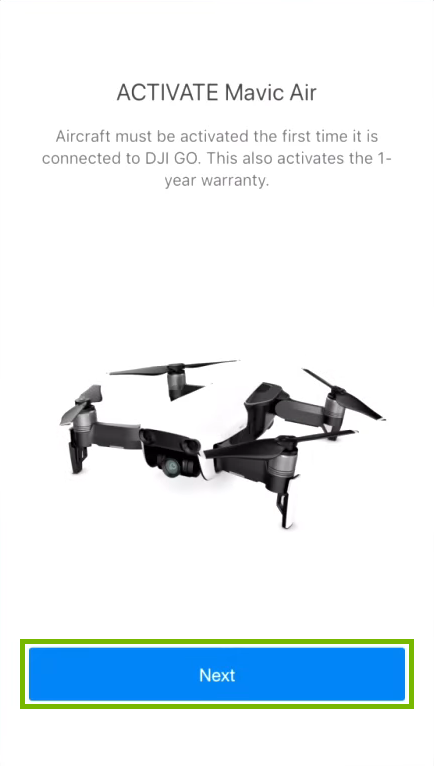
11. Activate Mavic Air
Depending on which DJI drone you have, the connected device may show a different name and image. However, the following procedure is the same for all DJI drones.
The DJI GO 4 app will prompt you to activate your drone. Tap Next to proceed.
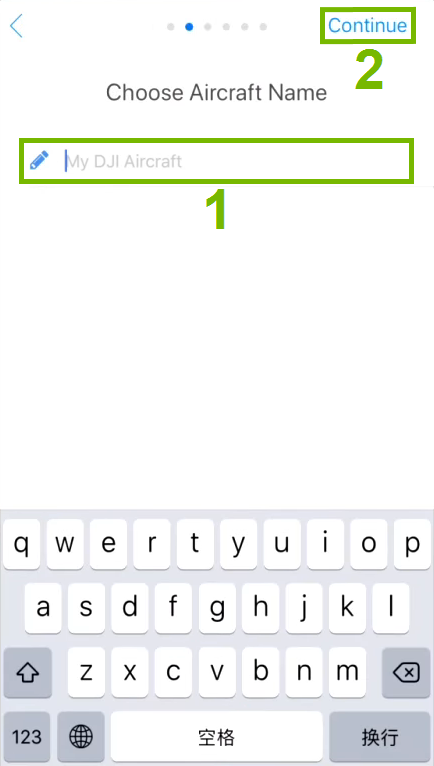
Type in a Name (1) for your drone, then tap Continue (2).
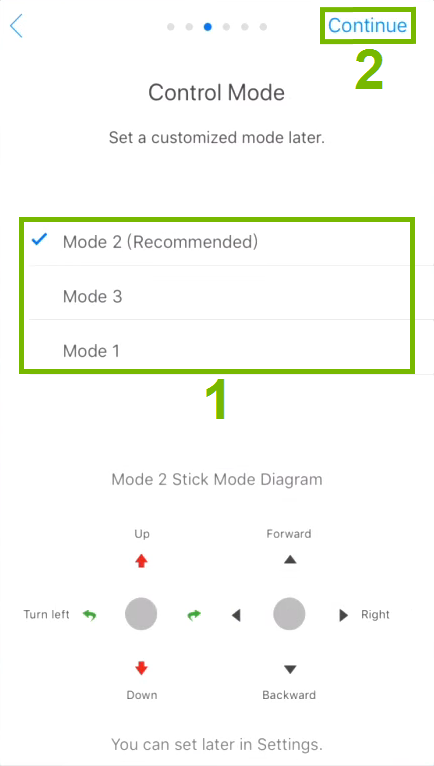
Choose a control mode for the remote. Tap each Mode (1) to see it's layout below, then tap Continue (2) when you're set.
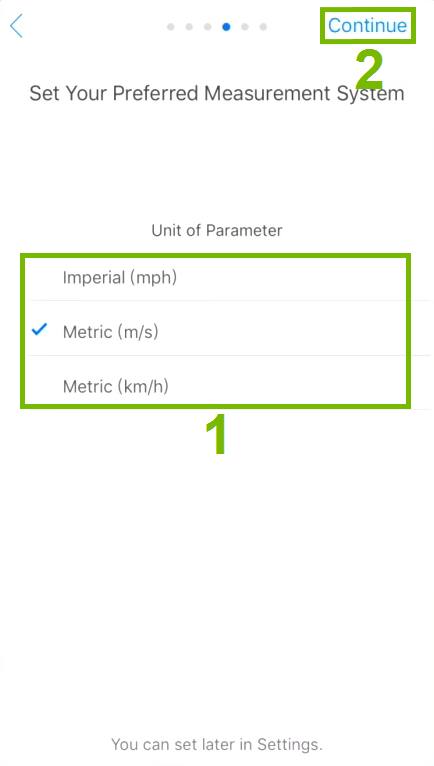
Choose your preferred Measurement System (1) then tap Continue (2).
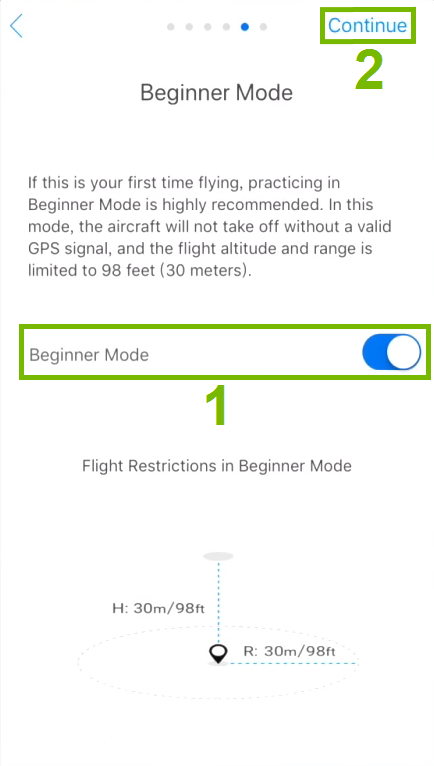
If this is your first time flying a drone, it's recommended you leave Beginner Mode (1) turned on, otherwise you can turn it off. Tap Continue (2) to proceed.
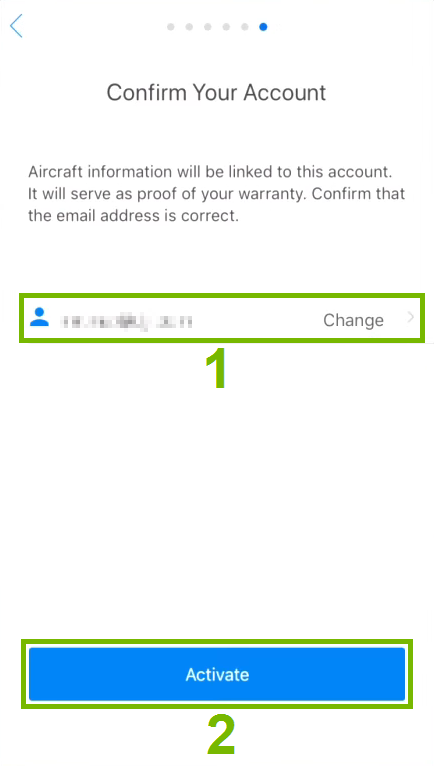
The email address (1) used for your account will be filled in automatically. Confirm it and tap Activate (2).
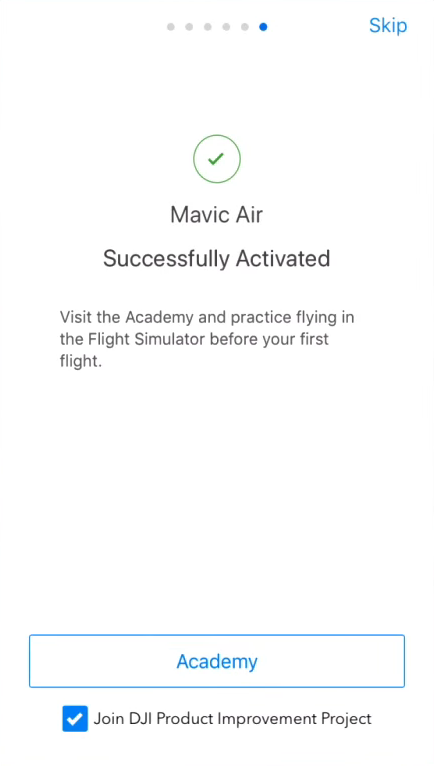
You'll be shown a confirmation screen once your drone is activated.
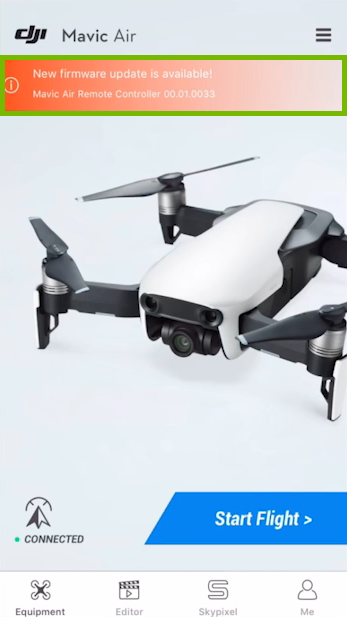
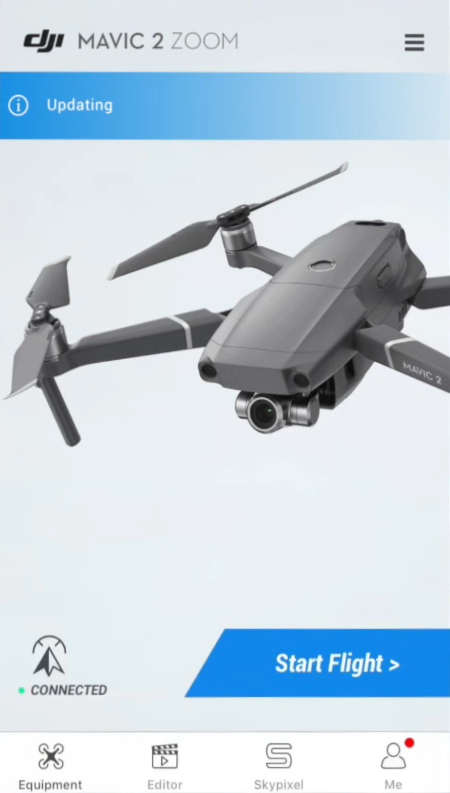
12. Update Drone
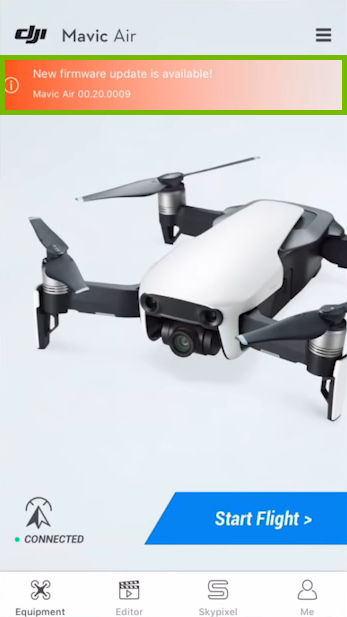
Depending on which DJI drone you have, the connected device may show a different name and image. However, the following procedure is the same for all DJI drones.
The DJI GO 4 app will notify you if there is a new firmware update available for your drone. Tap the notification in red.
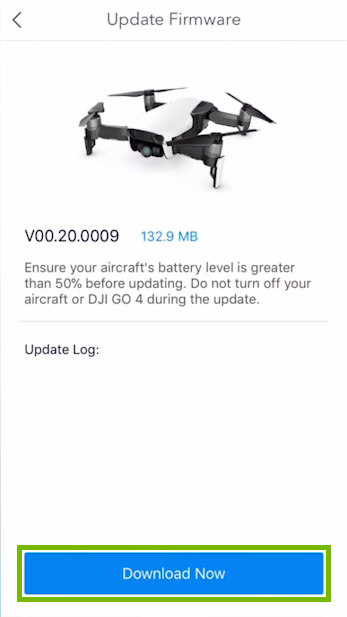
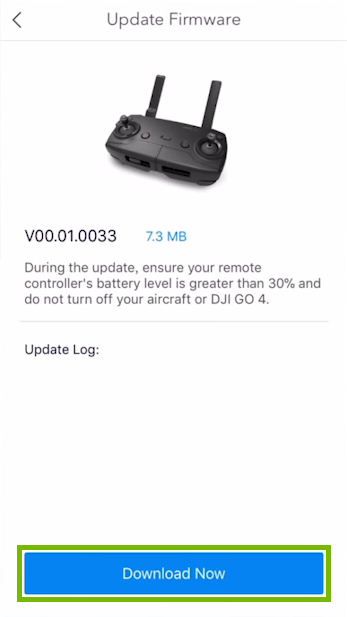
Tap Download Now to initiate the update.
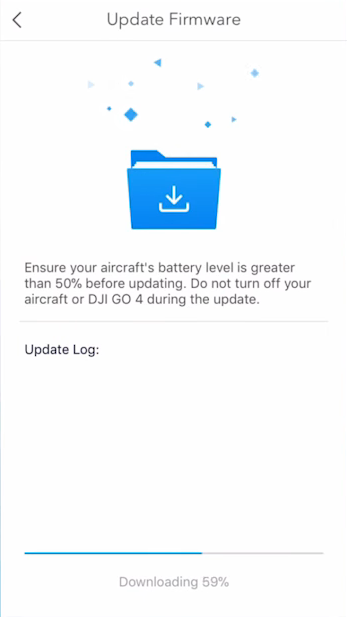
Wait for the process to complete.Do not turn off the drone and remote control or exit the mobile app during the update.
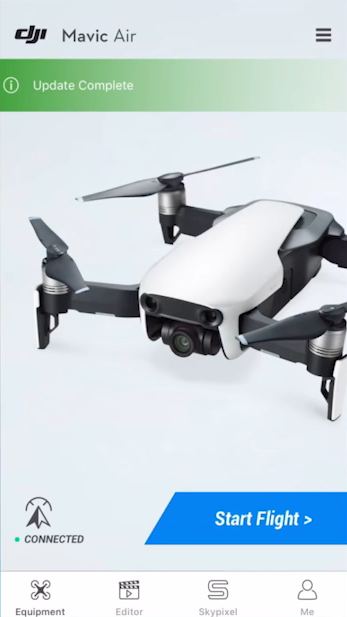
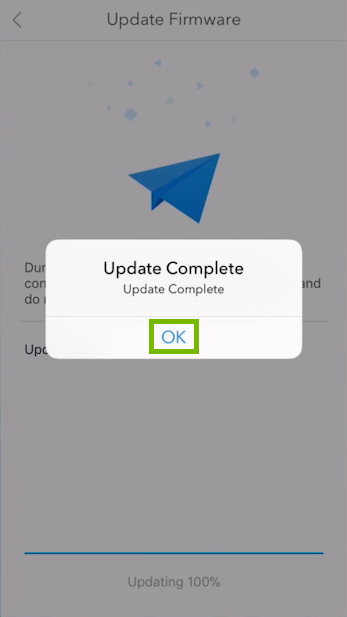
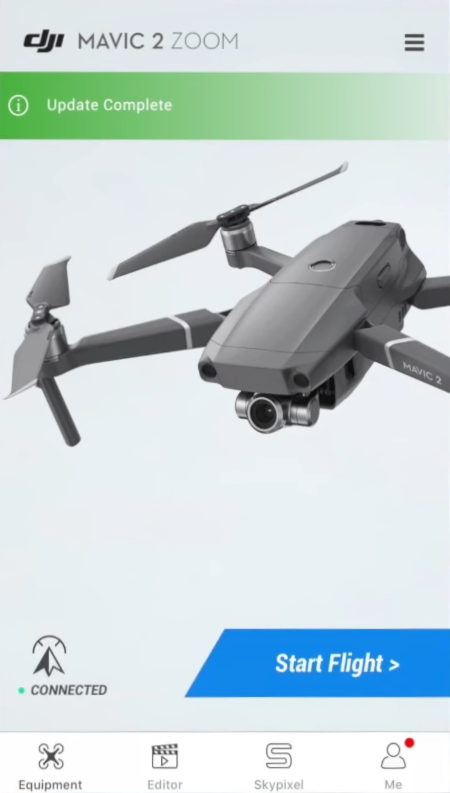
Once the update is completed you will be asked to restart the drone. We will do that next. Tap OK for now.
The app will notify you the update was completed.
13. Restart RC & Drone
To complete the following steps, you will need both your remote control and drone handy.
On the Remote Control
To turn off the remote control, press and release the power button then press it again quickly and hold it until the lights turn off.
To turn it back on, press and release the power button then press it again quickly and hold it until you hear it make the initialization sound.
On the Drone
To turn off the drone, press and release the power button then press it again quickly and hold it until the lights turn off.
To turn it back on, press and release the power button then press it again quickly and hold it until you hear it make the initialization sound.
14. Update RC
Depending on which DJI drone you have, the connected device may show a different name and images. However, the following procedure is the same for all DJI drones.
The DJI GO 4 app will notify you if there is a new firmware update available for your remote control. Tap the notification in red.
Tap Download Now to initiate the update.
Wait for the process to complete.Do not turn off the drone and remote control or exit the mobile app during the update.
Once the update is completed you will be asked to restart the drone. We will do that next. Tap OK for now.
The app will notify you the update was completed.
15. Restart RC & Drone
To complete the following steps, you will need both your remote control and drone handy.
On the Remote Control
To turn off the remote control, press and release the power button then press it again quickly and hold it until the lights turn off.
To turn it back on, press and release the power button then press it again quickly and hold it until you hear it make the initialization sound.
On the Drone
To turn off the drone, press and release the power button then press it again quickly and hold it until the lights turn off.
To turn it back on, press and release the power button then press it again quickly and hold it until you hear it make the initialization sound.
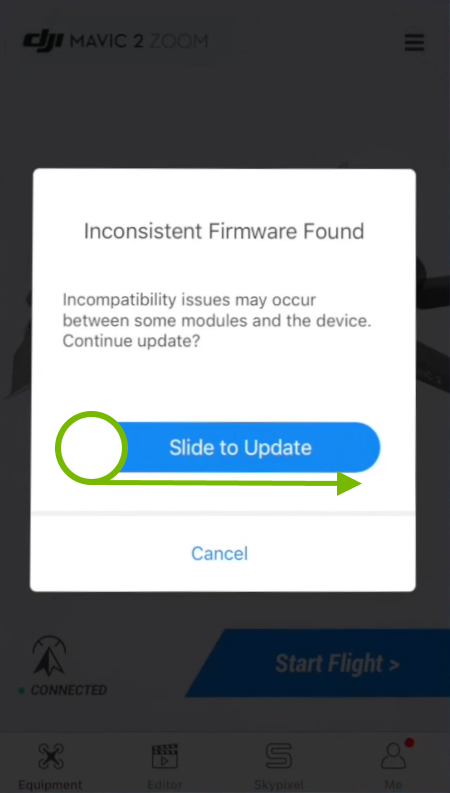
16. Update Battery
The drone is powered by an intelligent battery which updates together with the drone. If you have any extra batteries, you will need to insert them one by one into the drone and check if they need to be updated to be compatible with the drone.
Depending on which DJI drone you have, the connected device may show a different name and image. However, the following procedure is the same for all DJI drones.
Replace the drone's battery.
The DJI GO 4 app will be notify you if the battery's firmware is incompatible with the drone's firmware and needs to be updated. Slide the switch to the right side to initiate the update.
The app will notify you the update is in progress.Do not turn off the drone and remote control or exit the mobile app during the update.
Then it will notify you the update was completed.
17. Restart RC & Drone
To complete the following steps, you will need both your remote control and drone handy.
On the Remote Control
To turn off the remote control, press and release the power button then press it again quickly and hold it until the lights turn off.
To turn it back on, press and release the power button then press it again quickly and hold it until you hear it make the initialization sound.
On the Drone
To turn off the drone, press and release the power button then press it again quickly and hold it until the lights turn off.
To turn it back on, press and release the power button then press it again quickly and hold it until you hear it make the initialization sound.
18. Connect Wi-Fi
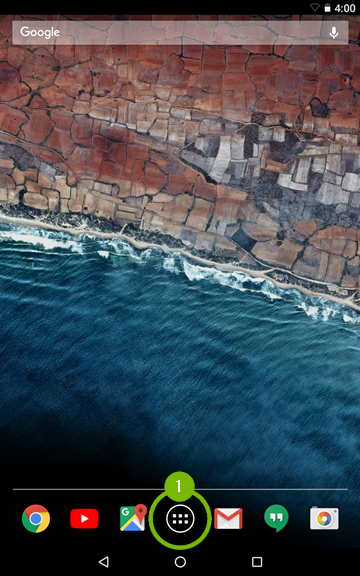
Depending on what device (Smartphone or Tablet) and which generation you have, the menu theme and options might look slightly different on your screen. However, the steps should be similar across all Android devices and generations.
From the main screen of your Android device, tap on the Apps button.
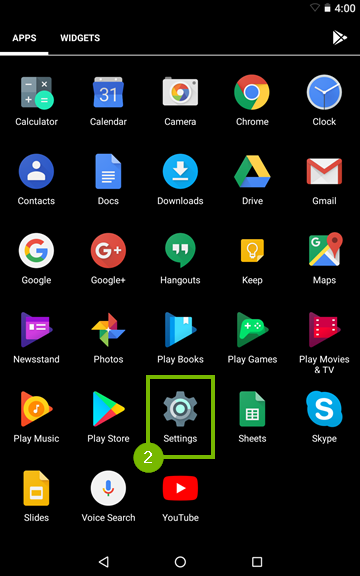
Then look for and tap on Settings.
Go to Wi-Fi.
Make sure the Wi-Fi feature is enabled by flipping the On / Off switch to the On position then wait for the network list to populate and tap on the Wi-Fi network that you want to connect to.
Your Android device will automatically connect to the network if there is no security enabled, or you have connected to it in the past. The Wi-Fi network name will show Connected underneath and the Wi-Fi symbol will fill up in the top right corner of the screen.
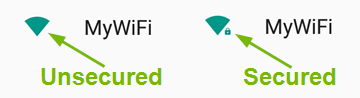
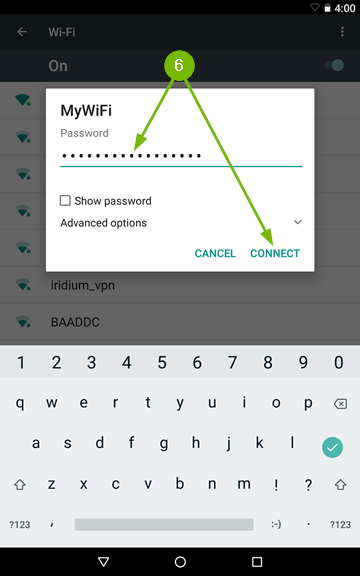
If the Wi-Fi network requires a password, then you will see a small padlock next to the Wi-Fi symbol, which also means the connection is secure. Tapping on a secured Wi-Fi networks name will prompt you to enter the password. Passwords are always case sensitive. Type it in using the on screen keyboard then tap Connect.
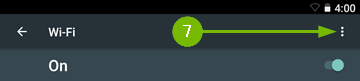
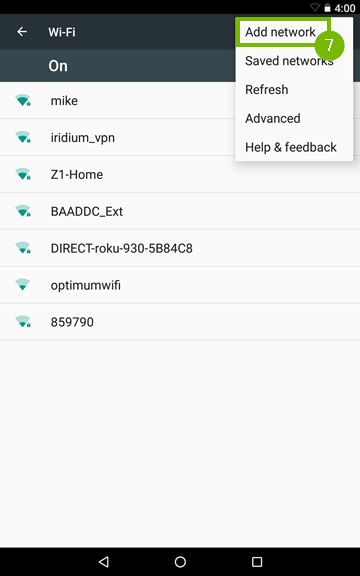
If the Wi-Fi network you are trying to connect to is hidden, then tap the More option which looks like three dots positioned vertically, on the top right corner of the screen, then tap Add network.
Enter the Wi-Fi networks name using the on screen keyboard and tap Save if no password is required to connect. If a password is needed to connect to the Wi-Fi network then tap on Security and select the security type. Type in the password, then tap Save.
At this point your Android device should be connected to Wi-Fi.
As an alternate way you can also try the following method:
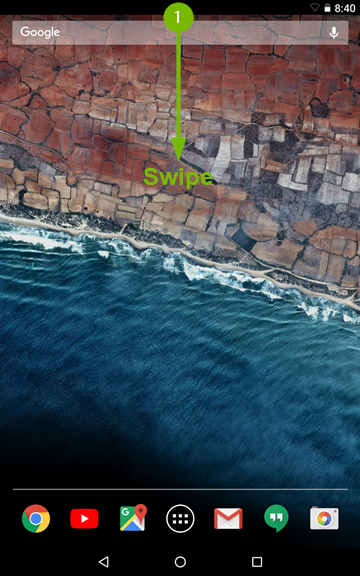
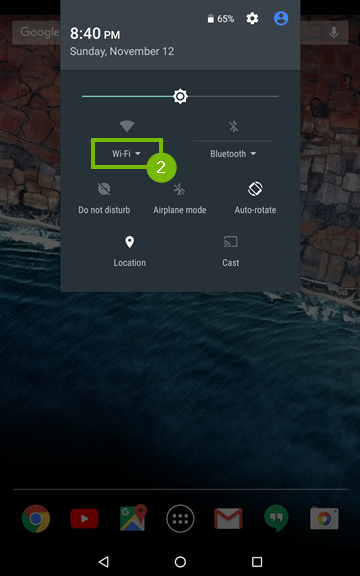
Swipe downwards from the top side of the screen.
Look for the Wi-Fi symbol in the drop down menu and tap on the word below it. If you're not connected to any network, it will say Wi-Fi. If you're already connected to a network, it will show its name.
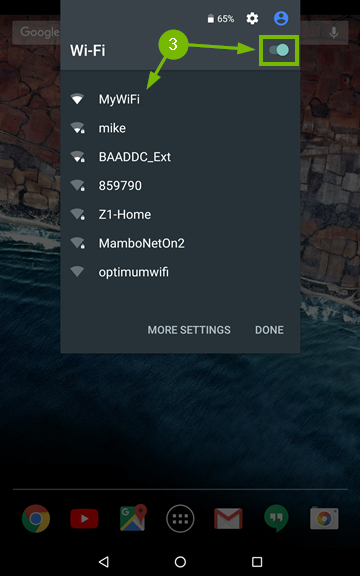
Make sure the Wi-Fi feature is enabled by flipping the On / Off switch to the On position then wait for the network list to populate and tap on the Wi-Fi network that you want to connect to.
19. Check Wi-Fi
Depending on what device (iPhone, iPad or iPod Touch) and which generation you have, the menu theme and options might look slightly different on your screen. However, the steps should be the same across all iOS devices and generations.
To check if your iOS mobile device is connected to Wi-Fi:
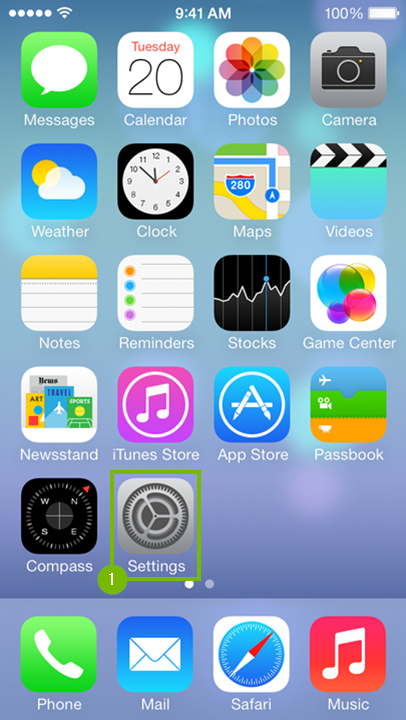
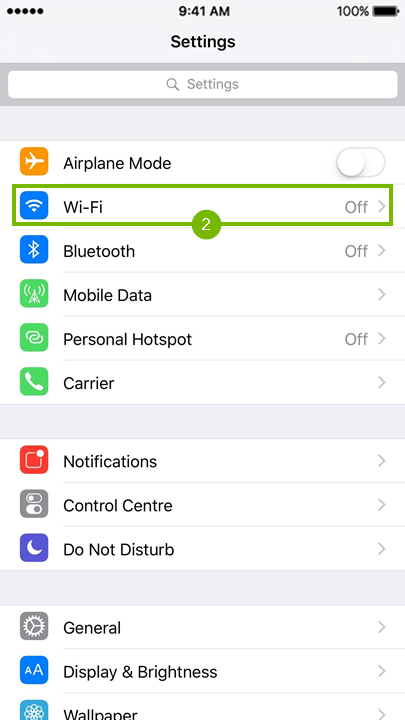
From the main screen of your device, look for and open Settings.
With Settings open, look for the Wi-Fi field. This field will display the current Wi-Fi status on the right hand side:
Off - the Wi-Fi antenna is currently disabled.
Not Connected - Wi-Fi is turned on, but your device is not currently connected to a network.
Wi-Fi network name - Wi-Fi is turned on, and the network name displayed is the network your device is currently connected to.
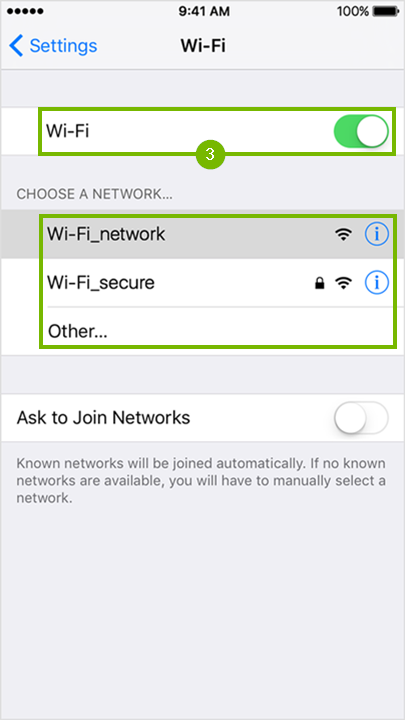
You can also tap on the Wi-Fi field and make sure the Wi-Fi switch is in the On position. The switch should be green in color and will display the network that you are currently connected to directly beneath it with a check mark to the left.
20. Install iOS App
Launch the App Store.
Tap Search in the bottom right corner.
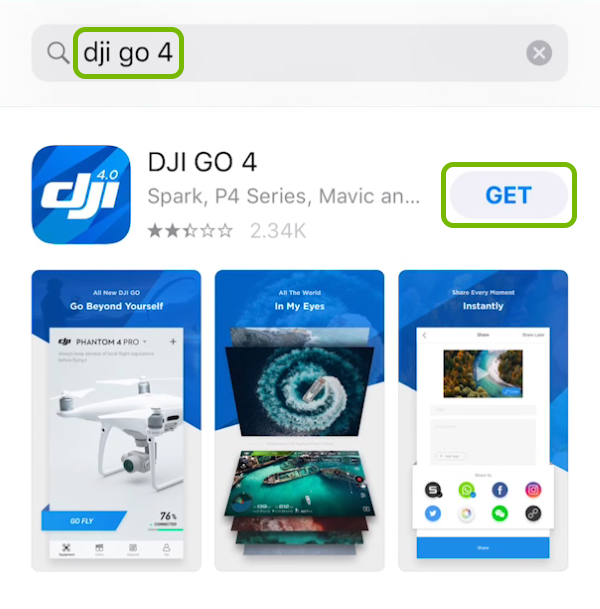
Type "DJI GO 4" in the search bar at the top. The app will show up below.
Tap Get and Install, then Open to use it.
21. Connect your iOS device to the Network
Depending on what device (iPhone, iPad or iPod Touch) and which generation you have, the menu theme and options might look slightly different on your screen. However, the steps should be the same across all iOS devices and generations.
From the main screen of your device, look for and open Settings.
After that, go to Wi-Fi. You will see that this option also shows one of three statuses to the right:
Off - the Wi-Fi feature is disabled
Not Connected - there is no Wi-Fi connection establishe
the Wi-Fi connections name - there is a Wi-Fi connection already established.
Make sure that the Wi-Fi feature is enabled by flipping the On/Off switch to the green position. Locate and tap the Wi-Fi networks name that you wish to connect to from the list.
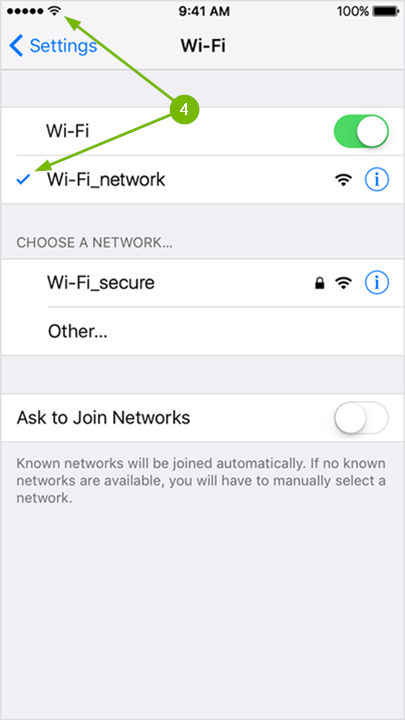
Your iOS device will automatically connect to the network if there is no security enabled, or you have connected to it in the past. The checkmark and Wi-Fi symbol indicate you are connected.
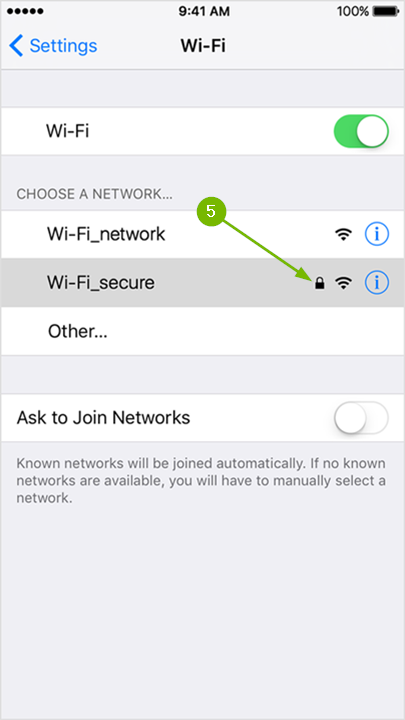
If the Wi-Fi network requires a password, then you will see a small padlock to the right of its name, which also means the connection is secure.
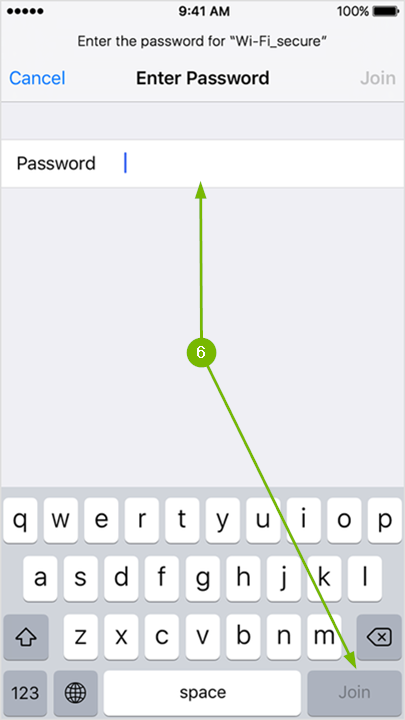
Tapping on a secured Wi-Fi networks name will prompt you to enter the password. Passwords are always case sensitive. Type it in using the on screen keyboard then tap Join on the bottom right corner. If tapping it does nothing, then it means the password you typed in is too short.
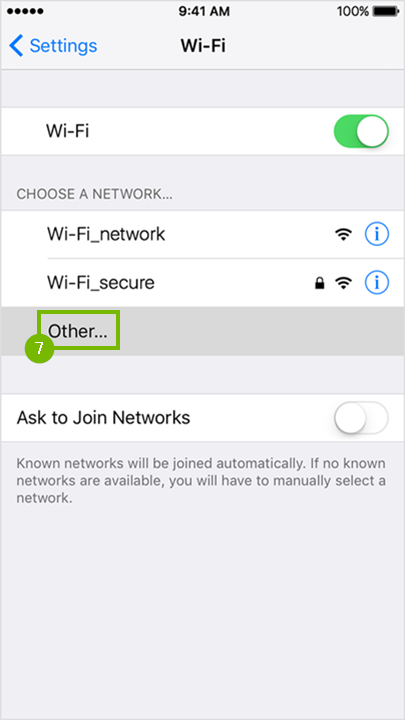
If the Wi-Fi network you are trying to connect to is hidden, then tap the Other... option.
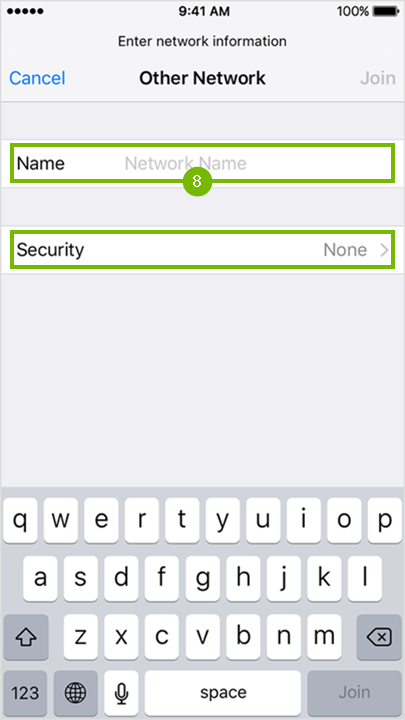
Enter the Wi-Fi networks name using the on screen keyboard and tap Join at the bottom right if no password is required to connect. If a password is needed to connect to the Wi-Fi network then tap on Security.
Choose the type of security the Wi-Fi network has by tapping on it.
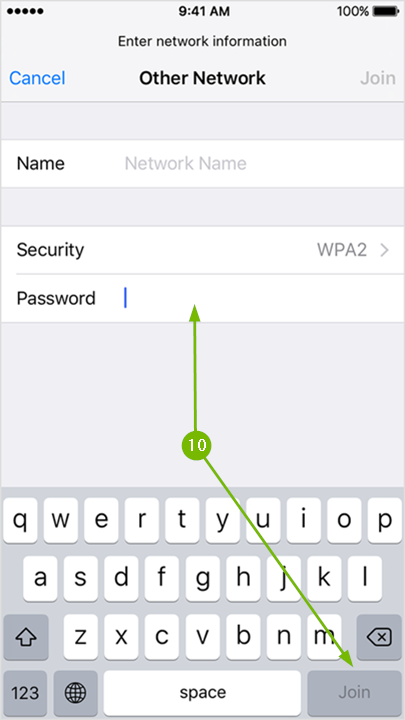
Finally, type in the required Wi-Fi password and tap Join at the bottom right corner to connect.
At this point your iOS device should be connected to Wi-Fi.
.png)