Accessing the files stored on your Mac computer while you're away from home is easy to do, thanks to the built-in Screen Sharing feature of macOS. In this guide, we will demonstrate how to set up the Mac in your home, as well as your router for remote access via Screen Sharing. This will allow you to access your Mac from any other Mac while you're on the go.
Tools You'll Need:
Have your router's administration login and password
-->
Supplies You'll Need:
Zip ties
Any other consumable supplies
Comment out supplies section if no supplies are necessary
Before You Begin:
You'll need your router's administrative login and password to be able to access port forwarding settings.
2. Enable Screen Sharing
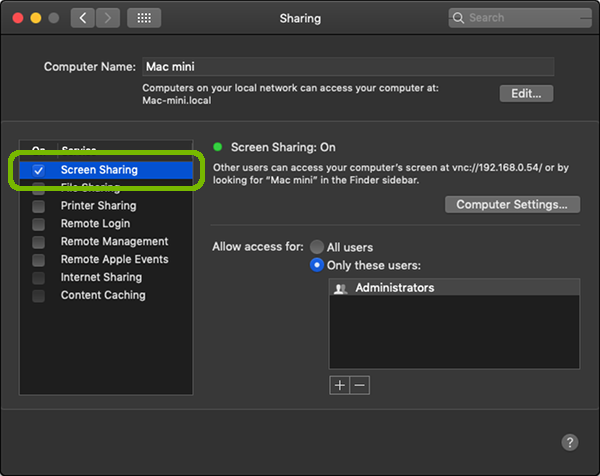
Select the Apple menu, then System Preferences.
Select Sharing.
Place a check next to Screen Sharing.
You now need to forward two ports from your router to your Mac.
TCP port 88
TCP port 5900
3. Port Forwarding with Your Mac
Find Your Router's IP
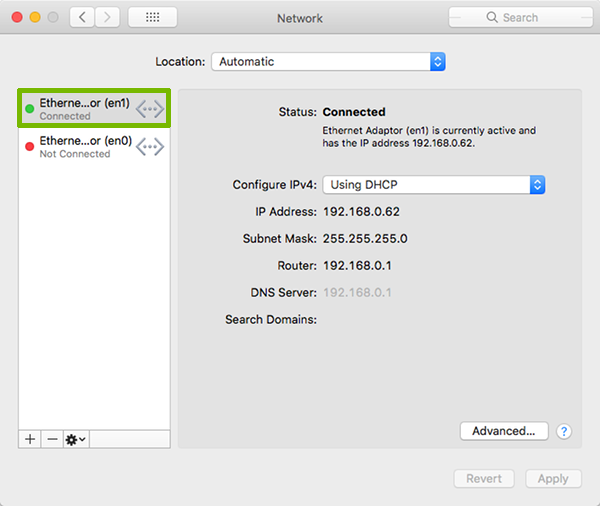
Select Apple menu > System Preferences.
Select Network.
On the left, select your active network connection. It will have a green dot next to it.
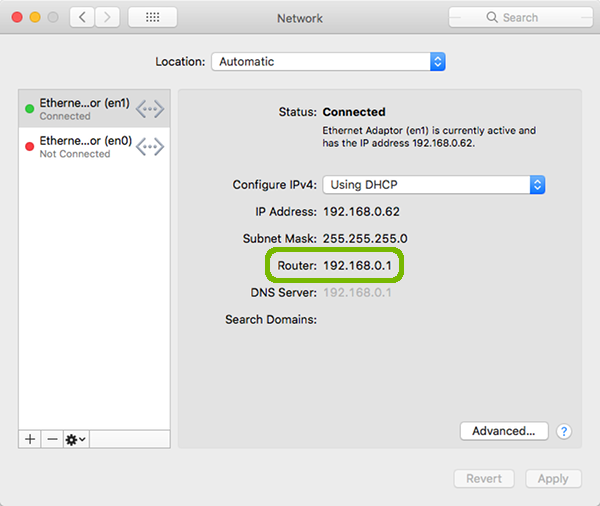
On the right, look for Router. Make note of the number listed here. Yours may be different than this example.
Write down the address listed for Default Gateway, you will need it in just a moment.
Open Your Router's Administration Page
Open your preferred web browser. Look for one of these icons.
Type the address you found above, and press return or enter.
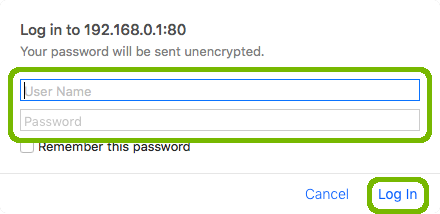
Type in your router's Administrator username and password, then Log In.
If you are not sure of your router's username and password, try some of these common defaults:
Username:
admin
administrator
user
blank (as in, do not put in anything)
Password:
admin
password
user
blank (as in, do not put in anything)
Set Static IP for Device
Setting a Static IP on your device only refers to your internal, home network. This has no effect on your Internet service.
It is critically important you setup a Static IP for your device, before you setup port forwarding. Without doing so, you could easily lose all your port forwarding setup, and expose other devices that may not be as well-secured to malicious attack on the Internet.
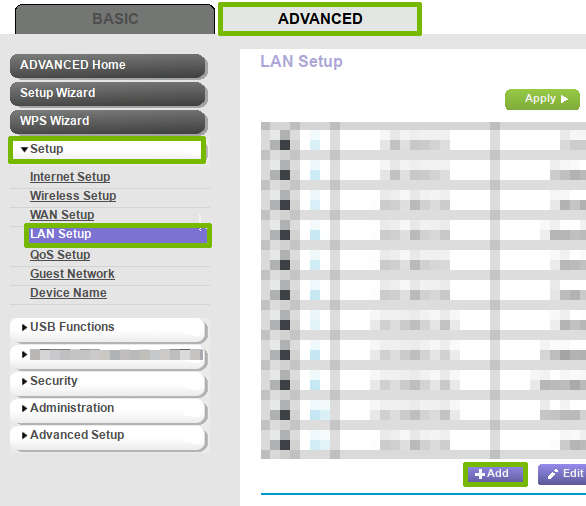
Locate and identify where in your router's interface you can setup an Address Reservation. In this example, it was under Advanced > Setup > LAN Setup, then scroll down to Address Reservation at the bottom.
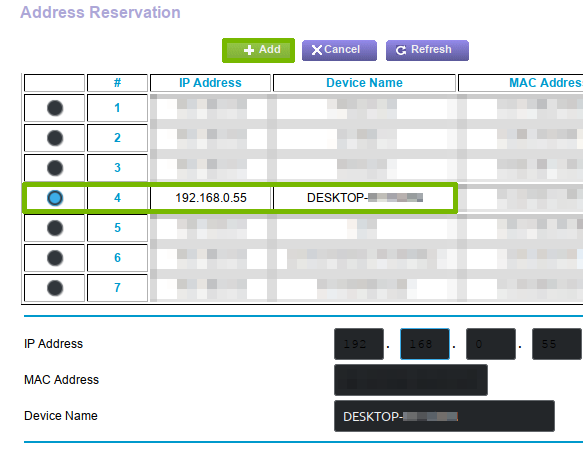
Select or enter the information required to assign a static address. Make note of the IP address you set as static for your device, you will need it in a moment.
Write down the address you just assigned as static, you will need it in just a moment.
Set Up Port Forwarding
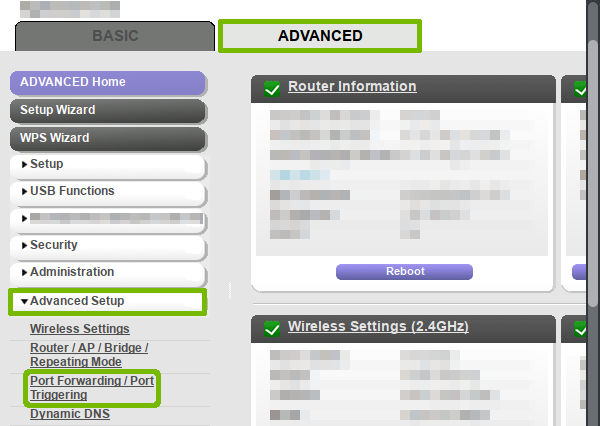
Locate the Port Forwarding section of your router's configuration. In this example, it was under Advanced > Advanced Setup > Port Forwarding / Port Triggering.
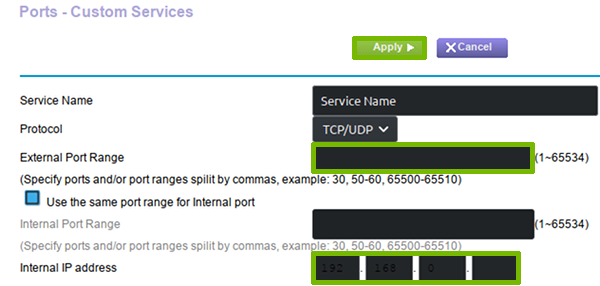
Enter the Internal IP you just statically assigned above, and the Port you want to forward, then Apply your changes.
4. Get Public IP
In order to connect to your computer while you are away, you will need to have the IP address of your home computer. A simple, reliable way to look this up is through a simple Google search.
You need to look this information up while you are still at home; preferably from the computer you intend to remotely access.
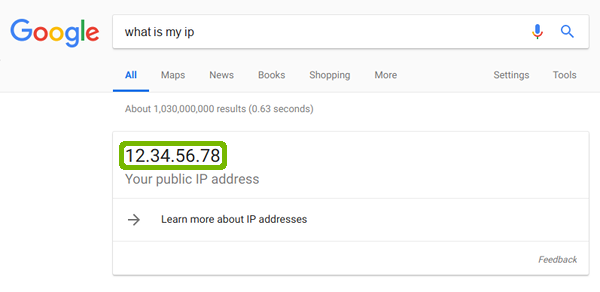
Open your preferred web browser.
In the address bar at the top, type in google.com and press enter or return on your keyboard.
In Google's search box, type in "what is my ip" and select Google Search.
At the very top of the next page, your public IP will be shown.
Make special note of this address. You will need it when you are on the road to access your home computer.
5. Connect to Remote Computer
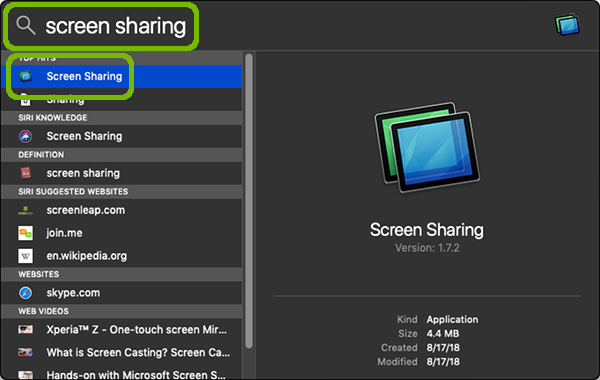
Select Spotlight Search.
Search for "screen sharing", and select Screen Sharing from the list on the left.
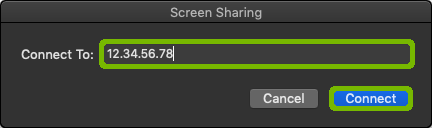
Enter your home computer IP address, then select Connect.
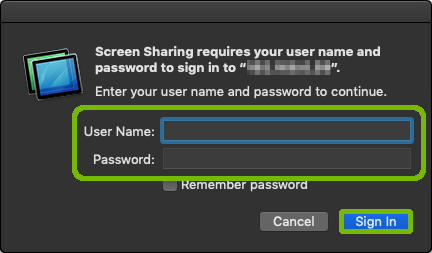
You'll be prompted to log into your home computer. Type in your home Mac's username and password, then select Sign In.
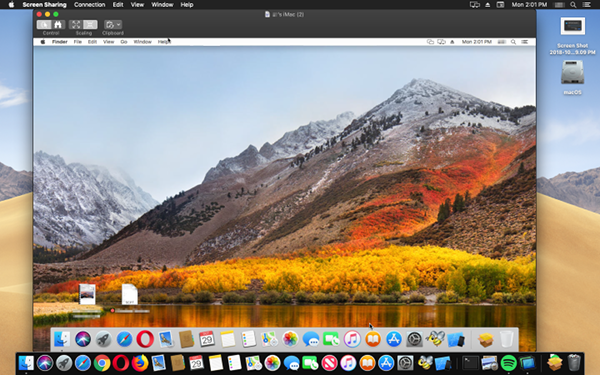
You will see your home computer screen, inside a window on your remote computer. You can use your home computer directly.
You can control the connection using the icons at the top.
Control Mode
This is the default, it allows you to use the keyboard and mouse on your remote computer.
Observe Mode
Allows you to see the screen, but not use the keyboard and mouse on the remote computer.
Scaling Off
Turns scaling off, making the picture of the remote computer larger, but you have to pan around to see the whole screen.
Scaling On
Turns scaling on, shrinking the remote computer's display to fit on your screen inside the window.
Clipboard
Turns on or off clipboard sharing. With it on, copying something to the clipboard on your local computer, you can paste that information on the remote computer.
6. Guided Path not helpful.
7. Escalate to PTE
If you are a PST, follow the Escalation Process to PTE.
.png)