Have your smartphone or tablet available to setup the Nest app
Have your router's Wi-Fi Network Name and Password
Have Broadband Internet service with at least 2Mbps upload speed
2. Pro Install Check
Proper installation of your Nest Hello Video Doorbell involves working with electricity, power tools, heights, and an existing doorbell transformer.
If you are not sure, or are uncomfortable with anything listed, it is best to have a professional review and install your Nest Hello Video Doorbell system for you.
3. Compatibility Check
Your Nest Hello Video Doorbell is compatible with a wide variety of existing home doorbell systems that run off mains power.
Requires Existing Doorbell
The Nest Hello Video Doorbell system requires an existing doorbell system to be attached to.
If you do not have a doorbell system, one will need to be installed first before the Nest Hello Video Doorbell will work.
Complex Systems
A doorbell with front gate controls, built-in intercom, or is installed at a distance from your home are probably not compatible with the Nest Hello Video Doorbell.
A professional installer will be necessary to review your current system to make sure.
Verify type of Doorbell System Currently Installed
The next steps involve working with live, high voltage electricity. If you are uncomfortable with this, contact an electrician or professional installer.
Locate your existing doorbell transformer.
Common locations are inside the doorbell chime box, next to or inside the breaker or fuse box, or in the basement or crawl space of your home.You can follow the wires coming from the chime or doorbell back to the transformer if it is installed nearby.
Many doorbell transformers have the information about their voltage rating molded or etched into the transformer body.The Nest Hello Video Doorbell requires 16 to 24 Volts AC, and 8 to 10 VA in North America.
If your transformer is not labeled, you can use a multimeter to test the voltage of your current doorbell system.If you are unsure how to use a multimeter to safely test voltage, it is best to contact an electrician or a pro installer.
4. Install and Setup Nest App
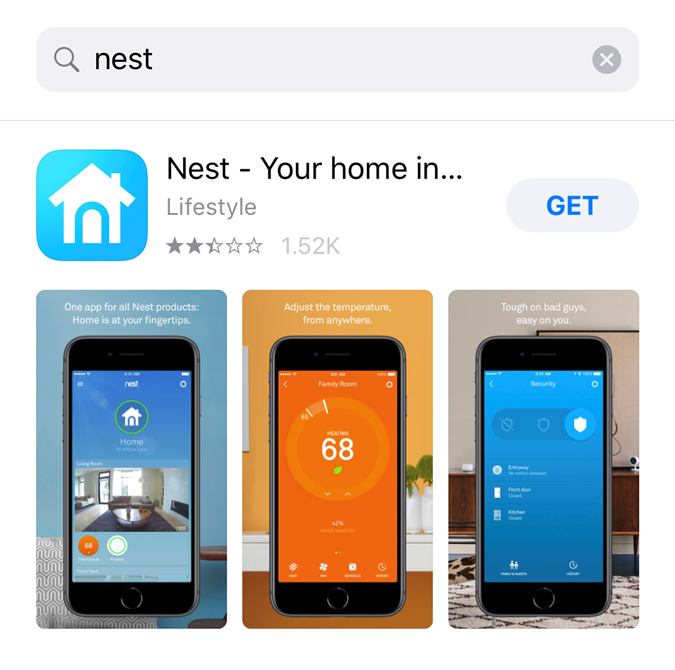
Locate and install the Nest app from your mobile device's app store or marketplace.
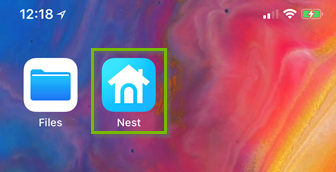
Launch the Nest app.
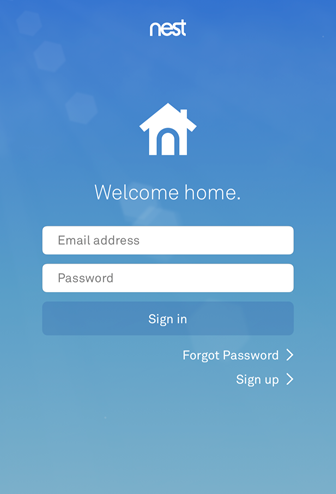
Log into an existing Nest account, or tap Sign up if you do not have a Nest account.
Once logged in, tap the I agree button to accept the Nest app's Terms of Service.
Tap Continue to proceed with Home setup.
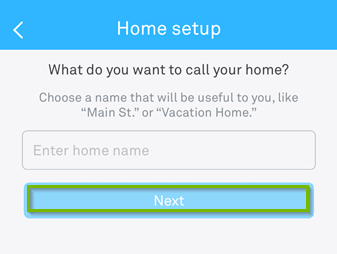
Choose a name for your Home and tap Next.
Fill in all requested information to complete Home setup. Tap Next.
Proceed through Home Setup with your preferred choice.
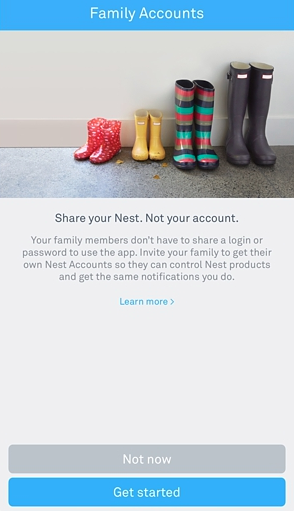
You can also share your Nest device with other people in the house so they can monitor and change settings from their own phone. You can also set this up later.
After this, your Nest app setup is complete and your device can now be added.
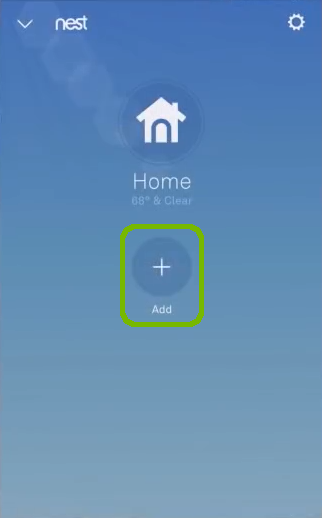
5. Add Device
Open the Nest app.
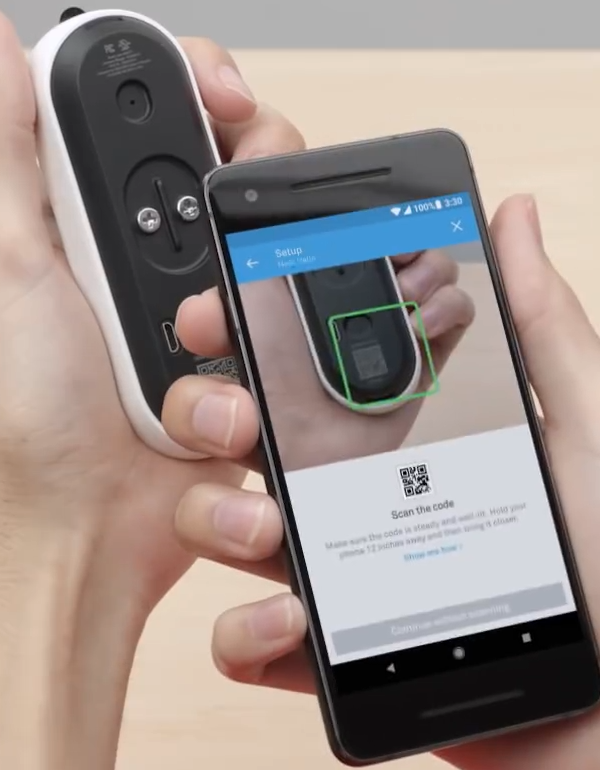
Select Add to add your Video Doorbell.
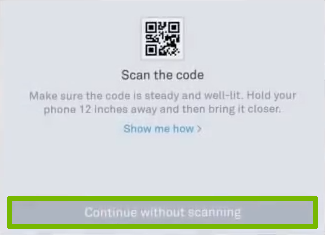
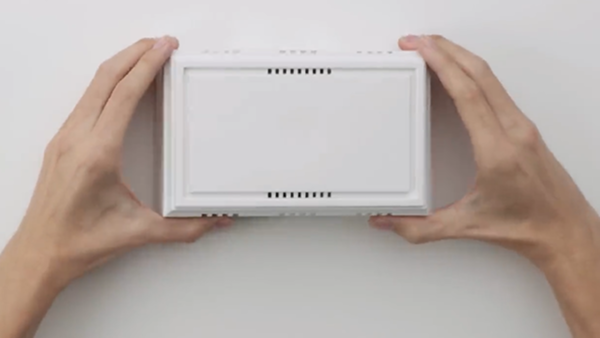
Locate the QR code on the back of your Nest Doorbell, and point your device's camera at it to scan.
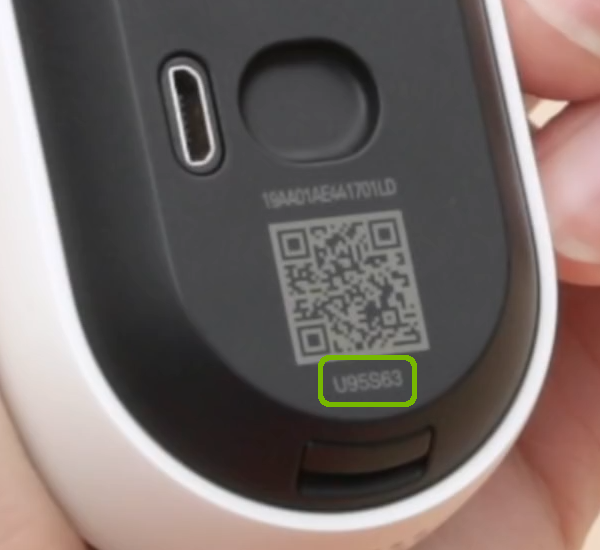
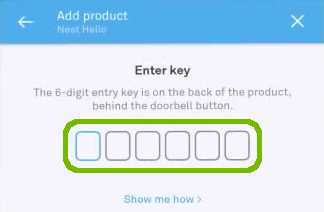
If The Code Won't Scan
Look below the QR code for a 6-Digit Code.
Select Continue without Scanning on the app.
Enter the 6 digit code.
We will return to the app in a moment, our next step is to connect the doorbell itself.
6. Connect Doorbell
Turn Off Power and Test to be Certain
Go to your home's breaker, and shut off the power to your doorbell and chime.
It is critically important to be absolutely certain power isn't going to your doorbell system. Serious injury or death can occur otherwise.
Go to your doorbell, and try ringing it. Make sure you do not hear it chime, and help check it does not have power.
If you are unsure which breaker controls your doorbell system, contact an electrician or shut off the main breaker to your home.
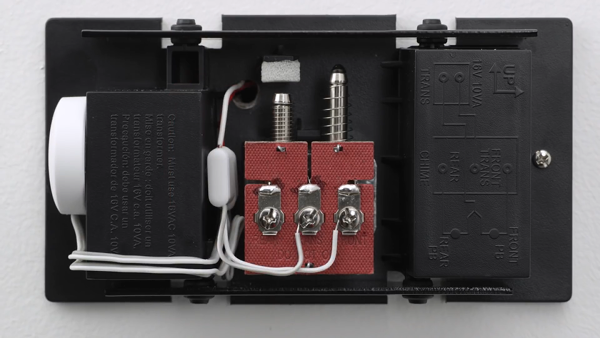
On your Chime
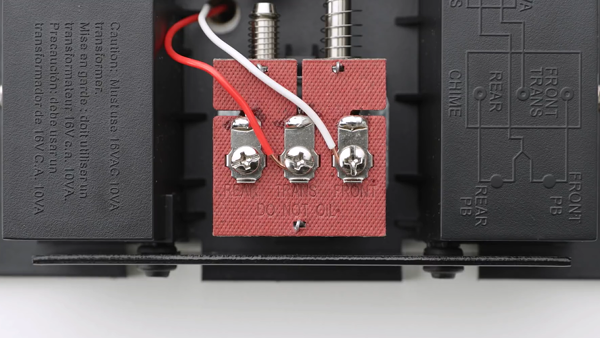
Remove the cover on your doorbell's chime.
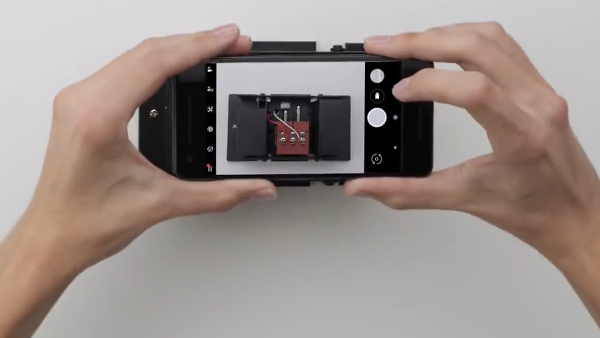
Take a picture of the wiring of your chime using your phone.
This is to help you troubleshoot, or remove your Ring Hello Video Doorbell in the future.
Look at the wires inside your chime carefully. Make note of how many wires, what they are connected to, and how they are labelled.
Yours will most likely look different than this picture.
In the Nest App
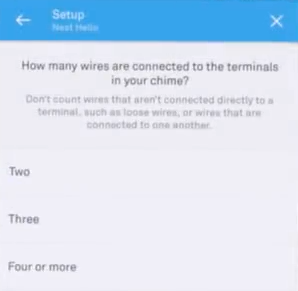
Select the number of wires you see in the Nest app.
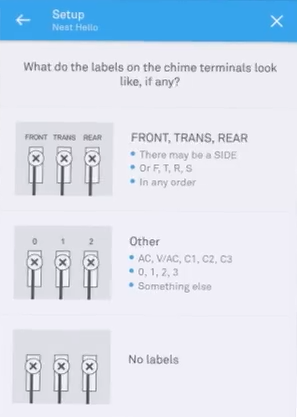
Select the layout of the wires in the Nest app.
Select the location where you're putting your Nest Hello Video Doorbell.
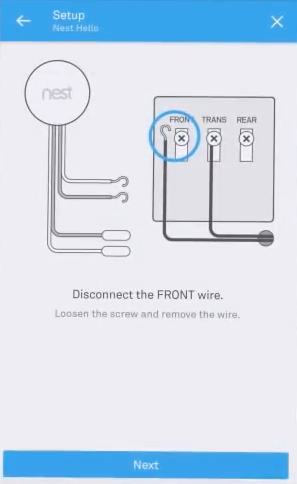
The app will give you custom, step-by-step instructions on what to disconnect, and what to connect again, where. These instructions will guide you through the process of installing the Nest Connector in your existing chime.
These are custom instructions for your particular doorbell. Keep your phone nearby and follow the instructions precisely to setup your Nest Hello Video Doorbell properly.
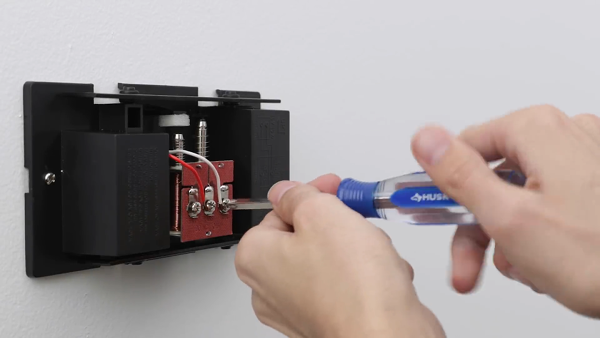
On your Chime
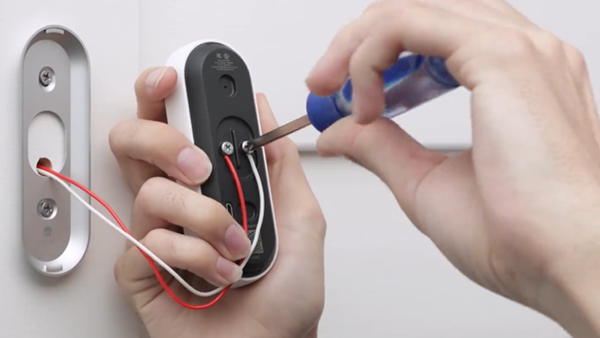
Carefully follow the instructions provided in the Nest app on your phone to connect the Nest Connector to your existing doorbell chime.
Once installed, carefully tuck the Connector and associated wires into the housing, making sure the cover will still fit, and nothing touches any exposed moving parts or wires.
Re-attach your chime's cover.
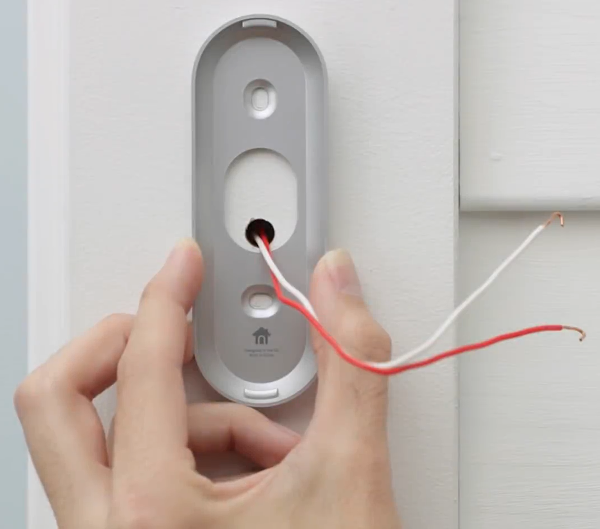
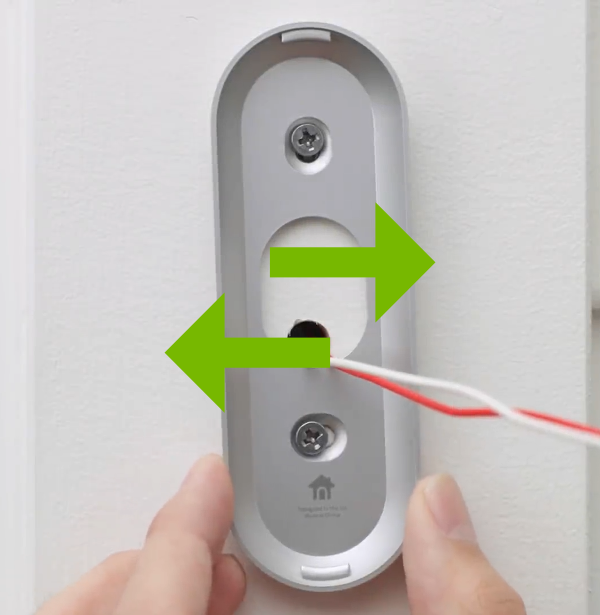
On Your Doorbell
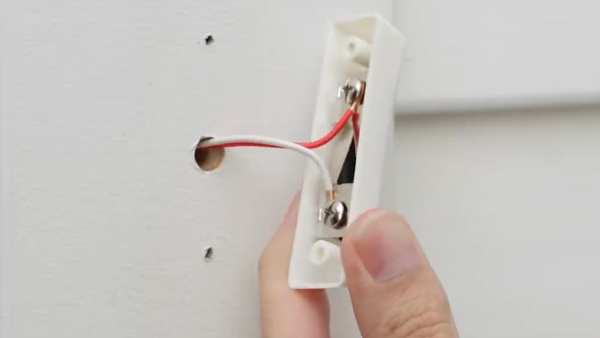
Unscrew and carefully pull the doorbell forward, exposing the 2 wires.
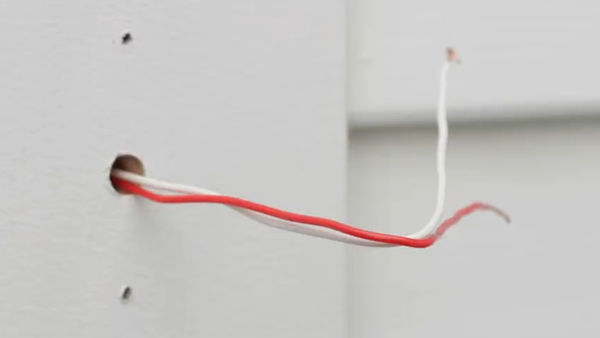
Remove the physical doorbell itself, then bend or tape the wires so they do not slip back into the wall.
Hold the bracket for the Nest Hello Doorbell up to the wall. Use a bubble level to make sure it is straight, and make sure the wires come through at the bottom of the large center hole.
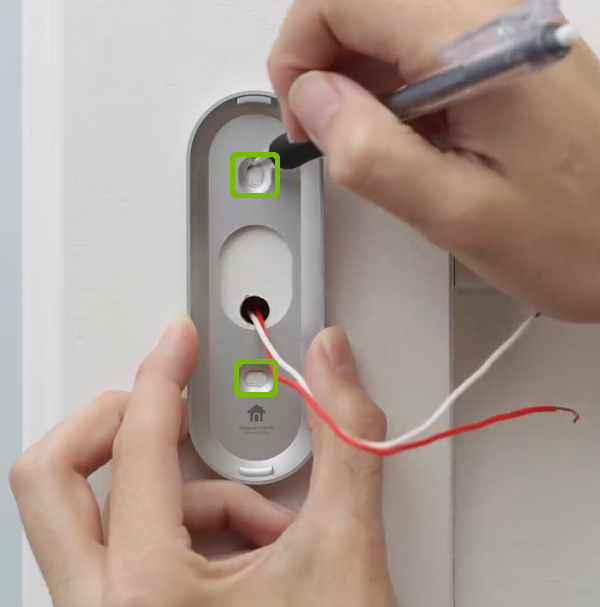
Don't worry about the existing screw holes from your previous doorbell, the new plate will cover them, and they most likely will not line up properly.
Mark the location of the new screw holes with a pencil or marker.
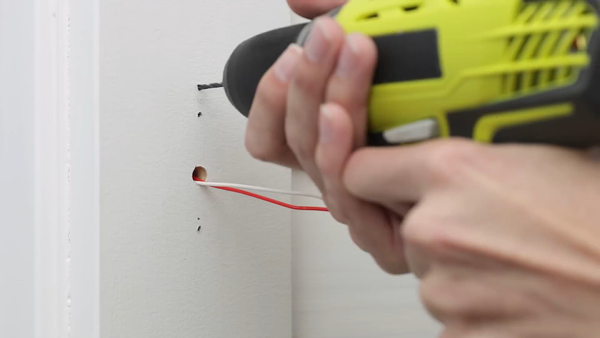
Remove the mounting plate. Use a power drill and a 3/32" drill bit to create pilot holes where you marked. If you are attaching to stone, stucco, brick or other hard materials, use the included drill bit and wall anchors, instead.
Put the mounting plate back, and carefully screw in the two included screws.
Using your bubble level, swing the mounting plate and make sure it is level before tightening the screws fully.
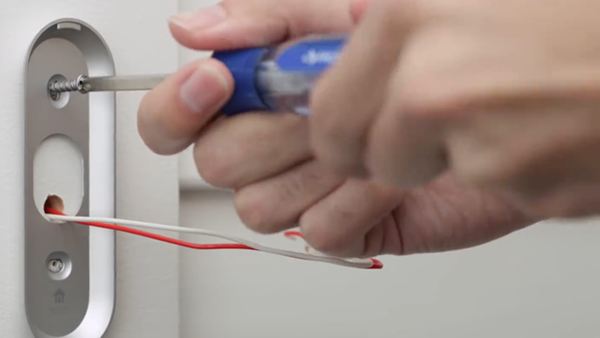
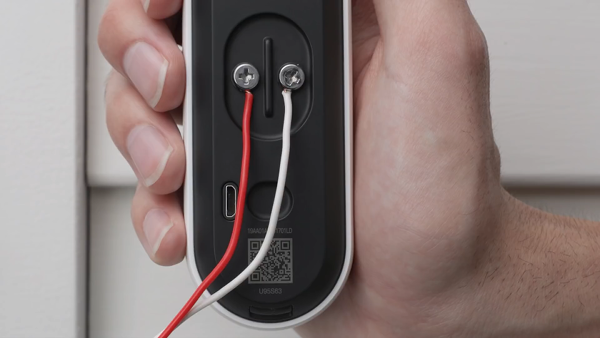
Connect the wires to your Nest Hello Video Doorbell.
It does not matter which wire connects to which terminal; the Doorbell and Connector you installed earlier will talk to each other and take care of that for you.
Make sure the wires point down, so it's easy to tuck extra wire back into the wall.
Tuck the wires back into the wall, and connect the Doorbell to the mounting plate. Slide it into the top, then push the bottom in till it clicks.
Turn Power On
Return to your home's breaker, and turn the power back on.
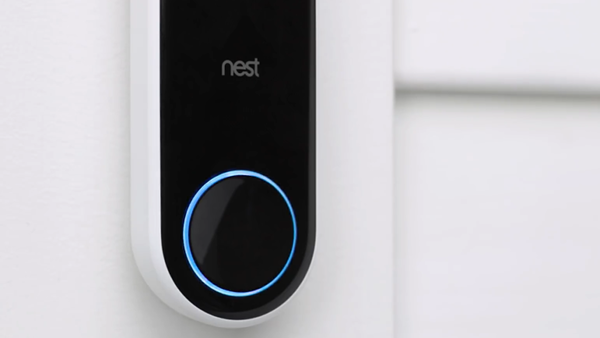
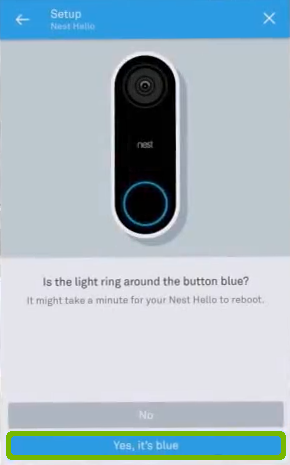
On Your Doorbell
The Nest Hello Doorbell will turn on, and the ring around the button will light up blue.
In the Nest App
Select Yes, It's blue to confirm the light around the Doorbell button turned blue.
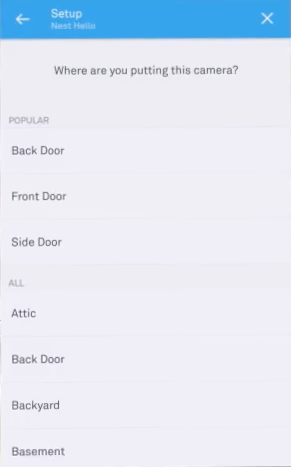
Select where this camera is located.
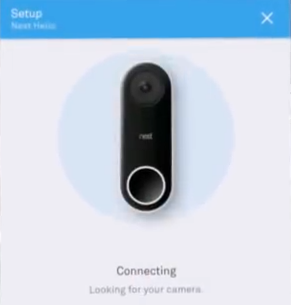
The Nest app will connect to your Doorbell camera.
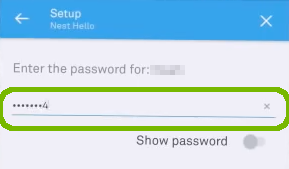
Enter the password for your Wi-Fi network.
Your Doorbell should now be connected.
7. Pro Install
Because of the complexities and possible incompatibilities you may encounter, it is recommended to have a professional complete the installation of your Nest Hello Video Doorbell system.
Nest has a special page setup to assist in locating a local professional to complete the installation of your Nest Hello Video Doorbell.
Nest Pro Finder Nest can provide a list of capable installers in your area.
.png)