Setup your Nest Secure Alarm System for the first time.
Before We Begin:
Have your smartphone available.
Have a phillips head screwdriver available.
Know your Wi-Fi network name and password.
2. Verify Contents
Before starting, it's best to verify you have all the parts you will need:
Nest Guard
Nest Tags
Nest Detect Sensors
For Installing the Nest Guard
Power Cable
Power Adapter
Power adapter bracket and screw
For Installing the Nest Detect Sensors
Corner Back Plates
Extra adhesive mounting strips
Screws
Also Needed
Phillips Head Screwdriver
You will also need a Phillips-Head (star shaped) screwdriver, to mount the Power adapter bracket, and possibly the Nest Detect sensors.
The screwdriver is not supplied with the Nest Secure, you will need to supply your own.
3. OS Choice
To continue, we need to know what Operating System your smartphone or tablet has.
There are 2 main Operating Systems for smartphones currently available, Android and iOS.
Android SmartphoneiOS SmartphoneAndroid smartphones are produced by multiple companies, such as Samsung, LG, Motorola, HTC, and OnePlus.Apple is the only company that makes iOS smartphones.
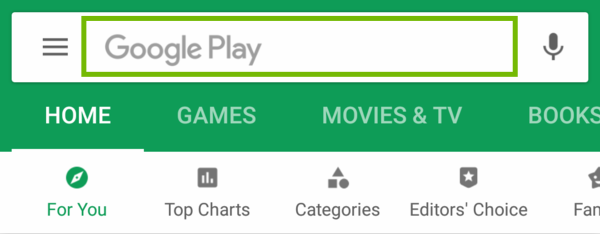
4. Install Android App
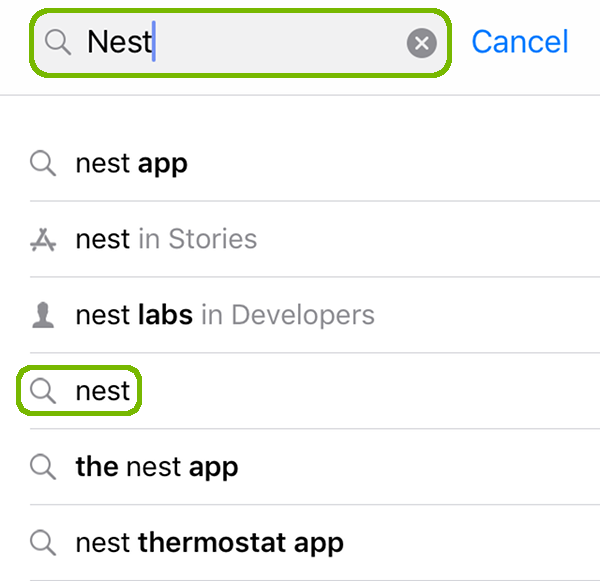
Launch the Play Store on your smartphone.
Select the search bar at the top.
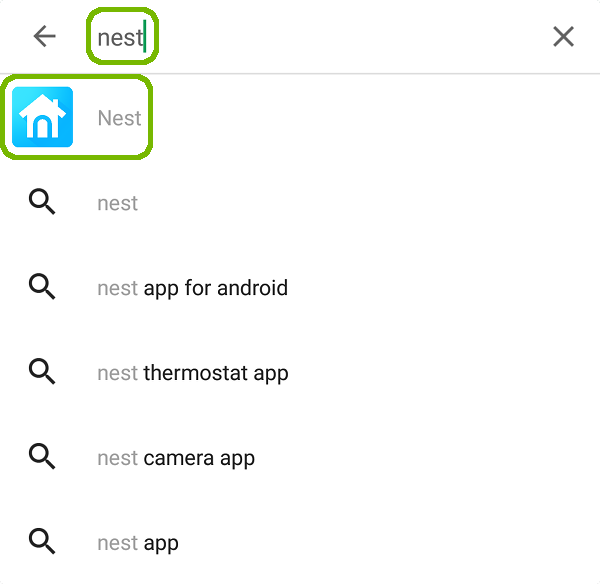
Type in Nest, then select Nest from the list.
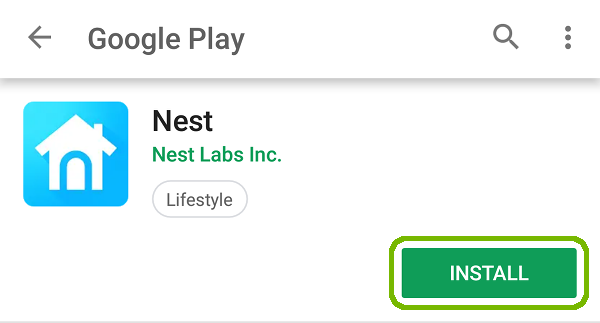
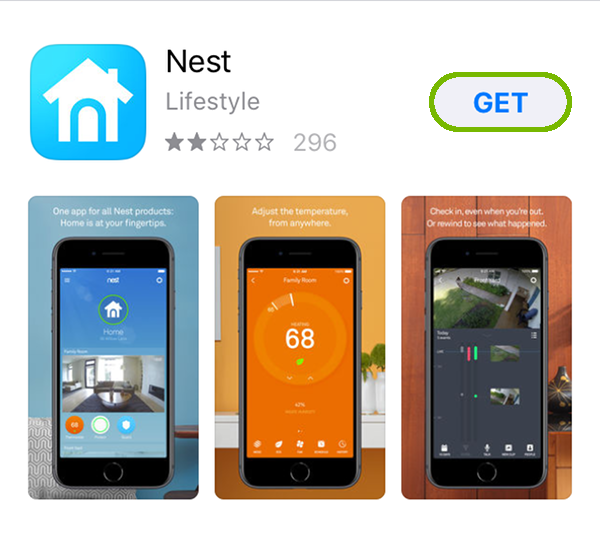
Select Install.
5. Create a Nest Account
Log Into An Existing Nest Account
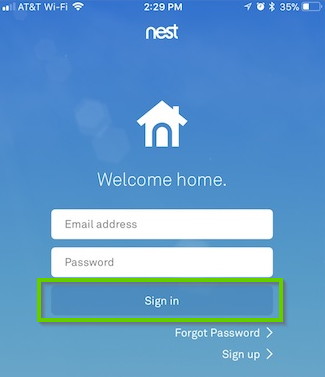
Open your Nest App if it is not already open.
If you already have a Nest account, you can enter your account credentials and tap Sign in to proceed.
Create a New Nest Account
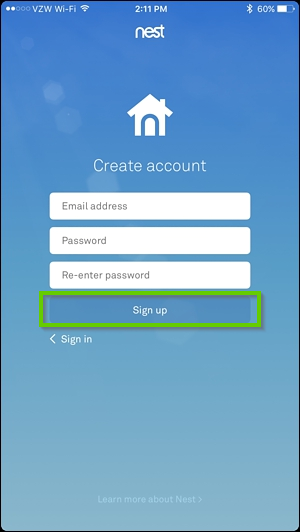
If you do not have a Nest account, tap the Sign up option beneath the Sign in button to create a free Nest account.
You'll need to enter your email address and choose a password.
Tap Sign up.
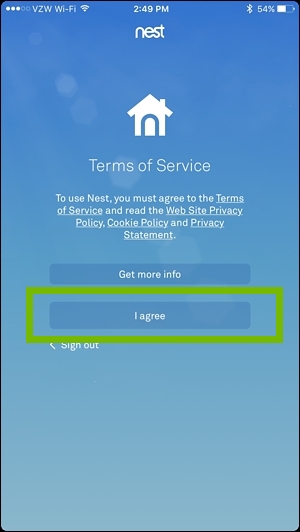
Select I agree to agree to the Terms of Service and Privacy Policy, and tap Continue at the bottom of the next screen.
6. Create Home
Open Nest (if it's not already open).
A welcome screen is displayed. Select Continue.
Give your home a name, then select Next.
Enter your home address, then select Next.
You will be offered news and marketing notifications from nest, as well as a monthly home report. Using the toggle on the right, choose if you wish to receive these Emails, then select Next.
You'll be asked if you wish to use Away Assist. Away Assist uses your phone's location information from GPS to determine if you're near your home or not, to help automatically adjust certain aspects of your Nest device. Choose Not now or OK, depending on your preference.You can always change this option later.
You'll be informed that each member of your family gets their own Nest account; you do not need to share your password with anyone. Instead, each family member creates their own Nest account, and can be added to your 'Family' of devices. This is our first time setting up, for now, select Not now.
7. Secure Alarm Setup Install Overview
When you're setting up your Nest Secure alarm system, it's best to take it step by step; adding each piece, one by one, and ensuring each is working properly before continuing.
This guide will walk you through adding, in order:
Nest Guard
This is the 'base station' that controls all the other devices, allows you to enter a PIN and use the Nest Tags. Since all other parts of the Nest Secure Alarm system needs this to function, it is recommended to set this up first.
Nest Tags
These act as alternates to your PIN, and it's best to set these up second.
Nest Detect
The Nest Secure Alarm system is extendable; meaning you can add on more sensors as time goes on. Since the Detect sensors are considered 'add-ons' by the system, it's recommended to set these up last.
8. Add Nest Guard
Install Nest Guard
It is best to place your Nest Guard near whichever door you use as the main entrance to your home, such as the front door, or garage door.
Plug the Nest Guard into an available wall outlet using the Power adapter and cable included.
Add Nest Guard to Nest App
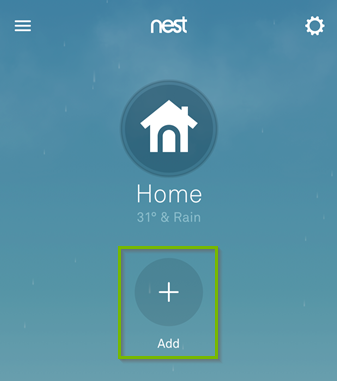
Open the Nest app.
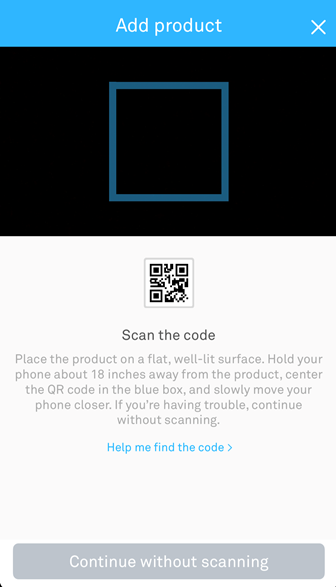
Select the Add button to add your Detect devices one at a time.
Point your smartphone's camera at the QR code on the bottom of your Nest Detect.
If The Code Won't Scan
Select Continue without scanning.
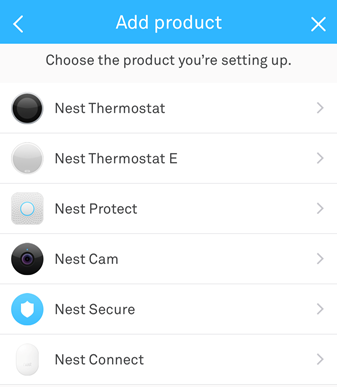
Select Nest Secure from the list.
Select Nest Guard.
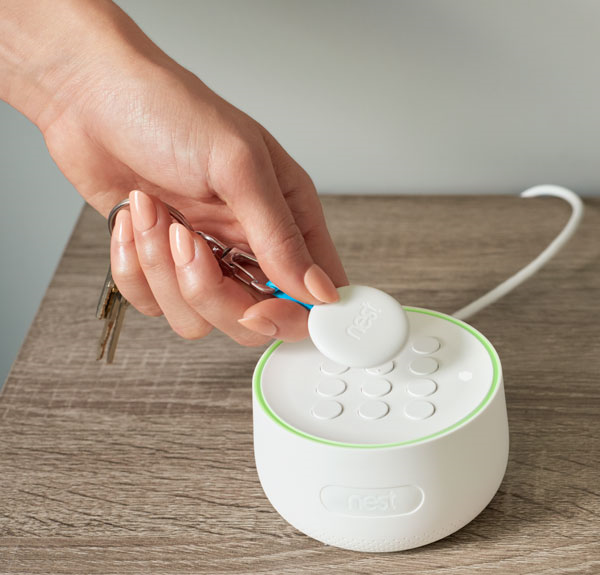
Look on the bottom of your Nest Detect. There will be a six digit code next to the QR code. Type that code in here.
A welcome screen is displayed. Select Next.
You will be reminded to plug in your Nest Guard. We have already done this. Select Next.
Enter your Wi-Fi password, then select Next.
If you have another Nest product, your Nest Guard will talk to it, and discover the Wi-Fi settings automatically, skipping this step!
Your Nest Guard is now successfully added to your Nest account. Select Next.
Personalization
Nest will ask you to personalize the options on your Nest Guard. These are personal preference options that will not have exact answers, and will change based on where your Nest Guard is located, what the Nest Guard can 'see' with its motion sensor, and many other factors.
For example:
Reduced Sensitivity
Nest Guard will check how far out it can 'see' with its motion detector, and may offer reduced sensitivity options.
Location
Nest Guard may ask where it is located, depending on if it found any other Nest products nearby, and was able to figure this out for you.
You may or may not see either or both of these options. That's okay; the Nest Guard will try its best to figure out certain settings for you, and will only offer options that make the most sense for your installation.
Setting Master Passcode
You do not need to share passcodes. Each person in your household will have their own, separate, unique passcode.
The first passcode you set is the Master passcode, in charge of everything that happens with your Nest Secure Alarm System. Make sure this passcode is easy for you to remember but hard for others to guess.
A welcome screen will be displayed. Select Next.
Nest Guard will have you choose a passcode, and try it out on the keypad on top of the Nest Guard device itself.
Follow the instructions on the screen to complete this step.
Your Nest Guard setup is now complete!
9. Add Device to App
Open the Nest app.
Tap the Add button to begin adding a Nest device to the app.
You will then be presented with a list of Nest devices that can be added to the app. Select Nest Tag from the list provided.
You now have the opportunity to use your smartphone's camera to scan your Nest Tag's QR code. Alternatively, if you cannot locate the Nest Tag's QR code, you can tap Continue without scanning.
On the next screen, the app will describe what the device does. Tap Next at the bottom to continue.
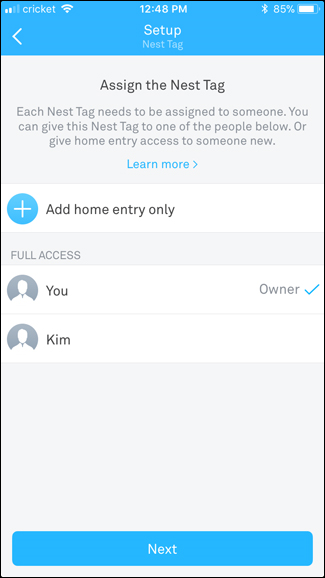
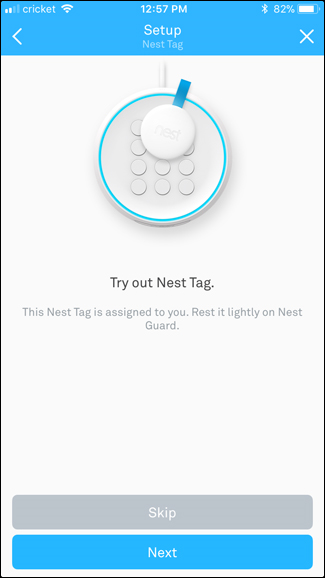
Assign the Tag to someone in your Nest Family. Tap Next when finished.
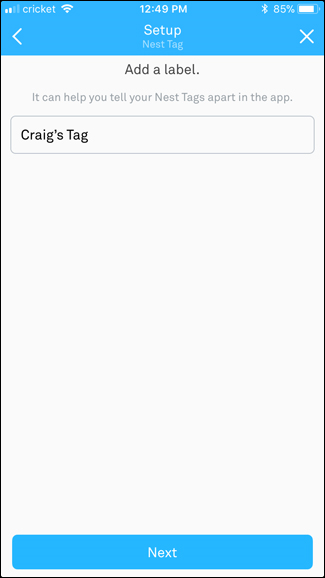
Name your Nest Tag and tap Next.
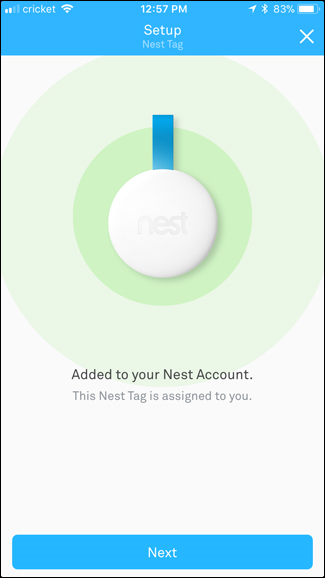
The Tag had now been added. Tap Next.
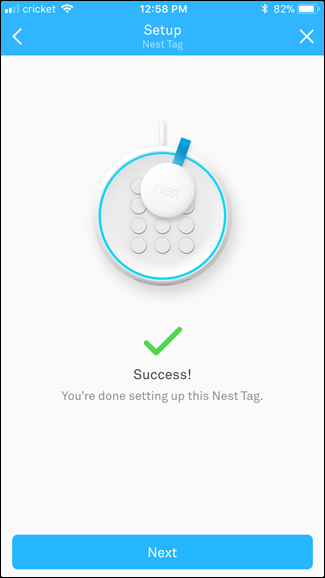
Test your tag by placing it near the Nest Guard. It will make a chime sound and the light will turn green when it is read. Tap Next in the app.
Success! Your Tag has been added!
These steps can be repeated for each additional Nest Tag you need to add to your system.
10. Add Device to App
Open the Nest app.
Tap the Add button to begin adding a Nest device to the app.
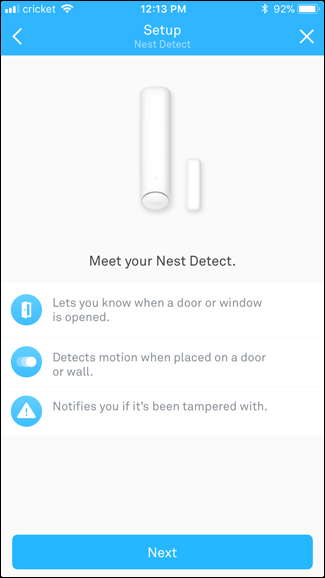
You will then be presented with a list of Nest devices that can be added to the app. Select Nest Detect from the list provided.
You now have the opportunity to use your smartphone's camera to scan your Nest Detect's QR code. Alternatively, if you cannot locate the QR code on your Nest Detect Sensor, you can tap Continue without scanning.
On the next screen, the app will describe what the device does. Tap Next at the bottom to continue.
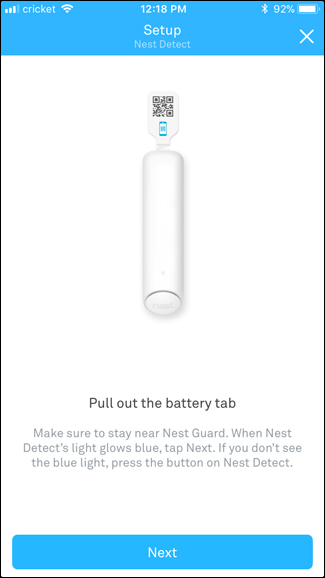
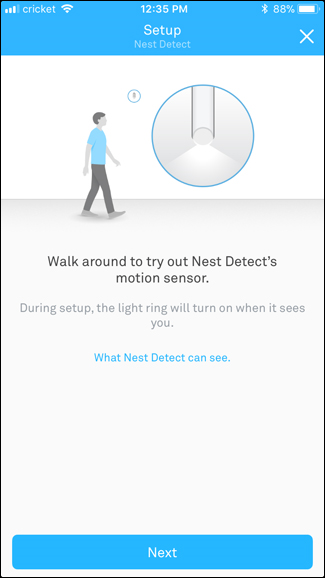
Follow the on-screen instructions and pull out the battery tab, then wait for the blue light to illuminate on your Nest Detect Sensor. Select Next on the following screen.
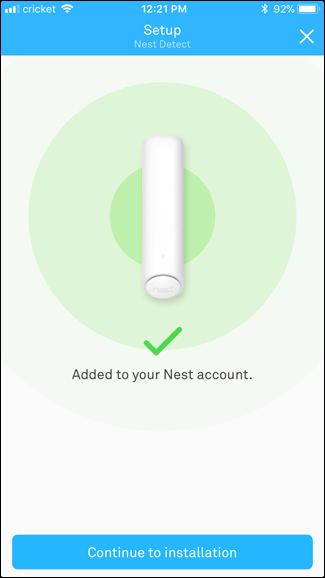
Wait for your sensor to pair with your Secure Alarm System and select Continue to installation.
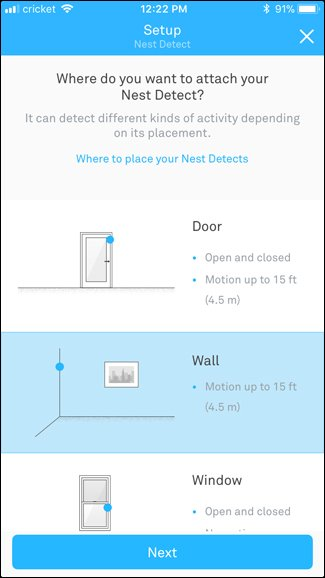
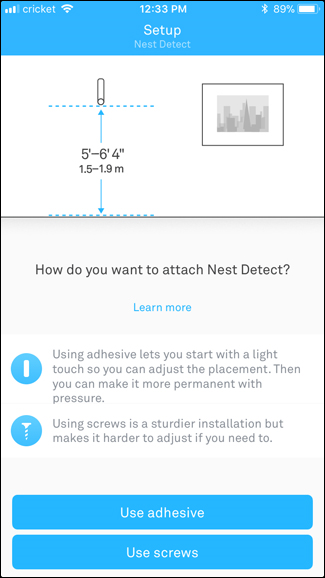
Select the location for your Nest Detect and tap Next.
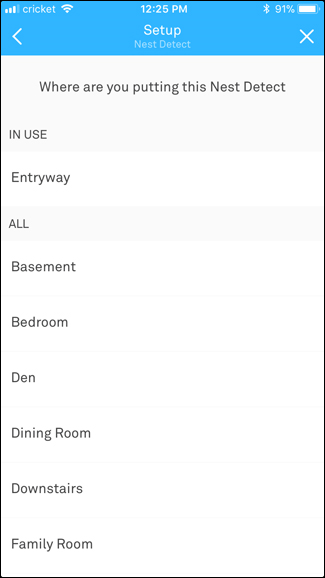
Select where you've placed your Nest Detect.
After that, you'll need to physically place your sensor. The app will tell you what you need to install the sensor and take you through that process, including how high to install it for the most accurate motion detection. Select whether you'll be using adhesive or screws.
Tap Next.
Congratulations! Your Nest device has been added to the Nest app and is ready to use.
These steps can be repeated for each additional Nest Detect Sensor you need to add to your system.
11. How to Arm and Disarm
There are multiple ways to arm and disarm your Nest Secure Alarm system:
Using the Nest Guard device
Using the Nest app
Using Nest Tags
To Arm and Disarm the System
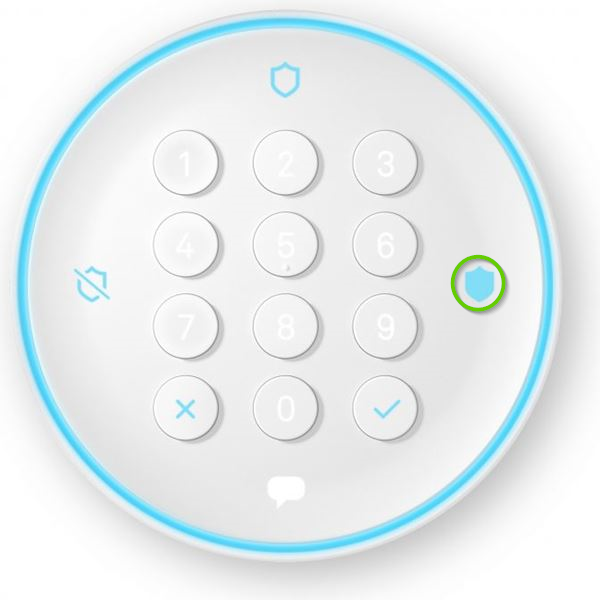
Using the Nest Guard
Arming
If going out. Press Away and Guarding. Away and Guarding arms doors, windows, and watches for motion.
If staying in. Press Home and Guarding. Home and Guarding only arms doors and windows.
Disarming
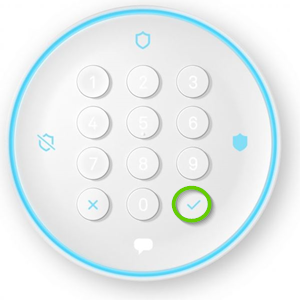
Enter your passcode with Guard's keypad.
Press the check button on Guard to confirm your passcode.
Using the Nest App
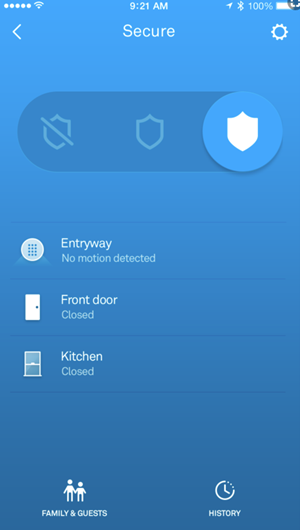
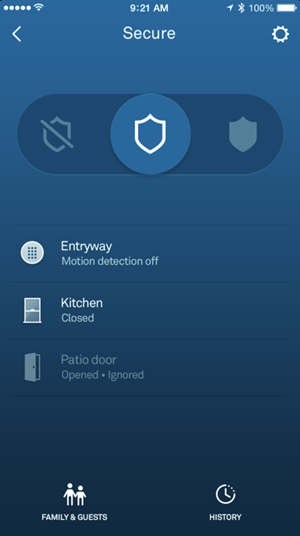
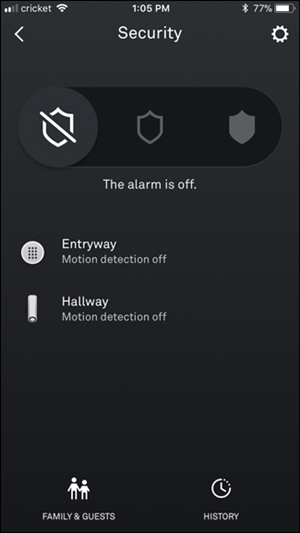
Tap the Security icon on the app home screen.
Select the security level that you want.
Away and Guarding arms doors, windows, and watches for motion.
Home and Guarding only arms doors and windows.
Off turns the alarm off.
Using Nest Tags
Any time Guard asks you to enter your passcode, you can use Tag instead of using Guard's keypad or your phone.
Hold the Tag over your Secure device until you hear the device chime.
Secure's light ring and security level buttons will light up to let you know what's happening.
12. Press Button Check
Try pressing the button on the bottom of the Nest Detect sensor.
The Ring around the button will glow based on the status of the Nest Detect.
Blue
1 Blue Pulse
Your Detect is working properly. If Quiet Open is enabled, you can open the door or window within 10 seconds while the alarm is still armed.
Continuous Blue Pulses
This sensor hasn't been setup with the Nest Secure Alarm system yet.
Yellow
5 Yellow Pulses
The battery has less than 30 days left.
The Nest Detect has hardware problems.
Red
Blinking Red
The battery is critically low, and will fail very soon. It needs to be replaced right away.
No Light
No Light
The battery has been entirely drained. The sensor will not work till the battery is replaced.
.png)