Replace your existing lock with the Nest x Yale lock.
Install the Nest app on your mobile device.
Set up your Nest x Yale lock for the first time.
Before We Begin:
Gather required tools for installation.
Have your mobile device handy to install and access the Nest app.
2. Prepare for Installation
Ensure the door meets requirements:
Thickness must either be 1 3/8", 1 3/4", or 2" to 2 1/4".
Lock hole center must be 2 3/8" or 2 3/4" from the edge of the door.
Gather the required tools:
Tools required for a new door:
Phillips screwdriver
Drill
Pencil
Utility knife
Wood chisel
Tape measure
Level
Tools required when replacing an existing lock:
Phillips screwdriver
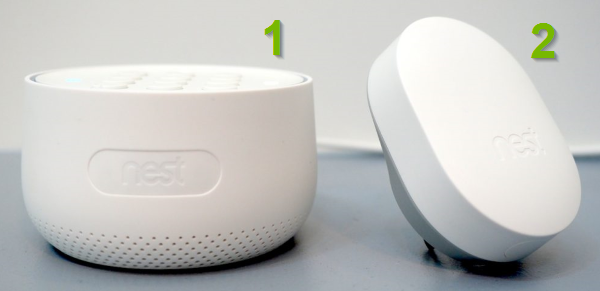
You must have a Nest Guard (1) or Nest Connect device (2).
If you aren't comfortable performing the physical installation yourself, professional installation options are available. See http://nest.com/profinder.
3. Additional Hardware Required
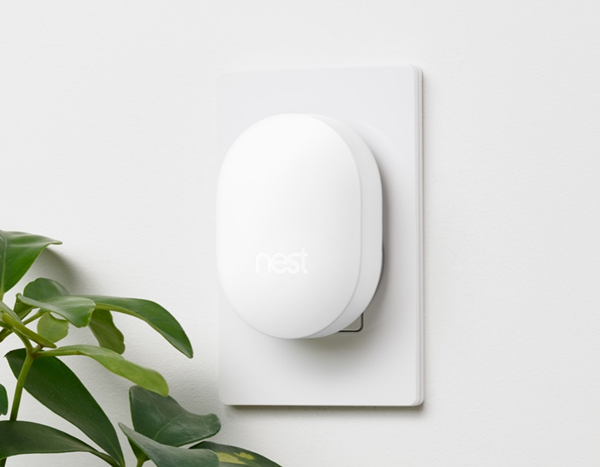
The Nest x Yale Lock doesn’t directly connect to the internet. It needs to connect through either a Nest Guard or Nest Connect device. You must have one of these devices already installed in your home and connected to the Nest app in order to be able to connect your Nest x Yale Lock properly.
The Nest Guard (1) is the base with keypad and siren that is part of the Nest Secure alarm system.
The Nest Connect (2) is a range extender that keeps your Nest Secure devices connected when they're far apart or helps connect the Nest x Yale Lock to Wi-Fi.
If you purchase the Nest x Yale Lock from one of the Nest retail partners, the Nest Connect will be included in the box. If you purchase it from the Nest store, you have the option to buy it with or without a Nest Connect. If you already have a Nest Secure alarm system in your home, you will only need to purchase Nest Connect device if your lock is too far from the Nest Guard.
4. Install the Lock
Remove your existing lock.
Keep your old lock handy in the event you have problems during the installation process and need to reinstall it.
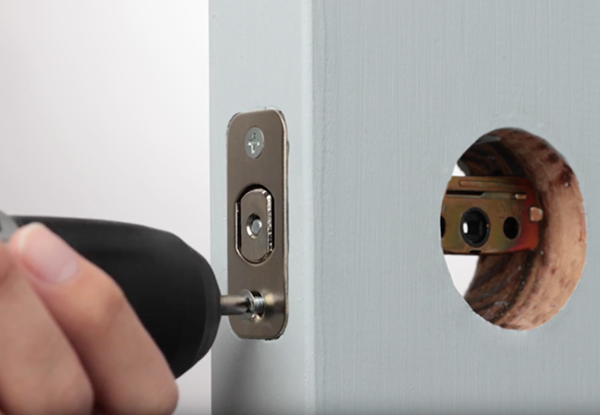
Remove the existing strike plate.
Install the deadbolt. Push to ensure you are fitting the bolt into the door as illustrated.
If the holes to not line up properly, you may need to re-drill new holes. If necessary, a chisel can help with the cutout for the deadbolt's faceplate.
Replace the old strike plate with the new strike plate.
You must install the new strike plate included with your lock, even if it looks the same as your current one. If you do not, your lock may jam.
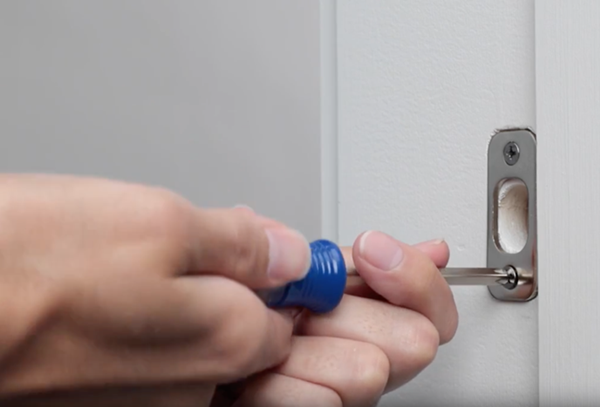
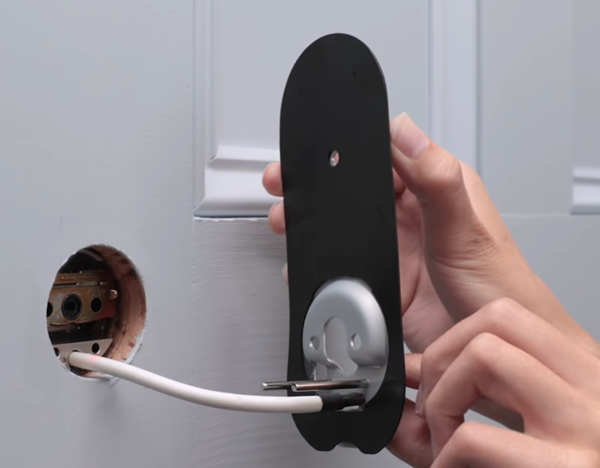
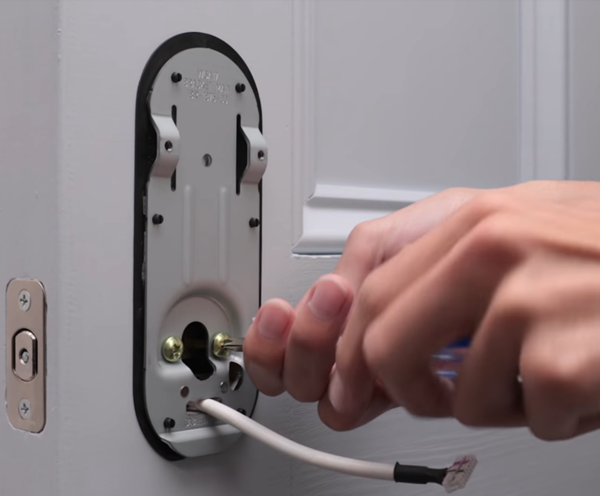
Install the keypad on the outside of the door. Place the cable of the keypad through the lock hole and press the keypad into the hole.
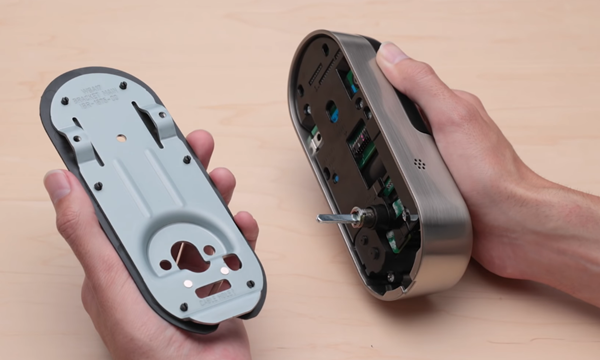
Pull the mounting plate off the back of the lock.
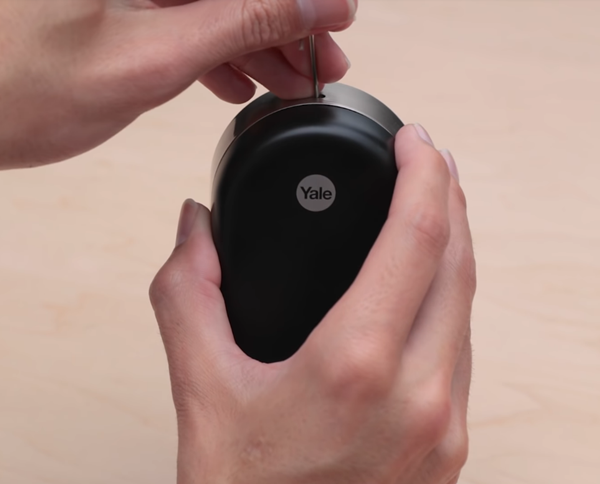
Remove the battery cover with the included key. Do not install the batteries yet.
If you misplace the key you may use a thumbtack or similar object to remove the battery cover.
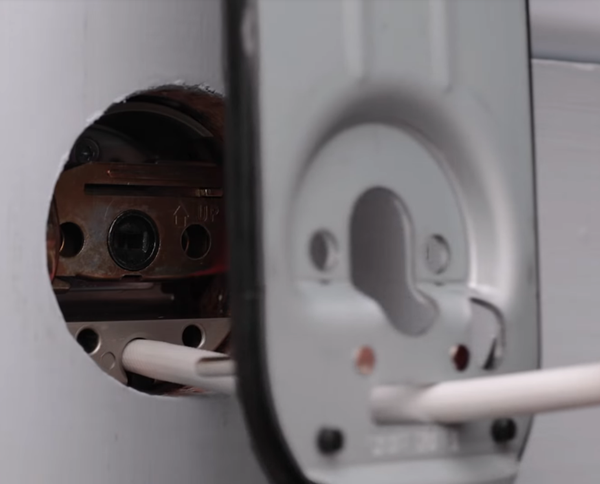
Run the cable through the hole in mounting plate.
Press the mounting plate pins through the holes on either side of the cable.
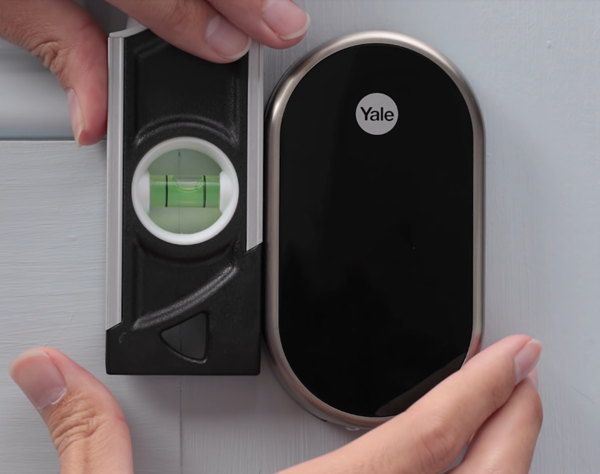
Secure the mounting plate with the screws provided.
Before fully tightening the screws, level the keypad.
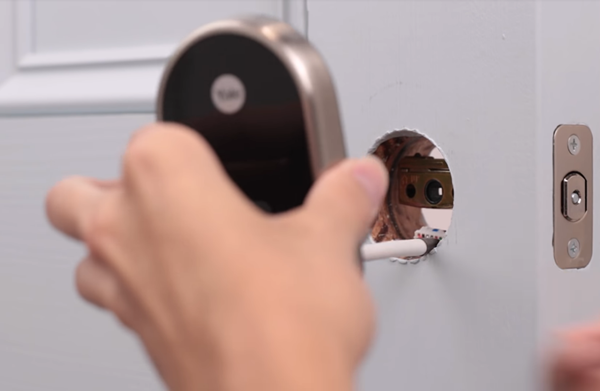
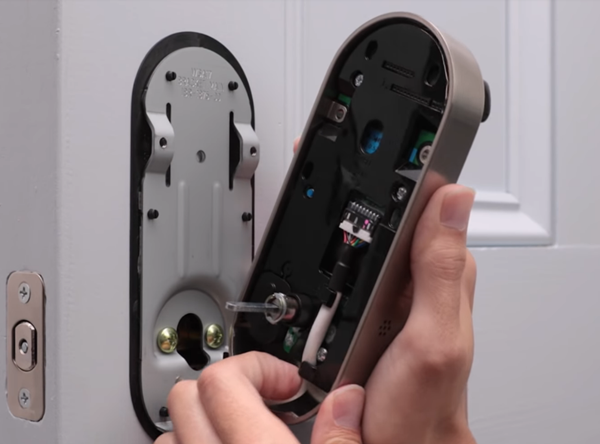
Plug the cable into the connector on the lock. A small tab will prevent you from plugging it in backwards.
Route the cable behind the cable hooks to hold it in place.
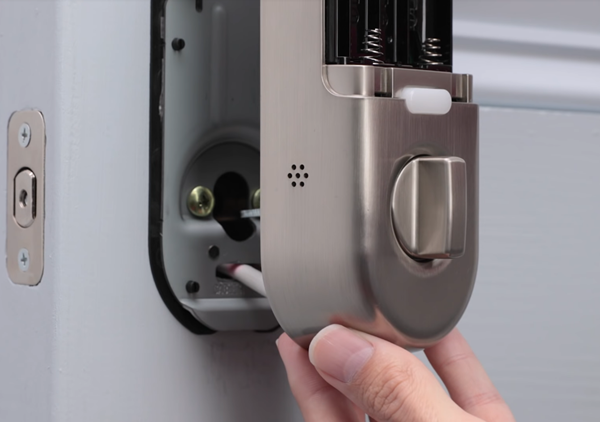
Before the following step, ensure that the thumbturn on the lock is pointed vertically and that the deadbolt is fully retracted (flush with the faceplate).
Guide the spindle through the hole and hook the lock onto the bottom of the plate.
Use the short black screws provided to mount the lock on the plate.
5. Test and Calibrate
Test the Lock
Open the door.
Test the deadbolt using the thumbturn mechanism. Ensure the deadbolt extends and retracts properly.
Close the door.
Test the deadbolt again using the thumbturn mechanism. Ensure the deadbolt extends and retracts without resistance.
During testing, if you feel resistance or if the deadbolt does not extend fully, remove the lock and re-check the deadbolt and lock installation.
Calibrate the Lock
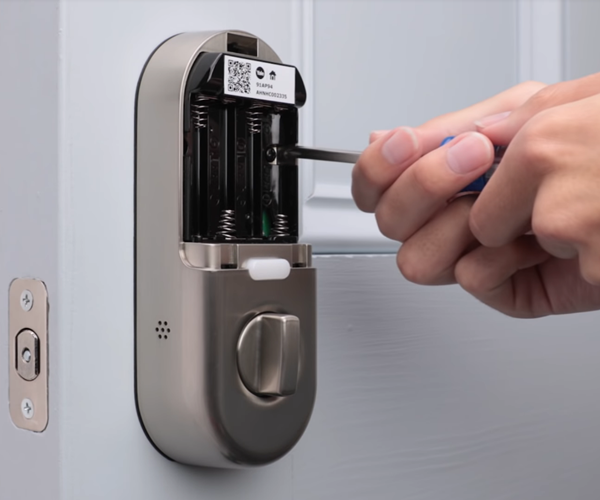
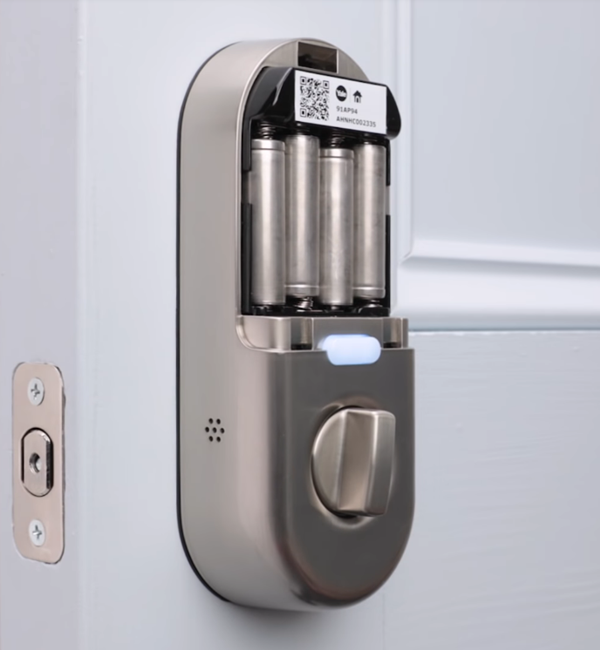
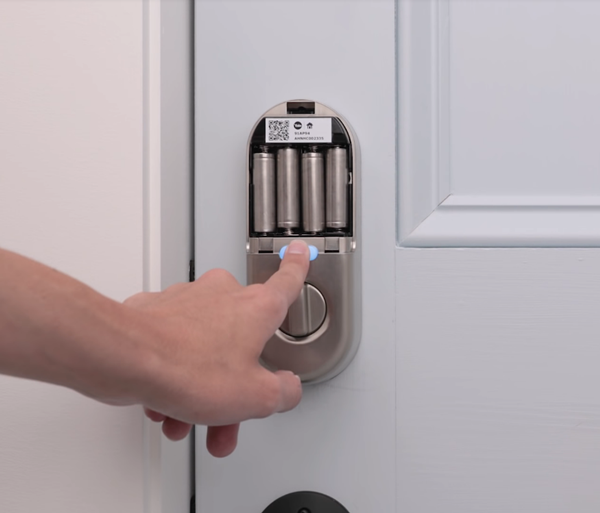
Install the AA batteries (included) into your lock. The lock will turn on and you will hear the Nest greeting.
Leave the battery cover off for now. You will need to scan the code inside to connect your lock to the Nest app later on.
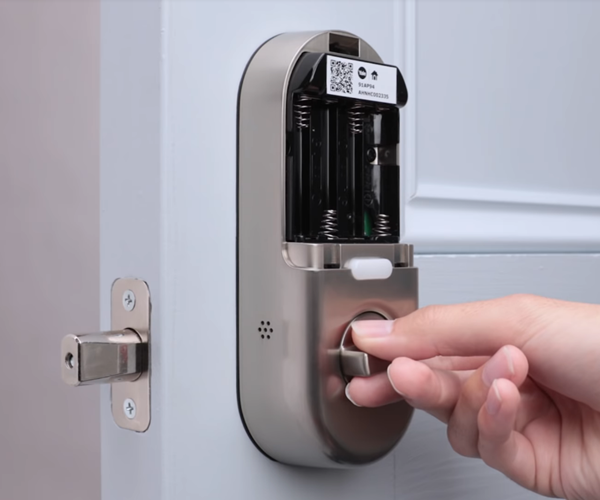
Touch your palm to the keypad or press the Yale logo to wake up your lock if necessary. The lock will give you instructions on creating a temporary master passcode.
Once your lock has been successfully connected to the Nest app later on, the master passcode will no longer be needed.
The lock will prompt you to close the door so it can calibrate itself. If the lock detects an issue such as a jam, it will automatically unlock itself.
It's important to keep the door closed while the lock calibrates itself. If you leave the door open, your lock may not work properly.
6. OS Choice
To continue, we need to know what Operating System your smartphone or tablet has.
There are 2 main Operating Systems for smartphones currently available, Android and iOS.
Android SmartphoneiOS SmartphoneAndroid smartphones are produced by multiple companies, such as Samsung, LG, Motorola, HTC, and OnePlus.Apple is the only company that makes iOS smartphones.
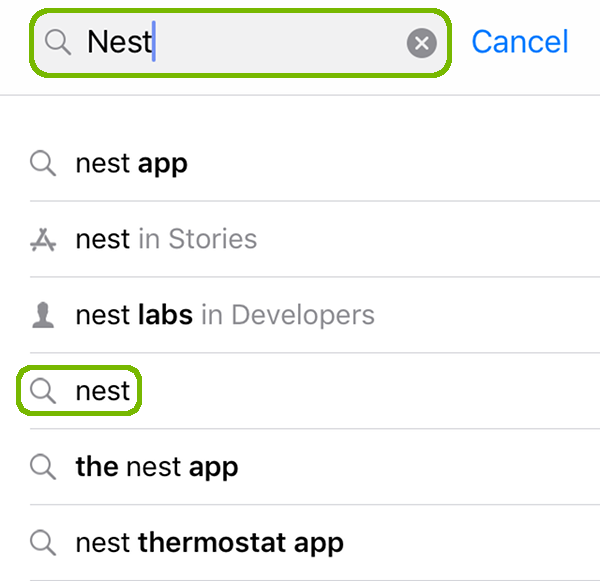
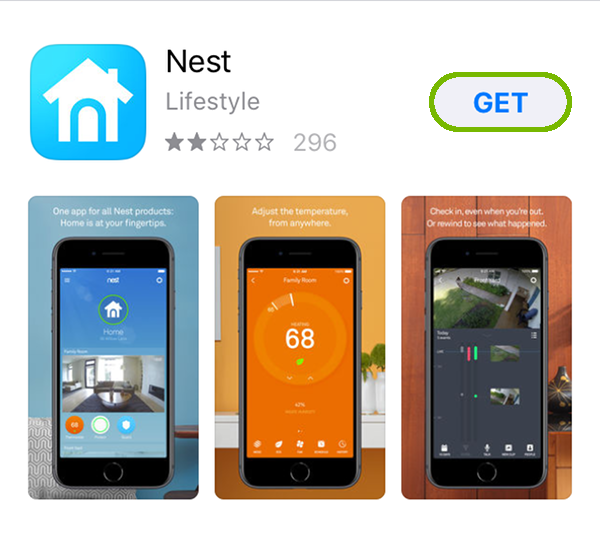
7. Install Android App
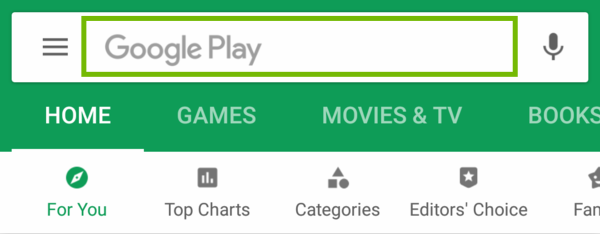
Launch the Play Store on your smartphone.
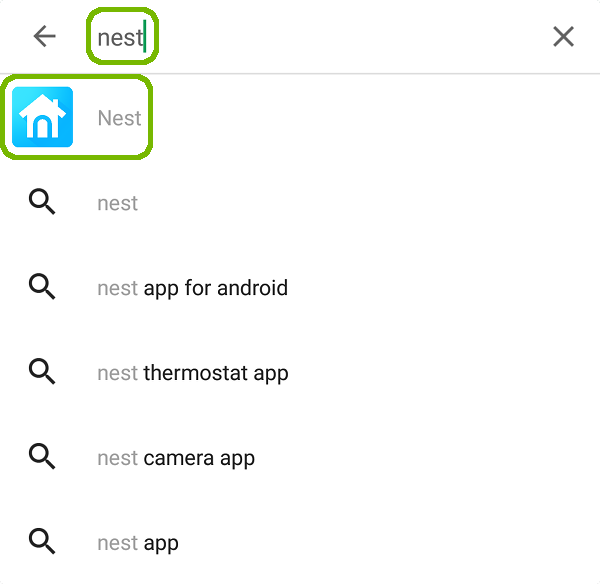
Select the search bar at the top.
Type in Nest, then select Nest from the list.
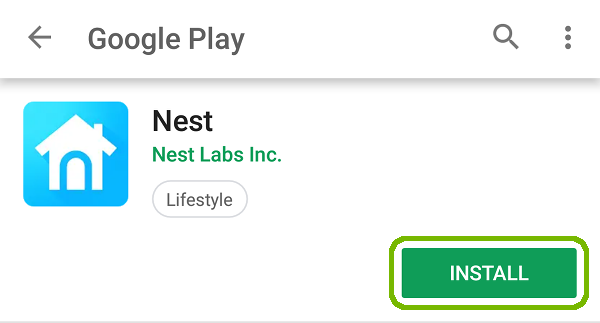
Select Install.
8. Setup App
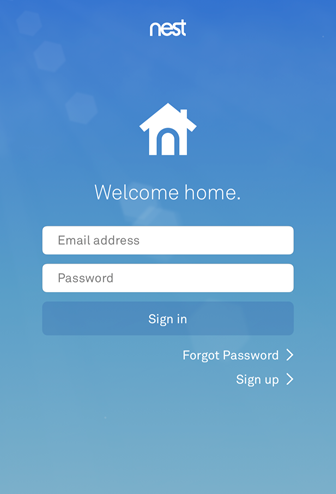
Launch the Nest app.
Log into an existing Nest account, or select Sign up if you do not have a Nest account.
Once logged in, select the I agree button to accept the Nest app's Terms of Service.
Select Continue to proceed with Home setup.
Nest accounts have a maximum of three "Home" locations (residences) that can be added to them.
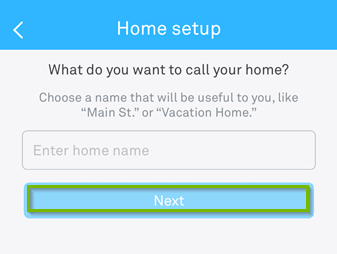
Choose a name for your Home and select Next.
Fill in the home address where your Nest products will be located to complete Home setup. Select Next to proceed.
Select a preference for using your mobile device's location.
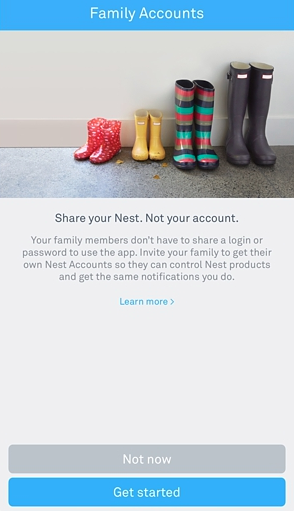
Select a preference for sharing/adding family accounts to your Nest home location.
Home setup is now complete. Nest devices can now be added to the home location you've just configured.
9. Connect Lock to App
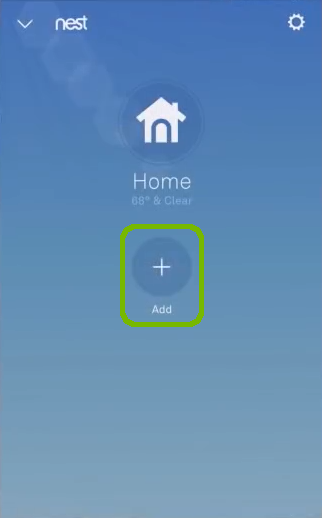
Launch the Nest app.
From the Home screen, tap the Plus sign to begin adding a device to your home location.
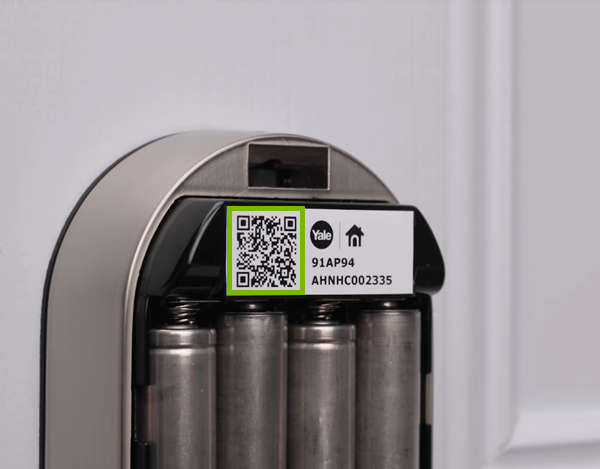
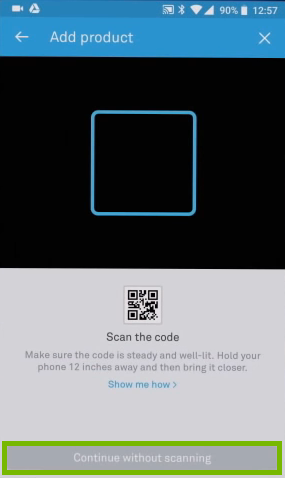
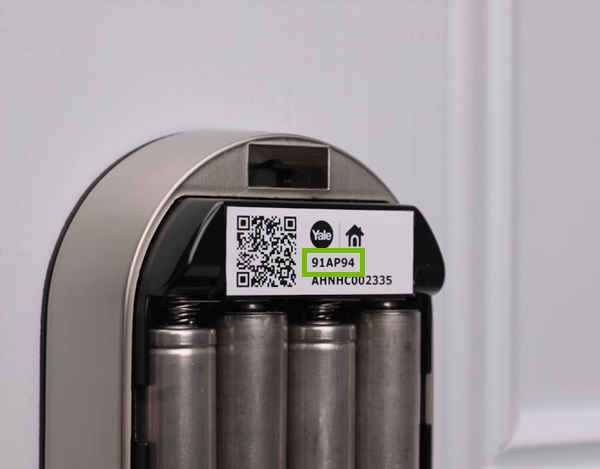
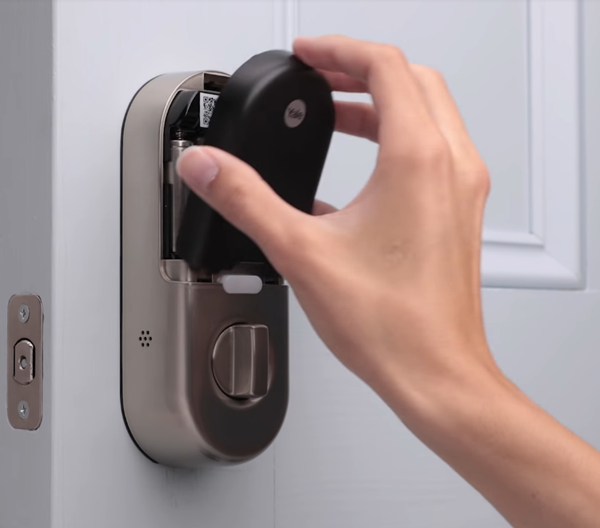
Scan your lock's QR code using your mobile device's camera. It is located in the battery compartment of your lock.
If you are having trouble scanning the code, select Continue without scanning.
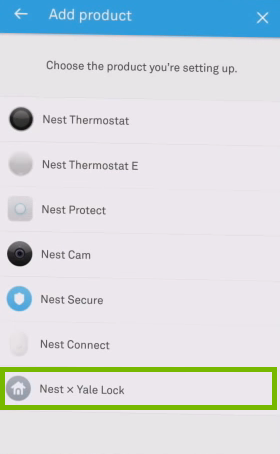
Select Nest x Yale Lock from the product list.
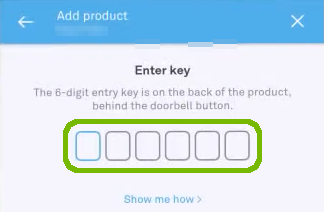
The Nest app will prompt you to enter your lock's six digit entry key.
The code can be located next to the QR code in the lock's battery compartment.
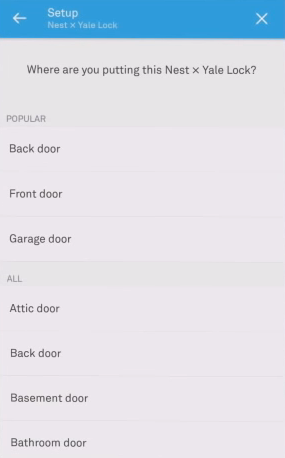
Select a location label for your Nest x Yale lock.
The app will use this location when it sends you notifications, so pick one that makes sense.
The app will begin looking for a Nest Guard or Nest Connect that it can connect to. Once it has found one, press and hold the button above the thumbturn mechanism to connect them. The lock should chime and state: "Ready. Use your Nest app too add the lock to your account." The Nest app will finish adding the lock to your account.
Once the lock is connected to the Nest app, you can put the battery cover back onto the lock.
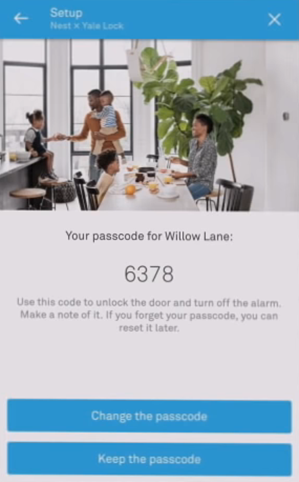
10. Create Nest Passcodes
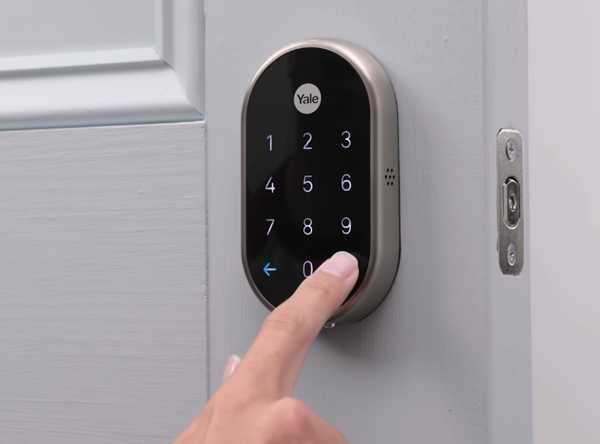
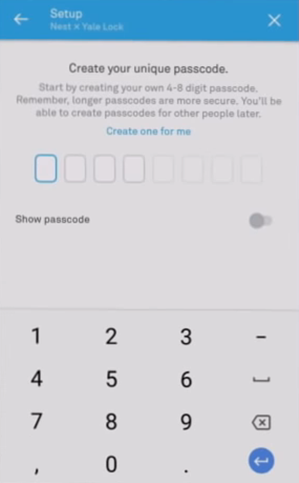
You will be prompted to create a passcode with the app. This passcode will replace the temporary master passcode that was created earlier during the calibration process.
Passcodes can be four to eight digits in length.
Optionally, you can create additional passcodes for other people who share access to your Nest home. You can also invite new people to share access to your home, and set schedules that limit when certain people can enter your home.
A maximum of 20 passcodes can be created for your Nest x Yale lock.
Congratulations, your Nest x Yale lock is ready to use!
11. How to Use Your Nest x Yale Lock
We have a separate guide dedicated to helping you understand and use your Nest x Yale Lock.
Clicking this button will open a new guide that will provide you with steps to resolve your issue.
17. Additional Device Needed
The Nest × Yale Lock requires a Nest Connect or Nest Guard in order to connect to your home's Wi-Fi and the Nest app. You'll need either one to lock and unlock your door remotely. Please reach out to a local or online retailer to acquire one of these devices to proceed with the setup for your Nest x Yale lock.
18. What's next?
19. Pro Install
Because of the complexities and possible incompatibilities you may encounter, it is recommended to have a professional complete the installation of your Nest x Yale Lock.
Nest has a special page setup to assist in locating a local professional to complete the installation of your Nest x Yale Lock.
Using your web browser on your home computer, tablet or mobile device, visit nest.com/profinder. This site will ask a few simple questions to help locate capable installers in your area.
You may also contact your preferred electrician, maintenance, or building contractor for assistance or referral.
.png)