.png)
Authored by: Support.com Tech Pro Team
Getting reliable WiFi signal everywhere in your home can be challenging. Often times, having a single wireless router can provide decent WiFi coverage within a certain range, but can end up leaving certain areas of your home with very slow or no WiFi coverage at all. Netgear Orbi mesh networking devices aim to make this a problem of the past.
Using mesh networking technology, multiple Orbi devices can be placed throughout your home, eliminating dead spots altogether. This guide will help you get to know how Netgear Orbi devices work, and how to build a mesh network in your home that will provide WiFi coverage everywhere you want and need it to be.
Before You Begin:
Install the App
You need to have the Netgear Orbi app already installed on your phone or tablet to be able to set up your Mesh WiFi System.
Before you begin setting up a Netgear Orbi mesh network system in your home, it's important to understand how the hardware itself works.
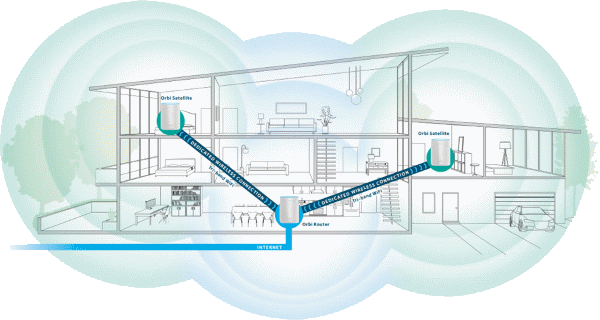
The idea behind a mesh network is to have multiple WiFi broadcast points throughout your home whose signals overlap one another to provide wireless coverage everywhere. This is much different than traditional WiFi, which usually only consisted of a single wireless router that was either attached to your Internet Provider's modem, or was built right into their modem. That single router is only able to broadcast WiFi from wherever its location is in your home, and getting coverage everywhere can be next to impossible depending on how large of a home you have.
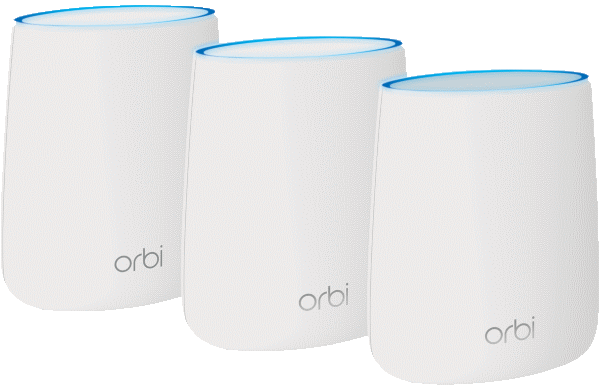
Mesh networks are designed to be modular. This means that your home network will consist of multiple Netgear Orbi mesh networking devices; one primary Orbi device that connects to your Internet Provider's modem, and up to three "satellite" devices that will all broadcast WiFi. The number of satellite devices you'll need for your home largely depends on its size. Netgear offers solutions for homes sizing 1500-6000 square feet. While these distances are a rough estimation, other factors can increase or decrease the number of Orbi devices you might need to create a reliable WiFi signal in all the areas of your home that are important to you.
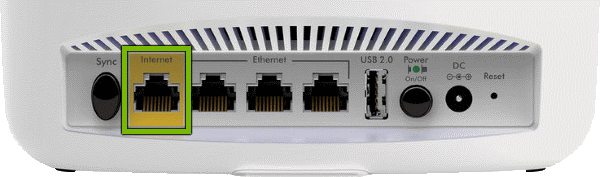
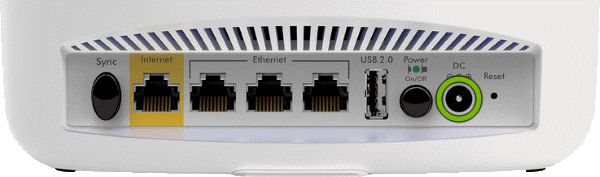
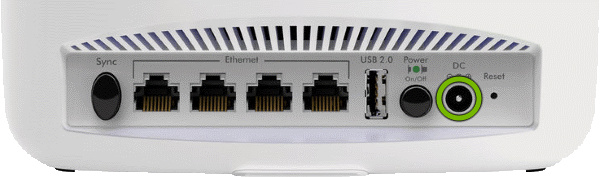
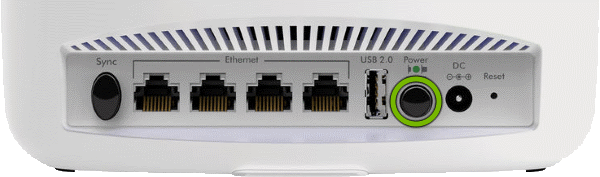
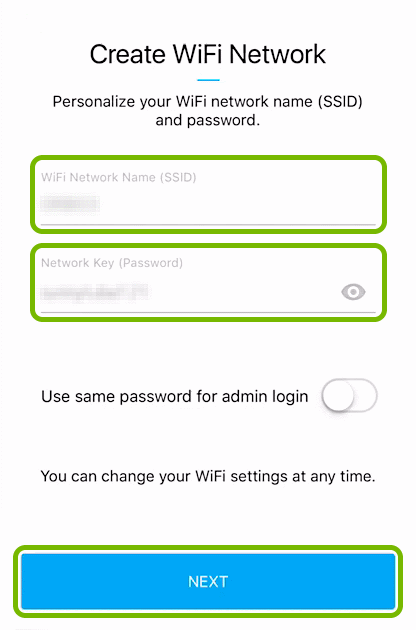
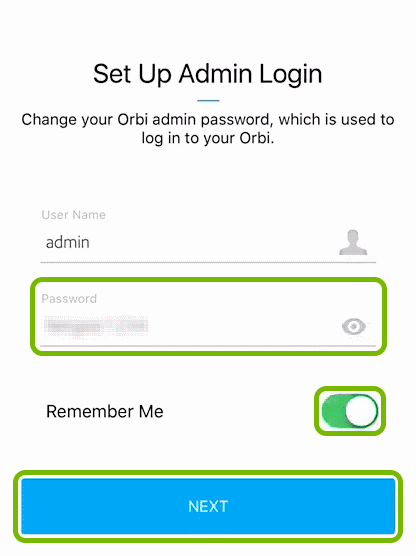
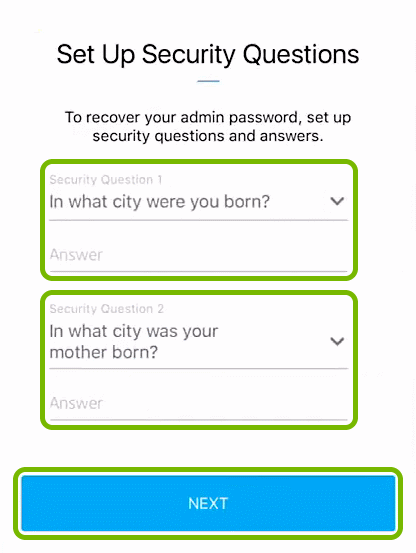
Getting started with Netgear Orbi mesh networking devices is not much different than setting up a traditional wireless router. All Orbi mesh networks must begin with a primary device or router. This primary device is made to connect to your Internet Provider's modem. Netgear also makes a cable modem/router which replaces your Internet Provider's modem altogether and also acts as your primary Orbi device. This primary Orbi device is where your WiFi network begins, very much like how a traditional wireless router creates a WiFi signal in your home.
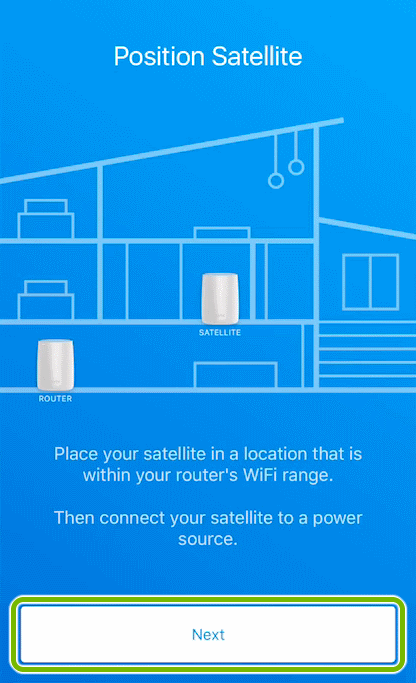
Once you have a primary Orbi device working with your internet service to create a WiFi signal in your home, this is where the modular nature of mesh networks really shine. You can add up to three Orbi "satellite" devices in your home that will also broadcast WiFi. Having these multiple WiFi broadcast points ensures that all of your home is blanketed in WiFi signal. Keep in mind that each one of your Orbi satellite devices need to be placed strategically in your home so they're close enough to be able to wirelessly communicate with one another to be able to create a reliable WiFi signal.
As an added benefit, there are multiple types of Orbi satellite devices on the market such as:
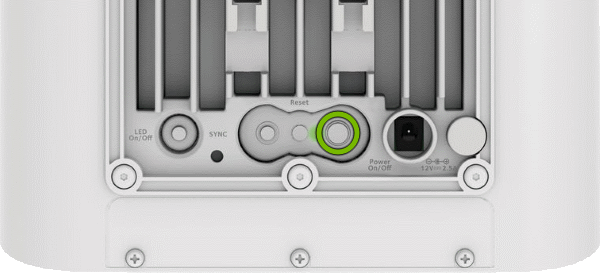
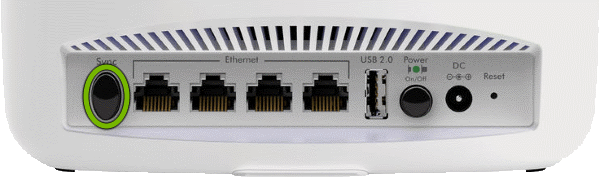
All Orbi mesh networks must begin with a primary device or "router." Depending on which Orbi package you've purchased, you may be connecting your primary Orbi device/router to your Internet Provider's existing modem, or you may be replacing your provider's existing modem altogether if you're working with an Orbi cable modem router.
Select the type of primary device you are setting up:
Orbi Router


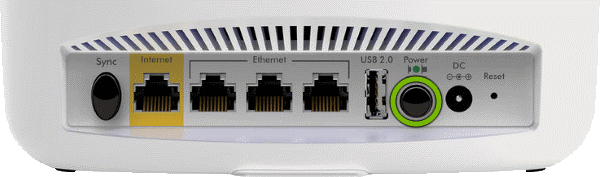
Orbi Cable Modem Router

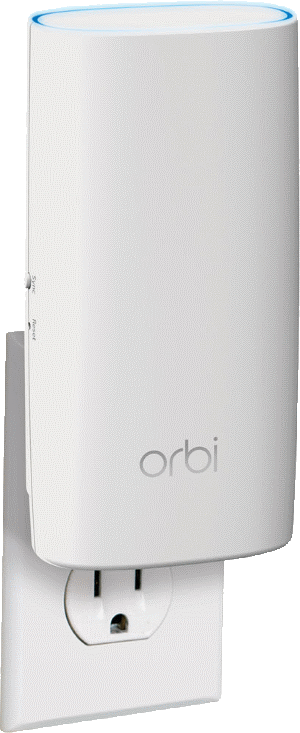
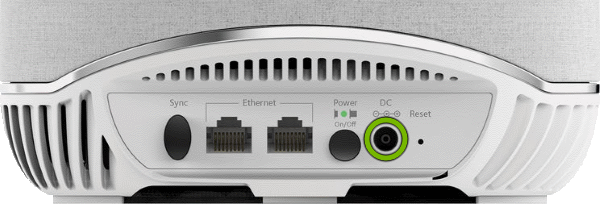
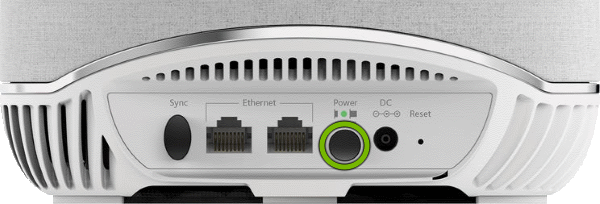
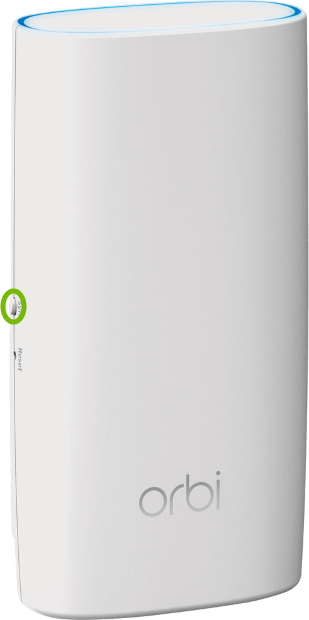
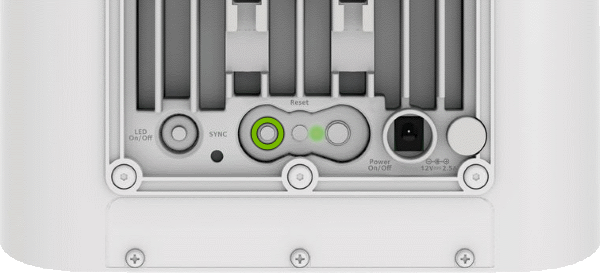
You can add up to three secondary Orbi "satellite" devices in your home that will also broadcast WiFi. There are a number of Orbi satellite devices available from Netgear.
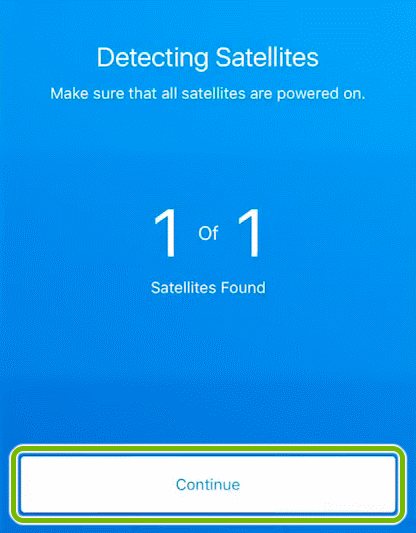
If you have multiple secondary "satellite" devices, these instructions can be repeated to set up each one of them.
Select the type of secondary "satellite" device(s) you are setting up:
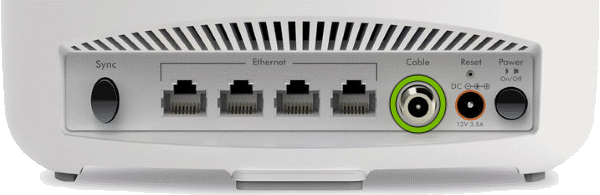
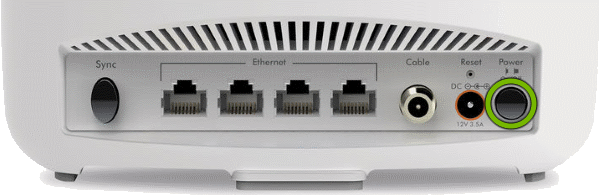
Orbi Satellite

Orbi Wall Plug Satellite

Orbi Outdoor Satellite
For easier setup, place your Orbi Outdoor Satellite close to the primary Orbi device first. Once it has been added to your WiFi mesh network, it can be relocated outdoors.
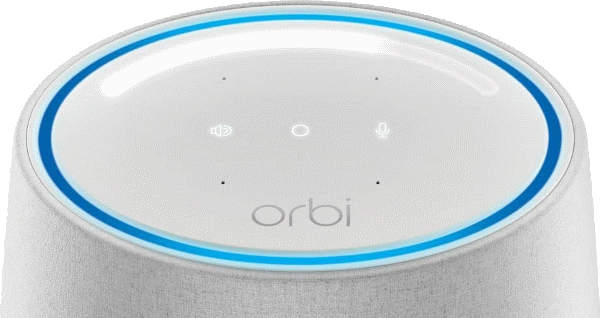
Orbi Voice
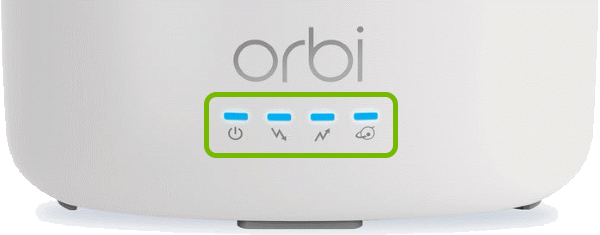
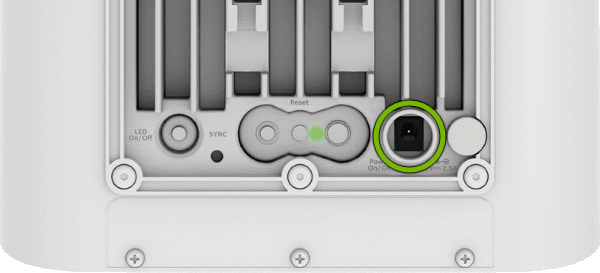
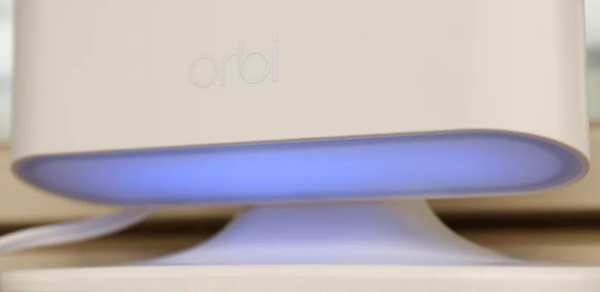
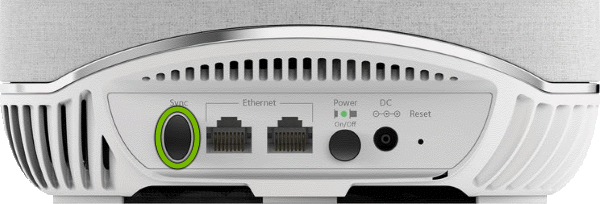
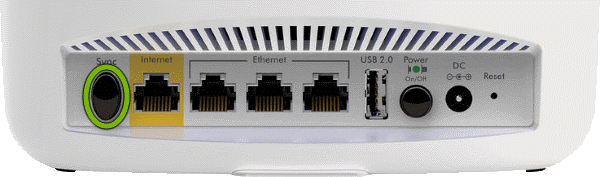
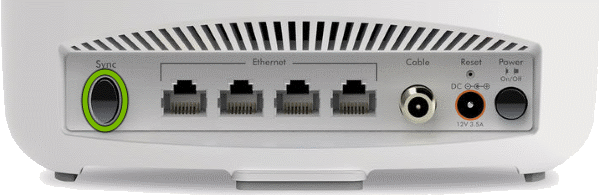
Now that your primary and secondary Orbi devices have been physically set up, we need to make sure that they are properly communicating with one another. By default, any secondary "satellite" devices that were purchased in a package with a primary device will have already attempted to synchronize with one another. Thankfully, each secondary Orbi "satellite" device has a light that will indicate what our next steps need to be. Take a look at the light on each secondary Orbi device in your home to determine which action you'll need to take next:
While each secondary device is booting up, the LED will be white while it attempts to sync with the primary device. The LED will then light one of the following colors to show its status for about three minutes and then will turn off. You may have to power off and power back on each secondary "satellite" device to properly assess its status.
Blinking White

This satellite is still booting up and searching for the primary device in the home to connect to. Check again in a few minutes.
Solid White

This satellite is not connected to the primary device and is ready to be manually synchronized.
Solid Blue

This satellite has successfully connected to the primary device and has excellent signal strength. No synchronization is required.
Solid Amber

This satellite has successfully connected to the primary device, but has poor signal. It will need to be moved closer to the primary device for better signal.
Solid Magenta

This satellite was unable to connect to the primary device. It will need to be moved closer to the primary device for better signal to be able to establish a connection with the primary device.
Off

This satellite has successfully connected to the primary device and is working properly.
If any of your secondary Orbi devices displayed an amber or magenta light, they will need to be relocated before you proceed further.
Attempting to proceed using a secondary device that has poor or no signal will result in your Orbi network not functioning properly, or performing poorly. Relocate these secondary devices until they display either a solid blue or solid white light.
At this point, all of your secondary Orbi "satellite" devices should display a solid blue or white light.


Support.com is committed to your privacy
We do not share or sell your data to third parties. We do use cookies and other third-party technologies to improve our site and services. The California Consumer Privacy Act (CCPA) gives you the ability to opt out of the use of cookies, third-party technologies and/or the future sale of your data. Do not sell my personal information.

Support.com is committed to your privacy
Read our Privacy Policy for a clear explanation of how we collect, use, disclose and store your information
