An internet connection - You need to connect your device to a Wi-Fi or wired (Ethernet) network to complete setup and access all of the content available on Sony TV.
2. Plugging in Cables
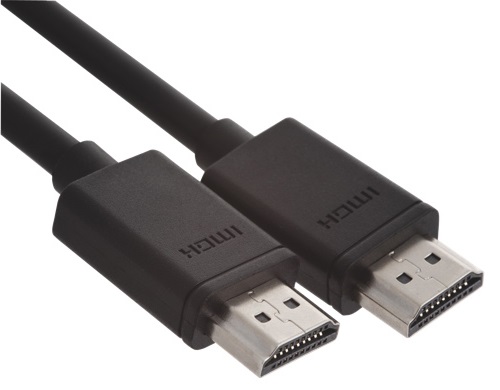
Plug your HDMI cable into your cable box if you have one.
Plug your power cable into the television and the other end into an outlet.
HDMI Cable
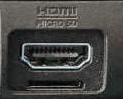
HDMI Port
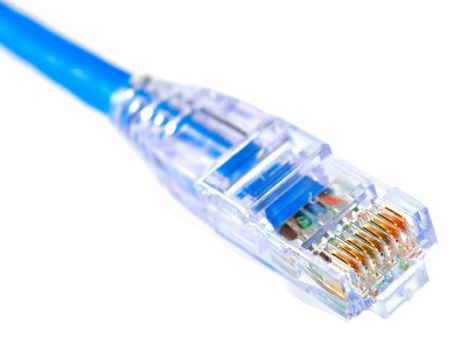
Ethernet Cable
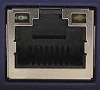
Ethernet Port
Acquire an Ethernet cable if you want a wired connection.
Take one end of the cable and plug it into your router/modem's Ethernet port.
Plug the other end of the cable into your device's Ethernet port.
3. Power On
After you have plugged in your cables, press the power button on your Smart TV or on your remote control.
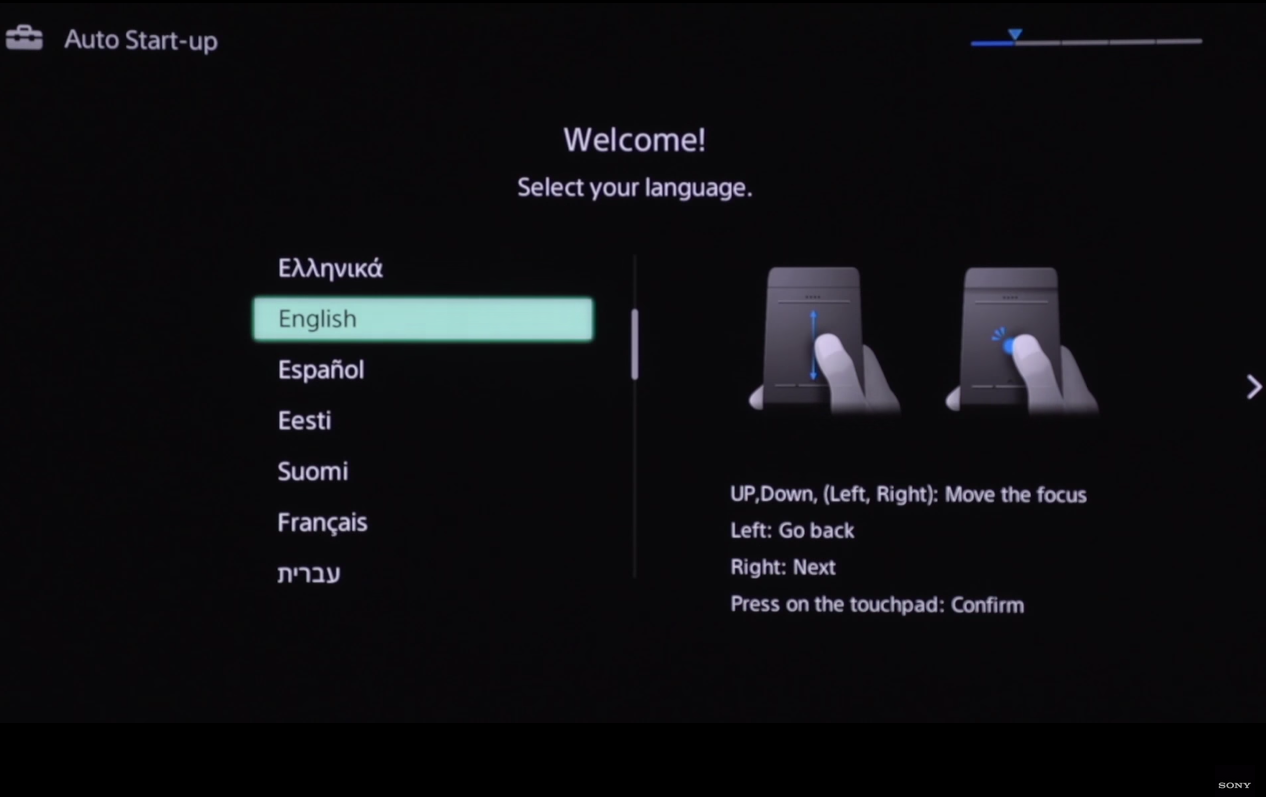
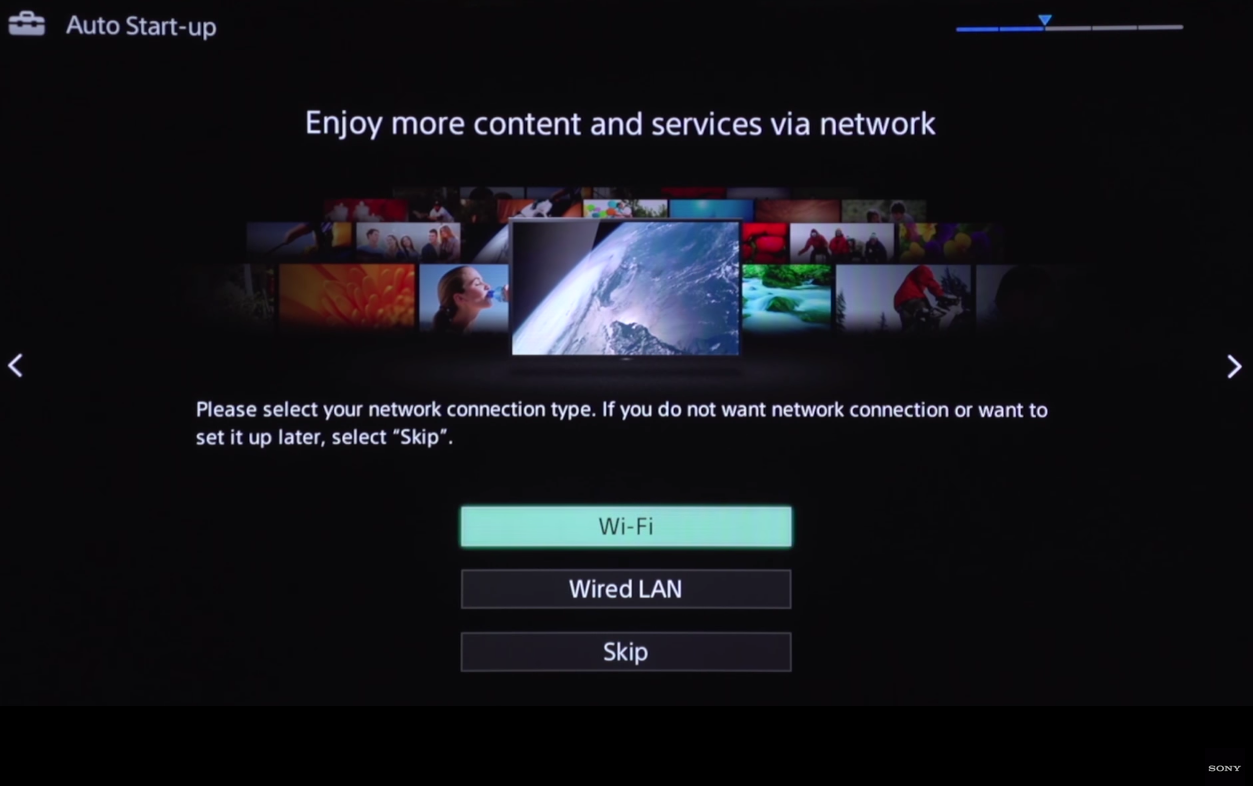
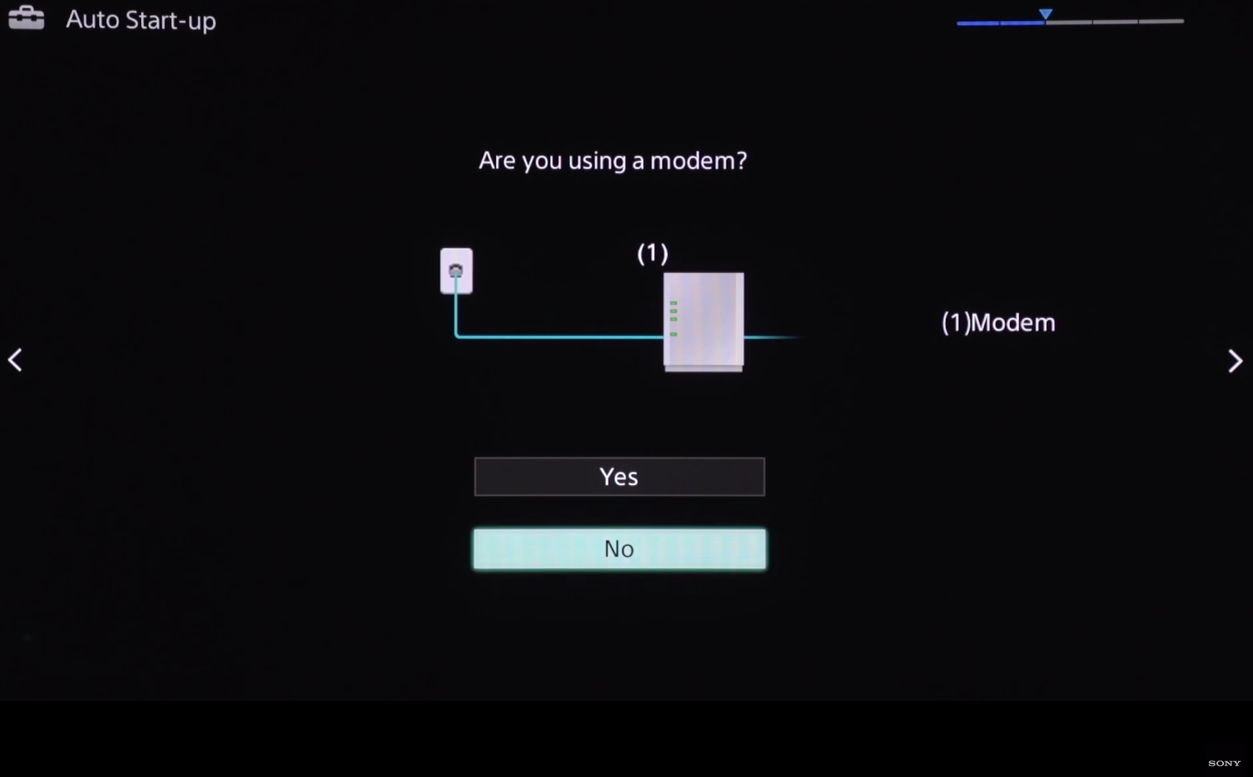
4. Auto Start-up
After turning on your Sony TV, select your language.
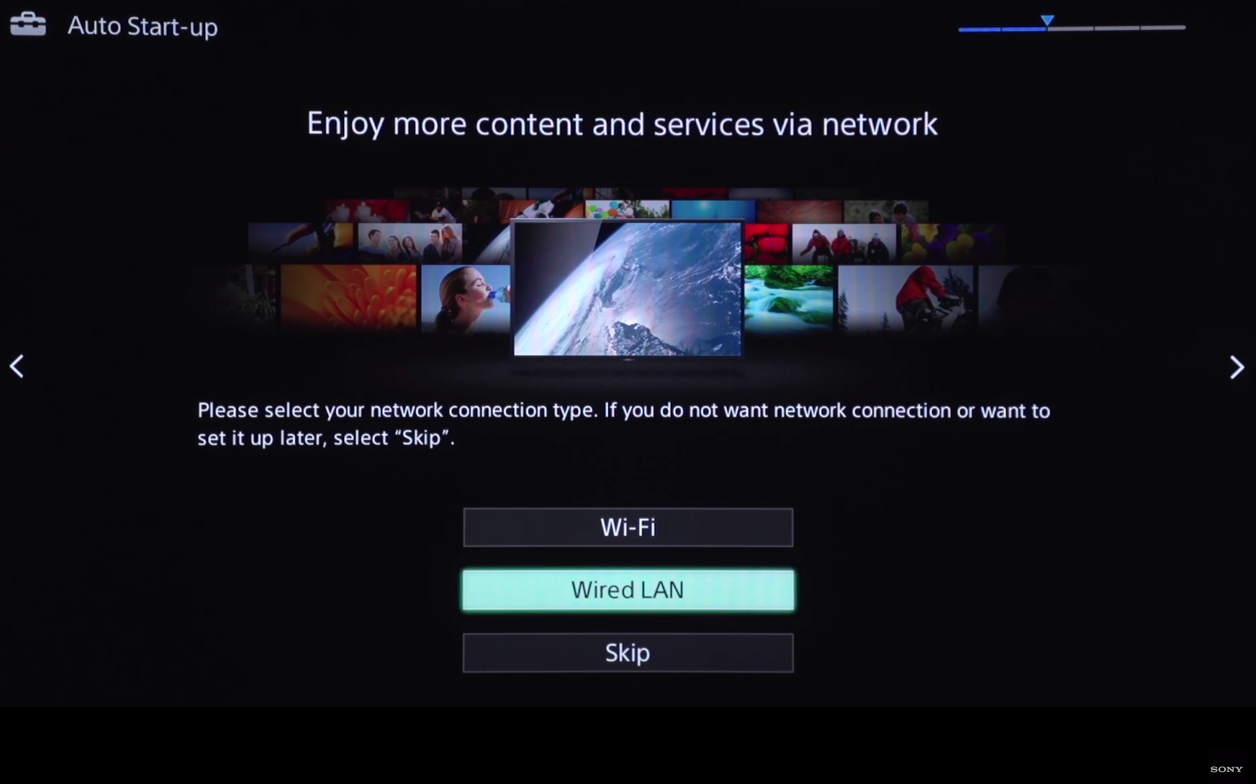
Select your connection type.
5. Credentials
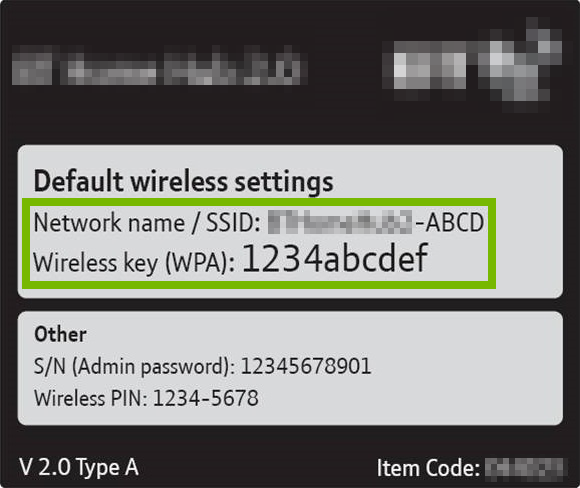
In order to connect to a wireless network, you must have the required credentials. These are:
Wireless Network Name (SSID)
Wireless Network Key (Password)
Finding Network Credentials
Most wireless routers/gateways have a label with the default credentials. If the credentials aren't there, look in the devices documentation.
If your Internet Service Provider (ISP) installed the wireless router or gateway, they might have left you a setup sheet which may have the credentials.
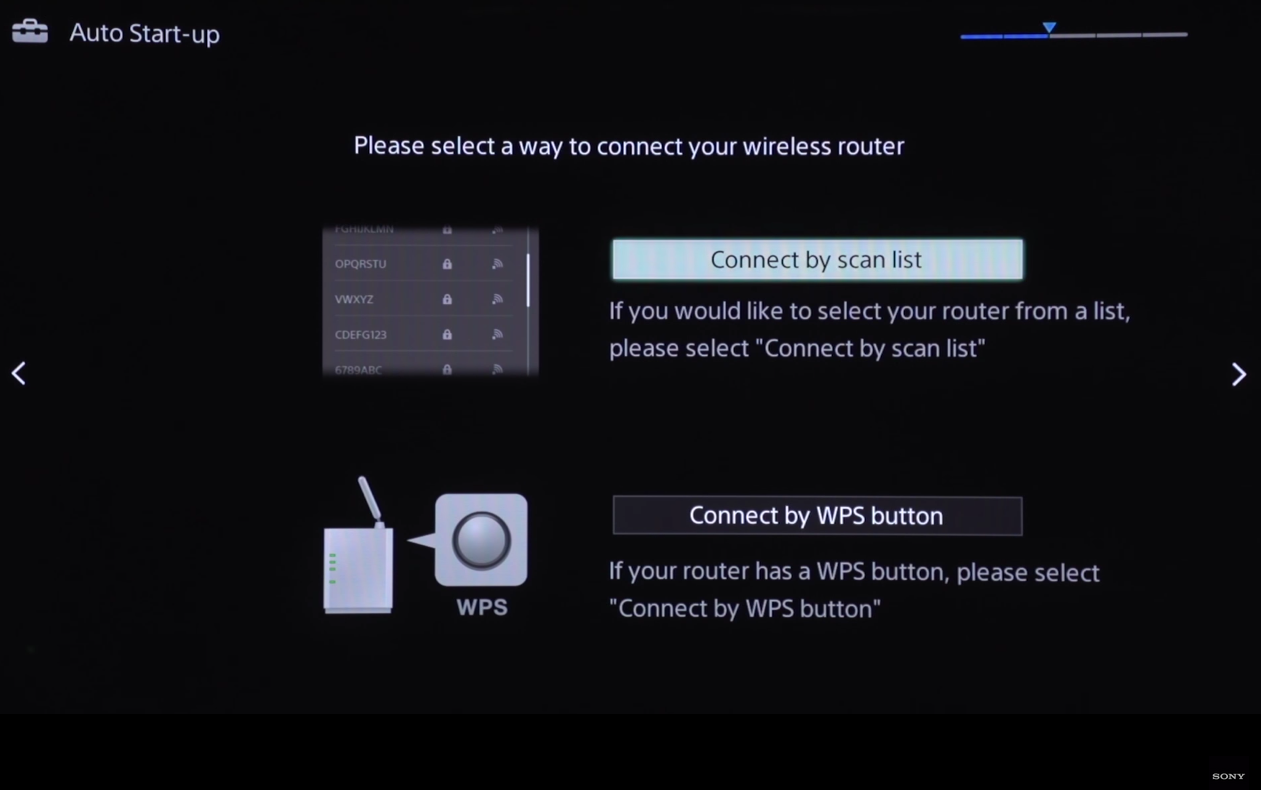
6. Connect to Wi-Fi
Select Connect by scan list.
Enter your Wi-Fi password.
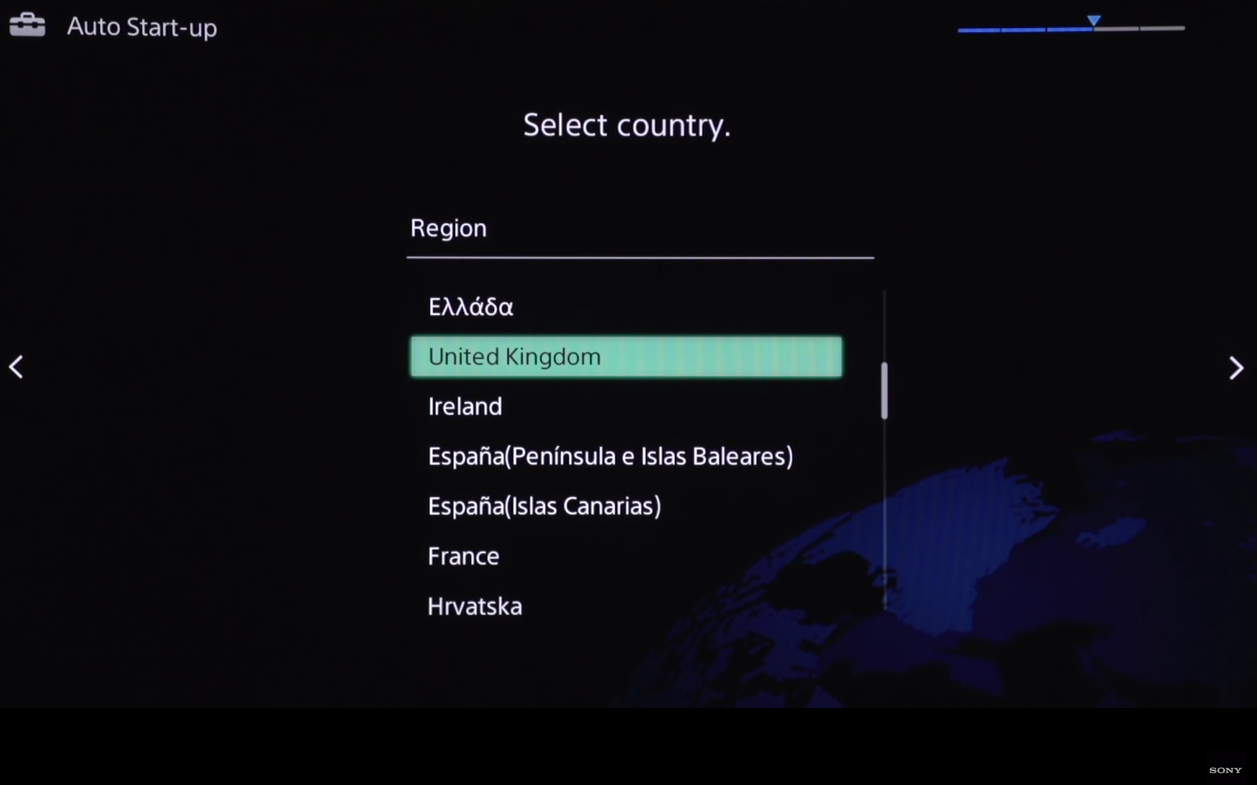
7. Select Country
Select your country from the list.
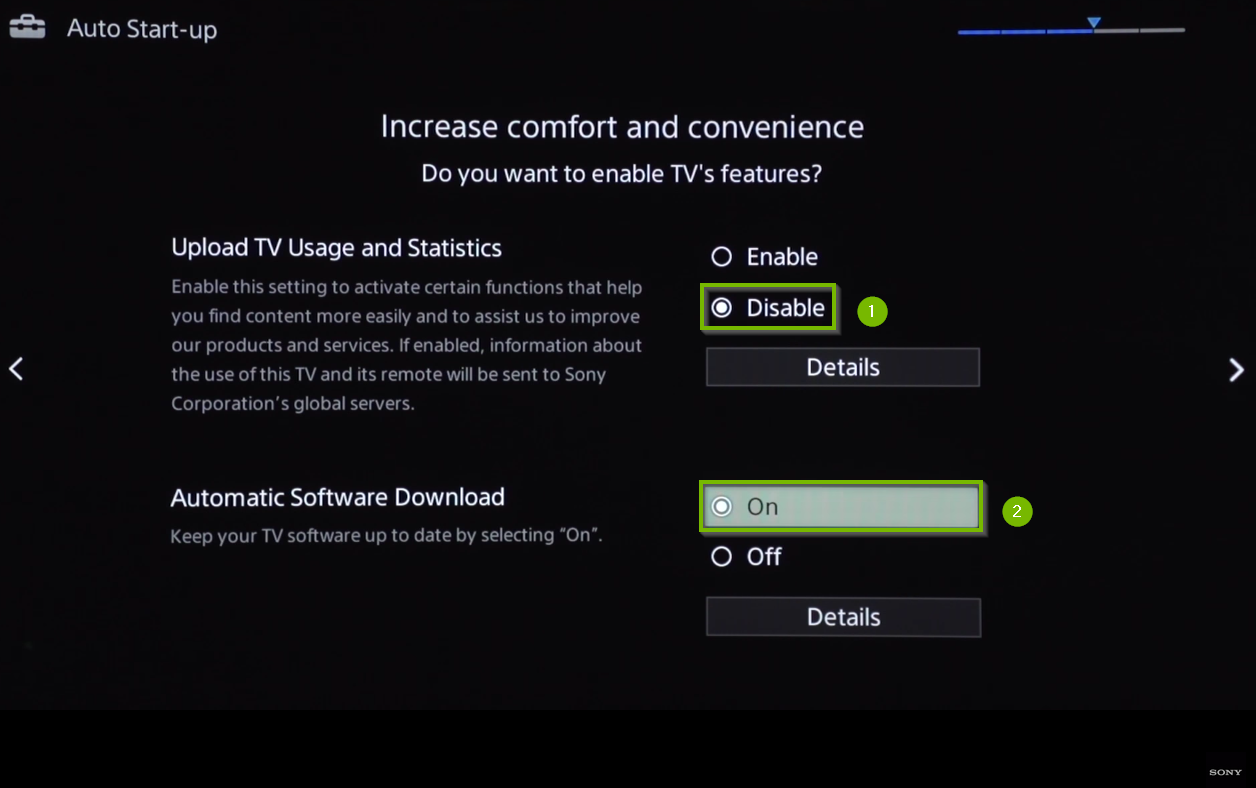
8. Enable TV Features
Select Disable on Upload TV Usage and Statistics option.
Select On for Automatic Software Download option.
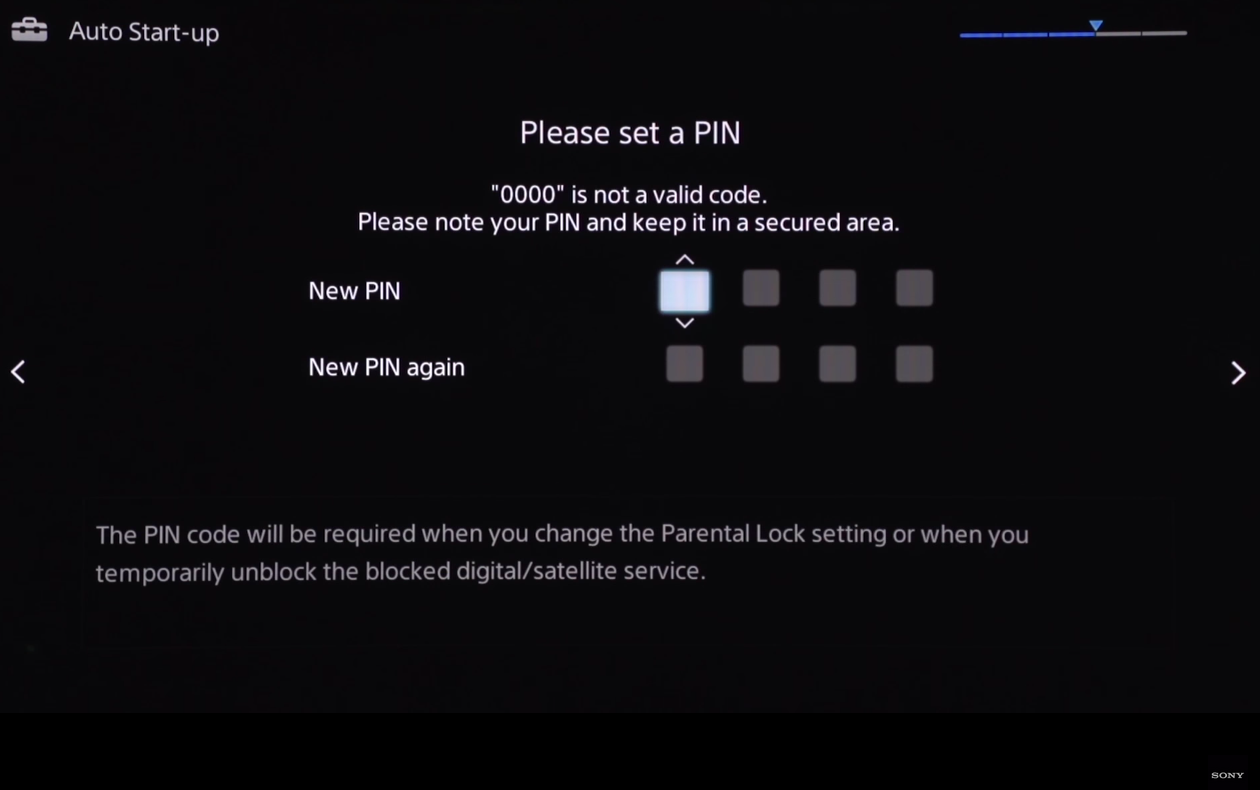
9. Set PIN
Set your PIN.
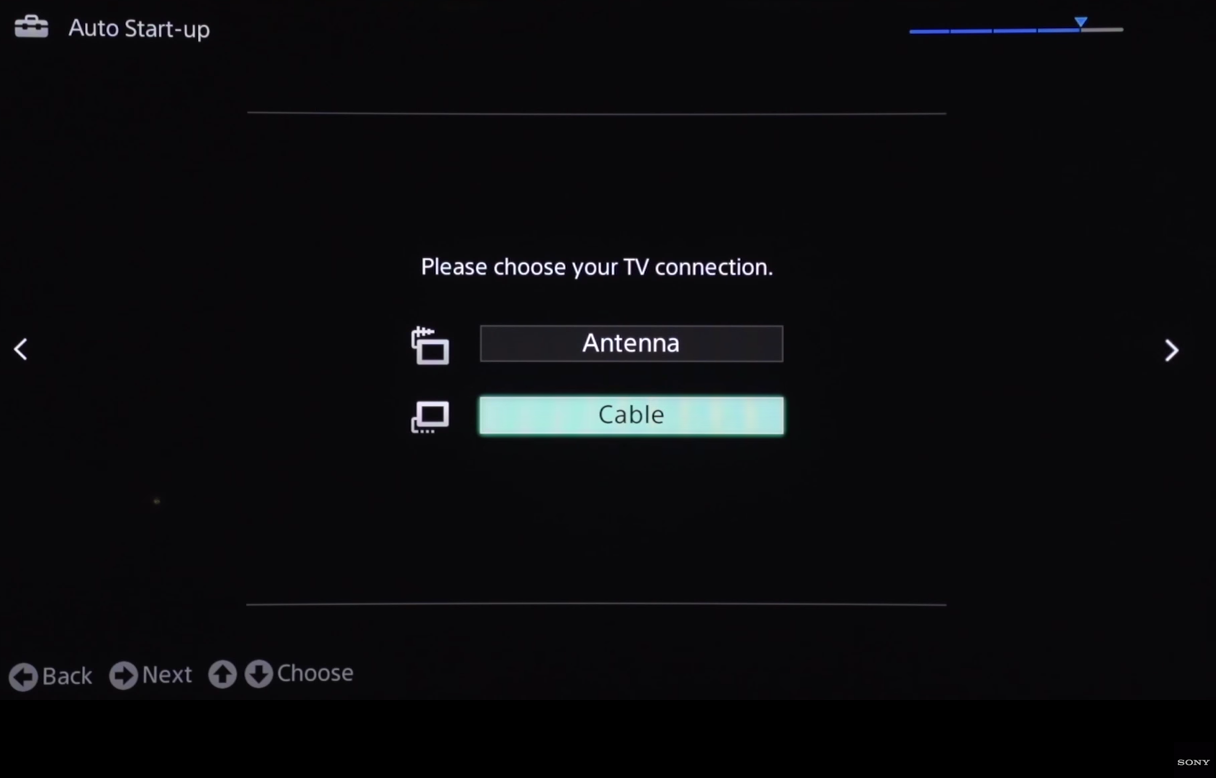
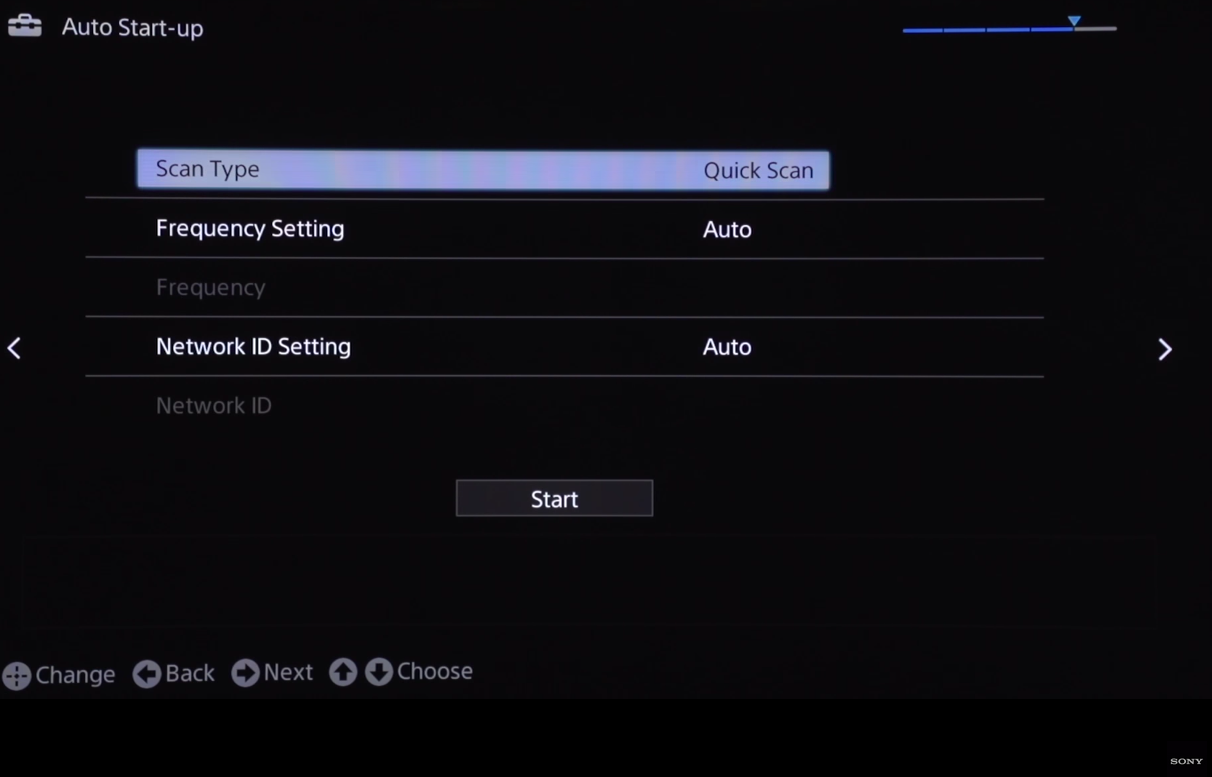
10. TV Provider
Select Cable.
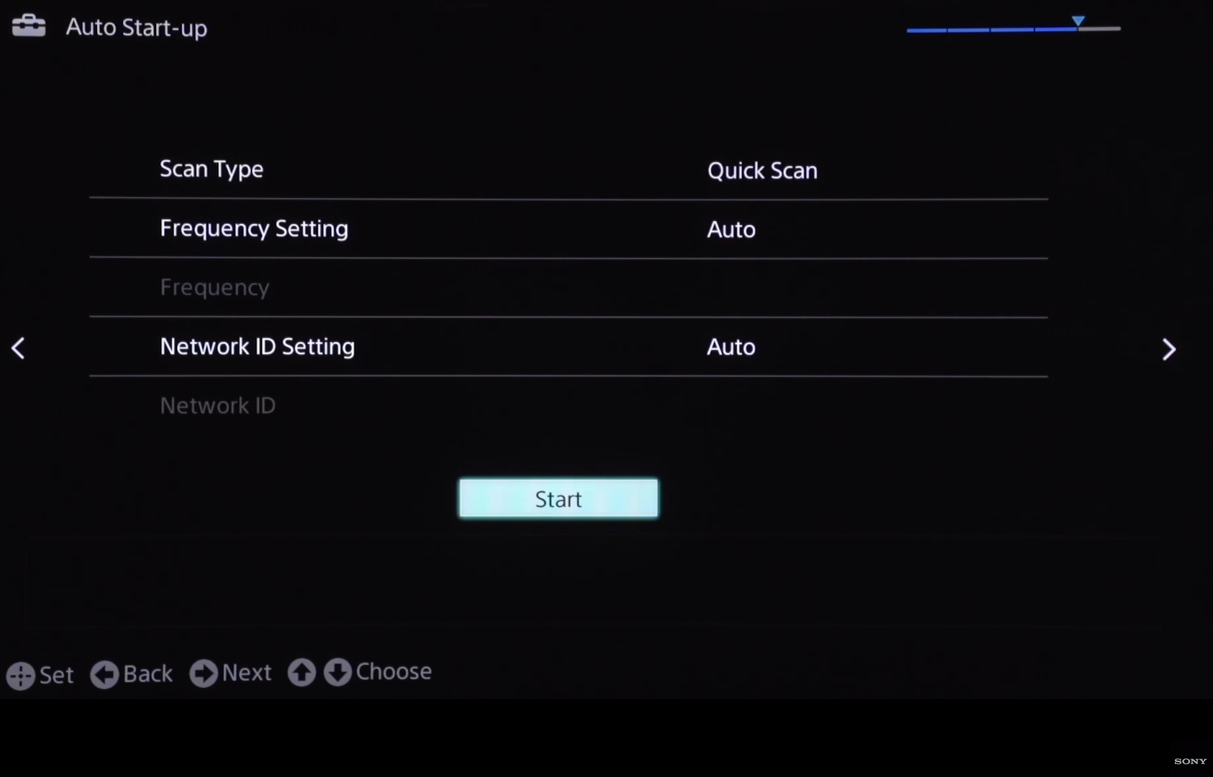
Select Quick Scan to automatically scan for channels.
Select Start.
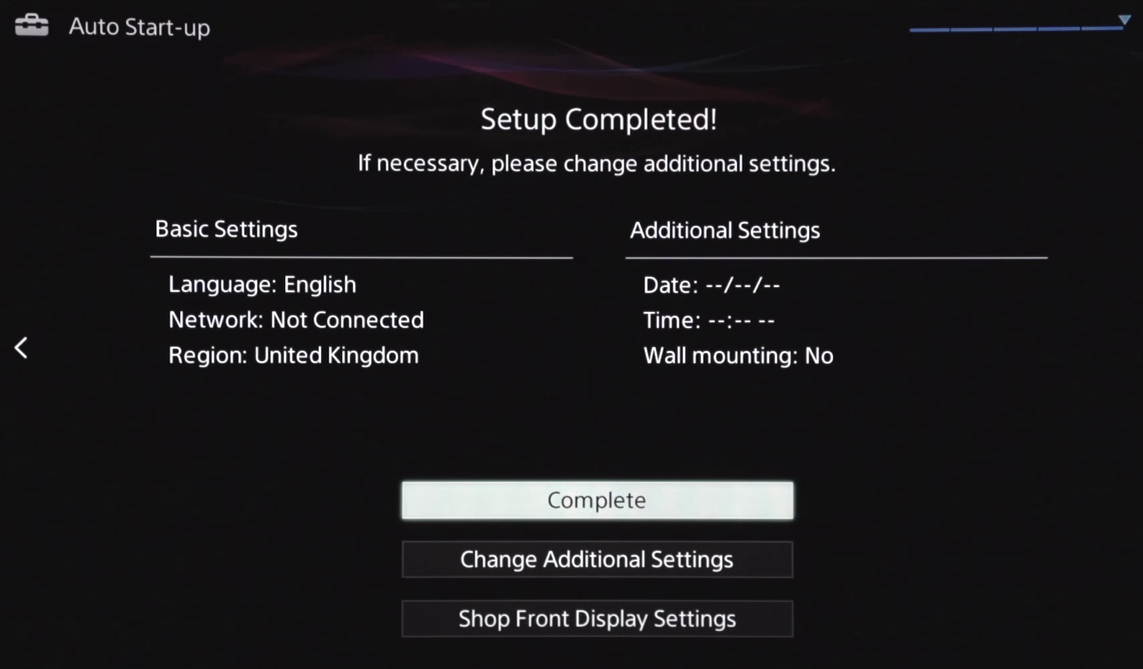
Setup is now complete.
11. What's next?
12. Wired Connection
Acquire an Ethernet cable.
Take one end of the cable and plug it into your router/modem's Ethernet port.
Plug the other end of the cable into your device's Ethernet port.
Usually this is all that is needed to connect your device to a wired connection.
Ethernet Cable
Ethernet Port
13. Wired Connection
Selecting Wired LAN from the network connection type screen.
Select No when you're asked if you are using a modem.
Remove Hidden Spyware In Minutes For Free
Detect and remove spyware, keyloggers, tracking cookies, and other
threats that slow down your PC or steal your data.
65+ Million Downloads
Spyware scanner with AI-powered detection engine + database
.png)