How to Set Up a TP-Link RE580D AC1900 WiFi Repeater
Authored by: Support.com Tech Pro Team
1. Introduction
In This Guide
You'll Learn:
How to set up and position your TP-Link range extender.
You'll Need:
A wireless router that broadcasts Wi-Fi already set up and working properly.
Your router to have a WPS button for the easy setup method.
A computer or mobile device for the regular setup method.
A mobile device for the app setup method.
Your home network's Wi-Fi credentials:
Wi-Fi network name (SSID),
Wi-Fi password (security key).
2. Setup Prep
Plug the range extender into a power outlet located within a few feet of the wireless router you wish to extend.
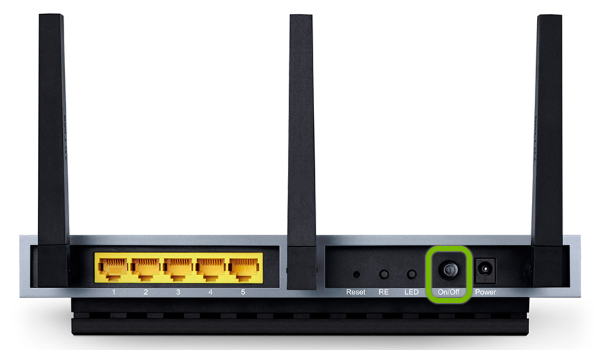
Press the power button on the rear of the range extender to turn it on.
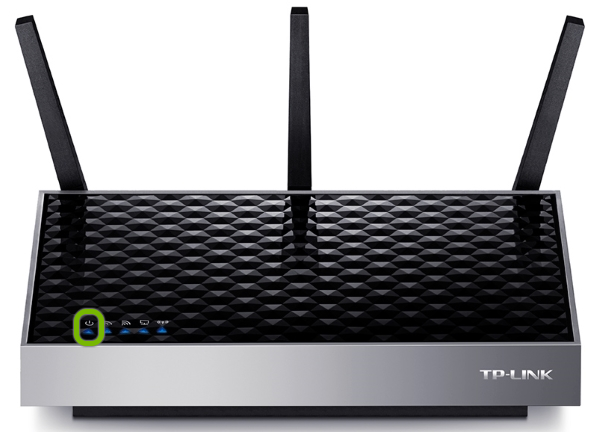
When the power light on the front of the range extender turns solid blue, the device is ready to be set up.
3. Setup Methods
There are three ways to get your TP-Link range extender set up for the first time:
Wi-Fi Protected Setup
This is an easy setup method in which all you have to do is press the WPS button on your router, then press the same button on your range extender, and they will exchange information and connect to one another automatically.
Web Interface Setup
This is a standard guided setup method that requires the use of a web browser on a computer or mobile device. This process involves selecting the Wi-Fi network you wish to extend, and providing the Wi-Fi password manually. The upside to this process is that it offers more customization options for your new extended network than the WPS method does.
Mobile App Setup
This is a guided setup method similar to the web interface setup method but requires you to use the TP-Link Tether app on your mobile device instead of using a web browser.
This process also involves selecting the Wi-Fi network you wish to extend, and providing the Wi-Fi password manually.
4. WPS Setup
On Your Wireless Router
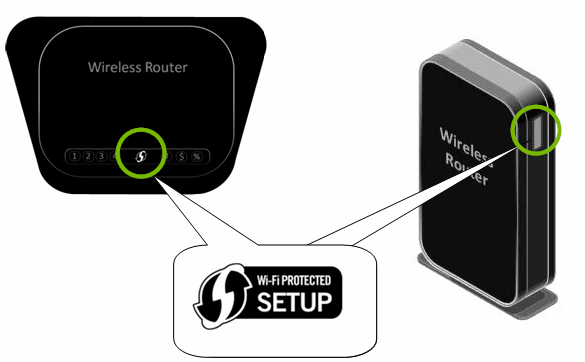
Locate and press the WPS button on your wireless router. It may be labeled with the symbol depicted below or it may simply say WPS.
Depending on the brand and model, your wireless router may have an indicator light that turns on when the WPS button is pressed.
On Your Range Extender
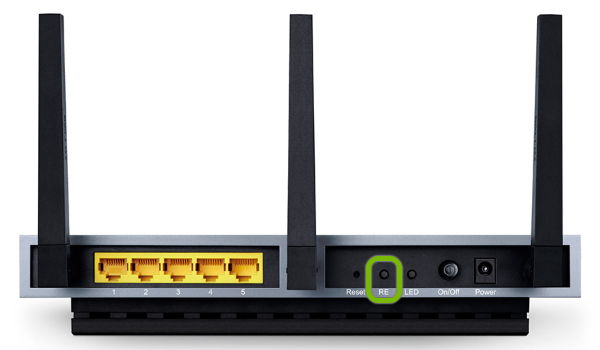
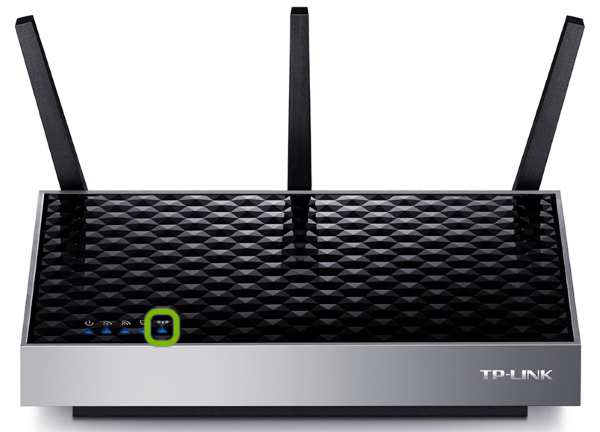
Press the WPS button labeled RE on the rear of the range extender within two minutes.
The Wi-Fi status light will start flashing blue meaning it's connecting to the router. Once connected it will turn solid blue.
By default, the range extender will use the same Wi-Fi network name and Wi-Fi password that are set on the wireless router.
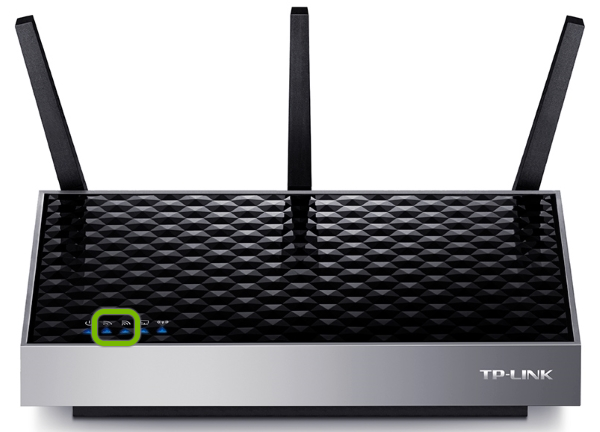
Wi-Fi Status
Solid Blue
Connected to wireless router with excellent signal.
Solid Orange
Connected to wireless router with weak signal.
Blinking Blue
WPS connection is being established.
Off
Not connected to wireless router.
If you are connecting the range extender to a dual-band wireless router with both the 2.4GHz and 5GHz networks enabled but if only one of the two band indicator lights turns solid blue on your range extender, repeat the same process above to connect to the other band as well.
2.4GHz Band
Solid Blue
Connected to 2.4GHz wireless network.
Off
Not connected to 2.4GHz wireless network.
5GHz Band
Solid Blue
Connected to 5GHz wireless network.
Off
Not connected to 5GHz wireless network.
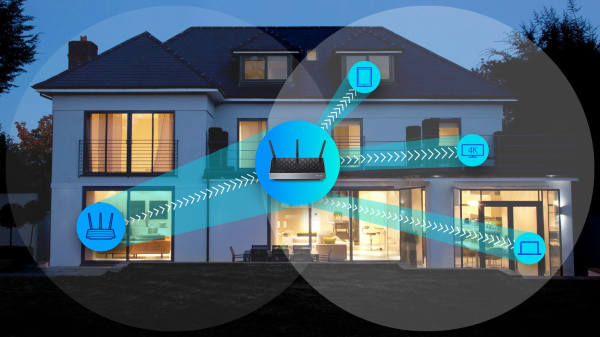
5. Find Optimal Position
The purpose of a Wi-Fi range extender is to expand the Wi-Fi coverage in your home, by capturing the signal from your wireless router and expanding it further. To accomplish this, you need to place the range extender within the existing coverage area of your wireless router. However, to maintain an excellent wireless signal for your Wi-Fi devices, the range extender needs to be positioned within optimal distance from the wireless router. Here's how to accomplish this:
Plug your range extender into an available power outlet in the area you'd like to expand your home's Wi-Fi coverage to.
Check the Wi-Fi status light on the front of the range extender:
Solid Blue
Connected to wireless router with excellent signal.
Solid Orange
Connected to wireless router with weak signal.
Off
Not connected to wireless router.
If the status indicator light shows a weak signal, plug the range extender into a power outlet that's a bit closer to your wireless router.
Repeat this process until the range extender indicates an excellent signal.
6. How to Install the App for Your TP-Link RE580D AC1900 Wi-Fi Range Extender
In order to set up your range extender, you'll need to connect your computer or mobile device to its Wi-Fi setup network first. The default Wi-Fi network names of the range extender are TP-Link_Extender_2.4GHz and TP-Link_Extender_5GHz.
If you're using a computer that is wired directly to your router, you will need to unplug the Ethernet cable and connect to this Wi-Fi network before you can proceed.
8. OS Choice
To continue, we need to know what Operating System your computer or mobile device has.
For Computers
There are 2 main Operating Systems for personal computers currently available, Windows and macOS.
Windows
Windows runs on computers produced by multiple companies, such as Lenovo, Asus, Dell, Toshiba, Hewlett Packard, Acer, and Sony.
macOS
Apple is the only company that makes macOS computers.
For Mobile Devices
There are 2 main Operating Systems for smartphones currently available, Android and iOS.
Android Smartphone
Android smartphones are produced by multiple companies, such as Samsung, LG, Motorola, Sony, Nokia, Lenovo, and HTC.
iOS Smartphone
Apple is the only company that makes iOS smartphones.
9. Connect to Setup Network (Windows)
Windows 10 may show slightly different options, but the steps should be similar across all versions of Windows 10.
Select the Network icon in the bottom right.
Select the TP-LINK_Extender_2.4GHz or TP-LINK_Extender_5GHz Wi-Fi network from the list.
Select Connect.
The network is unsecured; this is normal. You will be using it to set up the device only. After, you will be using the device over a secured wireless connection.
10. Web Setup
Launch the browser that you use to go online.
Navigate to tplinkrepeater.net.
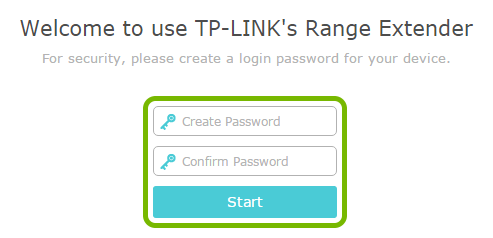
You will be asked to create a new login password. To keep it simple, you can use the same login password you use for your router. Enter it in both fields then click or tap Start.
This is the device administration login password and it is different from the Wi-Fi password, which you use to connect to the Wi-Fi.
You'll be taken to the Quick Setup.
Select your router's Wi-Fi network name from the list.
Enter your router's Wi-Fi password and click or tap Next.
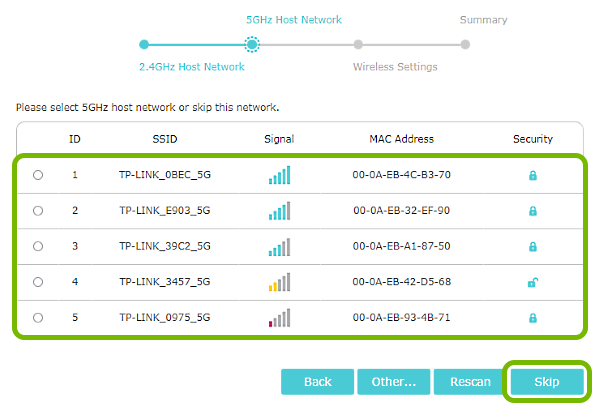
If your router supports dual-band networks and the 5GHz network is enabled on it, select it from the list. Otherwise click or tap Skip.
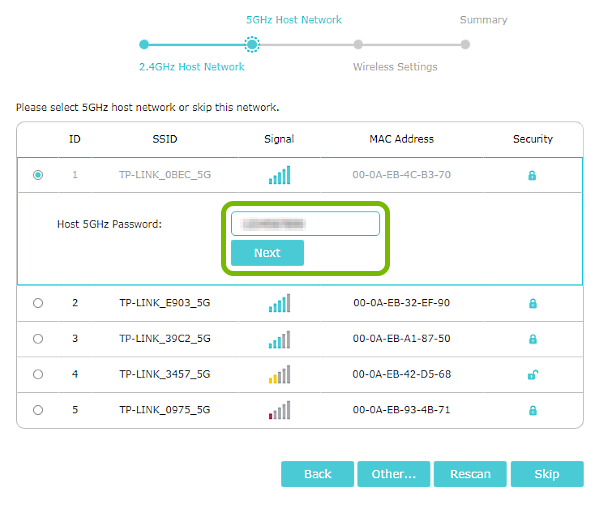
If you selected your router's 5GHz network from the list, enter its Wi-Fi password and click or tap Next.
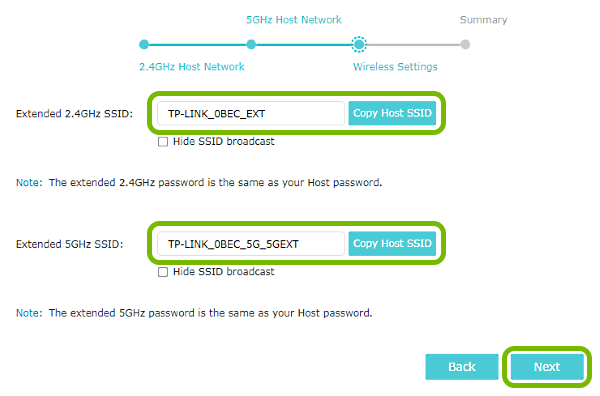
Next, you'll be able to customize your range extender's Wi-Fi network names. By default, the range extender will copy the router's Wi-Fi network names and append _EXT and/or _5GEXT at the end. To keep it simple it's best you leave them like that. Click or tap Next to continue.
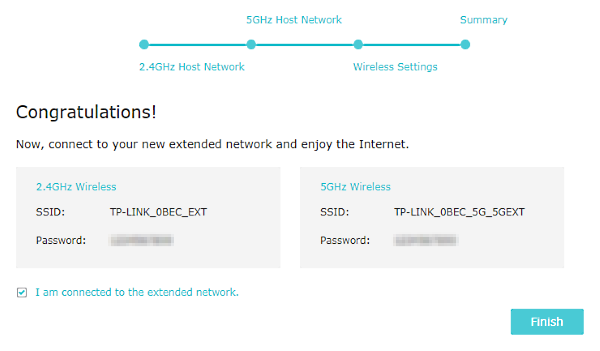
At the end you will be presented with a summary of the range extender's configuration. Click or tap Save to conclude the setup and reboot the range extender.
Wait for the range extender to be rebooted and you will get a final screen showing the Wi-Fi credentials you need to use to connect your devices to the range extender's Wi-Fi.
11. Connect to Setup Network (macOS)
macOS may show slightly different options, but the steps should be similar across all versions and themes on macOS.
Select Wi-Fi from the menu bar, then select your the TP-LINK_Extender_2.4GHz or TP-LINK_Extender_5GHz Wi-Fi network from the list.
The network is unsecured; this is normal. You will be using it to set up the device only. After, you will be using the device over a secured wireless connection.
12. Connect to Setup Network (Android)
Depending on your exact device (Smartphone or Tablet), and which generation you have, the menu theme and options might look slightly different on your screen. However, the steps should be similar across all Android devices and generations.
Open Settings.
Select Wi-Fi.
Select the TP-LINK_Extender_2.4GHz or TP-LINK_Extender_5GHz network from the list.
The network is unsecured; this is normal. You will be using it to set up the device only. After, you will be using the device over a secured wireless connection.
13. Connect to Setup Network (iOS)
Depending on your exact device (Smartphone or Tablet), and which generation you have, the menu theme and options might look slightly different on your screen. However, the steps should be similar across all Apple iOS devices and generations.
Open Settings.
Select Wi-Fi.
Select the TP-Link_Extender_2.4GHz or TP-LINK_Extender_5GHz from the list.
The network is unsecured; this is normal. You will be using it to set up the device only. After, you will be using the device over a secured wireless connection.
.png)