How to Set Up a Westinghouse Smart TV

Authored by: Support.com Tech Pro Team

1. Introduction

Westinghouse Smart TV.

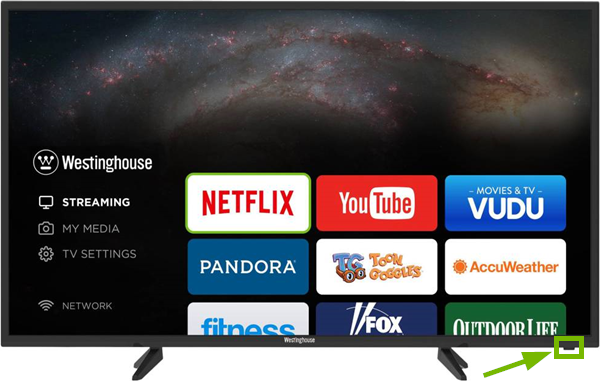
The innovative Westinghouse Smart TV is a versatile fit for a variety of places, brings everything you need at a great value and is easy to set up. This guide will help you get started.

In the box you should find the following items:

  • The TV itself
  • Stands and screws
  • Power cable
  • Remote control and batteries
  • Owner's manual
  • Quick start guide
  • Product registration and/or warranty card

Depending on the TV model and where you live, you may also find additional items or accessories.

2. Install TV

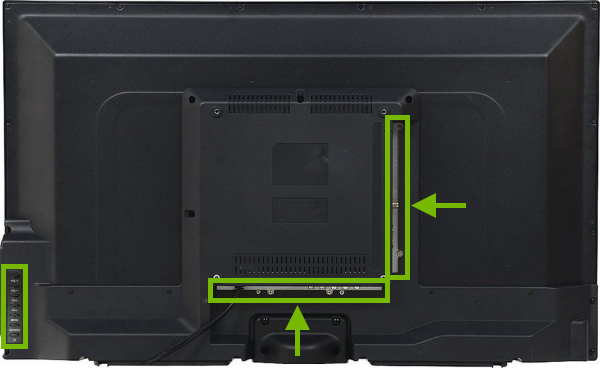
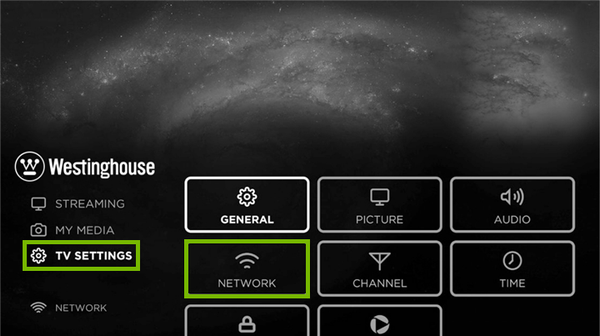
Use the owner's manual to perform the following steps, as they depend on the TVs model:

  • Install the stands on the TV then place the TV in your preferred location.
  • If you want to mount the TV on the wall, only purchase recommended brackets and have a professional install it.
  • Insert the batteries in the remote control with their terminals corresponding to the polarity indicators.

3. Identify Components

The positioning, color or shape of the control buttons, indicators and connectors may vary depending on the TV model.

  • On the front of the TV you should find the power indicator and IR receiver.

Power Indicator and IR Receiver highlighted on front of TV.
  • On the rear of the TV you should find the the control buttons and connection panels:

Control buttons and connection panels highlighted on rear of TV.

Control buttons and connection panels.

4. Connect Cables

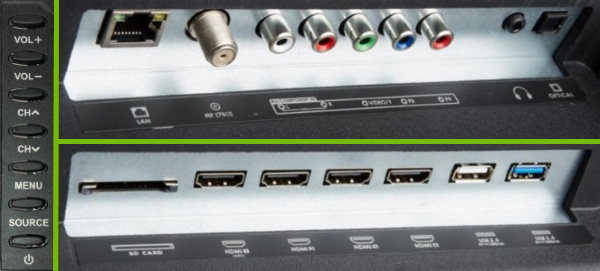
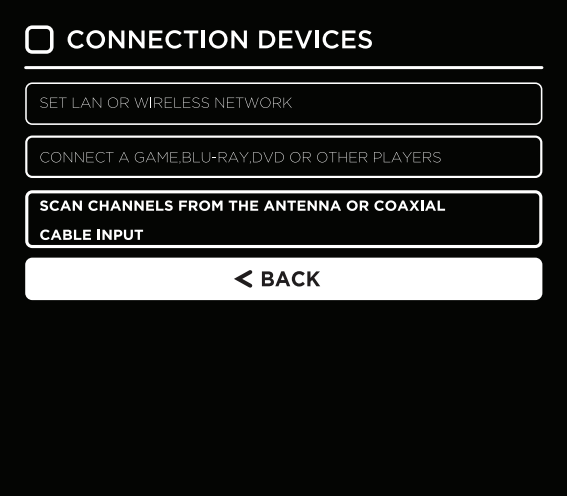
Only connect the power cable after all the other connections have been made. For the basic setup you'll need to connect the TV to an Antenna or paid Cable TV service with a coaxial cable. If you have to connect the TV to other devices refer to those devices' documentation and further to the TVs manual to learn what cables you need and where they plug in.

5. Initial Setup

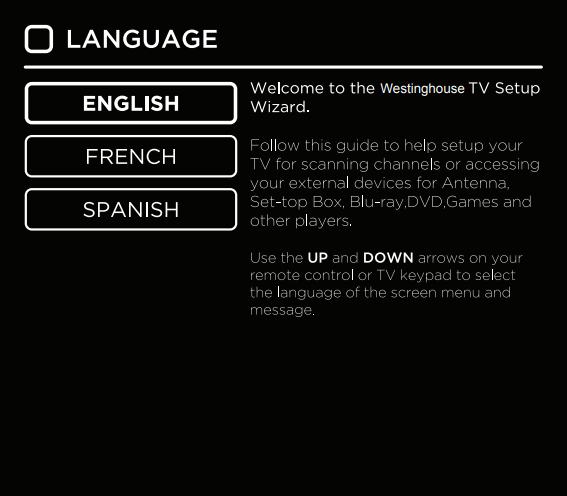
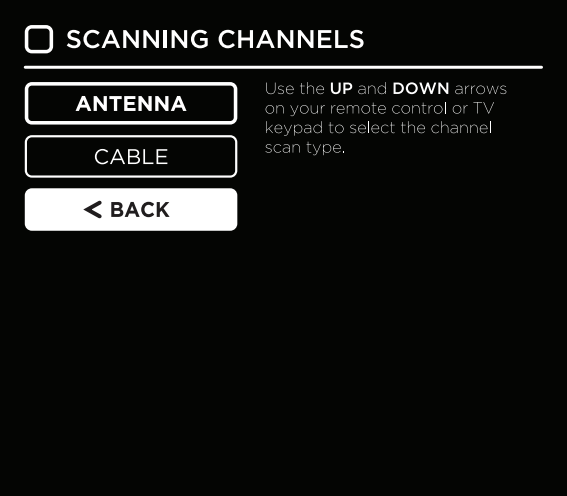
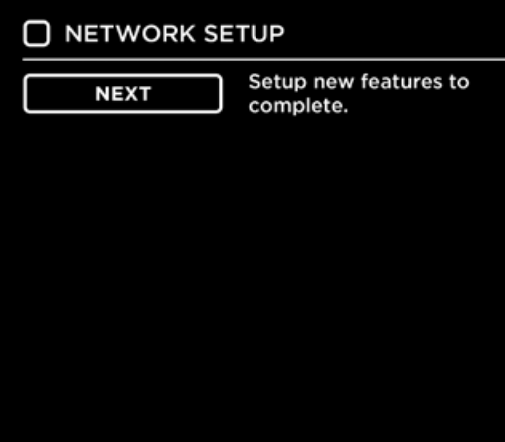
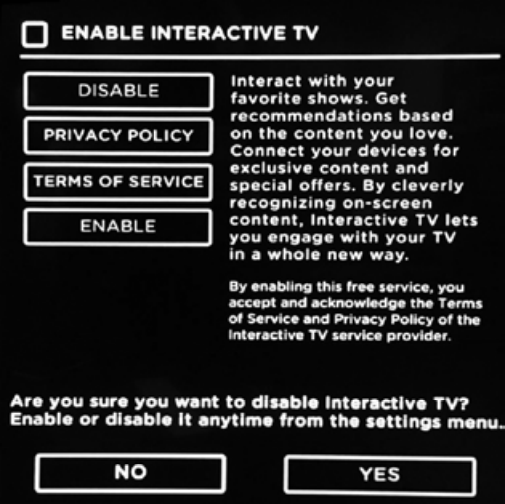
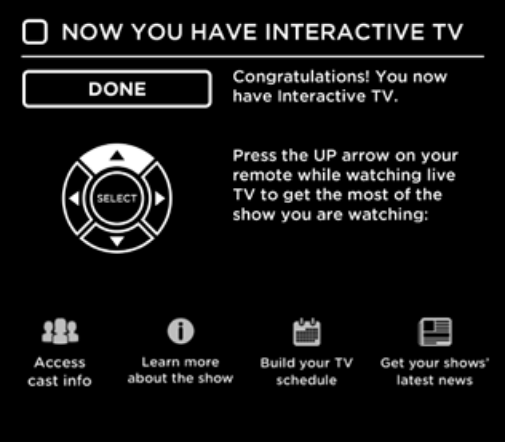
The first time you turn the TV on it will show the Setup Wizard. To perform the setup and navigate the menu afterward you'll need to use the Remote Control. Use the Arrows â–²/â–¼/â–º/â—„ to navigate and highlight your choices then press OK to confirm them.

Navigation buttons on remote control
  1. Turn the TV on by pressing the power button on the main unit or on the remote.
Power symbol.
  1. Select your preferred Language.
Language selection in setup wizard
  1. Select your Time Zone.
Time zone selection in setup wizard
  1. Then go to Scan Channels from the Antenna or Coaxial Cable Input.
Connection setup screen
  1. Select your input source: Antenna or Cable.
Channel source selection screen
  1. Wait for the channel scanning process to complete.
Channel scannning screen
  1. In case no channels are found you can select Return to Scan Channels Program to retry.
Channel scan results screen
  1. Once your back on the main screen, if you wish to stream online content, you can setup the internet connection by going into TV Settings and then selecting Network.
Smart TV settings menu.
  1. Choose the Network Type.
Smart TV network settings menu
  1. Select LAN, if you wired your TV with en Ethernet cable to your router, then connect to the network through the TV settings.
  2. Select Wireless, if you prefer connecting through Wi-Fi, then connect to the network by choosing your preferred Wi-Fi name and typing in the Wi-Fi password, if needed.
  3. With the Network Setup completed you'll be asked to toggle the Interactive TV feature. Select Next to proceed.
Smart TV network setup additional settings
  1. Read through the brief explanation of what the Interactive TV feature offers then choose whether you want to enable or disable it.
Interactive TV toggle screen
  1. If you enabled it, you will get a confirmation. Select Done to finish.
Interactive TV setup completion confirmation screen
  1. At this point, your basic setup for your Westinghouse Smart TV should be complete.