This guide will show you how to perform a basic setup for your Yamaha Blu-ray player.
In the box you should find the following items:
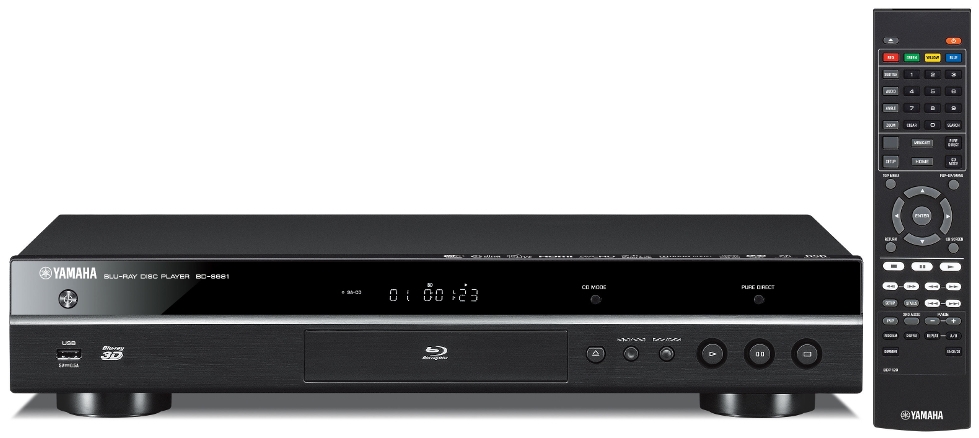
The player itself
The power cable
The remote control with batteries
The user manual
2. Identify Components
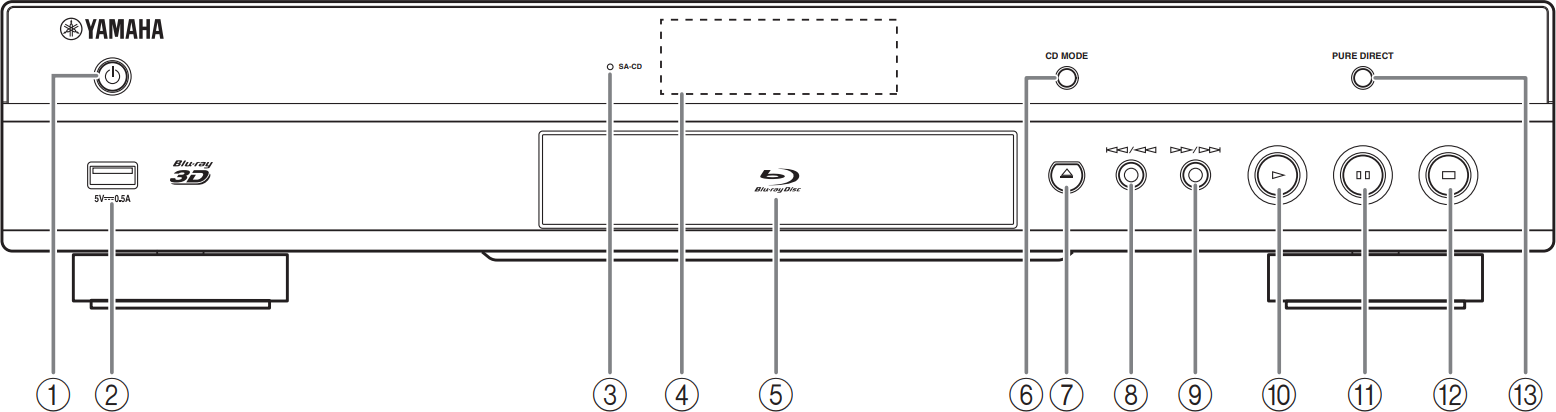
Front Panel
On / Standby
Turns player on / Sets to Standby mode. Press and hold for more than 5 seconds to reset.
USB Connector
SA-CD Indicator
Lights up when SA-CD is loaded and the SA-CD layer is selected
Front Panel Display
Displays various information for operational status
Disk Tray Door
CD Mode
Enables / Disables the CD mode
Eject
Opens / Closes the disc tray
Skip/Search Backwards
Press to skip backward, press and hold to search backward
Skip/Search Forward
Press to skip forward, press and hold to search forward
Play
Starts playback
Pause
Pauses playback
Stop
Stops playback
Pure Direct
Enables / Disables the Pure Direct mode
Rear Panel
Audio Out (L/R)
HDMI Out
Digital Out (Coaxial / Optical)
USB
Network
AC Power In
3. Setup Prep
Before performing the setup follow these preparatory steps:
Place the Blu-ray player close to your TV set so that it is within the length of the HDMI cable and of the power cable.
Only connect the power cable into a power outlet once all the other cables have been plugged into the player and the TV set.
Insert the batteries in the remote control with their terminals corresponding to the polarity indicators.
4. Connect Device to TV Via HDMI
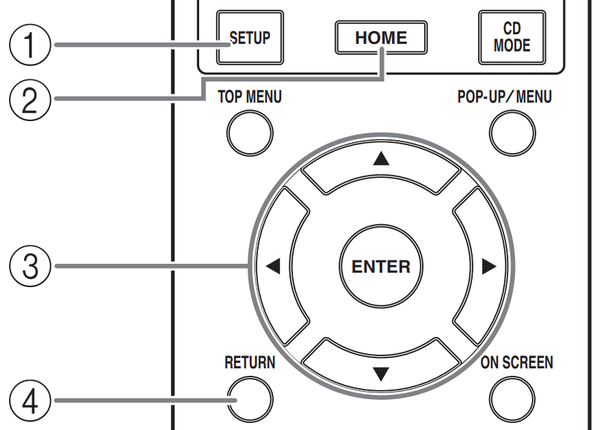
5. Menu Navigation
6. Initial Setup
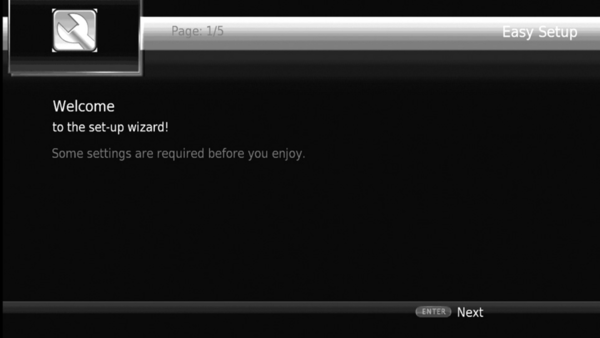
The first time you turn the Blu-ray on it will show the Easy Setup. To perform the setup and navigate the menu afterward you'll need to use the remote control.
Press Enter to start the Easy Setup.
Set the language, resolution and screen aspect ratio by following the on-screen messages.
7. Connect Network
Connect your device to your home network via:
Wired connection (Ethernet)
Wireless connection (Wi-Fi)
8. Connect Device to Network - Wired
Ethernet Cable
An Ethernet cable can come in many colors and lengths. The end is larger than a phone cable; and has eight small contacts on the bottom, with a clip on the top to make sure it stays locked into the port.
Ethernet Port
An Ethernet port will be on the side or back of your device, and sometimes has lights on the left and right, used to show traffic and link conditions. It is larger than a phone jack.
Acquire an Ethernet cable.
Take one end of the cable and plug it into your router or modem Ethernet port.
Plug the other end of the cable into your devices Ethernet port.
9. Connect via Ethernet
Press the Setup button on the remote control.
From the Setup menu screen go to General Setting, then Network, and then Connection setting. Select the Wired option.
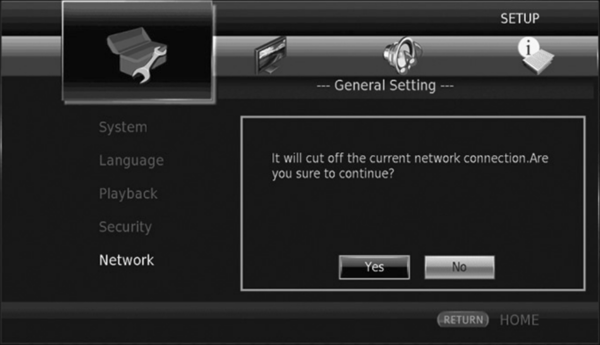
If you get a question asking if you want to cut off the current connection, select Yes.
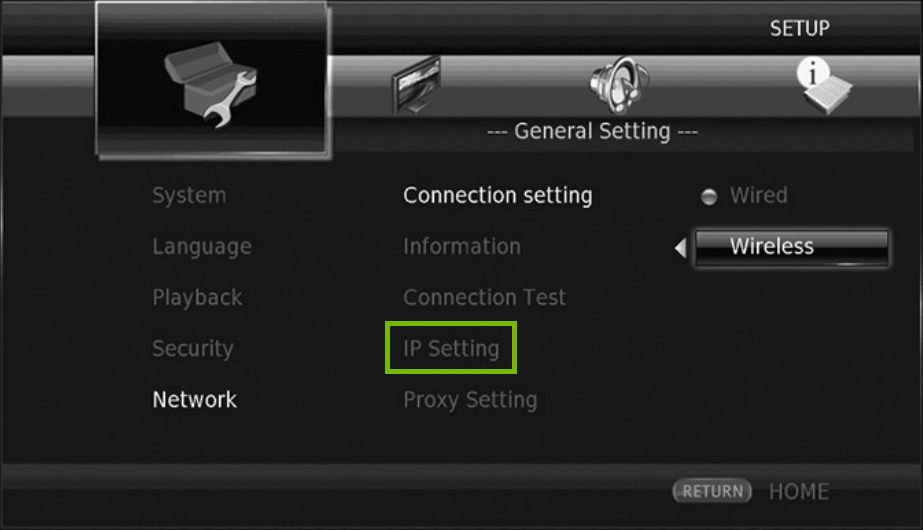
Then go back to Connection Setting then go to IP Setting. Make sure it is set to Auto.
10. Connect to Wi-Fi
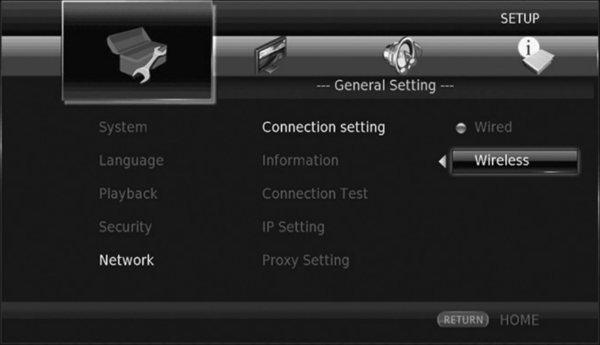
Press the Setup button on the remote control.
From the Setup menu screen go to General Setting, then Network, Connection setting and then Wireless.
If you get a question asking if you want to cut off the current connection, select Yes.
Select the Scan option and press Next to search for available Wi-Fi networks. Once the list is populated, select your preferred network and type in the Wi-Fi password if required.
Remove Hidden Spyware In Minutes For Free
Detect and remove spyware, keyloggers, tracking cookies, and other
threats that slow down your PC or steal your data.
65+ Million Downloads
Spyware scanner with AI-powered detection engine + database
.png)