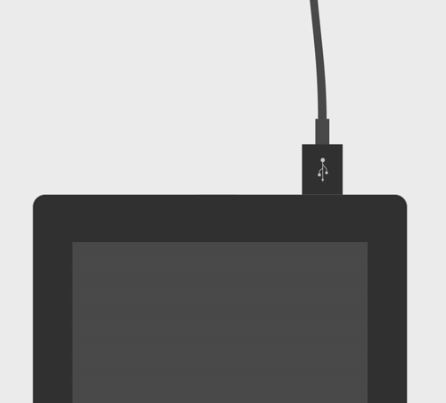
Your Fire Tablet may not be fully charged when you first receive it. Connect the power cable before you set up and register the device.
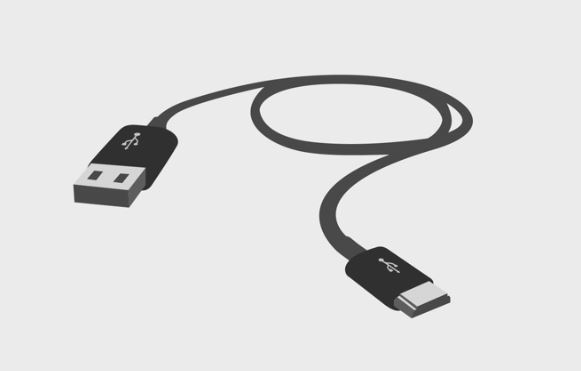
Connect the micro USB cable to your tablet.
Connect the other end to the power adapter, then plug it into a power outlet.
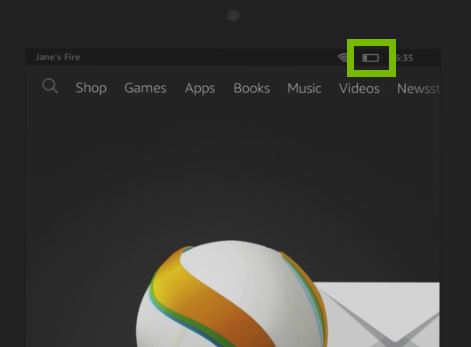
The battery icon at the top of your screen will display a lightning bolt to indicate that your device is charging properly.
2. Basic Setup
Turn on your Amazon Fire HD Tablet by pressing and holding down the power button.
Slide to unlock the device.
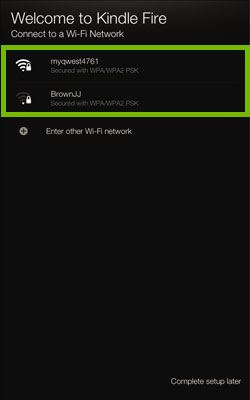
From the Welcome screen, connect to your Wi-Fi network from the list and type in the Wi-Fi password if needed.
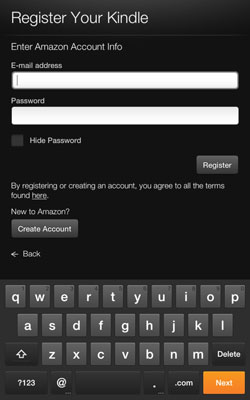
After you finish connecting your Amazon Fire HD Tablet to your wireless network, you need to register your Kindle. Type your email and password, then click Register. If you don’t have an Amazon account, click Create Account and follow the steps.
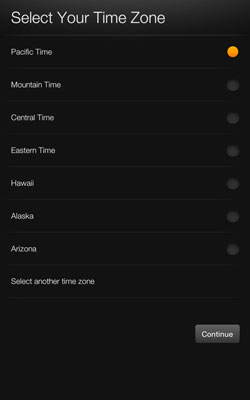
Select your time zone.
Confirm your account and it will give you an option to link your Kindle to your social media. Click Get Started Now to continue.
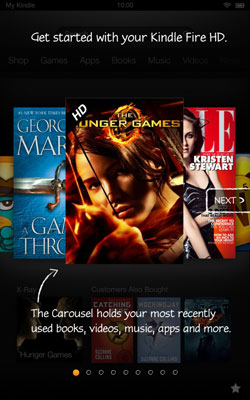
At this point, you will see a series of tutorials about the various features of your Fire. At the end of the series, click the Close button to go to your Kindle Fire Home screen.
3. Parental Controls
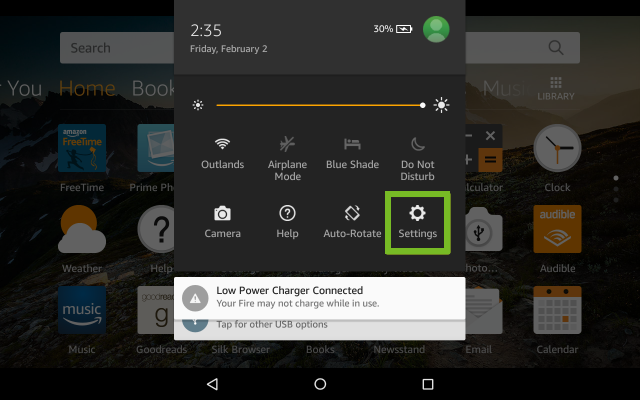
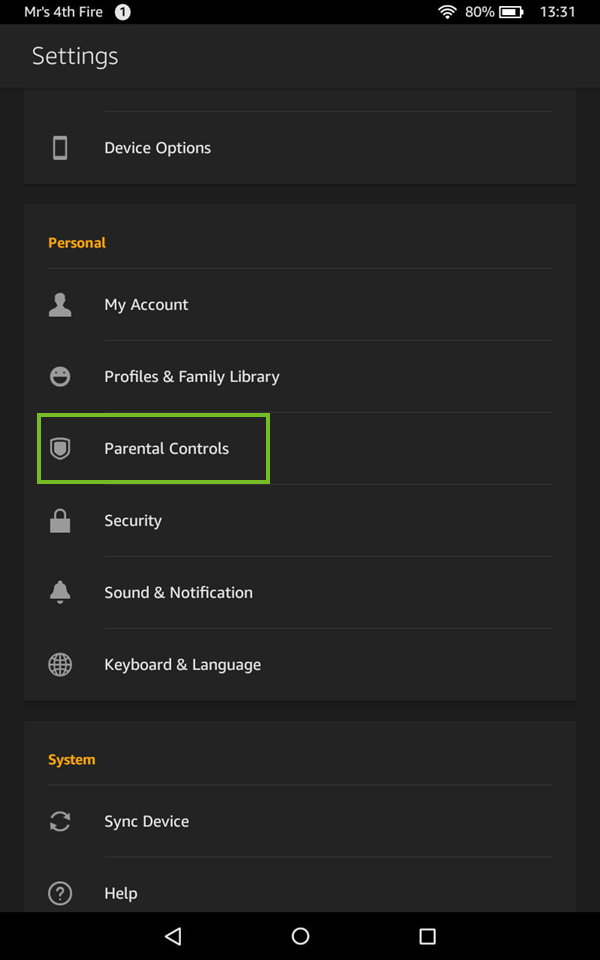
Swipe down from the top of the screen to reveal the notification bar, then tap Settings.
Tap Parental Controls.
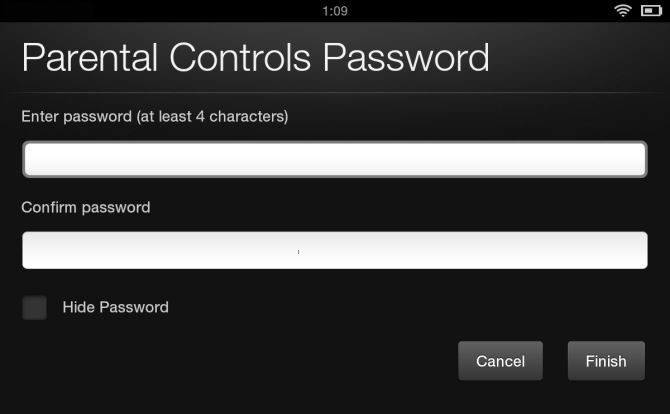
Create your new Parental Controls Password, then tap Finish.
Your Parental Controls password is different from your lock screen password.
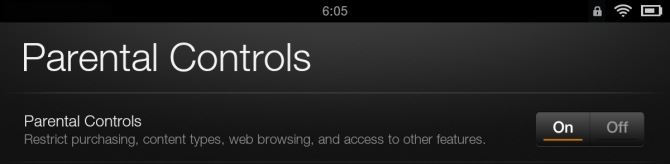
Tap the On button to turn on Parental Controls.
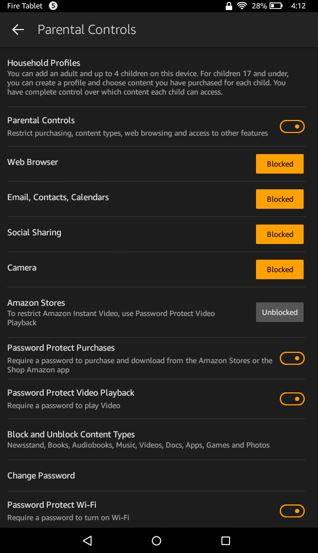
With Parental Controls enabled, you can restrict one or more of the following:
Disallow access to the Web Browser
Disallow access to the Email, Contacts, and Calendars apps
Disallow access to Social Sharing features
Disallow access to the Camera app
Disallow access to make purchases from the content stores on your device
The ability to play Amazon Video and Prime Video
Disallow access to specific content types (for example, Books or Apps)
Place wireless connectivity behind a password before being able to access
Disable Location based Services
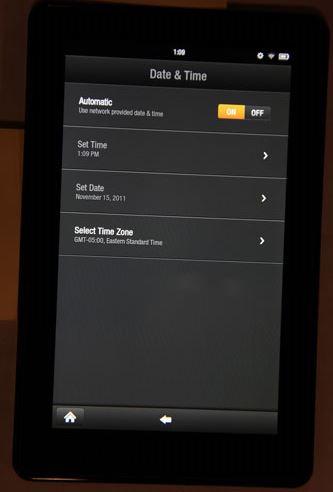
4. Change Date & Time
Swipe down from the top of the screen to bring up the notification bar and tap More.
Press Device, and then tap Date & Time.
Tap Select Time Zone, then select your preferred time zone from the list.
To set the time manually, you need to turn off the Automatic option first.
Remove Hidden Spyware In Minutes For Free
Detect and remove spyware, keyloggers, tracking cookies, and other
threats that slow down your PC or steal your data.
65+ Million Downloads
Spyware scanner with AI-powered detection engine + database
.png)