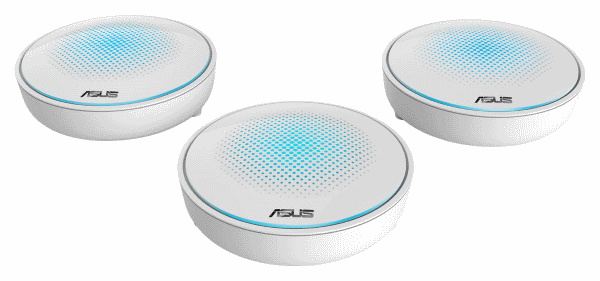
Getting reliable WiFi signal everywhere in your home can be challenging. The Mesh networking capabilities of ASUS Lyra aims to make this a problem of the past. ASUS Lyra hubs are able to be wirelessly connected to one another so that WiFi signal can blanket your entire home. This guide will help you get your new ASUS Lyra hubs set up and broadcasting WiFi for the first time.
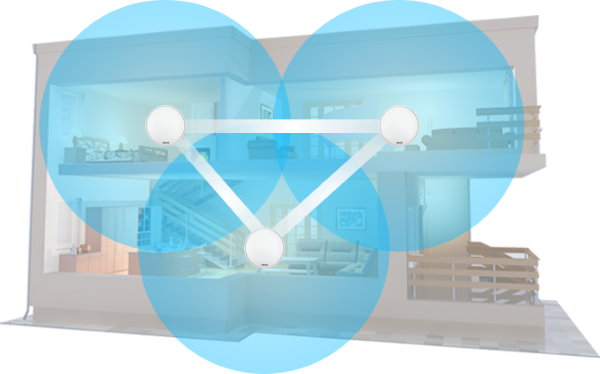
The idea behind the mesh network of ASUS Lyra is to provide multiple devices which hook up together to ensure better wireless coverage throughout your home. One of these router devices connects to your ISP's modem as normal, and then others are strategically placed elsewhere around your home, connecting wirelessly to one another, which serves to blanket your whole home with WiFi, ensuring a strong signal anyplace in your home.
The number of Lyra hubs you may need for your home largely depends on the size. ASUS recommends one Lyra hub for a home of up to 2000 square feet, two hubs for a home 2000-4000 square feet, and three hubs for a home 4000-6000 square feet. While these distances are a rough estimation, other factors could increase or decrease the number of hubs your home requires to create a reliable WiFi signal in all the areas that are important to you. Your primary Lyra hub must be connected to your ISP's modem, so it's a good idea to plan out where you might need additional hubs before making your purchase of additional ASUS Lyra hubs.
2. Connections
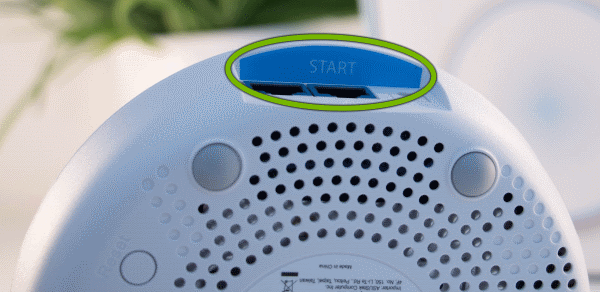
Make sure you start the setup with the primary Lyra hub. You can identify it by looking where the ports are. You will see a blue label that says START.
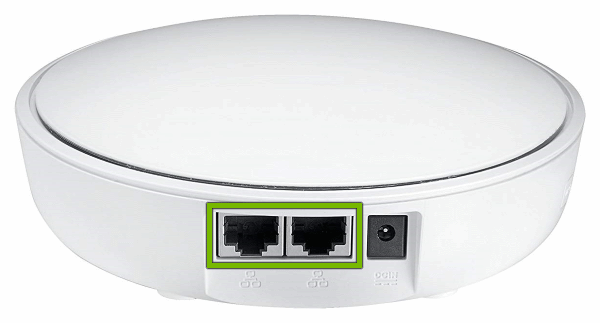
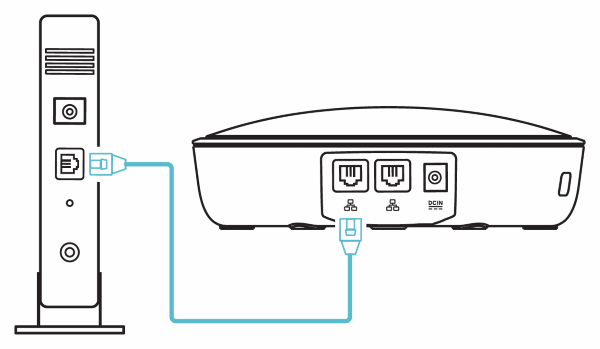
Plug one end of the Ethernet cord into any one of the two ports on the back of your Lyra.
The Ethernet port that you connect the modem/gateway to will be configured for the internet connection and will remain that way until the Lyra is reset.
Plug the other end of the Ethernet cord into your modem/gateway.
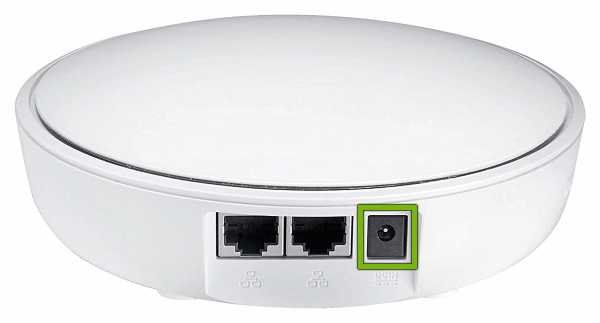
Plug the power cord into the back of your Lyra.
And plug the Lyra's power adapter into an available wall outlet.
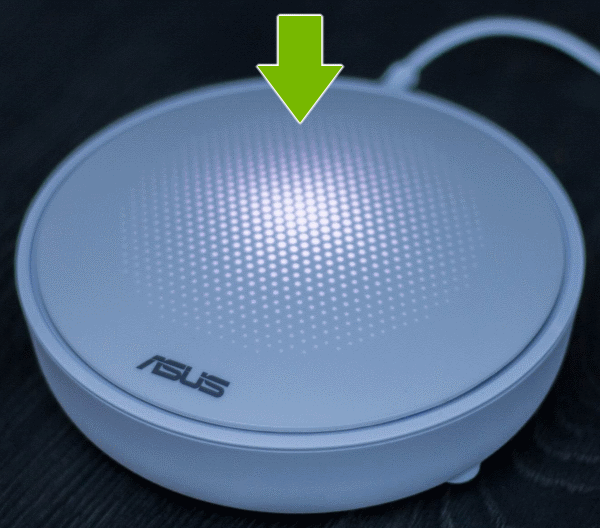
Wait until your Lyra has a solid white light on top.
3. Initial Setup
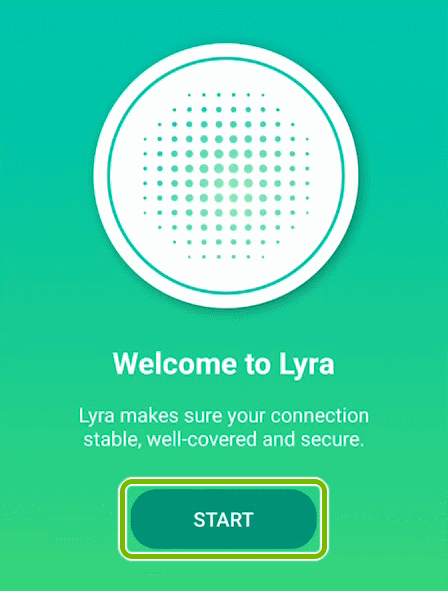
Open the ASUS Lyra App.
Tap OK to agree to all the ASUS policies.
Tap Start on the welcome screen.
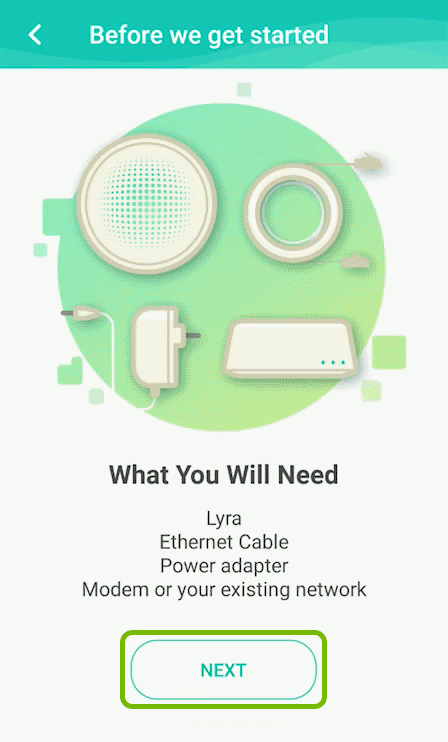
You'll be shown a list of requisites. At this point, you should already have these ready. Tap Next to continue.
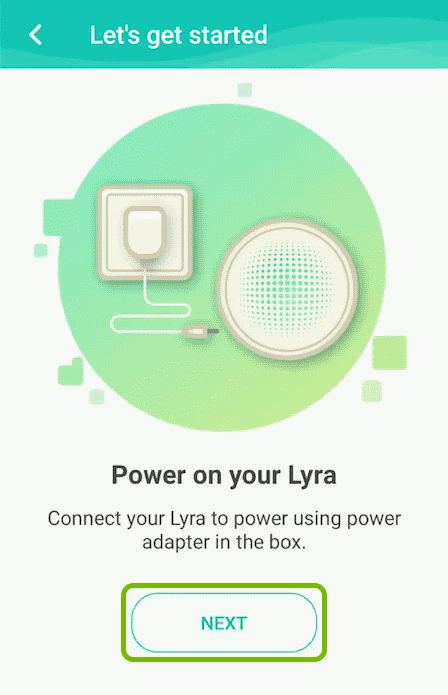
Your Lyra should already be powered on from the previous step. Tap Next to continue.
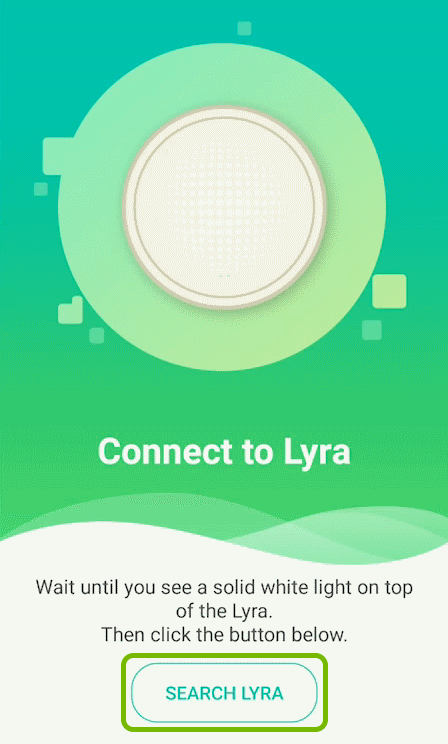
When your Lyra shows a solid white light on top, tap Search Lyra.
Wait for your Lyra to be found then tap Next.
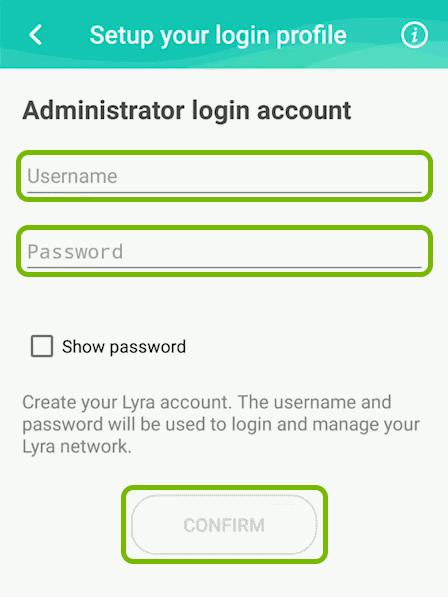
Create an administrator account to manage your Lyra hub. Fill in the Username and Password then tap Confirm.
The Lyra network administrator login credentials are not the same with the WiFi connection credentials which you will set up later.
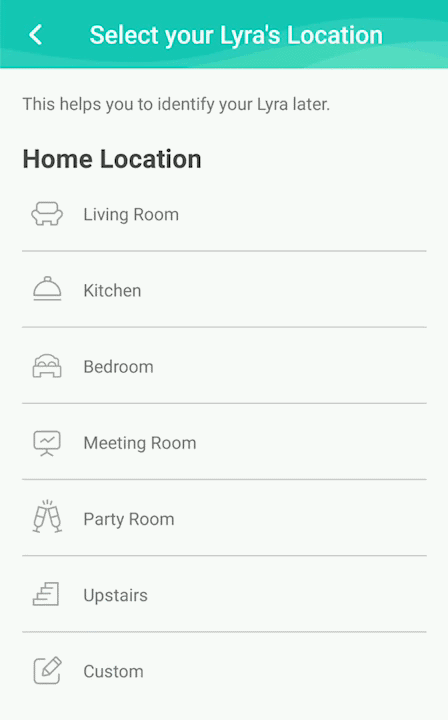
Select the location where your Lyra is placed within your home.
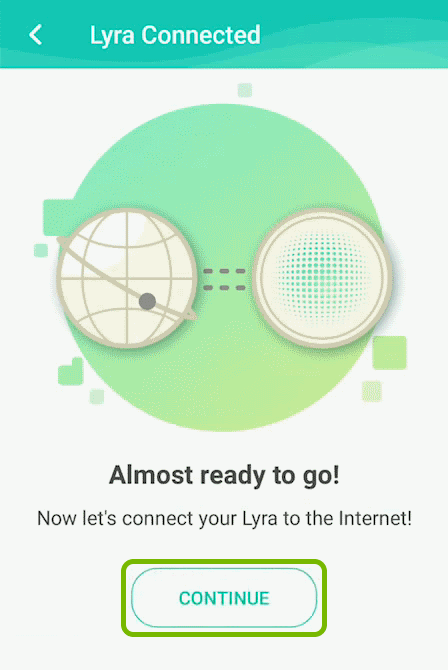
Next you need to connect your Lyra to the internet and set up WiFi access for your devices. Tap Continue to proceed.
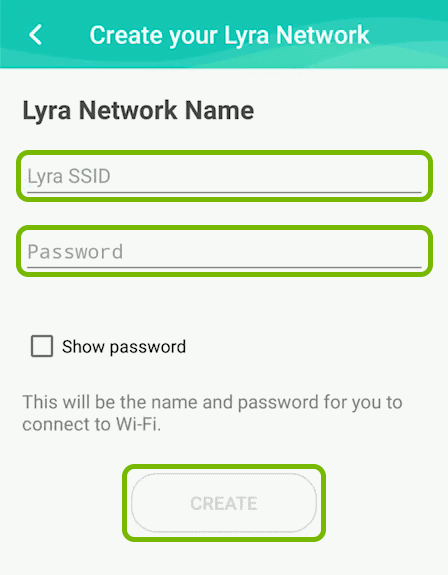
Create the WiFi network to which your devices will connect to. Fill in the SSID (network name) and Password then tap Create.
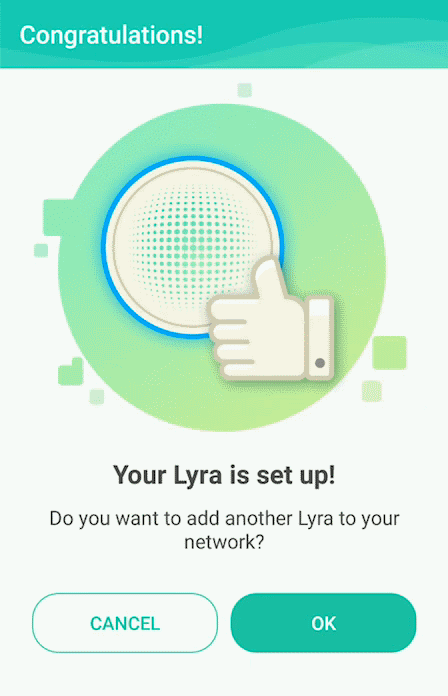
Your primary Lyra hub is now set up.
Choose whether you want to add any other Lyra hubs.
Expand to add secondary Lyra hubs
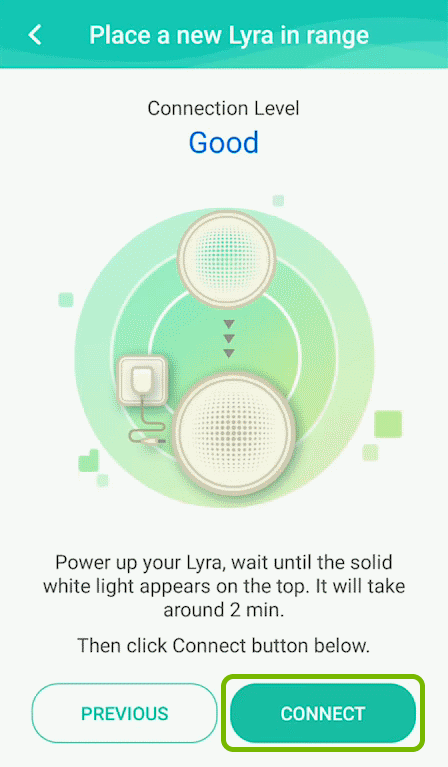
Go to the area or room where you want to place your next Lyra hub and make sure the Connection Level shows Good in the app.
Connect the additional Lyra hub to a wall outlet and wait for it to show a solid white light on top then tap Connect in the app.
Select the location where your additional Lyra hub is placed within your home.
Repeat the same process for as many additional Lyra hubs you have.
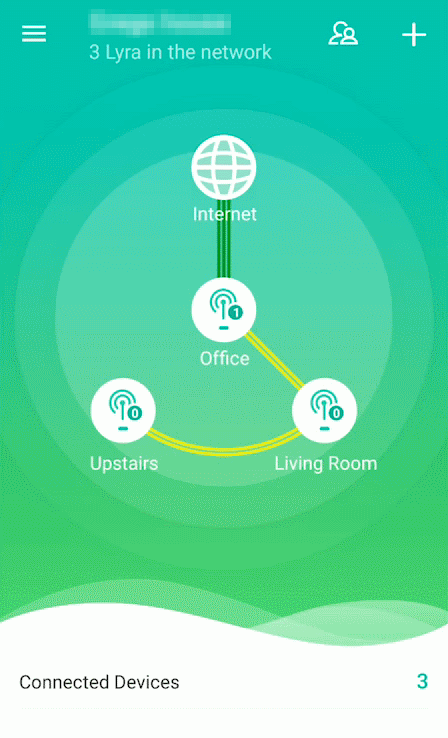
Once the primary Lyra hub and any additional hubs are set up, they will all be displayed in the app.
Remove Hidden Spyware In Minutes For Free
Detect and remove spyware, keyloggers, tracking cookies, and other
threats that slow down your PC or steal your data.
65+ Million Downloads
Spyware scanner with AI-powered detection engine + database
.png)