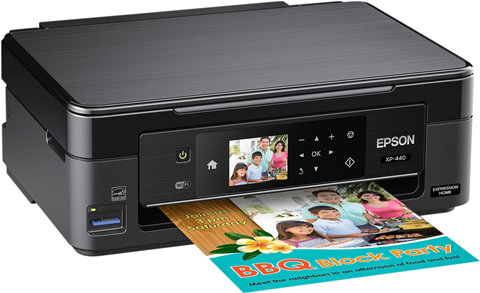
Connecting your printer to your router with an Ethernet cable allows you to print from virtually any device connected to the same router. This may save you space by reducing the number of printers you need, and a good amount of money on the ink cartridges they would go through. This guide will go over steps to get your printer connected to your router via Ethernet cable.
In order to complete these steps, you will need a router attached to your modem, an additional Ethernet cable available, and your printer must have an Ethernet port on the rear.
4. Connect via Ethernet
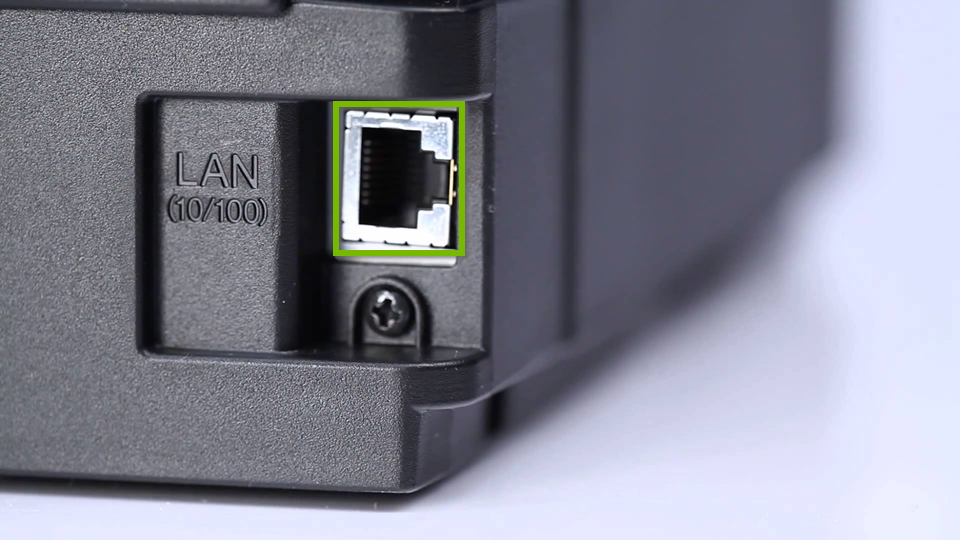
In order to connect to a wired Ethernet connection, your printer needs to have an Ethernet port on the rear. This will vary depending on the model printer you have.
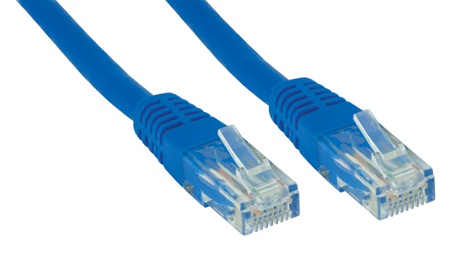
Acquire an Ethernet cable and connect it to the port on the back of the printer.
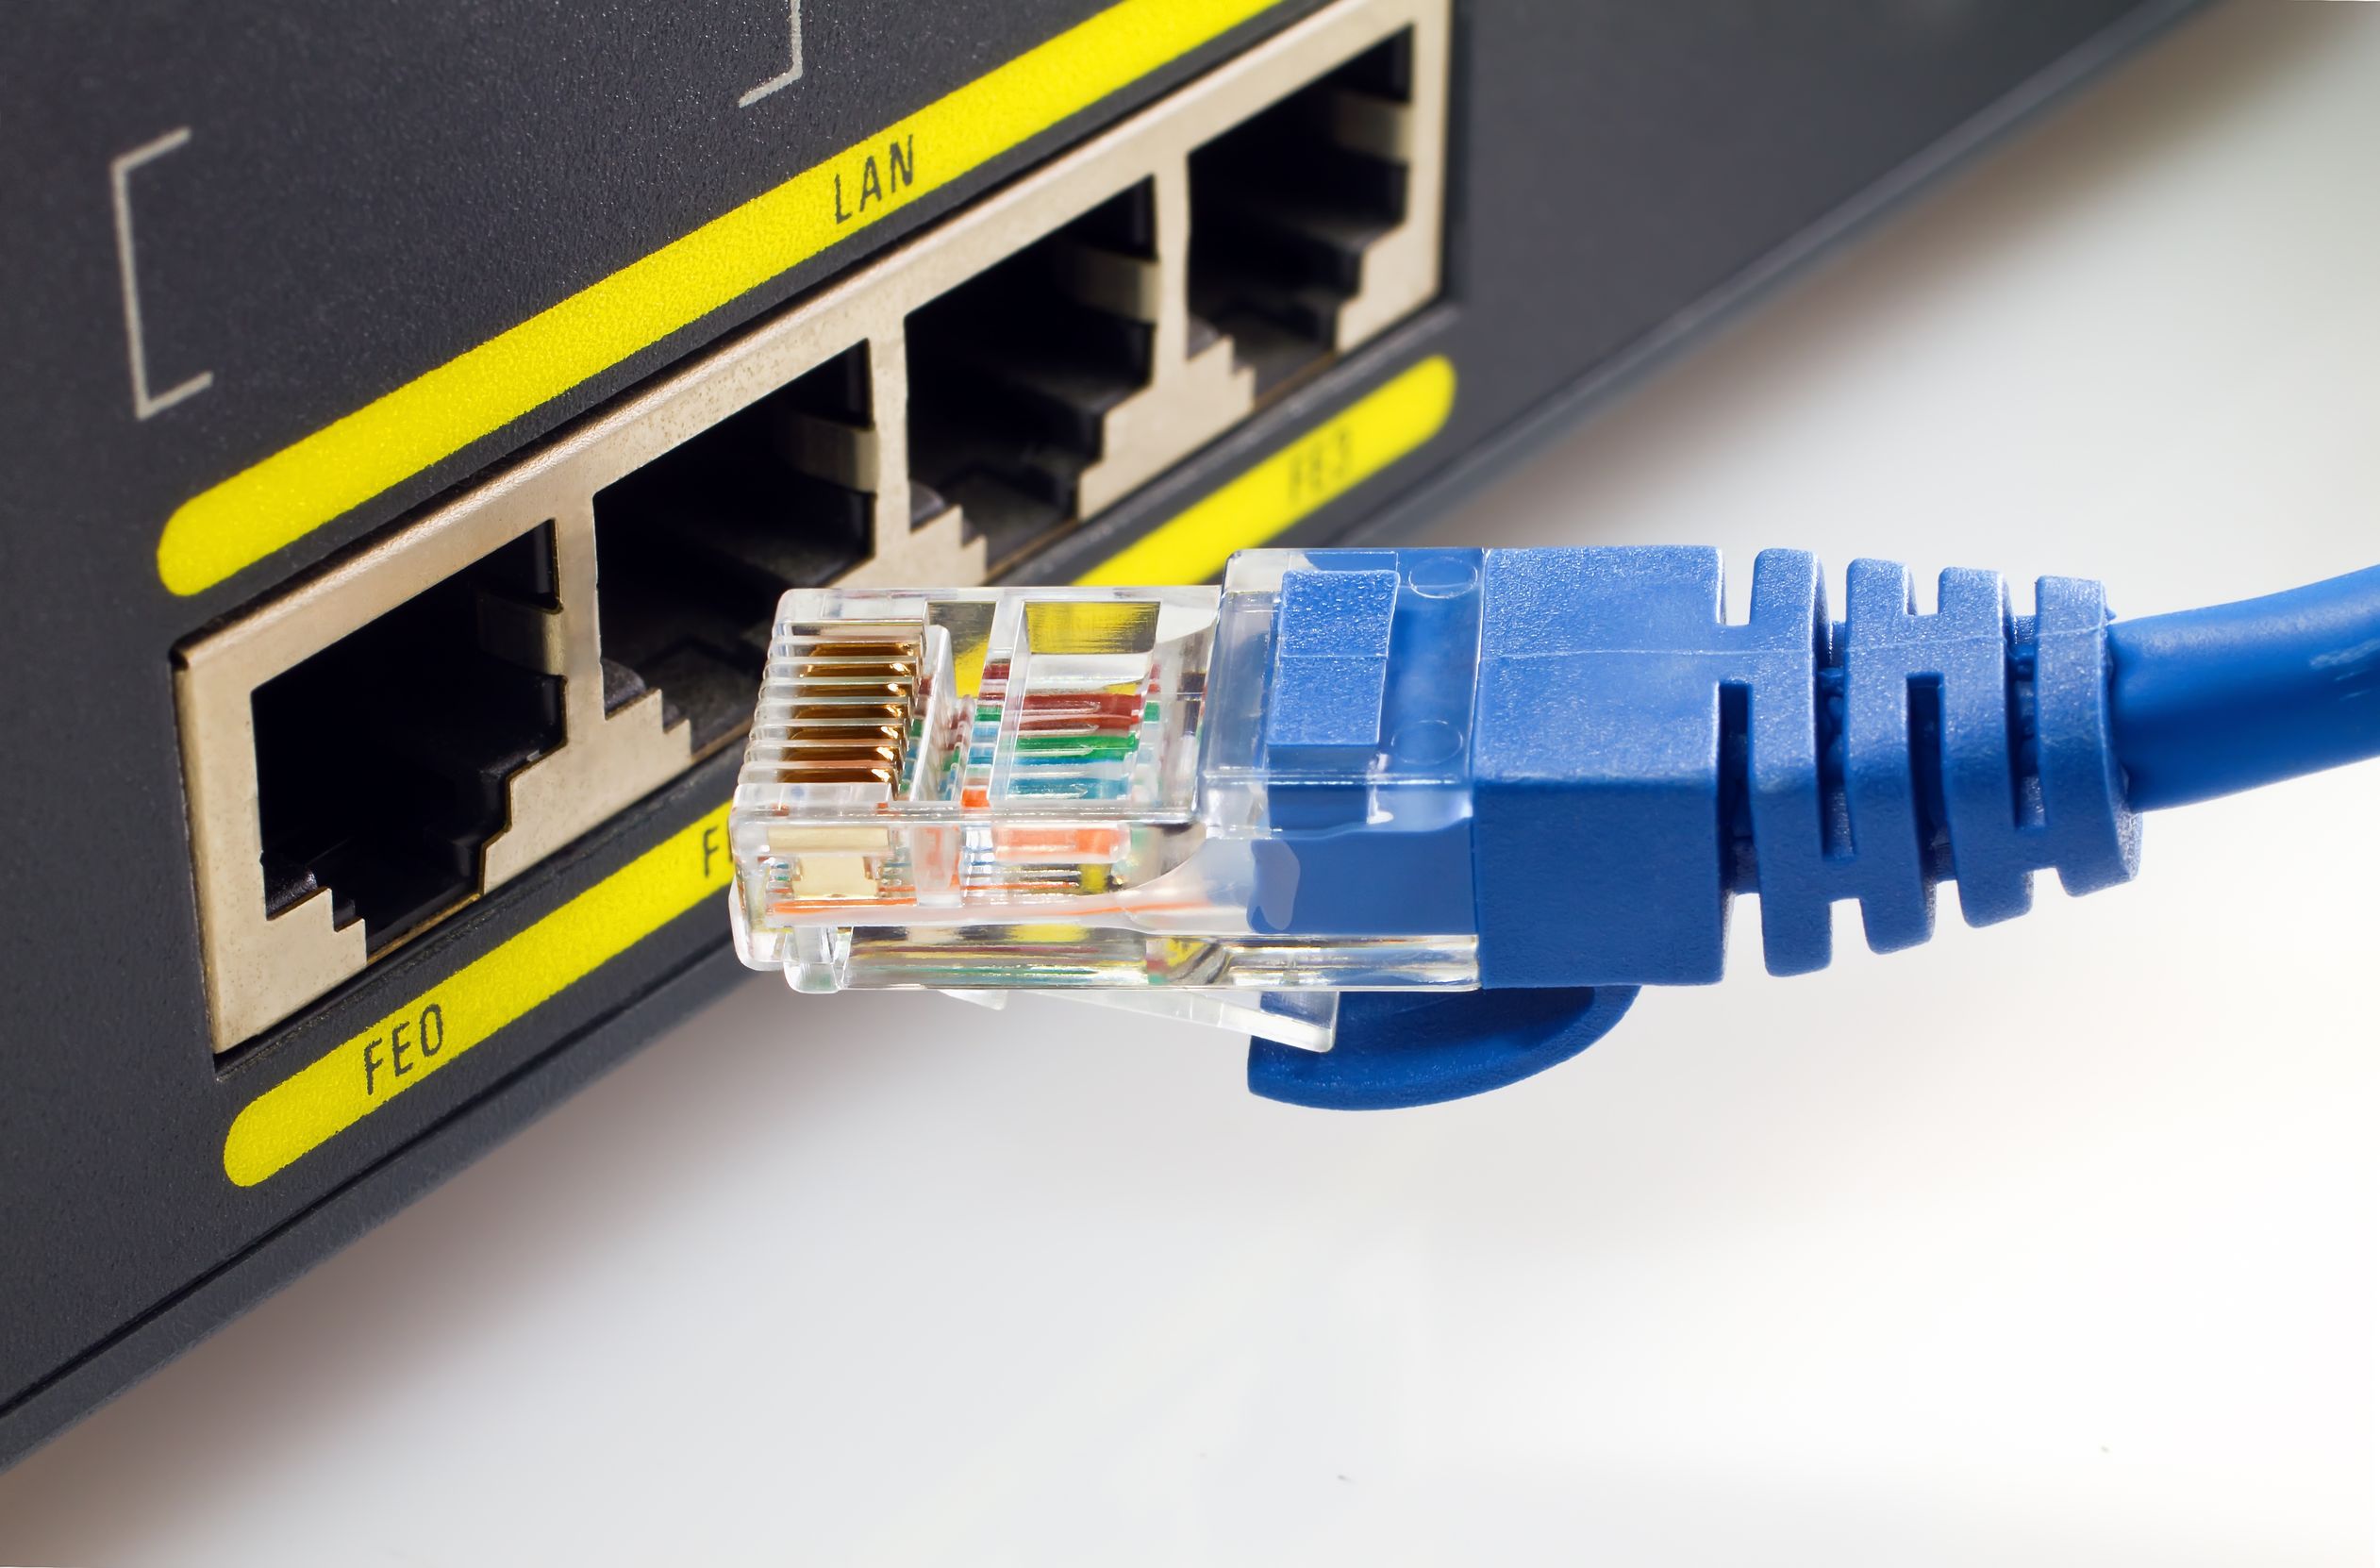
Take the other end of the Ethernet cable and plug it into your router's Ethernet port.
This is all that is needed to get your printer physically connected to your network.
5. Download Software
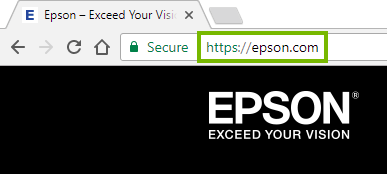
Using your computer's web browser, navigate to the Epson website.
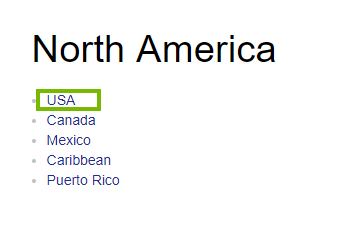
Click on USA within region selection.
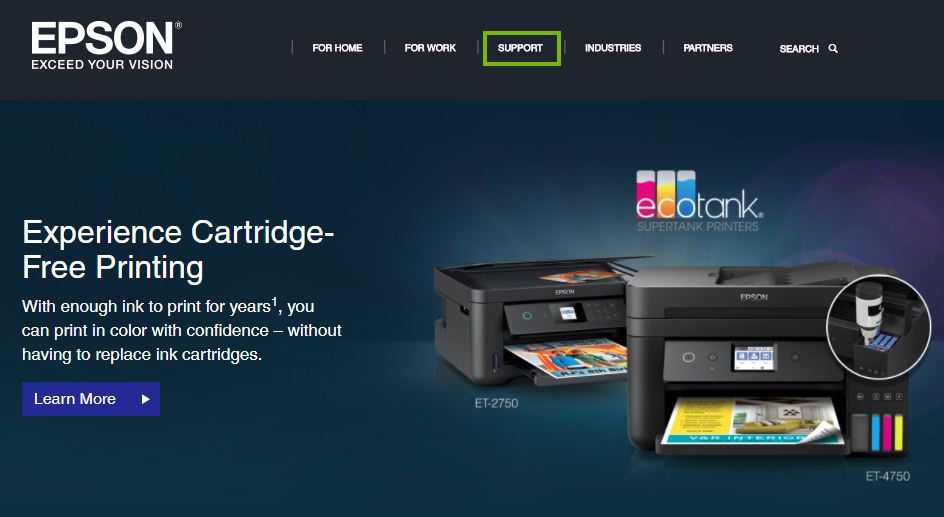
Click on Support.
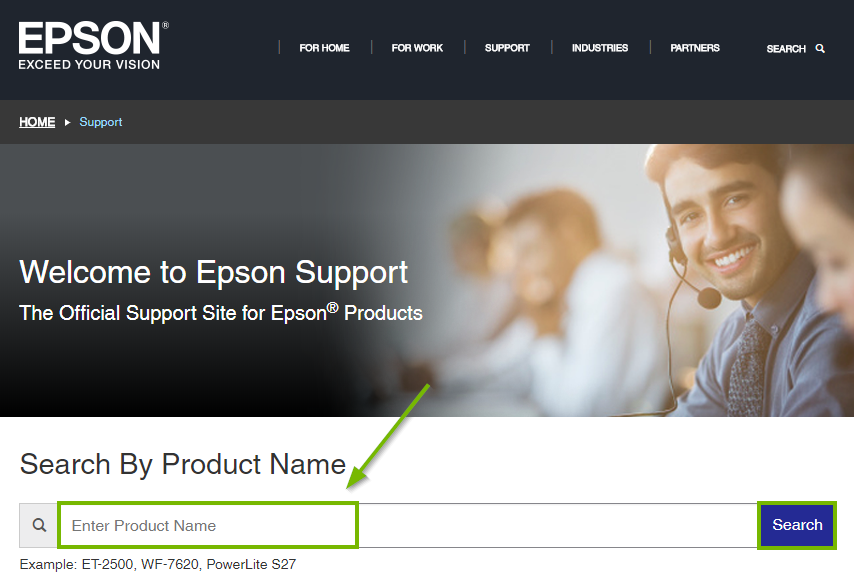
Type in your printer's model number into the search box and click Search.
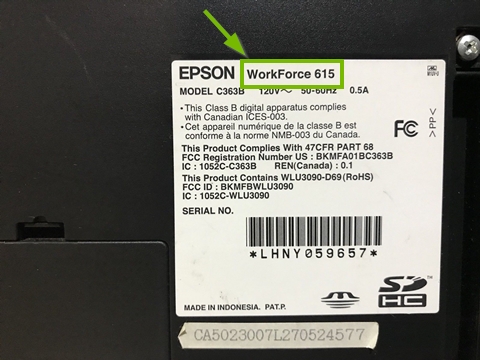
If you are having trouble locating your printer's model number, check on the rear of the printer for it's informational sticker.
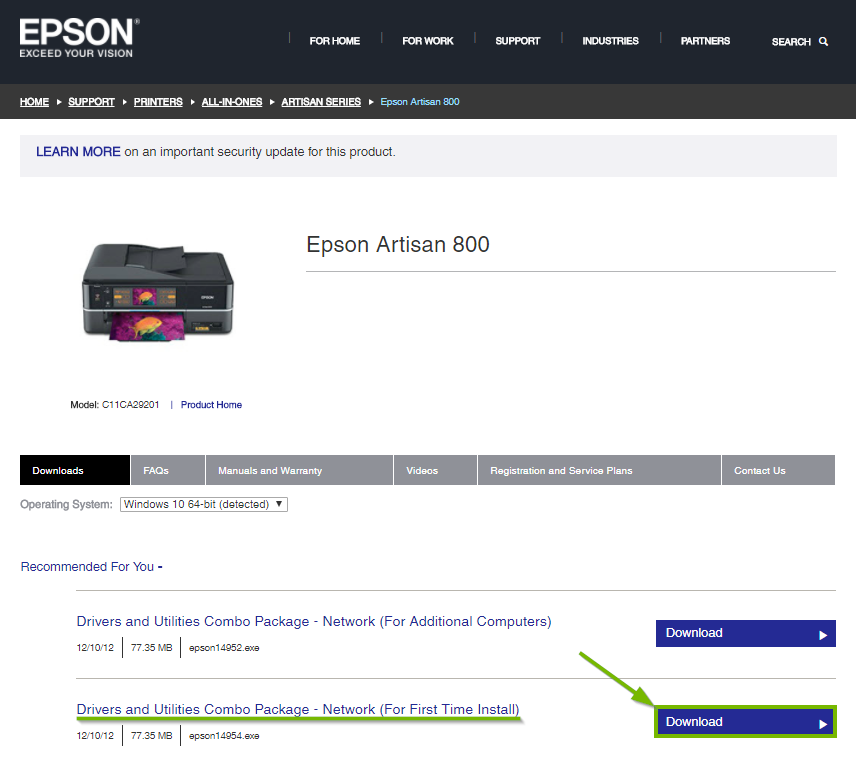
From your printer's support page, click the Download button on the driver package For First Time Install.
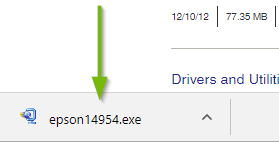
Your download should begin. Depending on what browser you've used, you may have to click Run or Save to continue, or simply click the file that's downloaded to launch the installer.
If the installation does not automatically begin, you may have to open the file manually.
Take note of the name of the file that was downloaded.
Windows OS - files typically download to your Downloads folder.
Mac OSX - files typically download to the Downloads folder in the Dock.
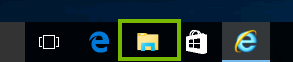
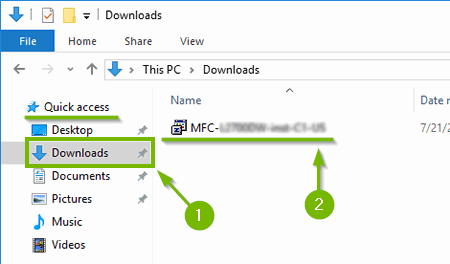
Click on File Explorer from your taskbar.
Click the Downloads folder underneath Quick access in the left-hand column. Then, locate and double-click the installation file that downloaded.
The software installation should now begin.
6. Connect via Ethernet
To install your Epson printer on a wired network using an Ethernet cable:
You can launch the installer from the CD that came with your printer or from the file you downloaded using your internet browser. It is however recommended to launch it from the latter to install the latest software available.
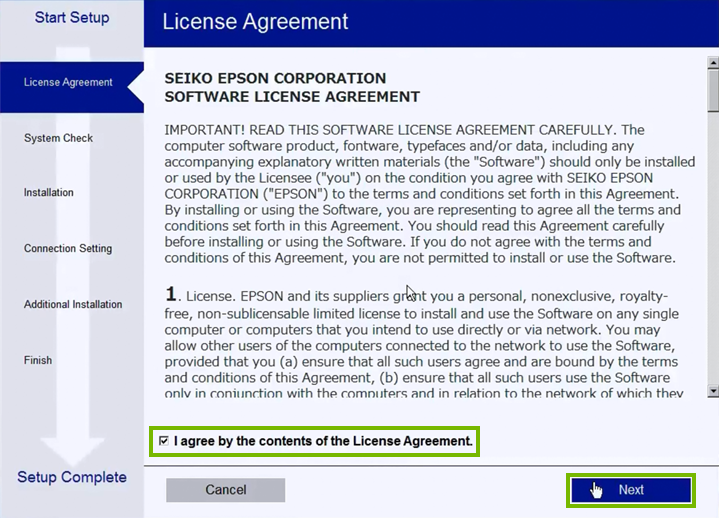
Check the box to accept the license agreement and click on Next.
Once the installer checks your system click on Next.
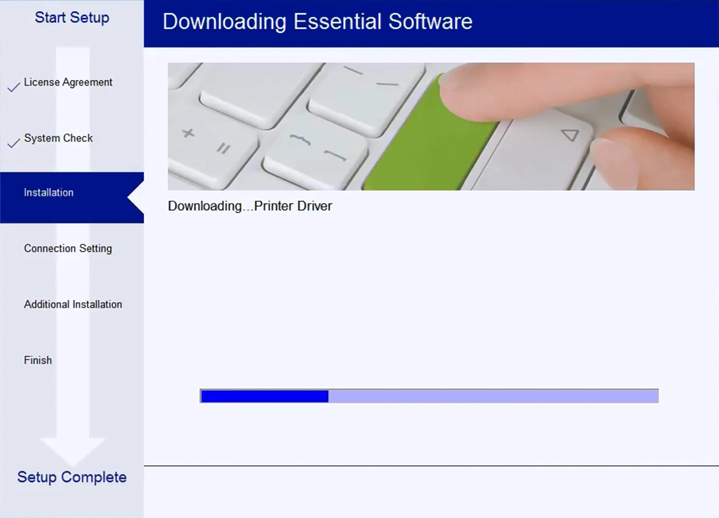
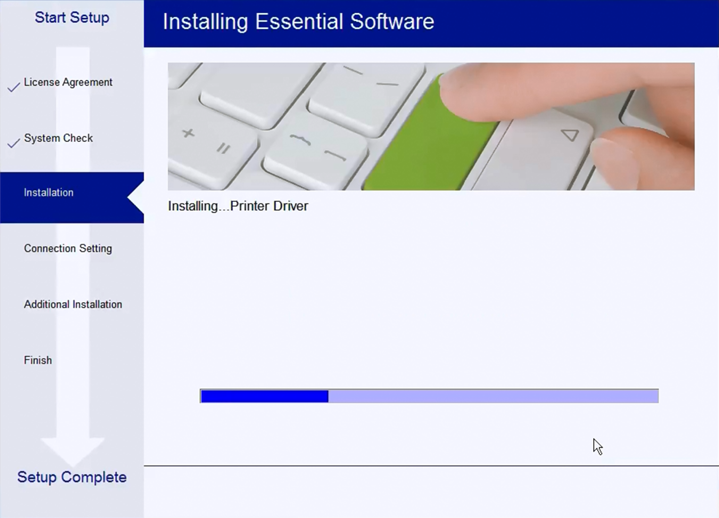
Wait for the essential software to be downloaded.
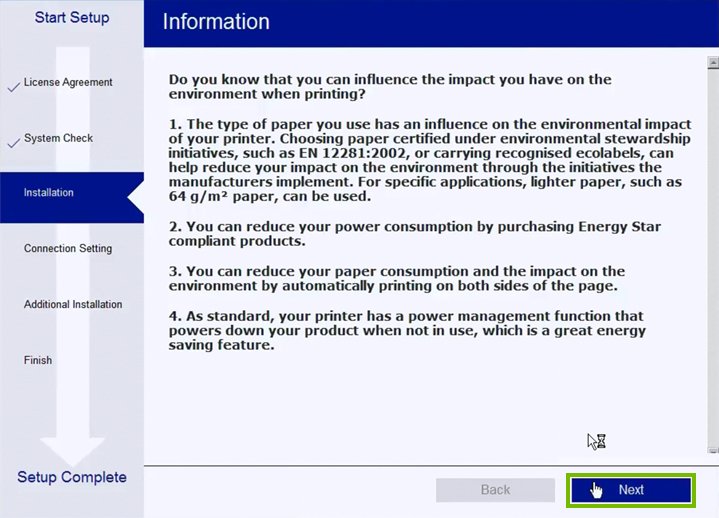
Read through the provided information and click on Next.
Wait for the essential software to be installed.
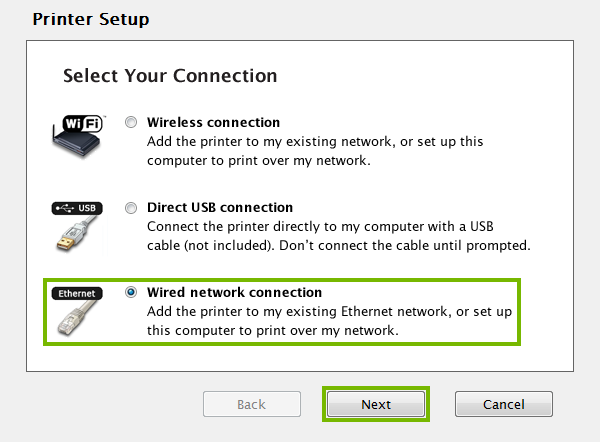
Select the Wired network connection type and click on Next.
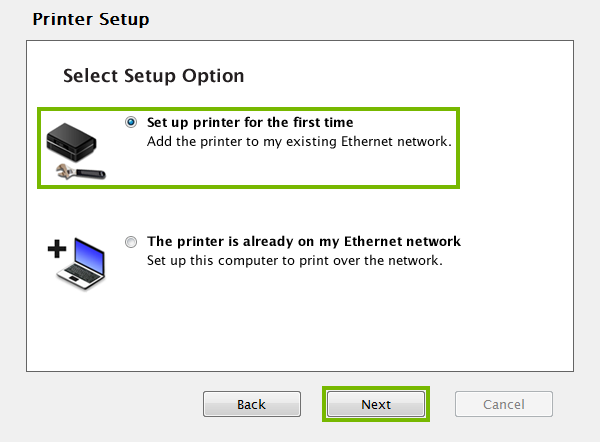
Select Set up printer for the first time as the setup option then click Next.
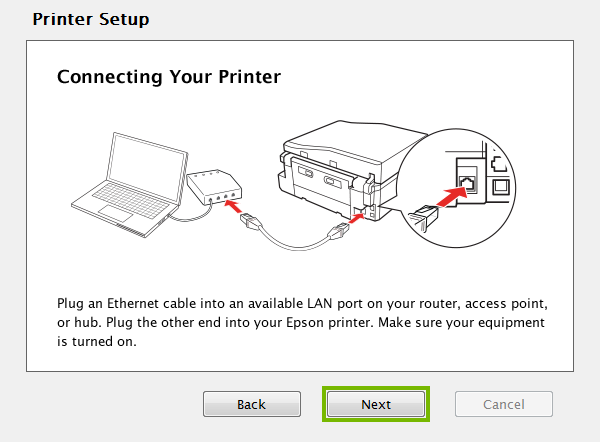
If you haven't already, connect the printer to your network using an Ethernet cable and make sure it's turned on.
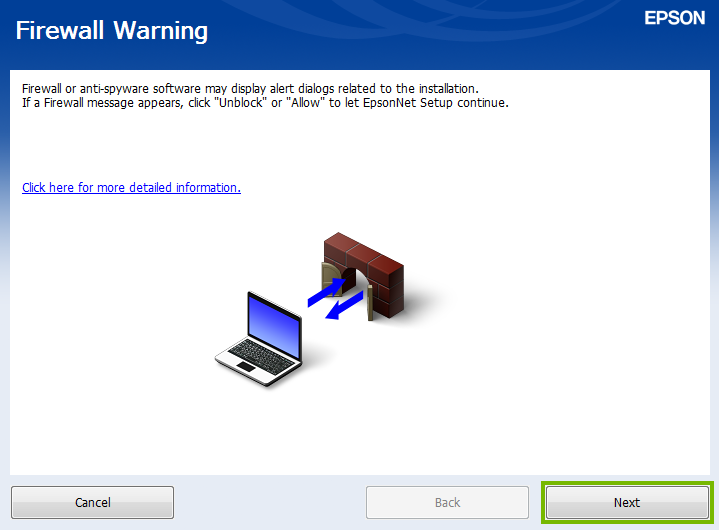
If you get a firewall warning, make sure you allow the software to access your network then click on Next.
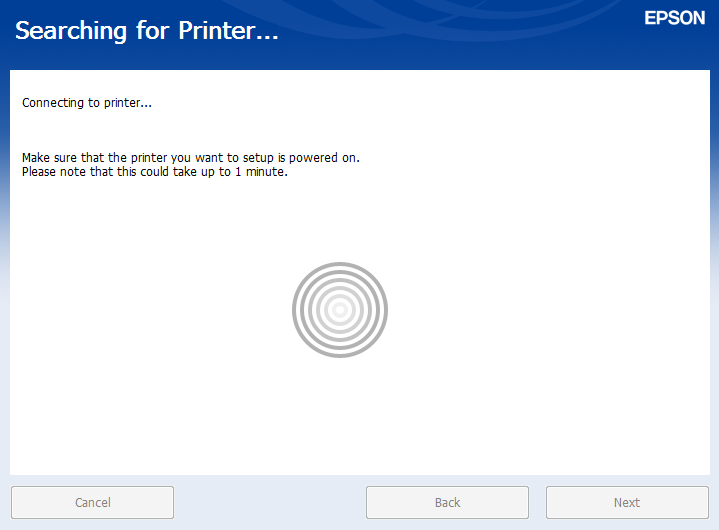
Wait for the printer to be detected on the network.
Once the printer is detected and connected to the computer, click on Next.
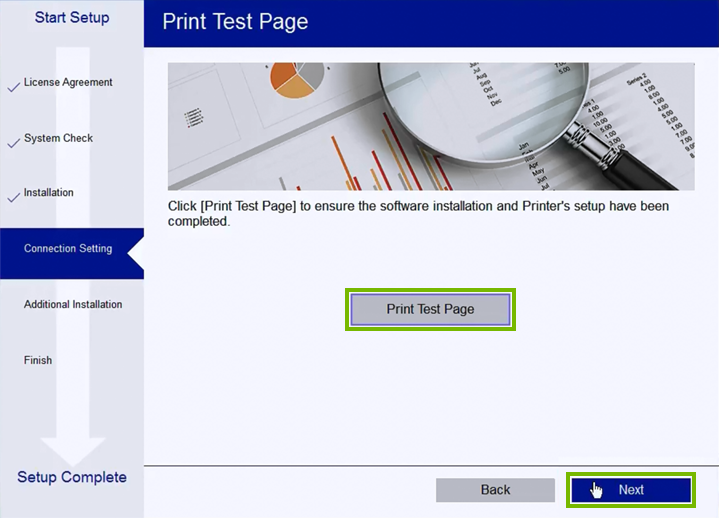
Click on Print Test Page if you'd like to try out the printer or click on Next to continue.
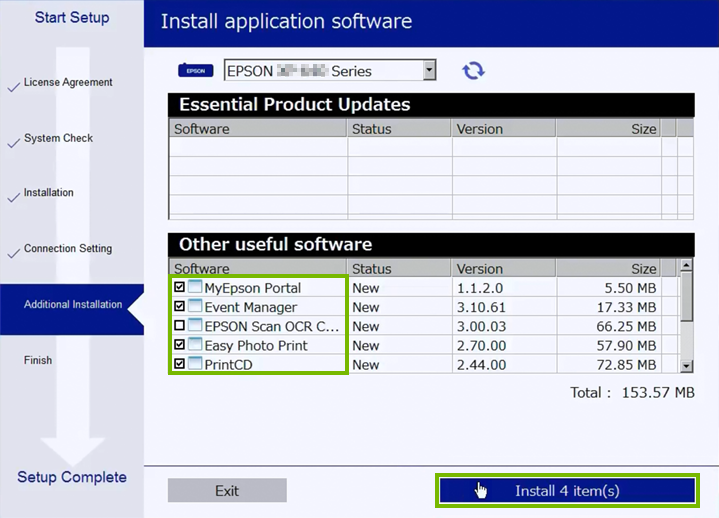
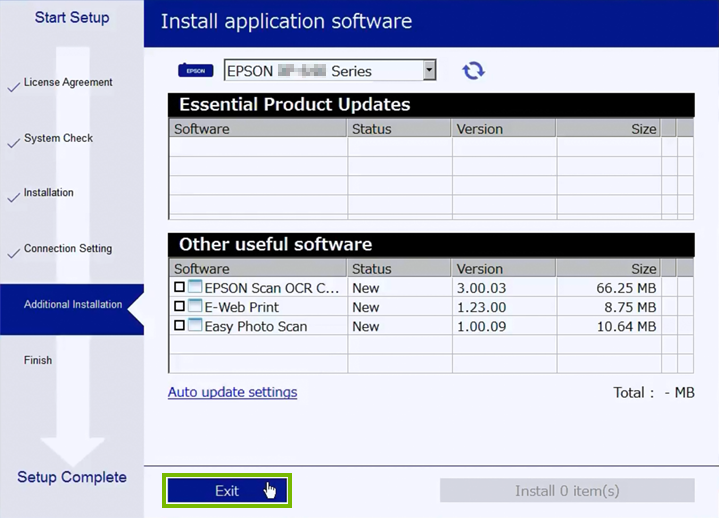
Put a checkmark in front of every extra programs' name that you want to update then click on Install. Click on OK once on the confirmation box once everything you selected was installed.
If you're done updating or you don't want to update anything then click on Exit.
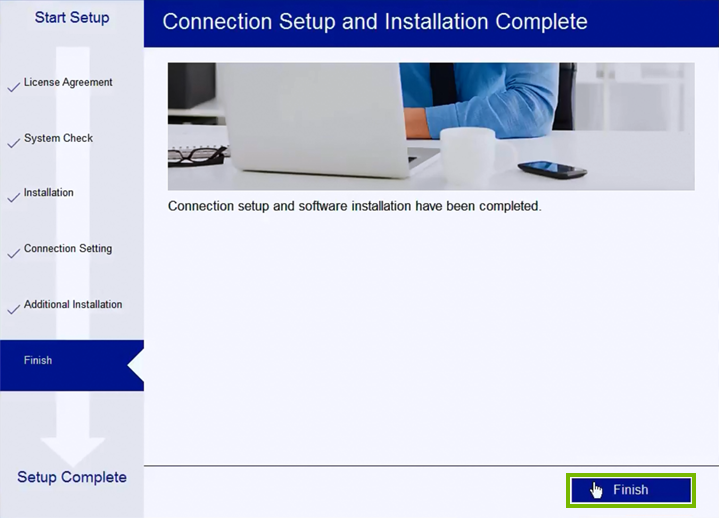
Your printer is now set up. Click on Finish to exit the installer.
7. Connect via USB (Prep)
This is just a preparatory step. Only perform it when requested by the installation software.
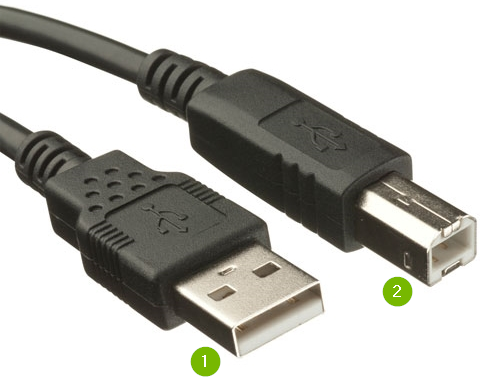
Acquire a USB cable compatible with the printer. One end (1) goes into the computer and the other end (2) goes into the printer.
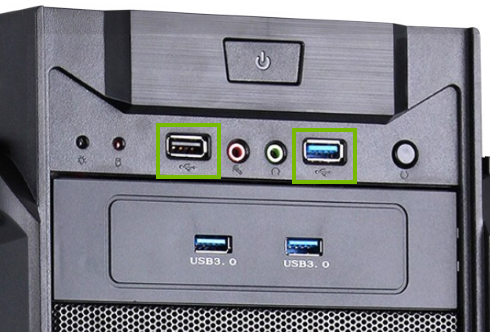
Locate the USB ports on the front, back or sides of the computer.
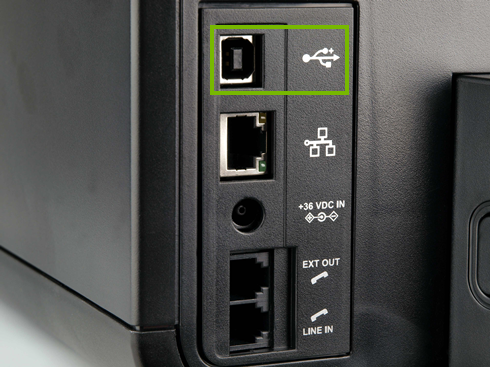
Locate the USB port on the side or back of the printer. Make sure not to confuse it with the any other ports that might be next to it. Look for the USB symbol next to the port. The number and layout of the ports varies by printer.
8. Download Software
Using your computer's web browser, navigate to the Epson website.
Click on USA within region selection.
Click on Support.
Type in your printer's model number into the search box and click Search.
If you are having trouble locating your printer's model number, check on the rear of the printer for it's informational sticker.
From your printer's support page, click the Download button on the driver package For First Time Install.
Your download should begin. Depending on what browser you've used, you may have to click Run or Save to continue, or simply click the file that's downloaded to launch the installer.
If the installation does not automatically begin, you may have to open the file manually.
Take note of the name of the file that was downloaded.
Windows OS - files typically download to your Downloads folder.
Mac OSX - files typically download to the Downloads folder in the Dock.
Click on File Explorer from your taskbar.
Click the Downloads folder underneath Quick access in the left-hand column. Then, locate and double-click the installation file that downloaded.
The software installation should now begin.
9. Connect via USB
To install your Epson printer locally using a USB cable:
Launch the installer from the CD that came with your printer or from the file you downloaded using your internet browser.
Check the box to accept the license agreement and click on Next.
Once the installer checks your system click on Next.
Wait for the essential software to be downloaded.
Read through the provided information and click on Next.
Wait for the essential software to be installed.
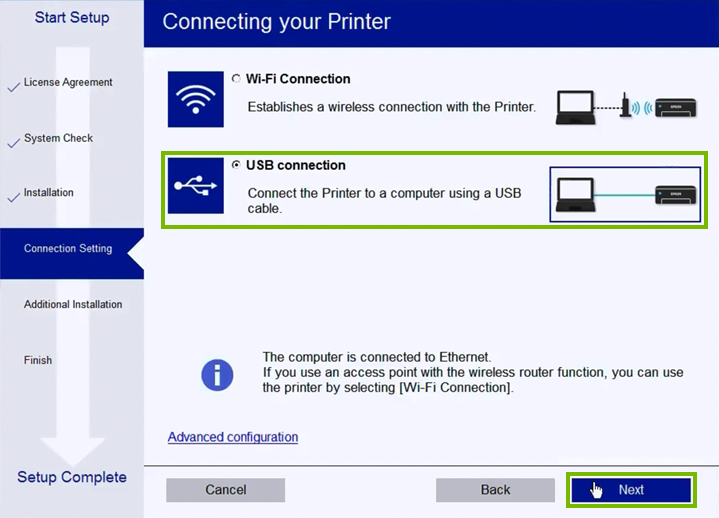
Select the USB connection type and click on Next.
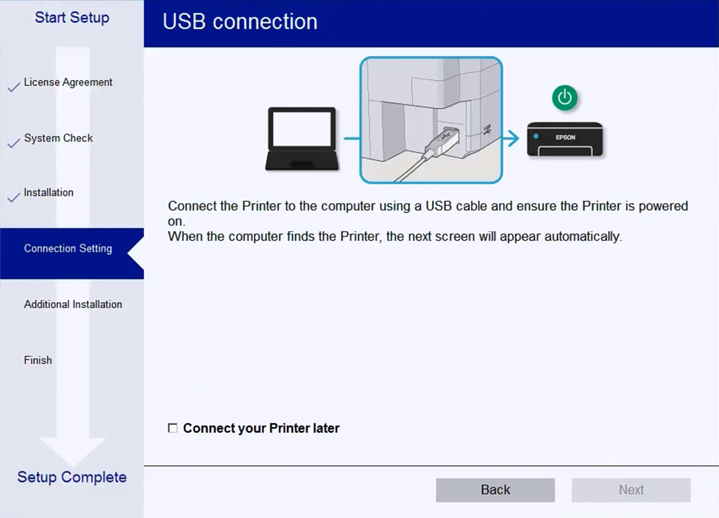
Connect the printer to your computer using a USB cable and make sure it's turned on.
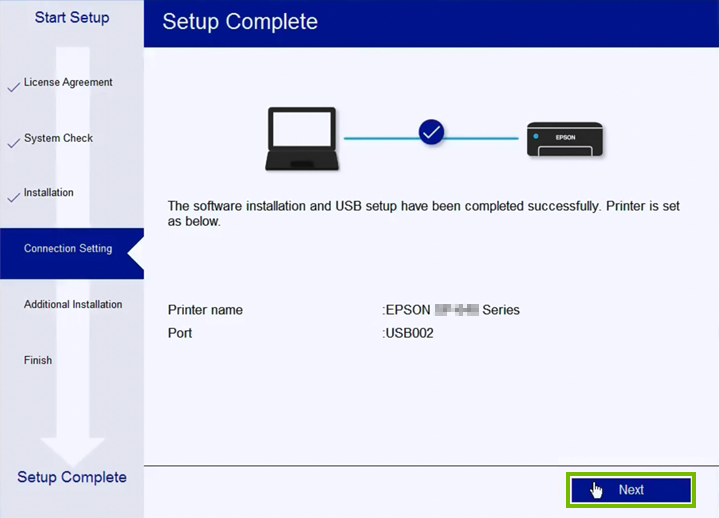
Once the printer is detected and connected to the computer, click on Next.
Click on Print Test Page if you'd like to try out the printer or click on Next to continue.
Put a checkmark in front of every extra programs' name that you want to update then click on Install. Click on OK once on the confirmation box once everything you selected was installed.
If you're done updating or you don't want to update anything then click on Exit.
Your printer is now set up. Click on Finish to exit the installer.
.png)