When you work with a lot of documents at once, or find yourself with a lot of windows open, it can become welcome, if not necessary, to have more display room for your work all at once on your computer. Rather than buy a single, larger monitor, you can use a second one to display either the same or different windows.
This guide will take you through the basics of setting up a second monitor for your computer.
2. Setup and Hardware Requirements
Our first step is to be sure we have all the necessary physical hardware available.
On Your Desk
Make sure there's enough space for both monitors.
Make sure you can still reach your keyboard and mouse comfortably.
Make sure you can see both monitors when you sit down.
For Each Monitor
Each monitor will need the following:
A power cable or adapter, and an outlet to plug it in.
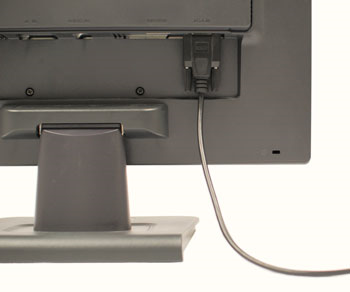
A cable to connect to your computer that fits one of the ports on your monitor.
Desktop
Laptop
For Your Computer
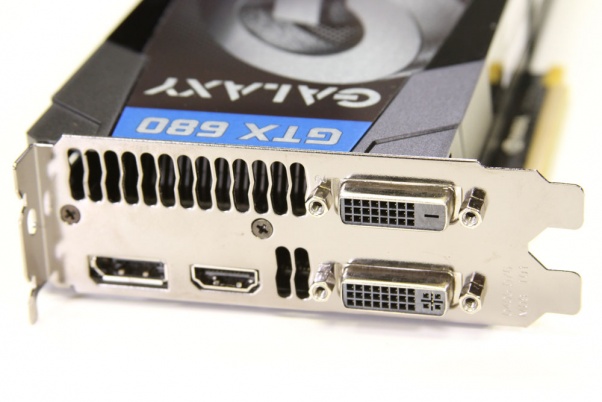
A port for each monitor.
Graphics cards and laptops may have multiple monitor hookups.
The ports on your computer must match the cables coming from both your monitors.
For DisplayPort, you can 'daisy chain', or connect one monitor through another if both the computer and one of the monitors supports it.
For laptops where you intend to use the built-in display as one of your monitors, you only need one place to plug in the second monitor on the laptop.
Adding another monitor adds, at minimum, two more cables to your computer setup. Please be sure these cables will not be caught or snagged by your chair, desk, or people walking by.
3. Connect Monitor
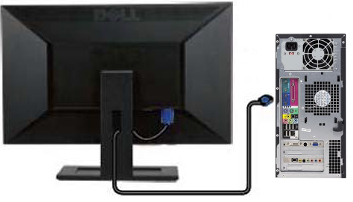
Connect the video cable to your monitor.
Connect the other end of the video cable to your computer.
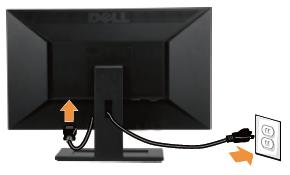
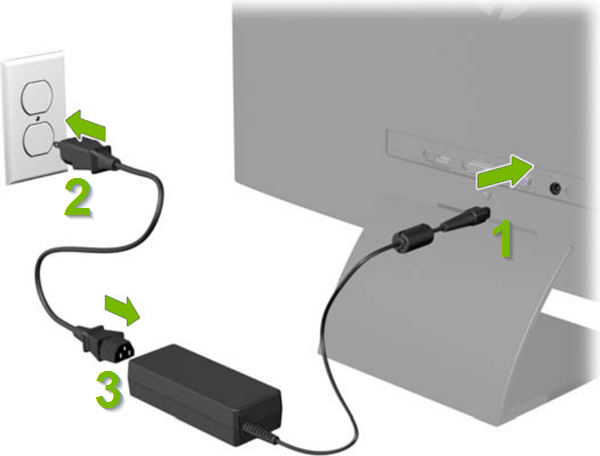
Connect power to your new monitor:
One connector (1) plugs into the monitor.
The other connector (2) plugs into a power socket.
And sometimes, a third (3) connector plugs into the supply itself.
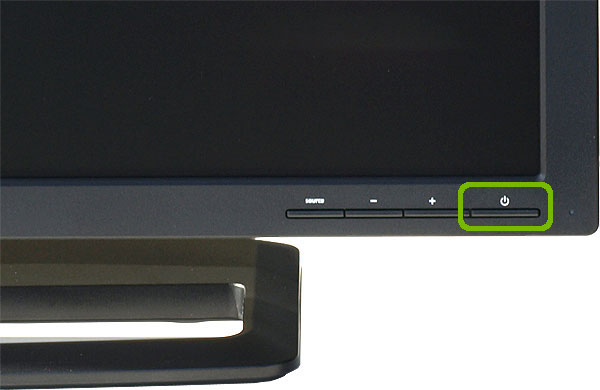
Turn on your monitor.
Turn on your computer.
Setting up multiple monitors on a computer can significantly enhance your productivity and provide a more immersive experience for gaming or multimedia. Whether you're using a Mac or a PC, configuring a dual or multi-monitor setup is straightforward. In this blog, we'll cover the steps to set up multiple monitors on both types of systems.
Setting Up Multiple Monitors on a PC
1. Check Your Graphics Card
Compatibility: Ensure that your graphics card supports multiple displays. Most modern graphics cards do.
Ports: Check the available ports (HDMI, DisplayPort, DVI, VGA) on your graphics card.
2. Connect the Monitors
Cable Connection: Connect each monitor to the appropriate port on your graphics card using the right cable (HDMI, DisplayPort, DVI, or VGA).
Adapters: If your graphics card and monitors have different ports, you may need adapters (e.g., DVI to HDMI).
3. Configure Display Settings
Windows Settings: Right-click on the desktop and select "Display settings."
Arrange Monitors: Drag and drop the displayed monitors to arrange them as they are physically set up.
Choose Primary Monitor: Select which monitor you want as your primary display.
Adjust Resolution and Orientation: Customize the resolution and orientation for each monitor according to your preference.
4. Choose Display Mode
Extend These Displays: This mode extends your desktop across all monitors.
Duplicate These Displays: Shows the same content on all monitors.
Show Only on 1 or 2: Chooses which monitor to display on and turns off the others.
Setting Up Multiple Monitors on a Mac
1. Check Port Availability
Monitor Ports: Identify the ports available on your Mac (Thunderbolt, HDMI, USB-C).
Adapters: You may need adapters if your Mac and monitors don't share the same types of ports.
2. Connect the Monitors
Connect Using Cables: Connect each monitor to the ports on your Mac. You might need to use Thunderbolt or USB-C hubs if you have multiple monitors and limited ports.
3. Configure Your Displays
System Preferences: Go to the Apple menu, then "System Preferences," and choose "Displays."
Arrangement Tab: Under the 'Arrangement' tab, you can set up your monitors' relative positions. Drag and drop the displays to match their physical arrangement.
Set Primary Display: Drag the white menu bar to the monitor you want to designate as the primary display.
Resolution and Orientation: Customize the resolution and orientation for each monitor.
4. Consider Using DisplayLink
For More Monitors: If you want to connect more monitors than you have ports for, consider using a DisplayLink adapter. This allows you to connect additional monitors via USB.
General Tips for Multi-Monitor Setup
Desk Space: Ensure your desk has enough space to accommodate multiple monitors comfortably.
Cable Management: Keep your cables organized for a clean and efficient workspace.
Monitor Stands or Mounts: Using monitor stands or mounts can help save desk space and provide ergonomic viewing angles.
Calibrate Your Displays: If you're using the setup for professional work like graphic design or video editing, consider calibrating your monitors for color accuracy.
Test Your Setup: After setting everything up, test your configuration with your usual applications to make sure everything works smoothly.
Conclusion
Setting up multiple monitors on your computer, whether it's a Mac or a PC, can dramatically change your computing experience. It's important to check the compatibility of your hardware and then properly connect and configure your monitors through the system settings. With some organization and calibration, you'll be well on your way to enjoying the benefits of a multi-monitor setup.
Contact Support.Com
If you are still having trouble, refer to the Step-By-Step Guide below, or Contact Support.Com for Personalized Assistance.
4. OS Choice
To continue, we need to know what Operating System your computer is using.
There are 2 main Operating Systems for personal computers currently available, Microsoft Windows and Apple macOS.
Microsoft WindowsApple macOSMicrosoft Windows runs on computers produced by multiple companies, such as Lenovo, Asus, Dell, Toshiba, Hewlett Packard, Acer, and Sony.Apple is the only company that makes macOS computers.
5. Version Check
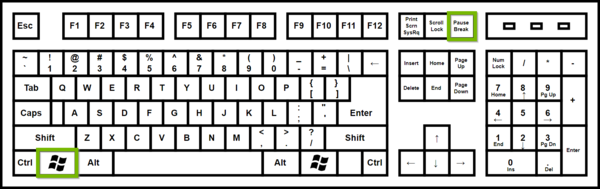
For the next steps, we'll need to determine which version of Windows you're running.
On your keyboard, hold the Windows key then tap Pause/Break.
A System Properties window will appear with your version of Windows.
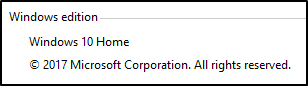
System Properties will also show which edition of Windows you have. Pictured below is Windows 10 Home Edition.
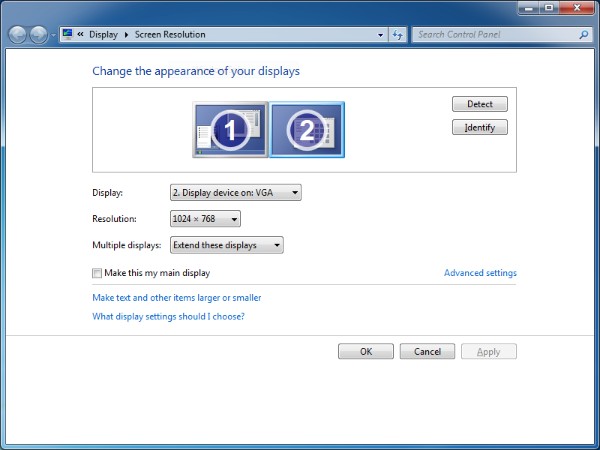
6. Manage Settings
Screen Resolution Settings
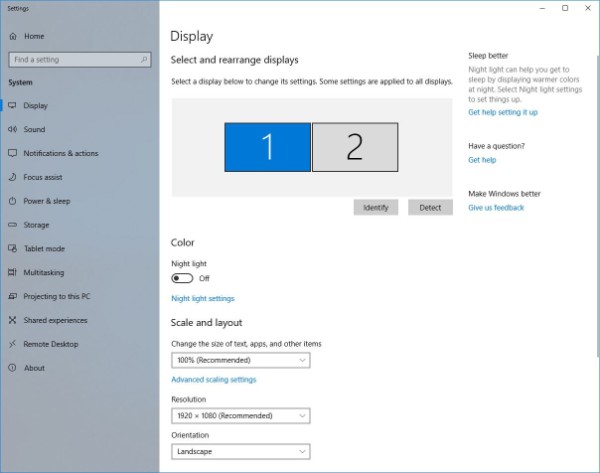
To manage your monitor settings, right click on a blank area of your desktop and click on Display Settings..
Detect Monitors
Your monitors should both show up automatically.
If you monitors don't show up automatically click the Detect button to scan for changes.
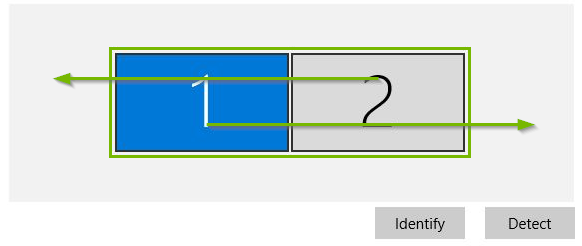
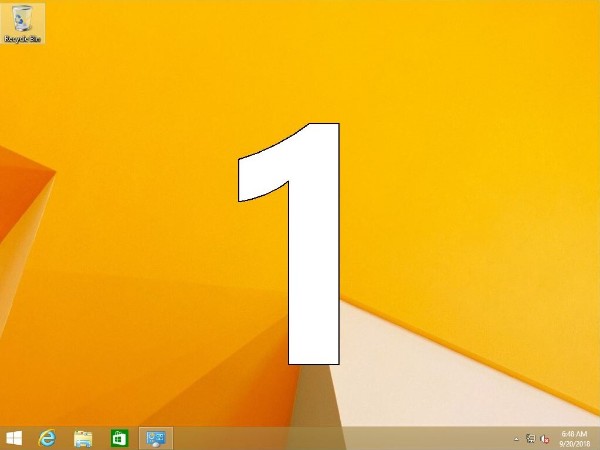
Identify Monitor
If you're unsure which monitor is which, you can Identify the monitor by clicking Identify.
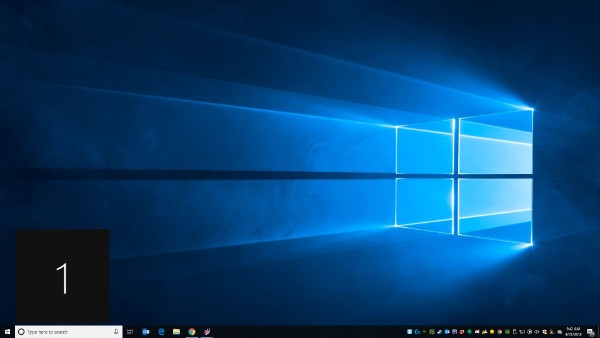
You will see the monitor number show up in the bottom left corner of the screen.
Positioning Your Monitor
You can position your monitors by dragging the monitor to rearrange how they show up.
Monitors can be positioned both vertically and horizontally.
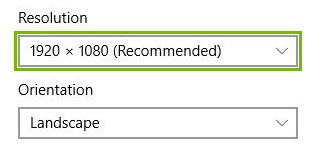
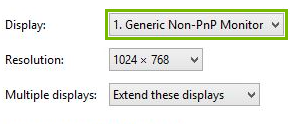
Set Monitor Resolution and Orientation
Make sure you have selected the correct monitor from the Display menu.
Select the resolution you want for your monitor from the Resolution Menu.
Choose the orientation or your monitor.
Manage Monitor Functionality
Make sure you have selected the correct monitor from the Display menu.
Choose how you would like your additional monitor to function from the Multiple displays menu..
ExtendAllows you use your additional monitor for additional screen.MirrorWill duplicate the contents of another monitor.
If you choose to extend your display, you can pick your primary monitor by clicking the box that says Make this my main display.
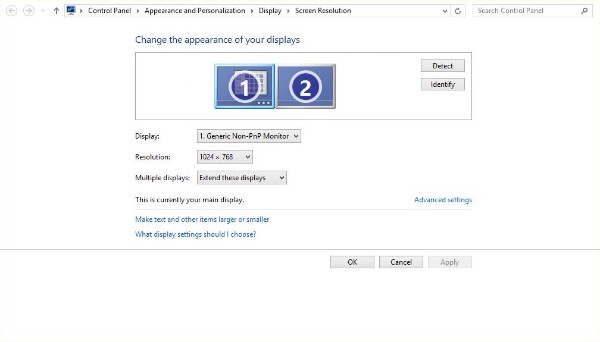
7. Manage Settings
Screen Resolution Settings
To manage your monitor settings, right click on a blank area of your desktop and click on Screen Resolution .
Detect Monitors
Your monitors should both show up automatically.
If you monitors don't show up automatically click the Detect button to scan for changes.
Identify Monitor
If you're unsure which monitor is which, you can Identify the monitor by clicking Identify.
You will see the monitor number show up in the center of the screen.
Positioning Your Monitor
You can position your monitors by dragging the monitor to rearrange how they show up.
Monitors can be positioned both vertically and horizontally.
Set Monitor Resolution
Make sure you have selected the correct monitor from the Display menu.
Select the resolution you want for your monitor from the Resolution Menu.
.
Manage Monitor Functionality
Make sure you have selected the correct monitor from the Display menu.
Choose how you would like your additional monitor to function from the Multiple displays menu..
ExtendAllows you use your additional monitor for additional screen.MirrorWill duplicate the contents of another monitor. If you choose to extend your display, you can pick your primary monitor by clicking the box that says Make this my main display.
8. Manage Settings
Screen Resolution Settings
To manage your monitor settings, right click on a blank area of your desktop and click on Screen Resolution .
Detect Monitors
Your monitors should both show up automatically.
If you monitors don't show up automatically click the Detect button to scan for changes.
Identify Monitor
If you're unsure which monitor is which, you can Identify the monitor by clicking Identify.
You will see the monitor number show up in the center of the screen.
Positioning Your Monitor
You can position your monitors by dragging the monitor to rearrange how they show up.
Monitors can be positioned both vertically and horizontally.
Set Monitor Resolution
Make sure you have selected the correct monitor from the Display menu.
Select the resolution you want for your monitor from the Resolution Menu.
.
Manage Monitor Functionality
Make sure you have selected the correct monitor from the Display menu.
Choose how you would like your additional monitor to function from the Multiple displays menu..
ExtendAllows you use your additional monitor for additional screen.MirrorWill duplicate the contents of another monitor.
If you choose to extend your display, you can pick your primary monitor by clicking the box that says Make this my main display.
9. Manage Settings
Click on the Apple menu and click System Preferences.
Click on Displays.
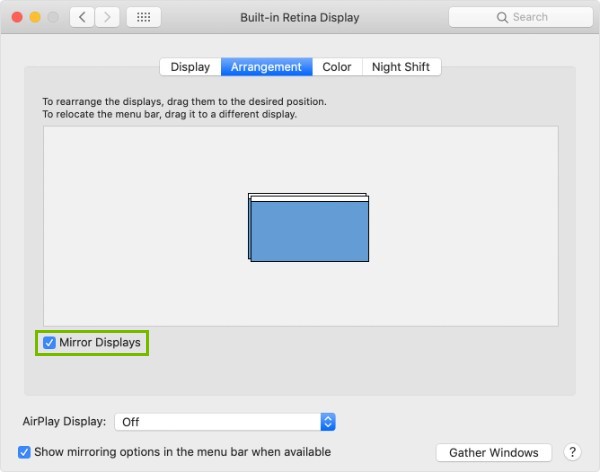
Extended Display
You can maximize your workspace with extended desktop mode, which lets you enjoy full-screen apps and windows on each monitor.
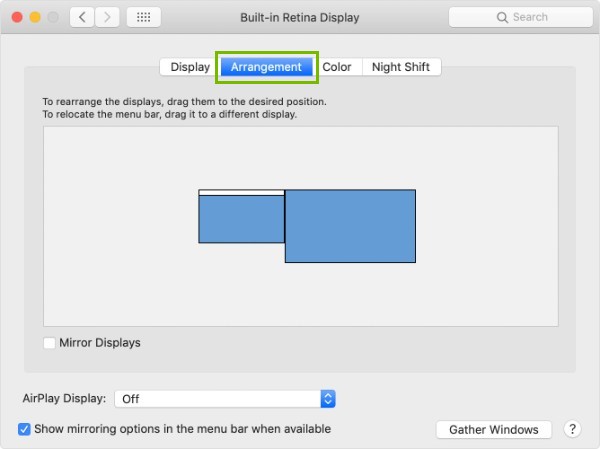
Click on the Arrangement tab.
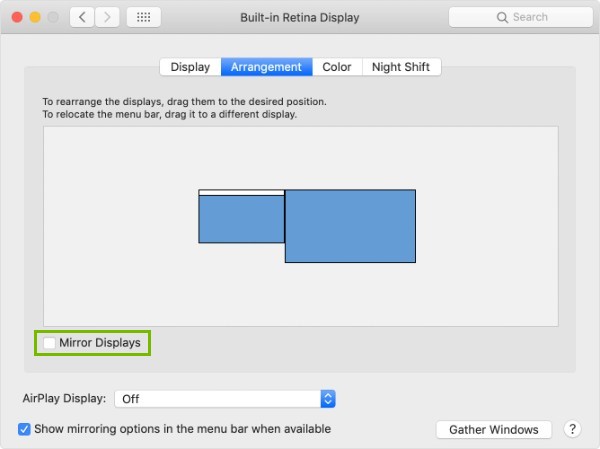
Make sure that Mirror Displays is unchecked.
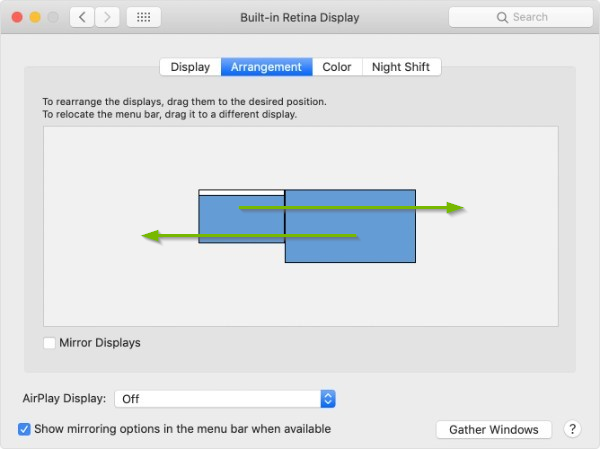
You can position your monitors by dragging the monitor to rearrange how they show up.
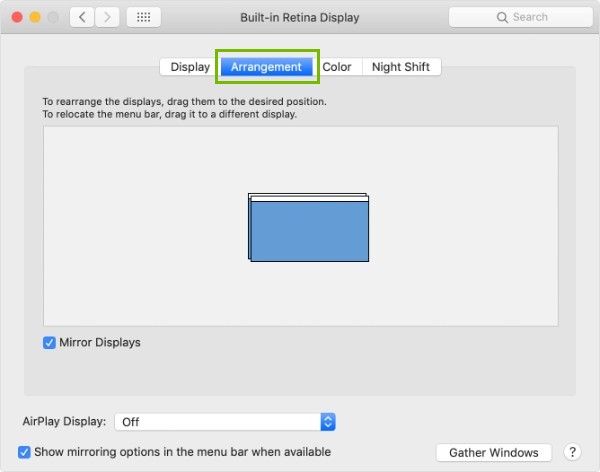
Mirrored Display
With video mirroring, all of your displays will show the same apps and windows.
Click the Arrangement tab.
Make sure Mirror Displays is checked.
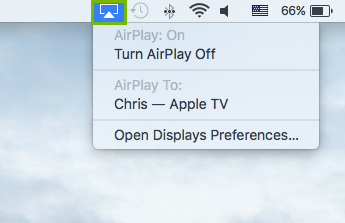
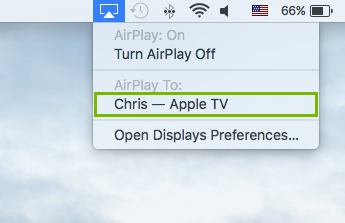
Using Airplay
If you have a compatible AirPlay device, you can choose to mirror or extend the display to it.
.png)