How to Set Up Parental Controls on a Nintendo Switch
Authored by: Support.com Tech Pro Team
1. Introduction
In This Guide
You'll Learn How To:
Understand what Parental Controls are.
Understand the ESRB rating system.
Change what kind of content a restricted Switch can access.
Before We Begin:
Have access to your Switch.
Have access to your Smartphone.
2. ESRB Ratings
The Entertainment Software Rating Board (ESRB) ratings provide guidance about video games and apps so that you can make informed choices about the ones you deem suitable for your family.
The ESRB is a single group, and only provides opinions on content. They are there to help give you an overview of the themes present in a game, not make decisions what is best for your child.
Parts of ESRB Ratings
Rating Categories suggest age appropriateness.
Content Descriptors indicate content that may have triggered a particular rating and/or may be of interest or concern.
Interactive Elements highlight interactive or online features of a product, including users' ability to interact with each other, the sharing of users' location with other users, if purchases of digital goods or services are offered, and/or if unrestricted internet access is provided.
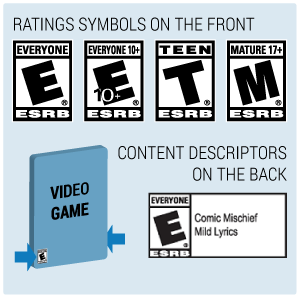
You can find the ESRB ratings on the front of physical games, with the content descriptor on the back.
Box Front
A small logo will be printed on the front of the game box, or prominently in the online store for the game.
Rating Pending
Games, but usually just promotional material for games, that the ESRB hasn't rated yet.
Early Childhood
Games designed for a preschool audience. No content that parents would find objectionable.
Everyone
Games that the ESRB believes to be "generally suitable for all ages". There may be infrequent mild or cartoon violence.
Everyone 10+
Games that the ESRB believes is still acceptable to everyone, but may have more mild or cartoon violence, mild language, crude humor, or suggestive content.
Teen
Games the ESRB finds suitable for teenagers. Things such as a moderate amount of violence, some language or adult themes, and crude humor.
Mature
Games the ESRB believes is generally suitable for people 17 or over. Realistic violence, strong adult themes, language, and so forth.
Adults Only
Games the ESRB believes are only suitable for adults 18 and over. Adult themes throughout, graphic depictions of adult themes, violence, and gambling with real-world money.
Content Descriptor
On the back of the box, a more expanded list of information about the rating, and a small list of why the rating was given is shown.
The primary information is repeated, here, just like the logo on the front. To the right, further information detailing what, exactly, gave it that rating. This is so you can make a more informed decision for your child.
ESRB For further information, as well as to check the ratings before leaving home, you can always check the ESRB Website.
Parental Controls are a method you to customize or use preset options to control and restrict various settings on your Switch.
With Parental Controls you can:
Restrict certain game content
Prevent the purchase of new games and content
Restrict social media posting
Restrict communication with other users
Additionally, with the Nintendo Switch Parental Control App you can:
View the games that have been played on the system
Set a daily time limit
Place a timer and schedule game time
Parental Controls are based on the console itself, not on the users. If you encounter your own restriction, don't worry, you can use your chosen pin number to override it.
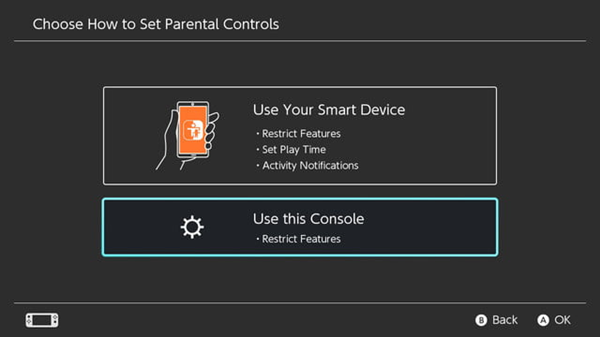
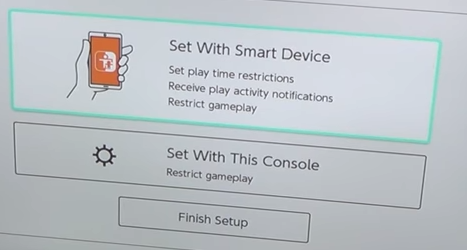
When you initially set up your Switch you were given the choice between whether to set up your Parental Controls by using a mobile device or the console.
But you can choose to set up and change Parental Controls at any time.
4. Android or iOS
For the next steps, we need to determine what type of mobile device you have.
5. Install Android App
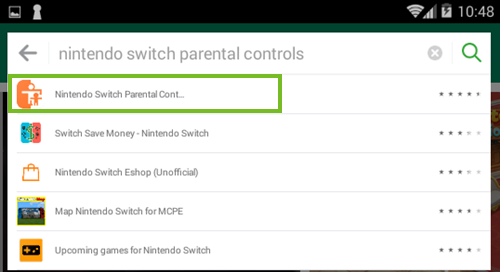
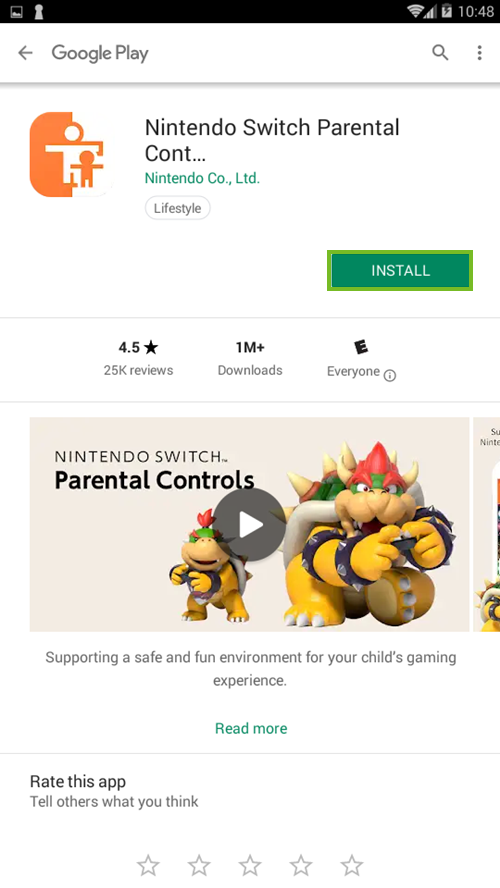
Launch the Play Store on your smartphone.
Select the search bar at the top.
Type in Nintendo Switch Parental Controls, then select Nintendo Switch Parental Controls from the list.
Select Install.
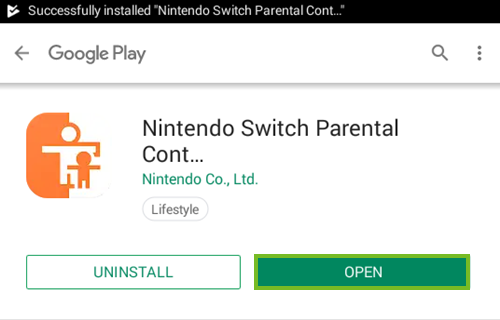
Select Open to open the app.
6. Link Switch to the App
On Your Smart Device
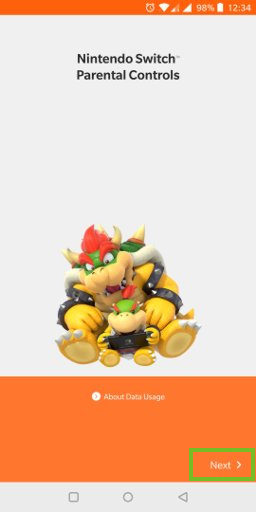
Launch the Nintendo Switch Parental Controls app.
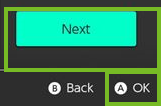
Select Next on the title screen.
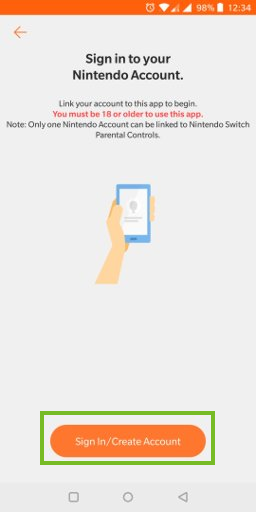
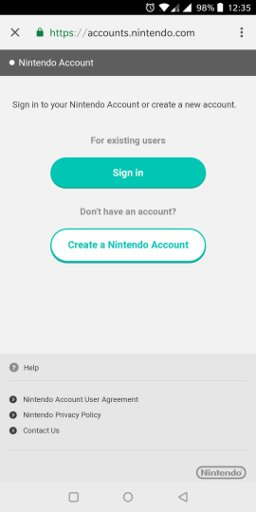
Tap Sign In / Create Account.
The application will launch http://accounts.nintendo.com in the device Internet browser. Sign in to your existing Nintendo Account or create a new one.
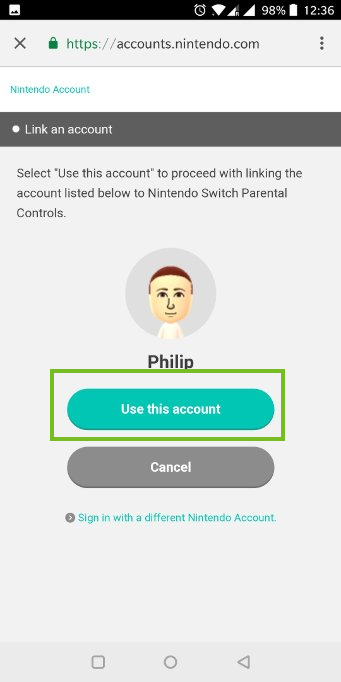
Your Nintendo Account nickname will appear on the screen. Select Use this account to confirm.
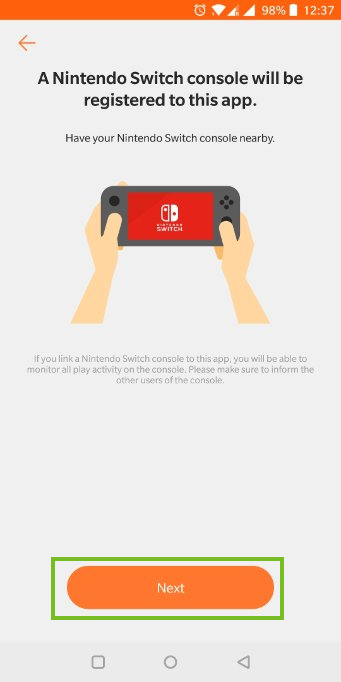
You will be returned to the Nintendo Switch Parental Controls application. Select Next.
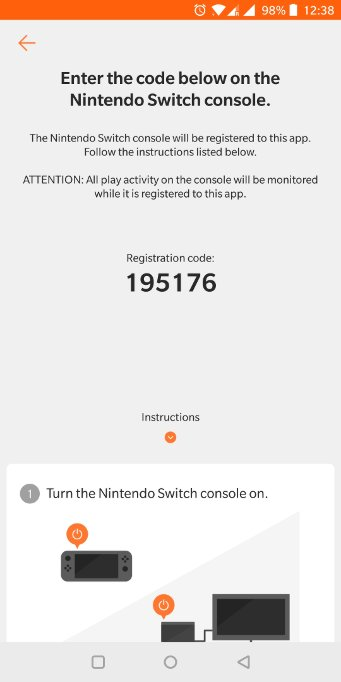
A Registration Code will appear on the screen of your smart device.
On Your Switch
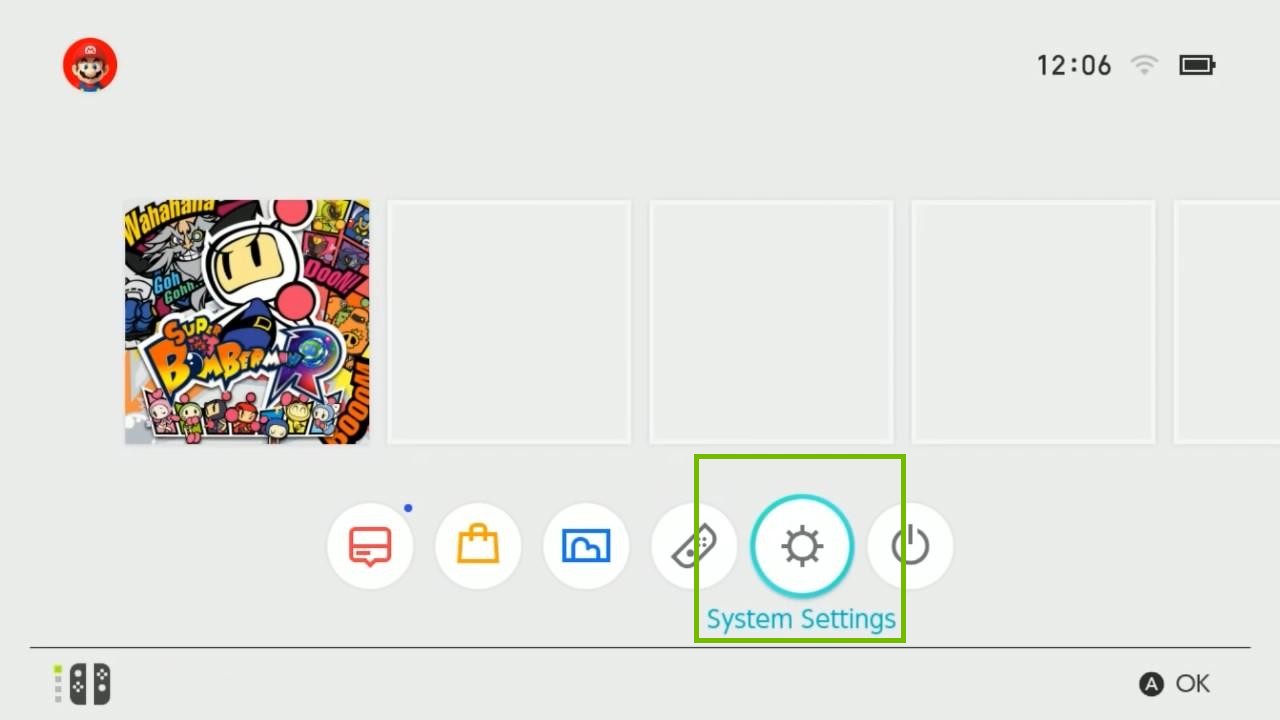
Use the Registration Code to link your Nintendo Switch system to your smart device. On the Nintendo Switch console, select System Settings from the HOME Menu.
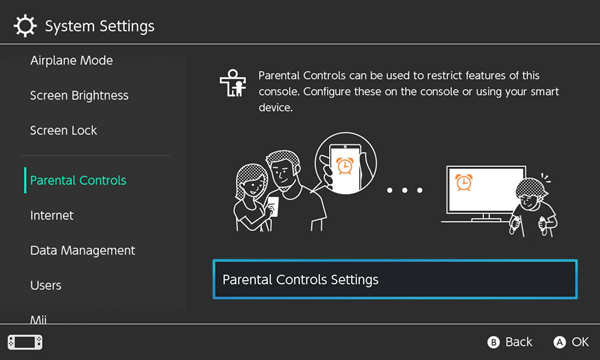
Scroll down to highlight Parental Controls, then select Parental Controls Settings.
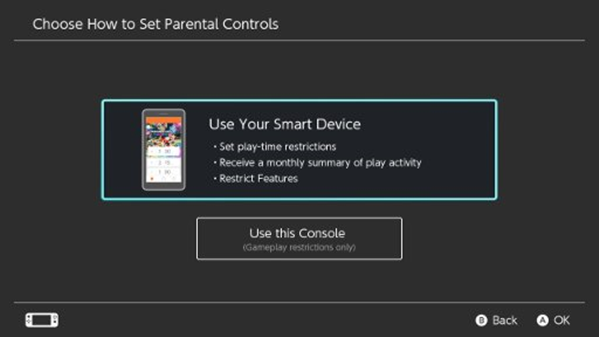
Select Use Your Smart Device.
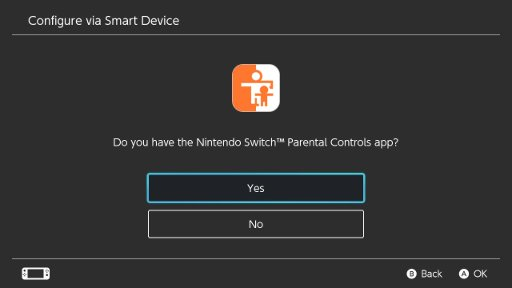
Select Yes to verify that you have the Nintendo Switch Parental Controls app.
Enter the six-digit Registration Code from your smart device. Select OK.
Select Register to link the Nintendo Switch to your smart device.
Return to Your Smart Device
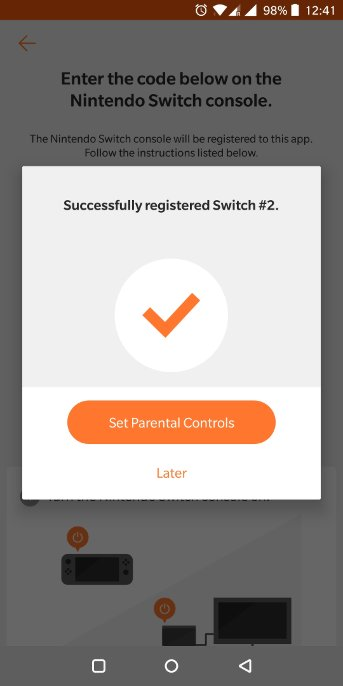
Make sure the Nintendo Switch Parental Controls app is open.
The app will tell you when your Switch is successfully registered. From here you can choose whether to begin setting restrictions or to so later.
7. Set Restrictions
Important: Nintendo eShop restrictions, including restriction of spending/purchases, must be set in the Nintendo Account settings.
Launch the Nintendo Switch Parental Controls app.
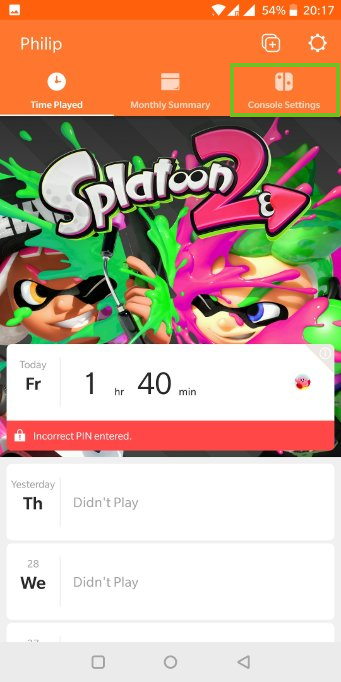
Select Console Settings in the upper-right corner.
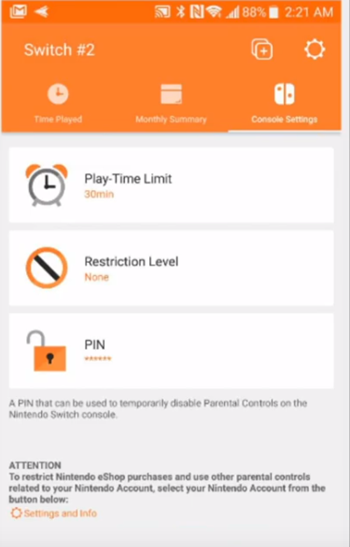
If you have more than one Nintendo Switch console linked to the app, tap the (+) icon in the upper-right corner to choose the correct system.
Select each setting you want to adjust:
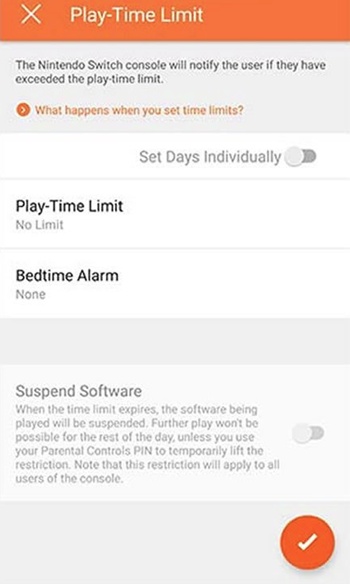
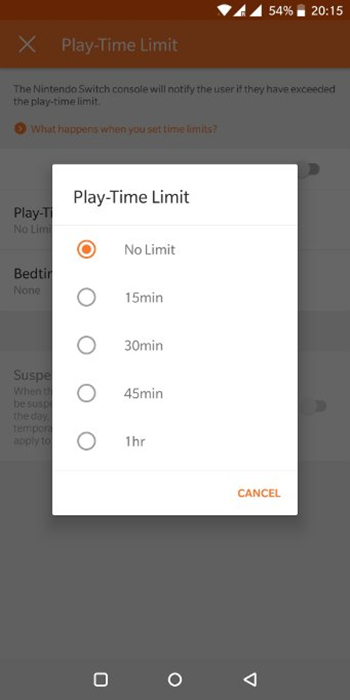
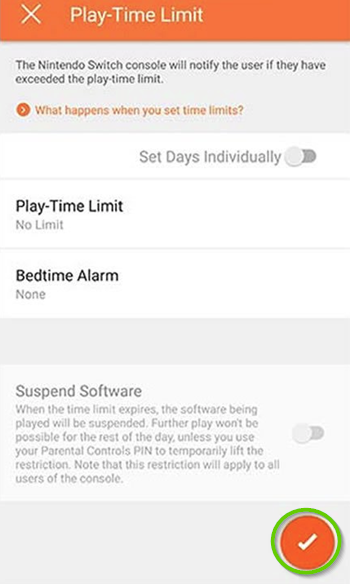
Play-Time Limit - If you have a Play-Time Limit and a Bedtime Alarm enabled, the system will use whichever time limit comes first.
Play-Time Limit - Set a daily limit on the amount of time the Nintendo Switch console can be used (from No Limit up to 6 hours). You can also choose to remove the restriction for a specific day.
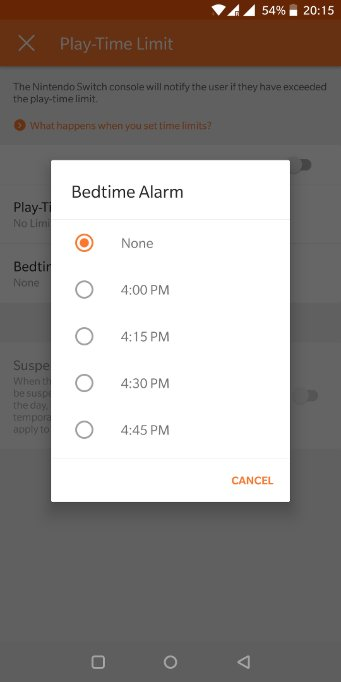
Bedtime Alarm - Set gameplay to stop at a certain time each day (between 6:00 PM - 11:45 PM).
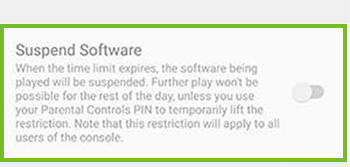
Suspend Software - When this is turned on, the software on the system will be stopped when the time limit is reached. Otherwise, a notification will appear when the limit is reached, but software will still be playable.
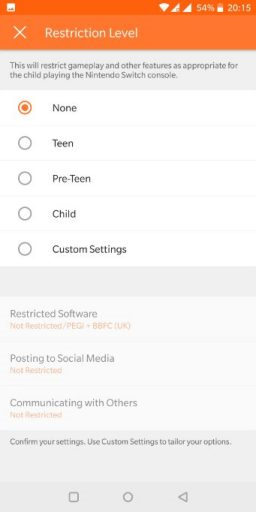
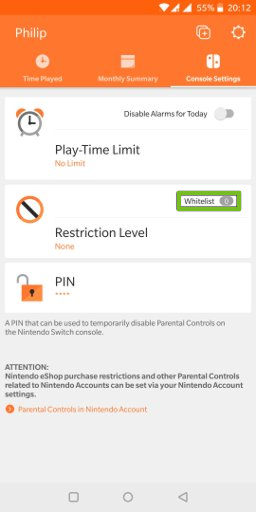
Restriction Level - Choose from preset restrictions by age or select "Custom Settings" to manually adjust the settings. You can also manage your whitelisted titles.
Whitelist – Select "Whitelist" to exclude specific software titles from Parental Controls Restricted Software settings. (Compatible with Nintendo Switch systems updated to ver 5.0 or higher.) Whitelisted games can be played on the system without entering a Parental Controls PIN. Whitelisted games are still subject to any restrictions set for daily Play Time Limits.
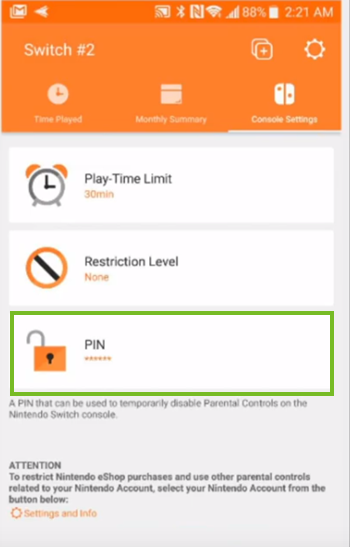
PIN - View or change the Parental Controls PIN for the console.
Once you have adjusted the settings as desired, tap the orange check mark on the screen to confirm.
The restriction(s) will be activated as soon as the Nintendo Switch console connects online.
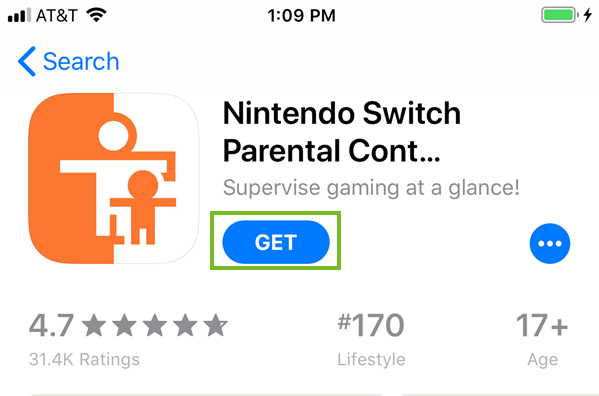
8. Install iOS App
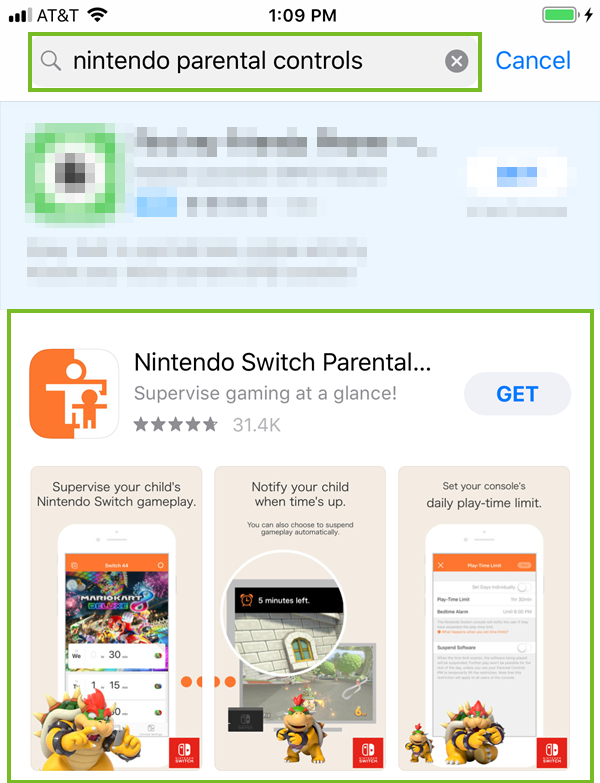
Open the App Store.
Select Search in the bottom right corner.
Type in Nintendo Switch Parental Controls, and select Nintendo Switch Parental Controls from the list.
Select Get for Nintendo Switch Parental Controls.
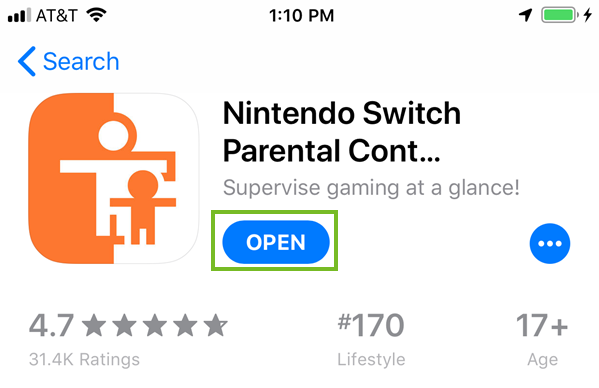
Select Open.
9. Set Parental Control Restrictions
Important: Nintendo eShop restrictions, including restriction of spending/purchases, must be set in the Nintendo Account settings.
Setting Up Parental Controls For The First Time
Select SystemSettings on the HOME Menu.
Scroll down to highlight Parental Controls, then select ParentalControlsSettings.
Select UsethisConsole.
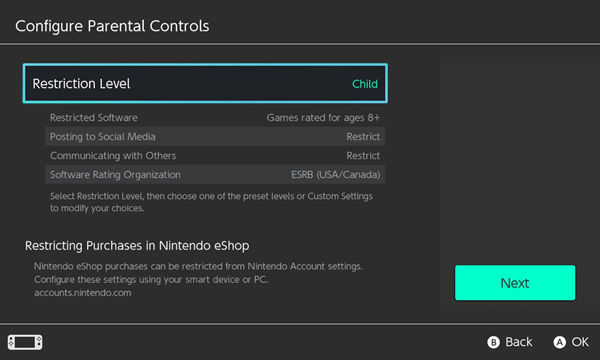
Select RestrictionLevel. You can choose from preset restrictions by age.
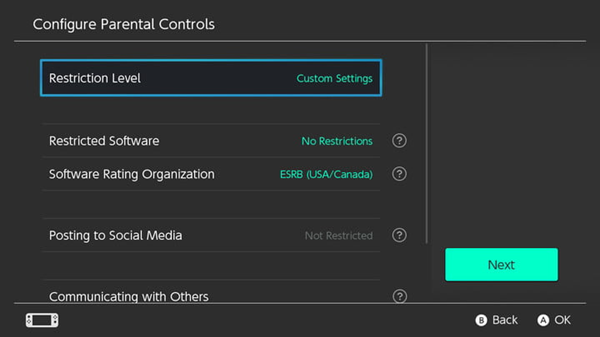
Or select Custom Settings to manually adjust the settings.
Select each setting that you want to adjust:
Restricted Software - Restrict software by age based on each game’s ESRB rating category. Select "Restricted software," then choose the age you would like to restrict software for (6+, 13+, etc). Additionally, videos captured using restricted software will not be viewable in the album.
Software Rating Organization - Adjust the software rating organization that software restrictions are based on (ESRB, PEGI, etc). This defaults to the appropriate organization for your region.
Posting Screenshots / Videos to Social Media - Disable the ability to share images and videos from Nintendo Switch on social media. Toggle between "Restricted" or "Not Restricted."
Communicating with Others - Restrict open communication between users, including chat features and exchanging messages. You can toggle between "Restricted" or "Not Restricted" for all software on the system, or adjust the settings for specific software.
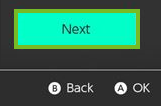
Once the restrictions are set as you want them, select Next.
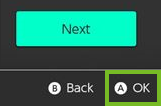
Then select OK to confirm.
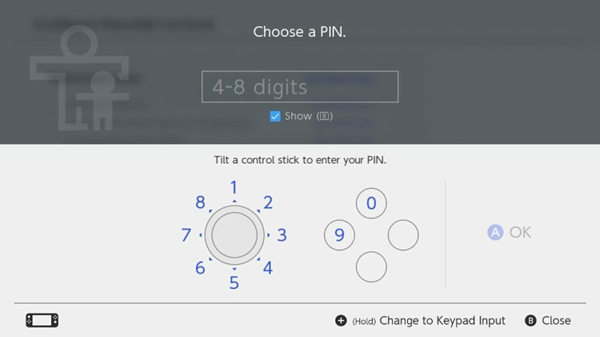
Choose a PIN number (between 4 and 8 digits long), then select OK.
If you use the Control Stick Input (default), each direction of the Control Stick is a number (1 - 8), the Y Button is 9, and the X Button is 0.
If you would prefer to enter the PIN using a number pad, hold the (+) Button ("Keypad Input") then use the onscreen number pad to enter your PIN.
Re-enter the PIN to confirm, then select OK.
Changing or Updating Your Parental Controls
Select System Settings on the HOME Menu.
Scroll down to highlight Parental Controls, then select Parental Control Settings.
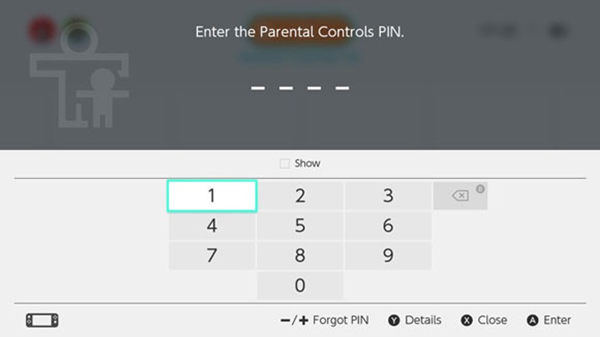
Enter the Parental Control PIN number for the system.
Select each setting that you want to adjust:
Restriction Level - Choose from preset restrictions by age or select “Custom Settings†to manually adjust the settings. Additionally, videos captured using restricted software will not be viewable in the album.
Software Rating Organization - Adjust the software rating organization that software restrictions are based on (ESRB, PEGI, etc). This defaults to the appropriate organization for your region.
Posting Screenshots / Videos to Social Media - Disable the ability to share images and videos from Nintendo Switch on social media. Toggle between "Restricted" or "Not Restricted."
Communicating with Others - Restrict open communication between users, including chat features and exchanging messages. You can toggle between "Restricted" or "Not Restricted" for all software on the system, or adjust the settings for specific software.
Once the restrictions are set as you want them, select Next, then select OK to confirm.
Remove Hidden Spyware In Minutes For Free
Detect and remove spyware, keyloggers, tracking cookies, and other
threats that slow down your PC or steal your data.
65+ Million Downloads
Spyware scanner with AI-powered detection engine + database
.png)