How to Set Up Parental Controls on a TP-Link Router
Authored by: Support.com Tech Pro Team
1. Introduction
In This Guide
You'll Learn:
How to set Parental Controls on your TP-Link Router.
You'll Need:
A computer or mobile device to navigate the router's web interface.
The administrative login credentials to gain access to the router's web interface.
2. Introduction
Parental Controls are features that may be available on computers, mobile devices, gaming consoles, media players, television sets or networking devices, that help parents reduce the risk of their children encountering unwanted or inappropriate content for their age or maturity level while using any of the above mentioned devices. The types of Parental Controls available can vary depending on device type, manufacturer, model or software being used.
Using Parental Controls is only an extra step in helping parents protect their children. Active, engaged parenting is essential in helping children develop good habits. Working with the children, talking to them and encouraging responsible behaviour is critical.
3. Login
Launch the browser that you use to go online on your computer or mobile device.
Log in with the administrator password set on your router. Depending on the router model you may need to enter the administrator user name as well.
This is the device administration login password which is different from the Wi-Fi connection password.
4. Parental Controls UI Selection
Depending on the model of your TP-Link router and the firmware version it runs on, you may configure the Parental Controls settings in two different ways. To take the correct path within our guide, you'll need to do the following once you've logged into your router's web interface:
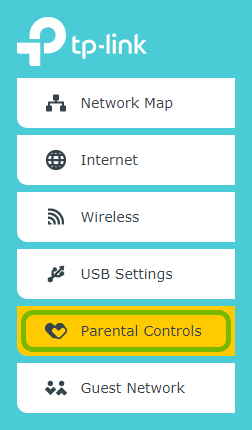
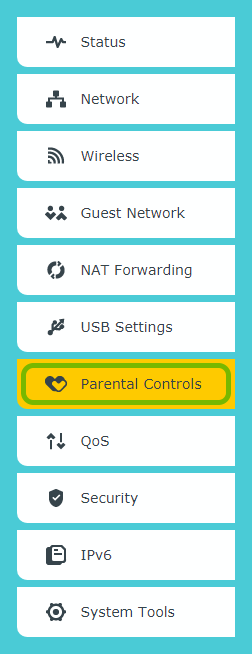
Select Parental Controls from the menu on the left side.
Check if there is a Status toggle option to the right of the menu.
5. Add Device to Parental Controls
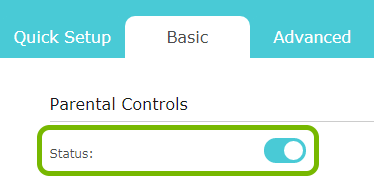
Enable Parental Controls
Toggle on the Parental Controls Status.
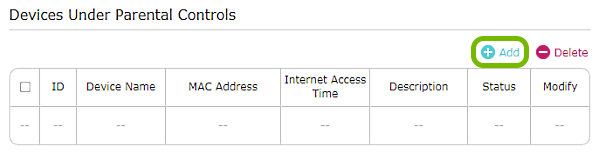
Add Devices
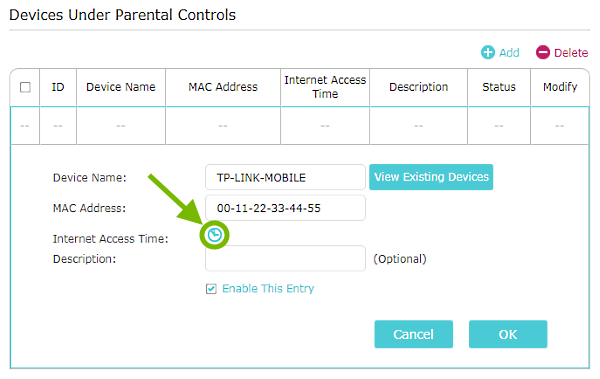
Select Add under the Devices Under Parental Controls heading.
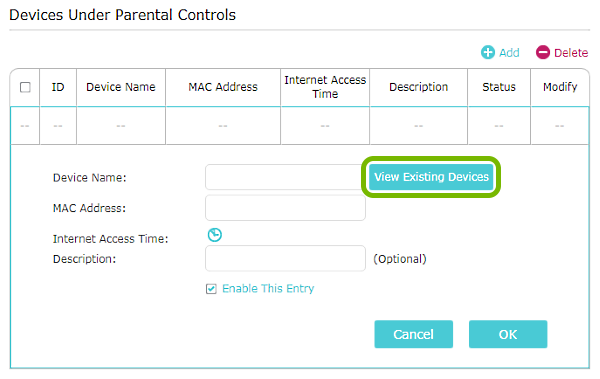
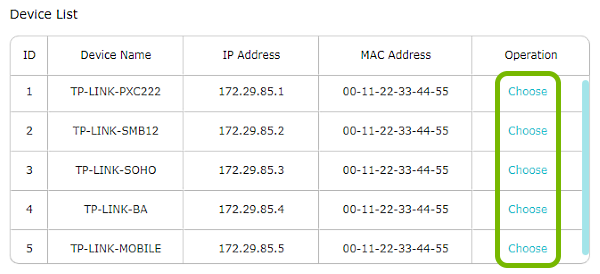
Select View Existing Devices.
You will see a list of devices that are currently connected to the router. Choose a device from the list.
If the device you wish to add isn't listed, ensure it is connected to the router first. If you are having trouble identifying your device within this device list, you may need to find your device's MAC address to be able to properly identify it.
Select the clock icon to restrict internet access to the chosen device to a set schedule.
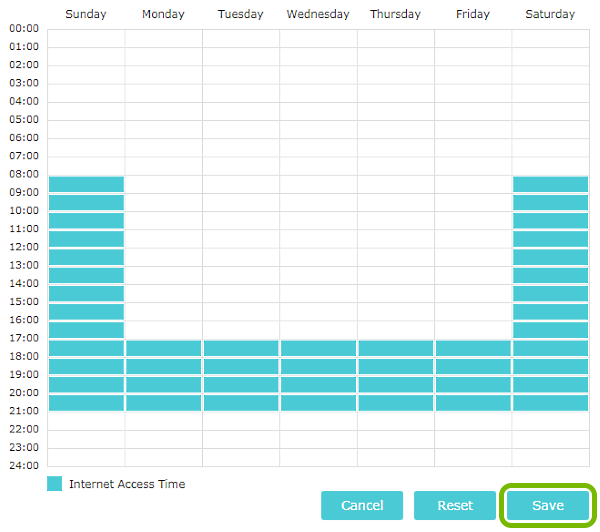
You'll be able to set a weekly schedule for each device. Select the time intervals for each day of the week in the schedule table. You can select boxes individually or click or tap and drag across a range of boxes.
Each box or range of boxes that appears in light blue represents an allowed time slot for the selected device to access the internet. White boxes represent time slots that are not allowed for that device to access the internet. Select Save to set the schedule.
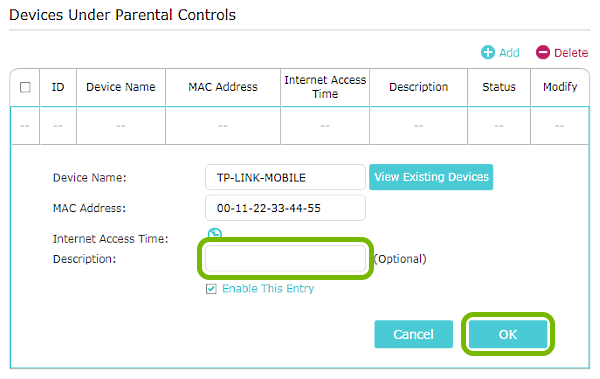
Optionally, you can enter a description for the device you are adding. Either way select OK to complete adding the device.
Repeat the same process for any additional devices.
6. Filter Content with Parental Controls
Go to the Advanced tab at the top.
Select Parental Controls from the menu on the left side.
Filter Keywords
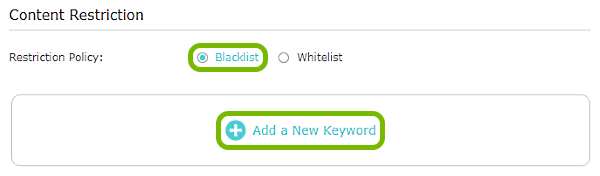
You can block access to websites containing keywords added to the blacklist:
Under the Content Restriction heading select Blacklist then Add a New Keyword.
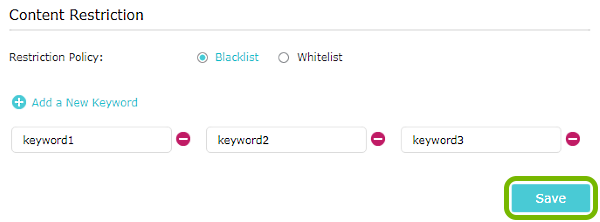
Enter the keyword you wish to block. Add other keywords the same way and select Save when done.
Filter Websites
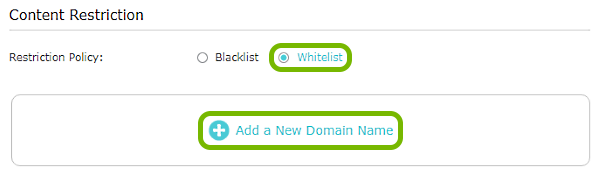
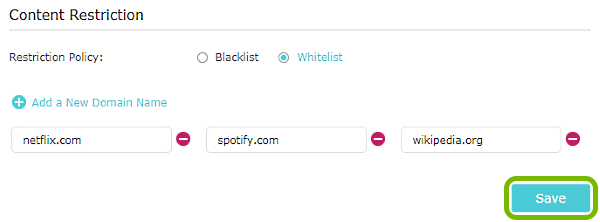
You can limit access only to the websites added to the whitelist:
Under the Content Restriction heading select Whitelist then Add a New Domain Name.
Enter the website's domain name you wish to allow access to. Add other website domain names the same way and select Save when done.
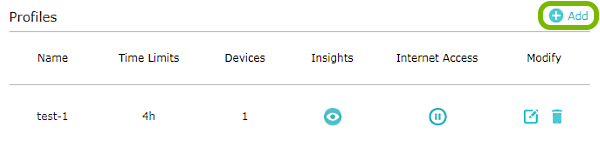
7. Add Profile to Parental Controls
Select Add to the right of the Profiles heading.
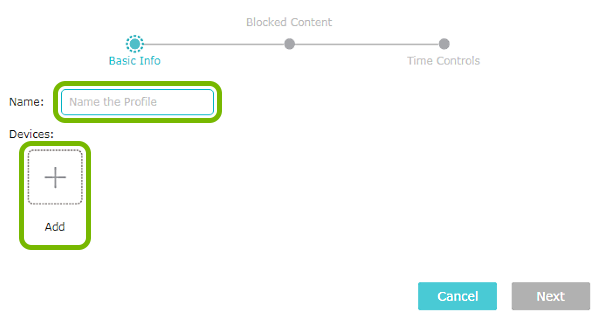
Enter a name for the Parental Controls profile then select Add.
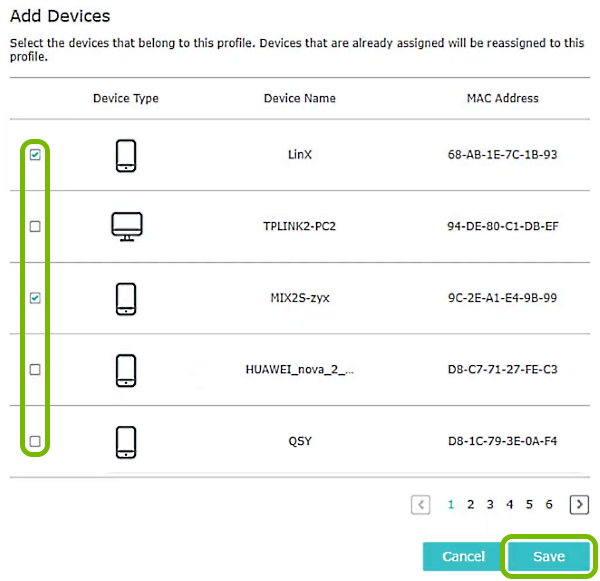
Tick the checkboxes to the left of each device you'd like to add the profile then select Save.
If the device you wish to add isn't listed, ensure it is connected to the router first. If you are having trouble identifying your device within this device list, you may need to find your device's MAC address to be able to properly identify it.
Once you've named the profile and added devices to it, select Next.
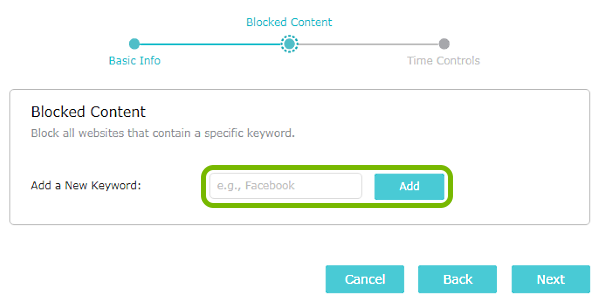
You'll be able to block websites containing specific keywords in their name. Enter a keyword and select Add.
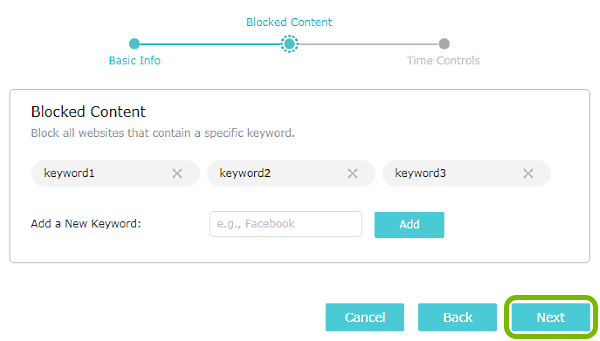
Add other keywords the same way and select Next to continue.
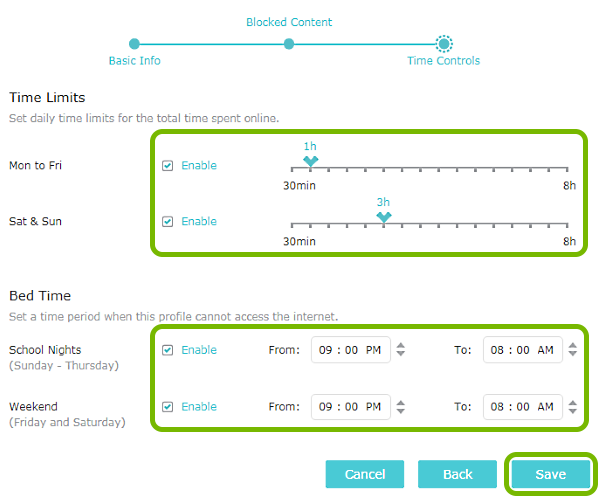
Set the total number of hours the selected devices will have internet access and the time intervals when they're allowed to have internet access. Tick the Enable box then configure the option you'd like to use. Select Save when done.
Repeat the same process for any additional profiles.
Remove Hidden Spyware In Minutes For Free
Detect and remove spyware, keyloggers, tracking cookies, and other
threats that slow down your PC or steal your data.
65+ Million Downloads
Spyware scanner with AI-powered detection engine + database
.png)