This guide will help you setup additional peripherals for your Nintendo Switch.
2. Joy-Con Controllers
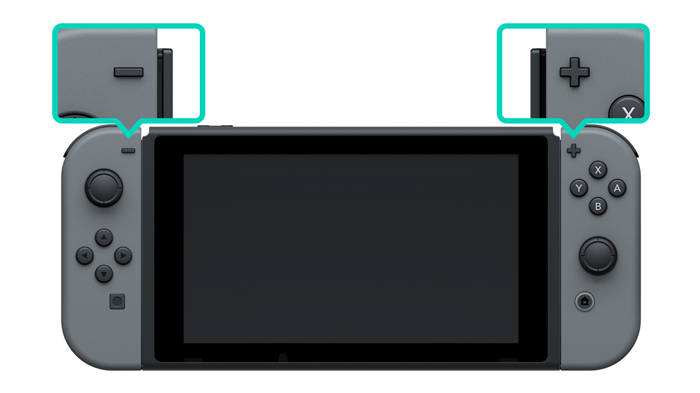
Attach Joy-Con Controllers
With the Switch LCD facing you, align the - symbol on the left Joy-Con with the top left corner of console, and align the + symbol on the Joy-Con with the top right corner of the console.
Using the rail on the side of the console, slide the Joy-Con from top to bottom, until you hear a click.
Once the Joy-Con controllers are attached to the system, they are registered, and can now be detached and used.
Detach Joy-Con Controllers
Press and hold the release button at the back of the Joy-Con.
Slide the Joy-Con from bottom to top.
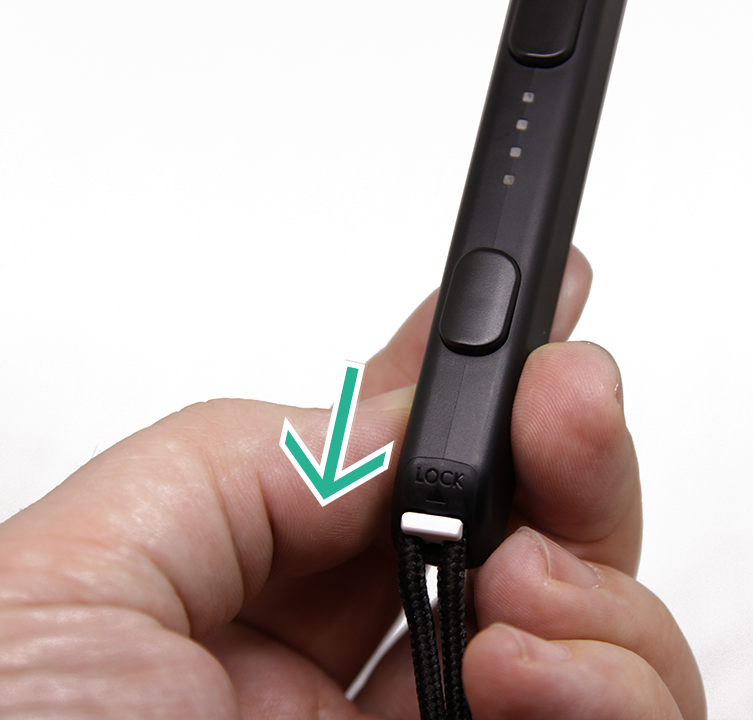
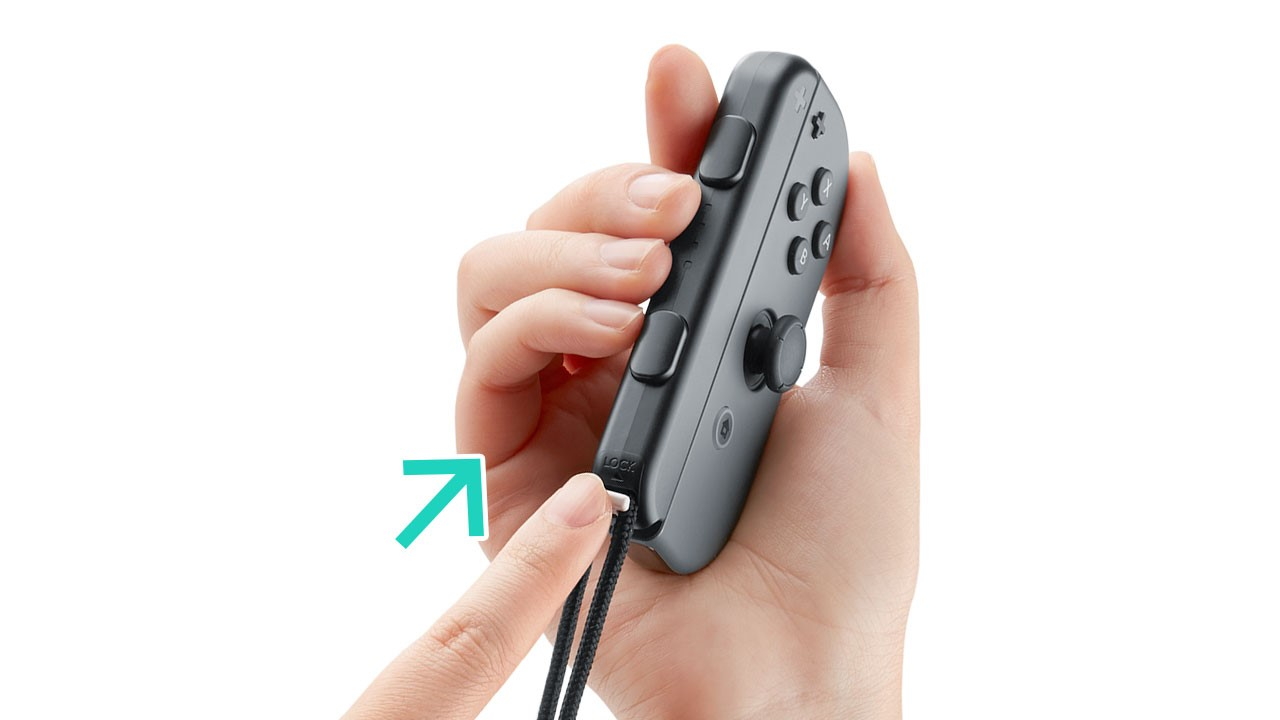
Ensure that the slide lock on the Joy-Con strap is in the unlockposition(down).
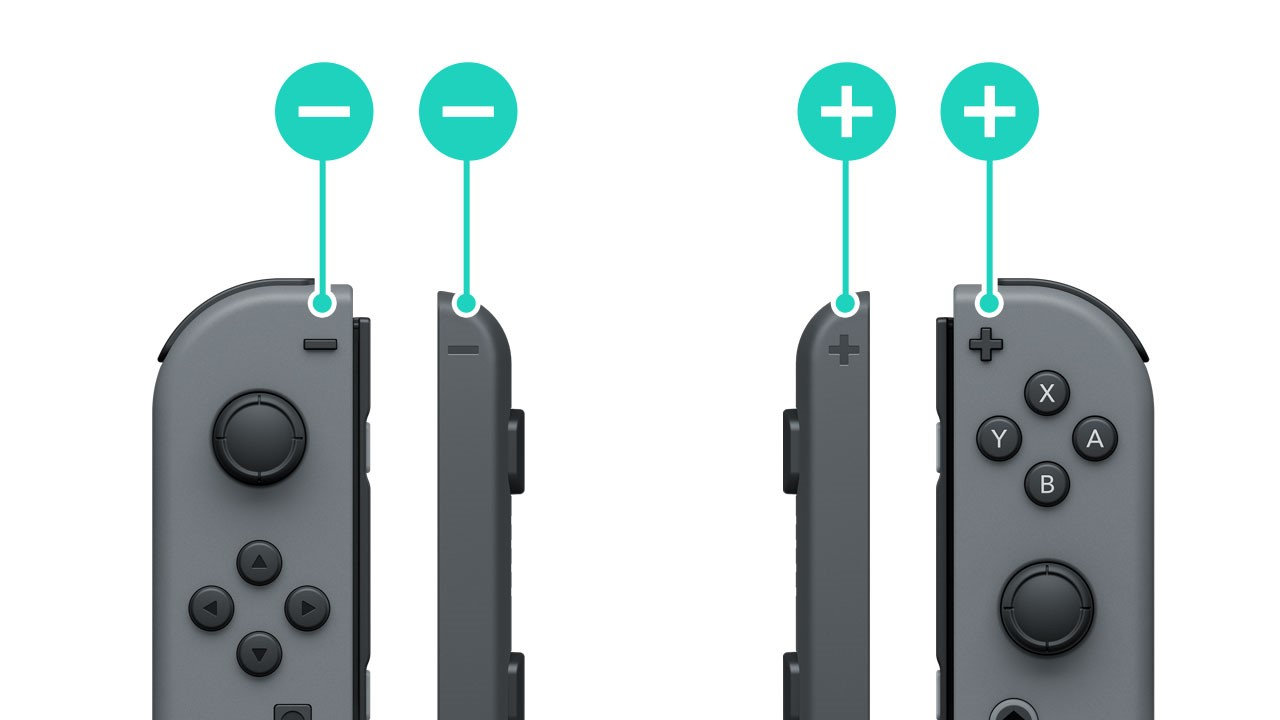
Make sure the Joy-Con straps are correctly oriented by aligning the + or -.
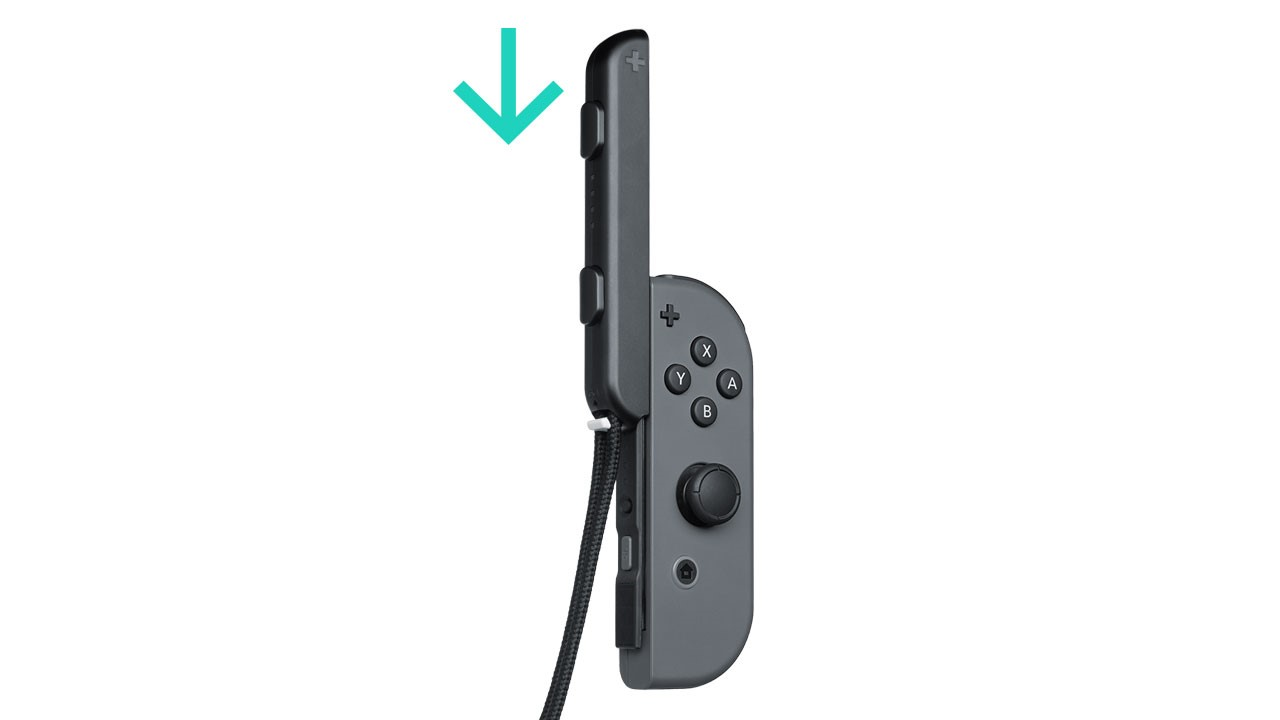
Attach the Joy-Con straps to the Joy-Con controllers using the rail on the side of the Joy-Con. Slide the Joy-Con strap from top to bottom until you hear a click.
Ensure the slide lock on the Joy-Con strap is in the lock position (up).
Checking the Charge of the Joy-Con
From the Switch Home Menu, select Controllers.
You can see the charge of each Joy-Con here.
Charging the Joy-Con Controllers with the Console
You can charge the Joy-Con using the Switch Console.
Attach the Joy-Con to the console.
Plug the console into the charger.
Charging the Joy-Con Controllers with the Charging Grip
Attach the controllers to the Joy-Con Charging Grip.
Plug the charging grip either into the Switch Dock or the AC Adapter.
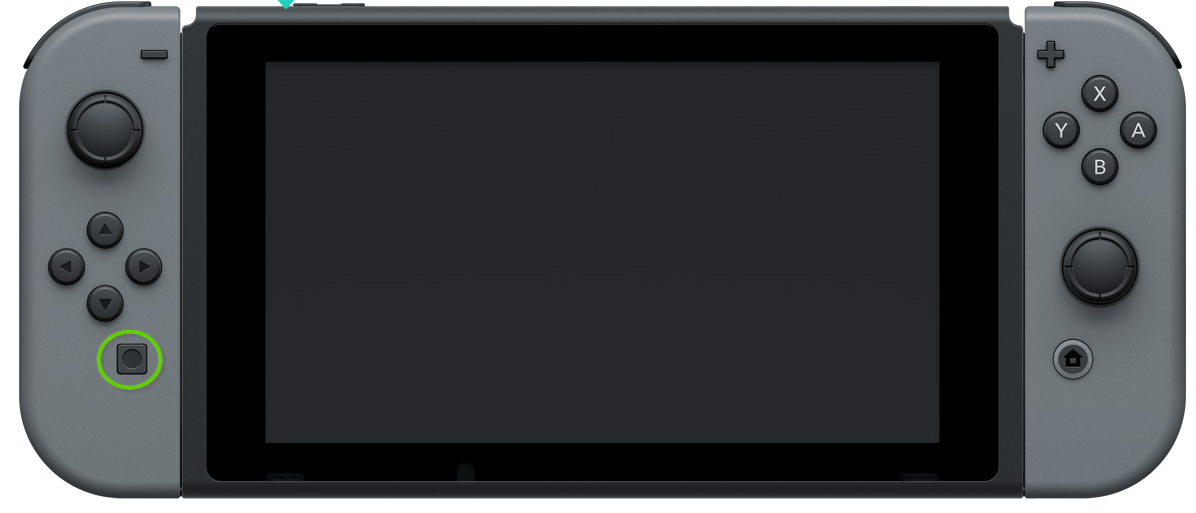
Take a Screenshot
Press the screenshot button.
3. Pro Controller
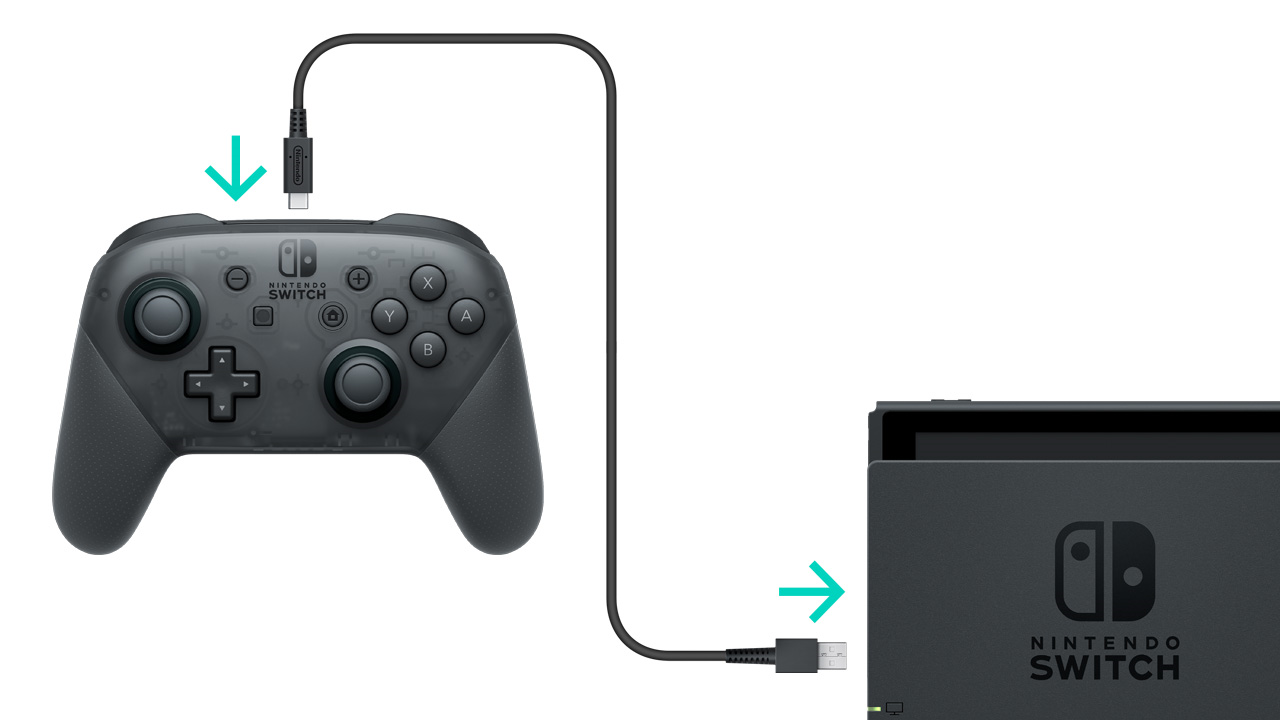
Connect With a USB Cable
Place the Nintendo Switch console in the dock.
Connect the Pro Controller to the dock with the included USB cable.
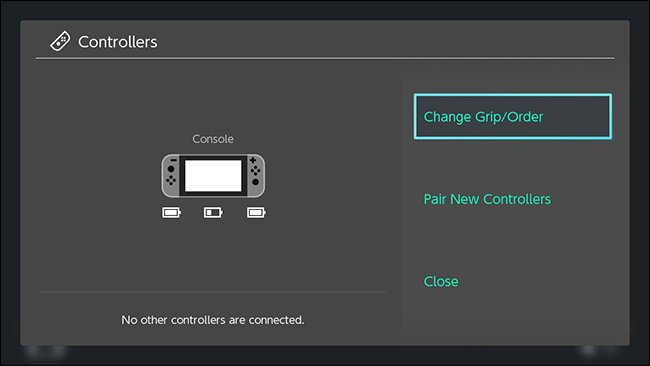
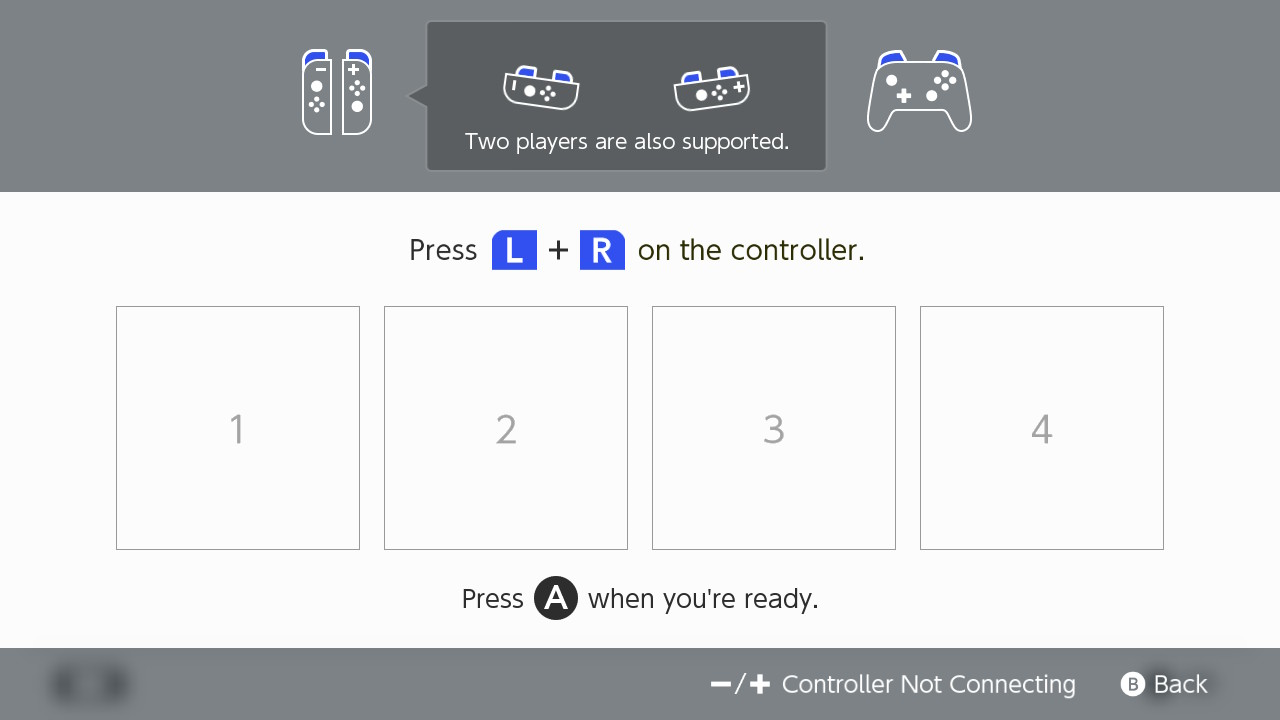
Connect Wirelessly
From the HOME Menu, select Controllers.
Select Change Grip and Order.
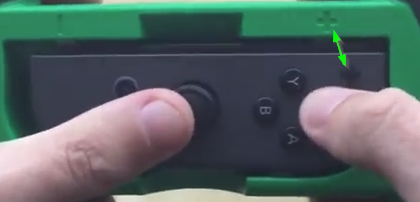
While the following screen is displayed.
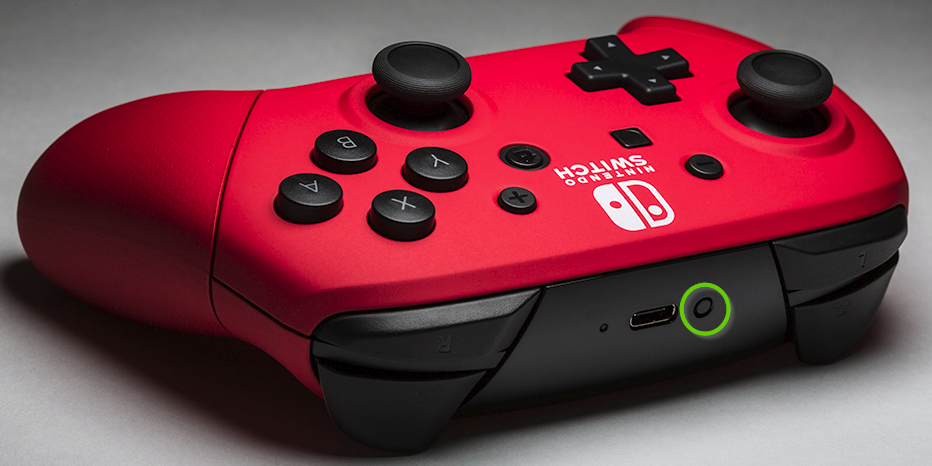
Press and hold down the Sync Button for at least one second on the Pro Controller you wish to pair.
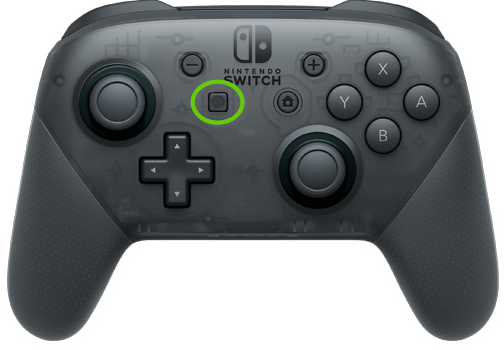
Take a Screenshot
Press the screenshot button.
4. Switch Dock
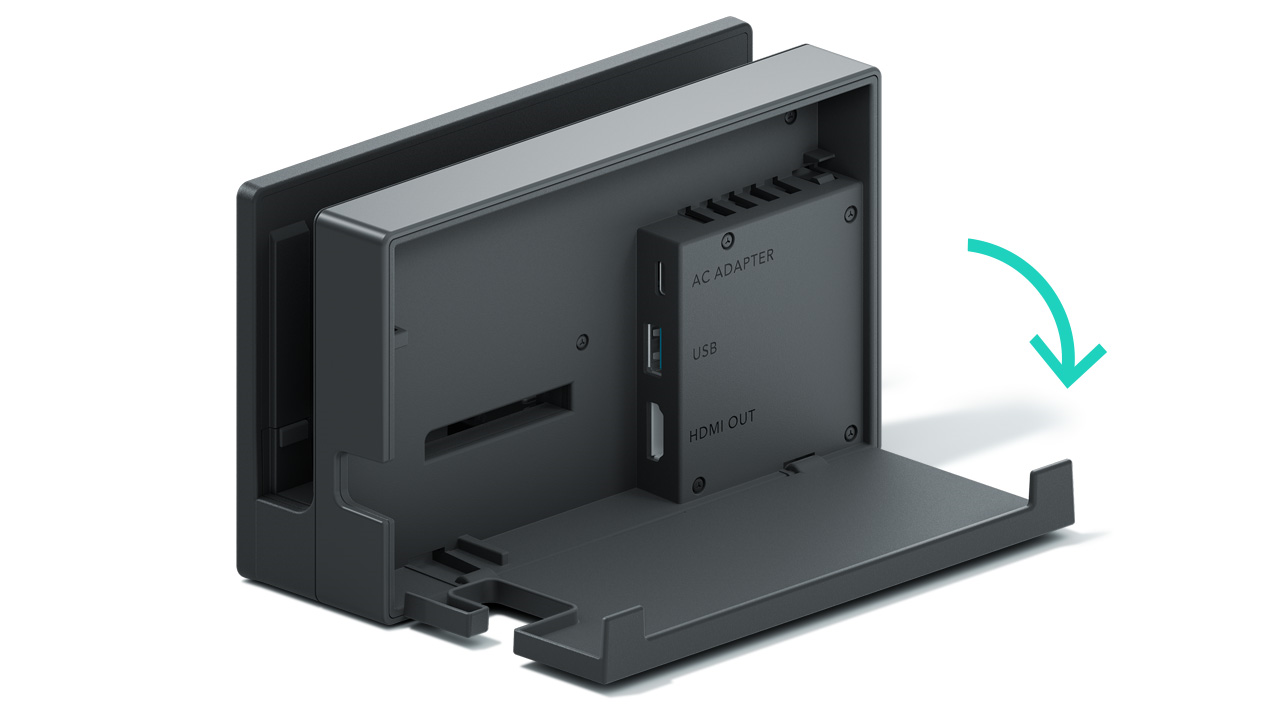
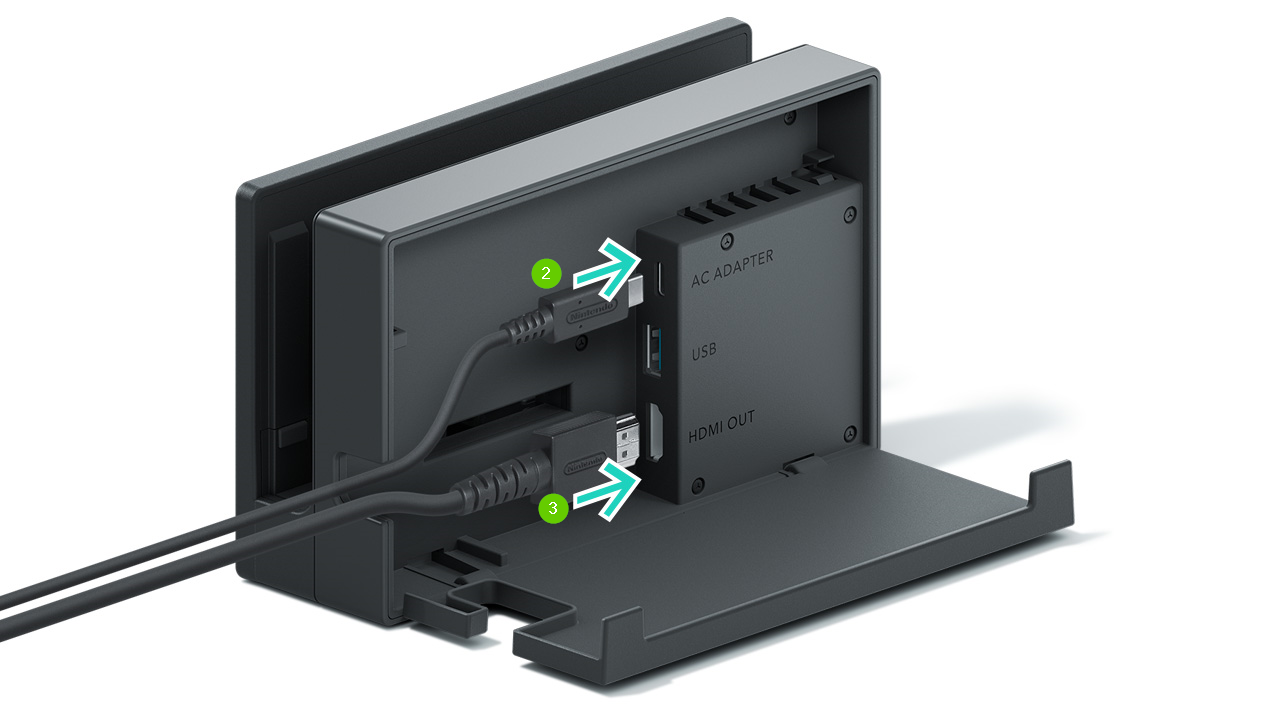
Open the back of the Switch dock.
Connect the USB plug from the Nintendo Switch AC adapter into the top terminal of the dock labeled AC ADAPTER, then connect the other end of the AC adapter to a wall outlet.
Connect one end of the HDMI cable into the bottom terminal of the dock labeled HDMI OUT, then connect the other end into an HDMI port on your television or monitor.
Close the back of the Dock.
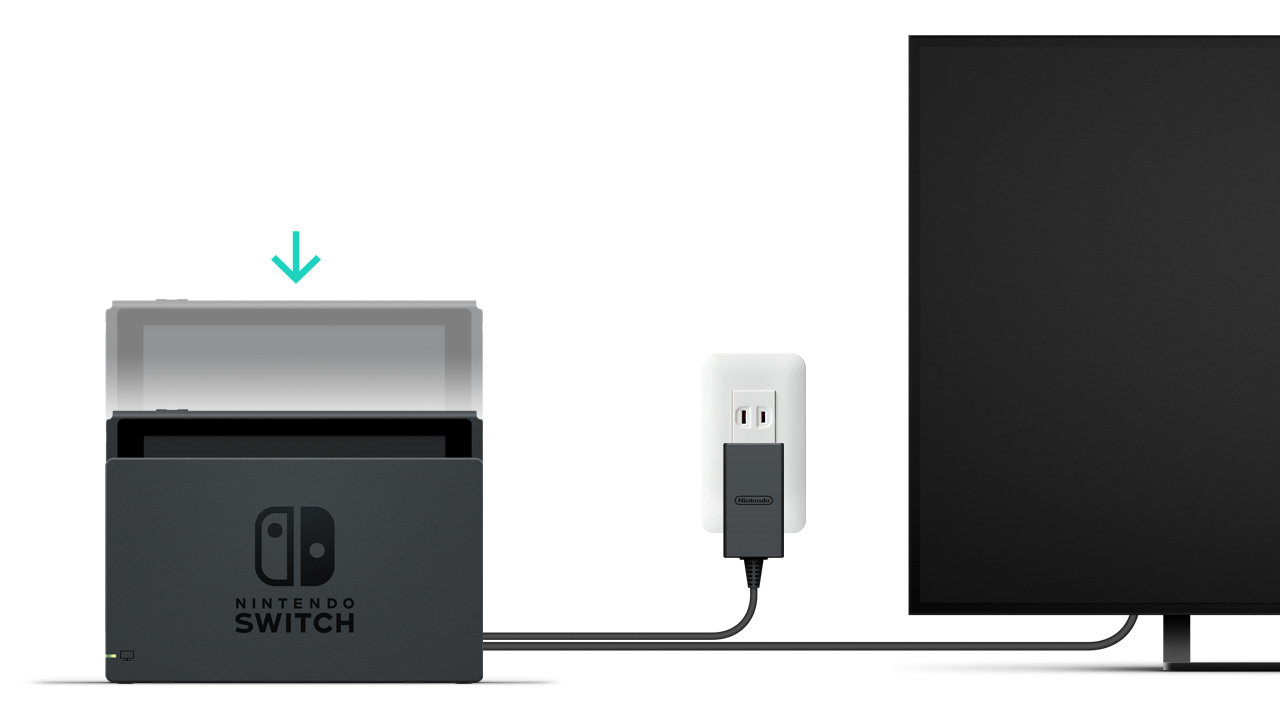
Position the console so that the LCD screen faces in the same direction as the front panel on the dock, then insert the console into the dock.
Turn the TV set on, and select the correct HDMI input.
5. Joy-Con Grip
Attach the controllers to the Joy-Con Charging Grip.
Plug the charging grip either into the Switch Dock or the AC Adapter.
6. Joy-Con Wheel
The Joy-Con Wheels use the Switch's tilt controls to mimic driving.
Line the + or - buttons with the respective icons on the Wheel.
Remove Hidden Spyware In Minutes For Free
Detect and remove spyware, keyloggers, tracking cookies, and other
threats that slow down your PC or steal your data.
65+ Million Downloads
Spyware scanner with AI-powered detection engine + database
.png)