.png)
Authored by: Support.com Tech Pro Team
Are you worried about someone getting access to your online accounts? Have you ever seen strange activity and devices you don't recognize on your Apple account?
You can avoid these by setting up two-factor authentication for your Apple ID.
Two factor authentication, also known as 2-Step or 2FA, is a way to add additional security to accounts and devices. After setting it up on your Apple account, the first time you log into a new Apple device you'll need to provide your password and the six-digit verification code. The six-digit verification code is automatically displayed on your trusted devices or sent to your phone number. Needing not only your password but access to another device gives your account added protection.
This guide will help you set up two factor authentication for your Apple ID.
Tools You'll Need:
-->
Supplies You'll Need:
-->
Before You Begin:
You must have this thing before you whatever.
-->

Two-Factor is available to iCloud and iTunes users with a device that's using the latest iOS or macOS, or who have access to a web browser and a phone number. A credit card is suggested as well in case you forget your password. The credit card can be used to help verify your identity.
Some Apple IDs created in iOS 10.3 or macOS 10.12.4 and later are protected with two-factor authentication by default. In this case, you will see that two-factor authentication is already turned on.
Minimum System Requirements for all devices that use your Apple ID:
If you don’t meet the recommended system requirements on all the devices you use with your Apple ID, or you don’t have a valid credit card on file, you'll receive a related warning message. Read the message before proceeding and consider updating your devices or adding credit card information to your account to ensure the best possible experience when signing in or resetting your password.

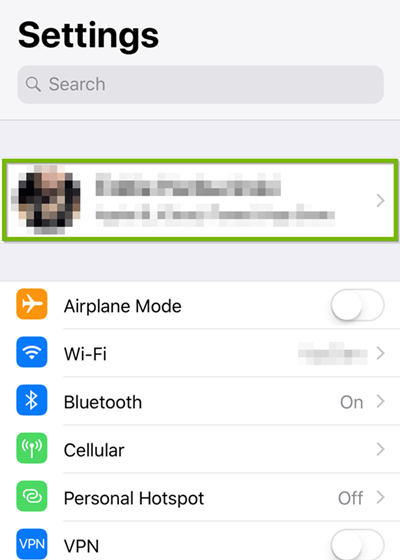
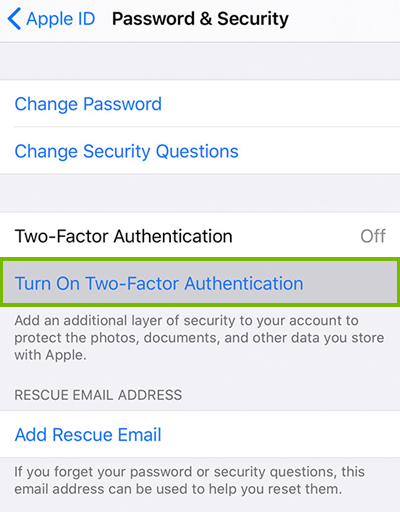
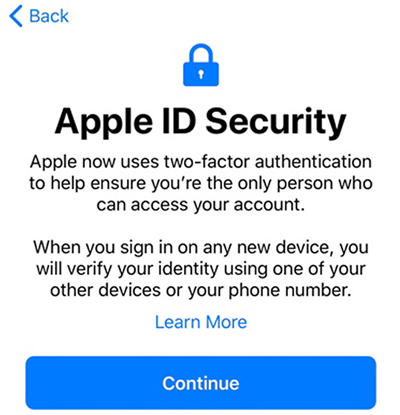
Set Up Two Factor on an iPad or iPhone


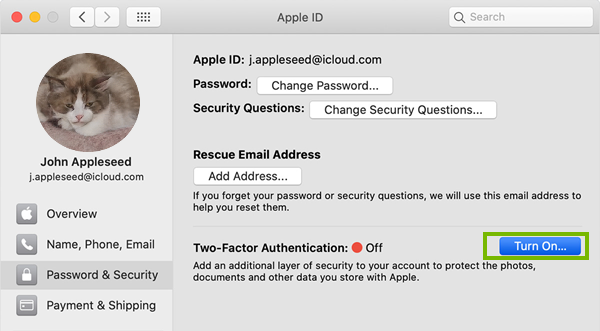
Set Up Two Factor on a Mac


If you're signing in and don’t have a trusted device handy that can display verification codes; you can have a code sent to your trusted phone number via text message or an automated phone call instead. Click Didn't Get a Code on the sign in screen and choose to send a code to your trusted phone number. You can also get a code directly from Settings on a trusted device.

If you can’t sign in, access a trusted device, reset your password, or receive verification codes you'll need to request account recovery to regain access to your account. Account recovery is an automatic process designed to get you back in to your account as quickly as possible while also denying access to anyone who might be pretending to be you. It might take a few days, or longer, depending on what specific account information you can provide to verify your identity.
If you've been using two-factor then you can no longer turn it off. You can only turn it off within two weeks of first enrolling.
Yes. Two-factor authentication is a new feature built directly into iOS, macOS, tvOS, watchOS, and Apple’s web sites. It uses different methods to trust devices and deliver verification codes, and offers a more streamlined user experience. You need two-factor authentication to use certain features that require improved security.
When you sign in on a new device, you’ll get a notification on your other trusted devices. This includes a map showing the approximate location of the new device. This is an approximate location based on the IP address the device is currently using, rather than the exact location of the device. The location shown might reflect the network you're connected to, and not your physical location.
If you know you’re the person trying to sign in but you don’t recognize the location shown, you can still tap Allow and continue signing in. However, if you ever see a notification that your Apple ID is being used to sign in on a new device and you're not the one signing in, tap Don’t Allow to block the sign in attempt.

Support.com is committed to your privacy
We do not share or sell your data to third parties. We do use cookies and other third-party technologies to improve our site and services. The California Consumer Privacy Act (CCPA) gives you the ability to opt out of the use of cookies, third-party technologies and/or the future sale of your data. Do not sell my personal information.

Support.com is committed to your privacy
Read our Privacy Policy for a clear explanation of how we collect, use, disclose and store your information
