It can sure be frustrating to enter a web conference call to find out you cannot hear others and / or others cannot hear you or even see you.
Have no worry. We will show you how to make a test call to verify your audio and video settings before you enter a live meeting with join.me.
Within this guide you will find instructions on how to host or join a test meeting, choose the correct audio devices for your microphone and speakers, as well as the correct video device for your camera. You will then test your devices to make certain you will be able to hear others, and they will be able to hear or see you during conference calls.
What You'll Need:
No extra tools or supplies are needed.
-->
Before You Begin:
Extra instructions.
hyperlink
-->
2. Test Audio and Video Settings in join.me
Join.me offers a quick and easy way to test your audio and video settings before you get into a live conference call. As a host, simply start a meeting without inviting anyone to it, then go into the settings to test your audio and video devices. As a participant, join the meeting without turning on your audio and video, and go straight to testing your devices.
Launch the join.me app.
Host or join a test meeting:
How to Host a Meeting with join.me.
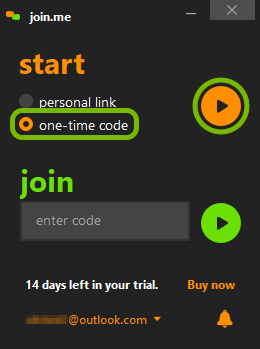
Select one-time code under the start heading, then click the start button to initiate a meeting.
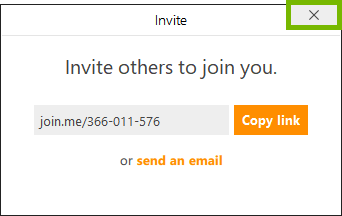
Close out of the invitation box.
How to Join a Meeting with join.me.
Ask someone to host a test meeting and have them give you the meeting code.
If you can't get someone to host a test meeting for you, you can also do this by joining a live meeting without turning on your audio and video. By default, they aren't turned on.
Enter the meeting code under the join heading, then click the join button to load into the meeting.
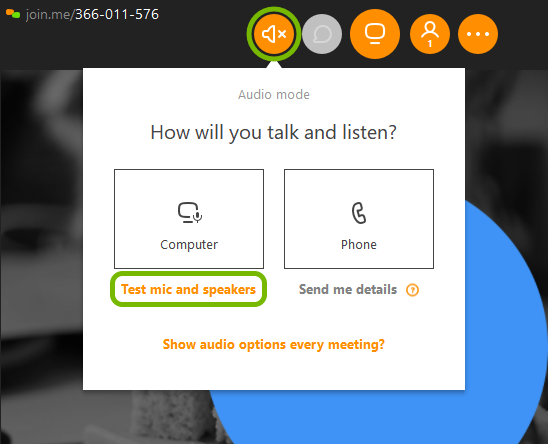
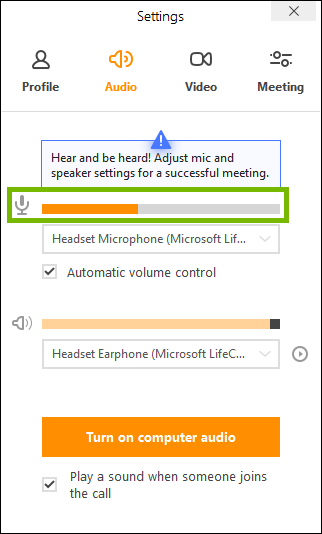
Click the Audio icon at top middle then click on Test mic and speakers.
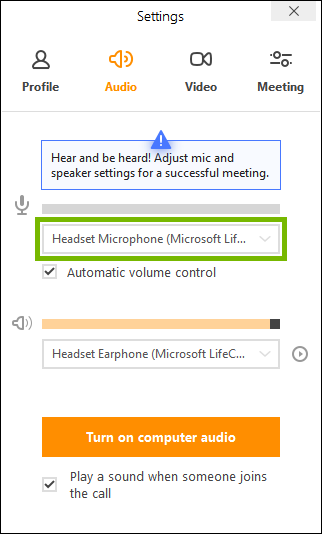
Make sure you have the correct audio device selected for your microphone.
To test the microphone, speak into it and you should see the volume bar change. If the volume bar doesn't change while speaking, check your mic to make sure it's not muted.
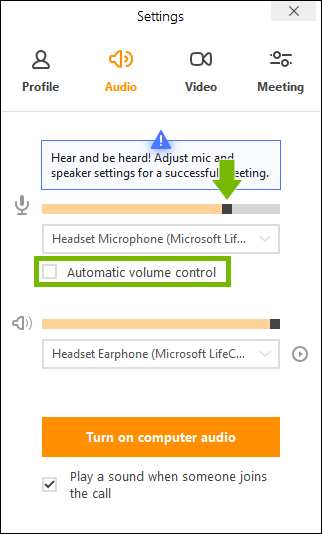
Sometimes you may find that your voice may become too loud or too soft for others to hear. If the microphone Automatic volume control doesn't work well for you, you can uncheck that option and move the volume control slider to adjust your microphone's volume manually. How high or how low you need to adjust the microphone volume depends on the system and microphone you are using.
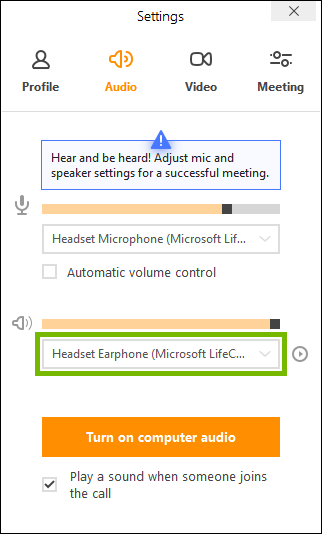
Next, make sure you have the correct audio device selected for your speakers.
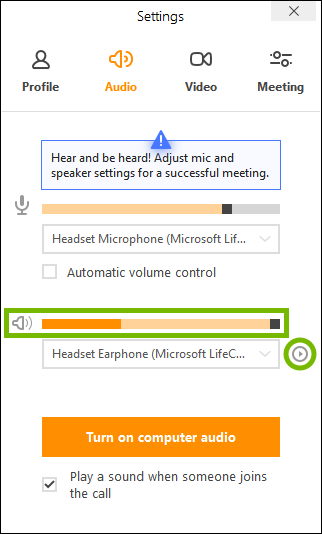
To test the speakers, press the play button next to the speaker selector and you will see the volume bar change while hearing a sound playing through your speakers.
If the speakers' volume is too high or too low, move the volume control slider to adjust it.
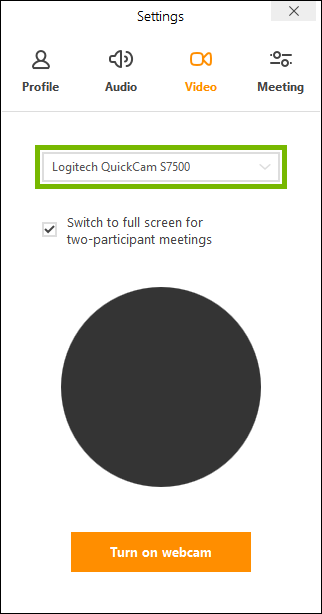
Once you're satisfied with your audio, click the Video icon at the top.
Make sure you have the correct video device selected for your camera.
Your camera feed should turn on right away.
Place the webcam at eye level or slightly higher as people tend to look more flattering at this angle. If you have a laptop, you can grab a few books and place them under if necessary.
Move your webcam closer or further from your face until you find the best angle that suits you. Try to place the webcam far enough away so that you are capturing your shoulders and entire face.
Use plenty of light. Light should be coming from in front of your or even from the side. Experiment and use soft, indirect light to avoid glare and washout. Doing so should create a pleasant and clear image.
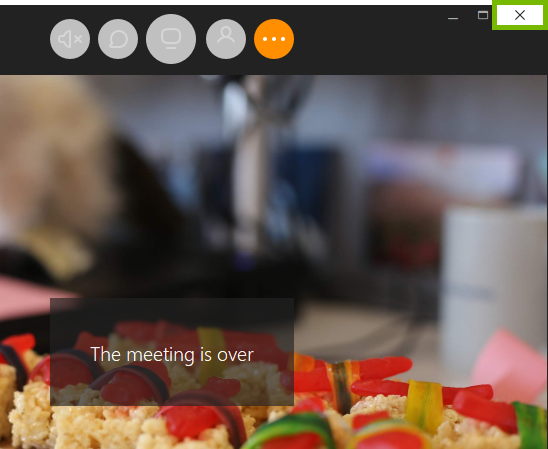
Once you're satisfied with your video, close out of the Settings window.
Then close out of the meeting to end it.
Remove Hidden Spyware In Minutes For Free
Detect and remove spyware, keyloggers, tracking cookies, and other
threats that slow down your PC or steal your data.
65+ Million Downloads
Spyware scanner with AI-powered detection engine + database
.png)