Make sure it shows you as online, and that the player can reach the Internet.
3. Online Update
Turn on your television, and make sure it's set to your Blu-Ray player's input.
Turn on your Blu-Ray player.
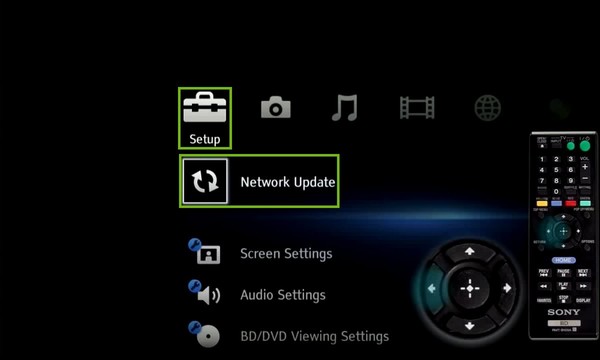
Press the Home button on your remote.
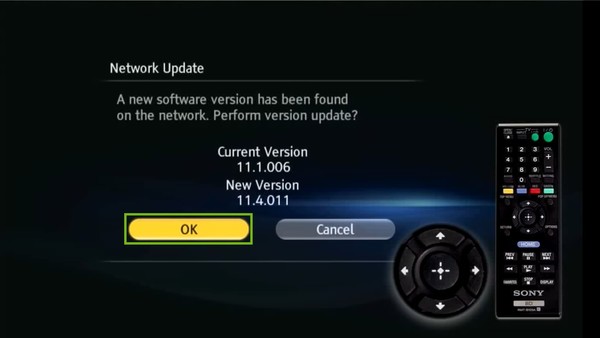
Select Setup > Network Update.
If an update is available, you'll be given an option to update right away. Select OK to begin the update.
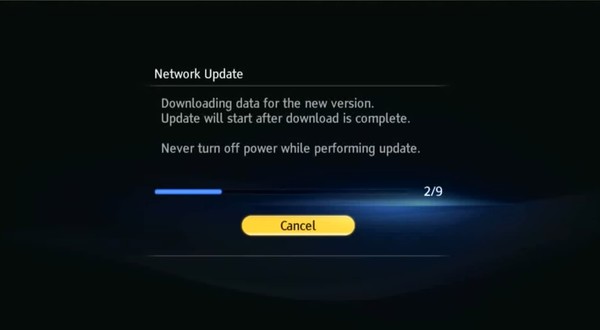
Your player will update on its own from here.
This process can take 30 minutes or more. Do not turn off, reboot, or unplug your Blu-Ray player while it is updating.
Update Notifications
You can enable update notifications, so you won't have to check manually. Instead, your player will check for updates for you, allowing you to apply or ignore them in the future.
Turn on your television, and make sure it's set to your Blu-Ray player's input.
Turn on your Blu-Ray player.
Press the Home button on your remote.
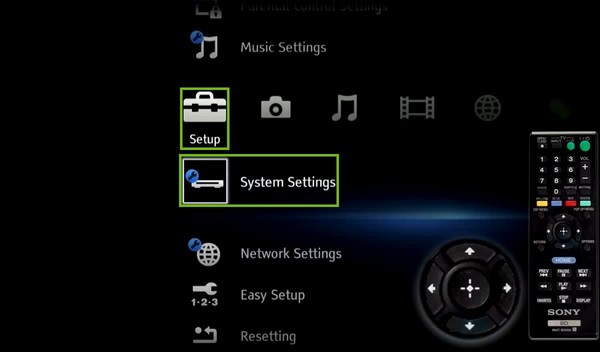
Select Setup > System Settings.
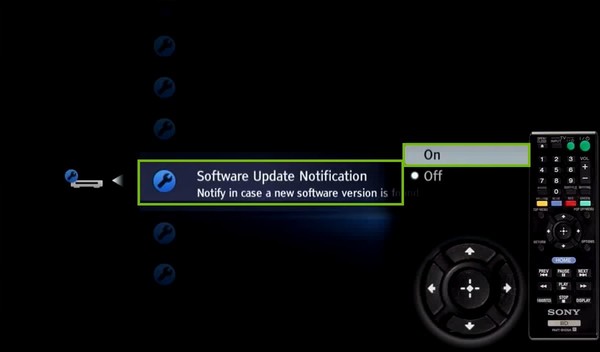
Select Software Update Notification > On.
4. Connect Your Sony BDPS3700 to Your Home Network
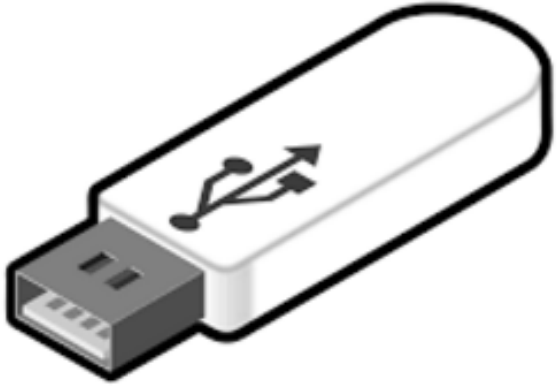
In order for your device to properly process this firmware update successfully, you will need access to a computer and a Flash Drive that has been formatted to a FAT32 filesystem.
6. Download Update to USB
Connect your USB drive to your computer.
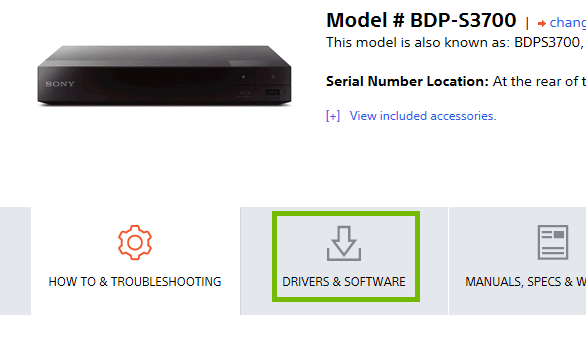
Open your browser, and visit https://esupport.sony.com/US/p/model-home.pl?mdl=BDPS3700.
Scroll down, and select Drivers & Software.
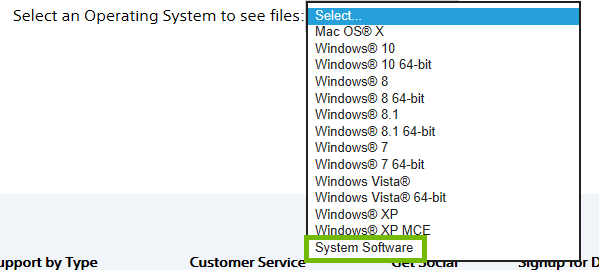
Scroll down, and for "Select an Operating System to see files:", select System Software.
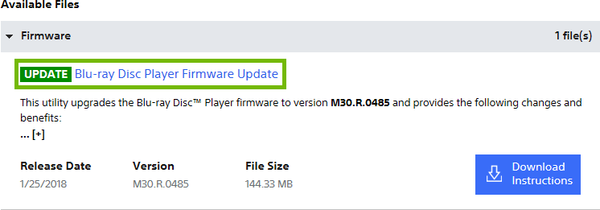
Under Firmware, select the Blu-ray Disc Player Firmware Update.
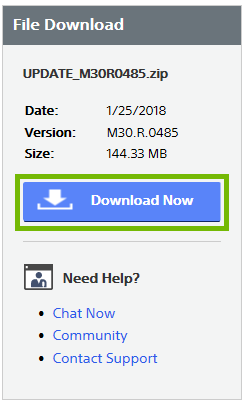
On the right, select Download Now.
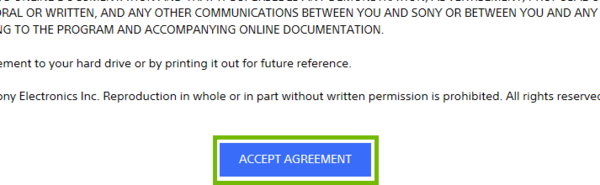
You will be presented with the licence agreement for this download. Read this information carefully. When you are ready, scroll to the bottom, and select Accept Agreement.
At the bottom, you'll be asked what you want to do with the file. Select Open.
You will see a folder called UPDATE listed. Copy this entire folder to your USB drive for the update. You can usually just drag this folder to your USB stick on the left.
7. Apply Update over USB
Turn on your TV and Blu-Ray player.
Remove any USB disks currently attached to your Blu-Ray player.
Insert the USB drive with the update you just made.
Press the Home button on your remote.
Select Setup > Software update.
Select Update via USB Memory, then select OK.
Select OK when prompted to update to the new software version.
Your player will update on its own from here.
This process can take 30 minutes or more. Do not turn off, reboot, or unplug your Blu-Ray player while it is updating.
When complete, remove the USB disk from the Blu-Ray player.
8. OS Choice
To continue, we need to know what Operating System your computer is using.
There are 2 main Operating Systems for personal computers currently available, Microsoft Windows and Apple macOS.
Microsoft WindowsApple macOSMicrosoft Windows runs on computers produced by multiple companies, such as Lenovo, Asus, Dell, Toshiba, Hewlett Packard, Acer, and Sony.Apple is the only company that makes macOS computers.
9. Format USB FAT32
Any and all data on the USB drive will be destroyed during this process. Make sure the drive is blank, or copy the data to a safe place before proceeding.
Insert a USB disk into your USB port.
Open Windows Explorer.
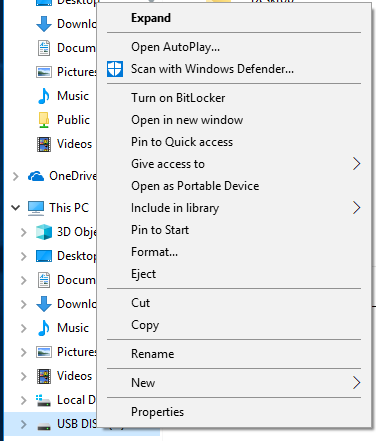
In the right-hand pane, locate your USB disk under This PC.
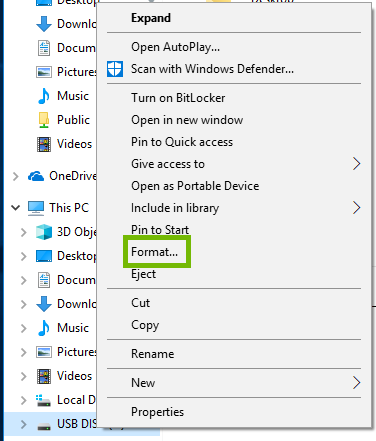
Using your right mouse button, right click on your USB disk. A menu will open up.
Select Format...
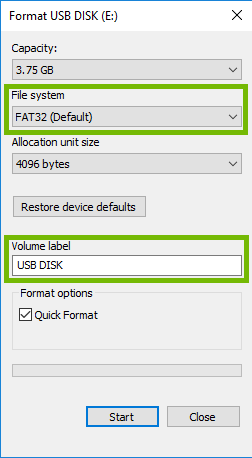
For File system, select FAT32. For Volume label, enter a name you want.
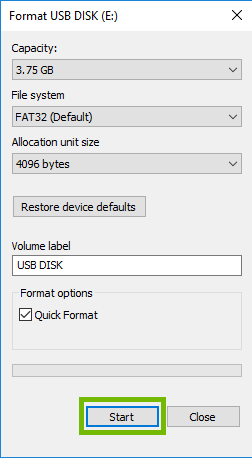
Select Start.
A message will open, reminding you that any and all data will be lost. If you are sure this is okay, select OK.
Once the disk is done formatting, a message will open to tell you it is complete. Select OK.
10. Format USB FAT32
Any and all data on the USB drive will be destroyed during this process. Make sure the drive is blank, or copy the data to a safe place before proceeding.
Insert a USB disk into your USB port.
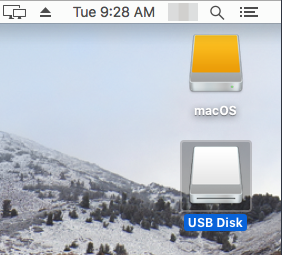
macOS will recognize the disk and show its icon on the desktop.
Launch Disk Utility.
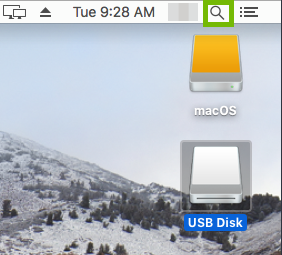
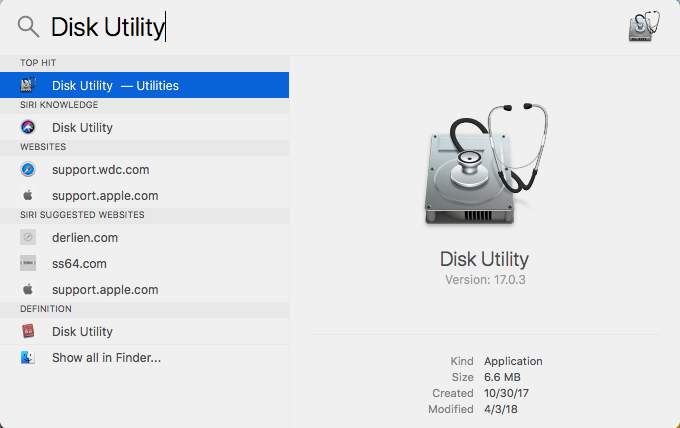
Select Search in the top-right corner.
type in "Disk Utility". Select the Disk Utility search result.
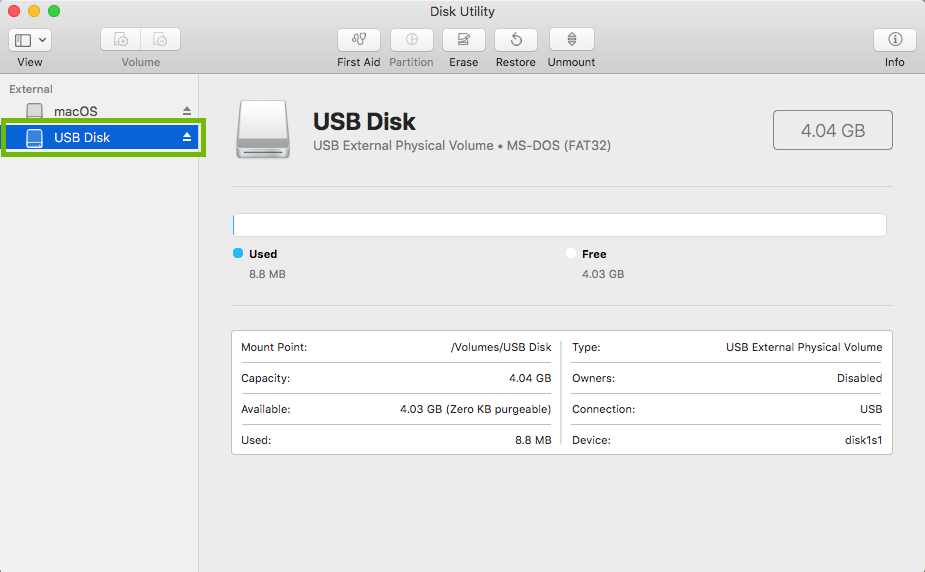
Select your USB Disk from the list on the left.
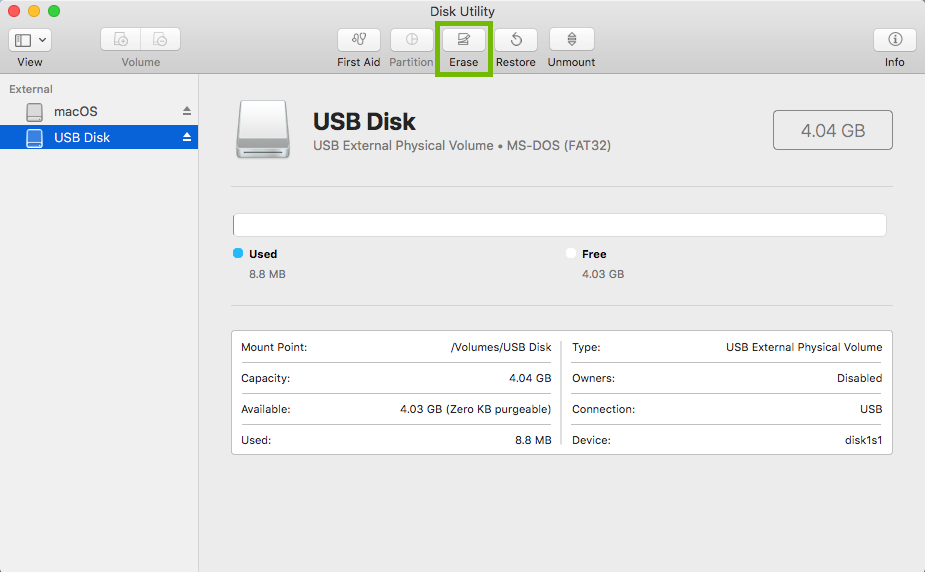
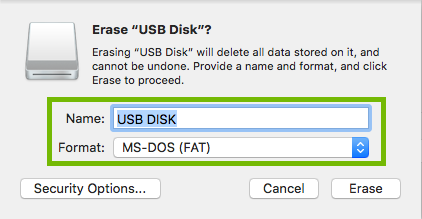
Select Erase at the top.
Give the disk a Name, and select MS-DOS (FAT) for Format.
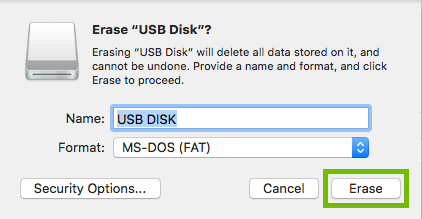
Select Erase.
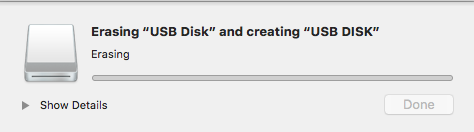
A progress bar will open. Wait will the disk is formatted.
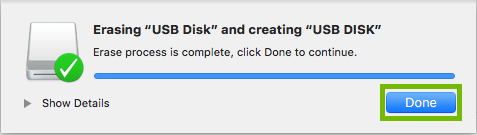
Once complete, select Done.
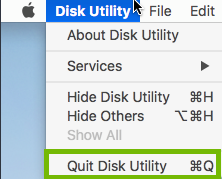
Quit Disk Utility. Select the Disk Utility menu at the top, then Quit Disk Utility.
11. No USB Drive
Return to this guide after purchasing a USB drive.
Remove Hidden Spyware In Minutes For Free
Detect and remove spyware, keyloggers, tracking cookies, and other
threats that slow down your PC or steal your data.
65+ Million Downloads
Spyware scanner with AI-powered detection engine + database
.png)