Your Apple watch provides a fast, customizable 'second screen' for your iPhone, as well as extended functionality such as a fitness tracker.
This guide will walk you through updating your Apple watch to the latest version.
2. Wi-Fi Check
You can skip this step if your iPhone or iPad is already connected.
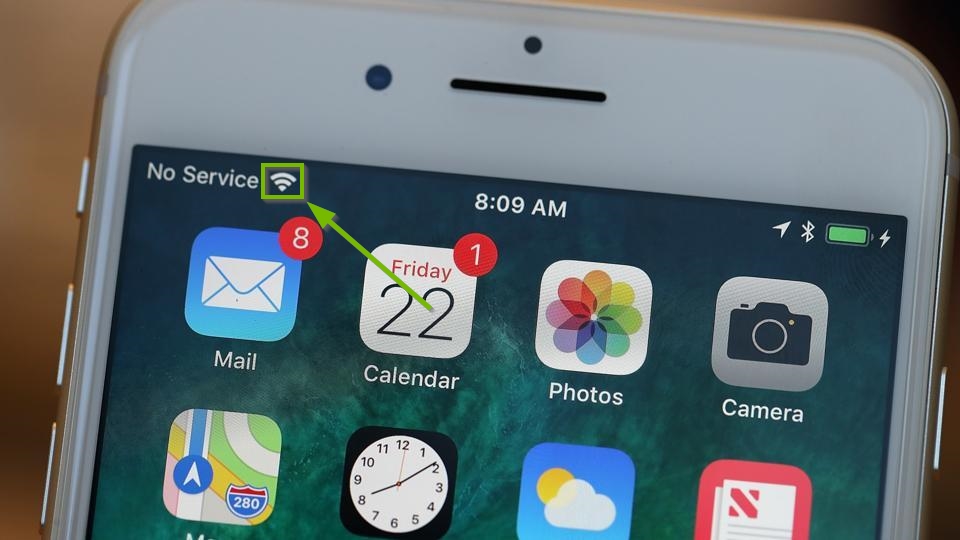
The simplest way to check to see if your iPhone or iPad is connected to Wi-Fi is to look across the top of your screen. The icon that is identified in the image below indicates that you are connected to a Wi-Fi network.
3. Check for Updates
To check and see if updates are available for your iOS device:
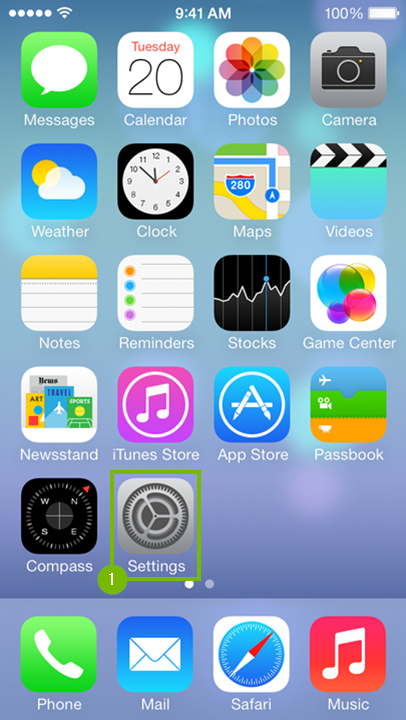
Open Settings on your phone or tablet.
Select General.
Select Software Update.
Your iOS device will perform a search for available iOS updates.
If no update is available, it will display your current version of iOS and inform you that your software is up to date.
If an update is available, it will be displayed.
Select Download and Install to begin the update process.
If prompted, enter your passcode to proceed.
4. Update watchOS
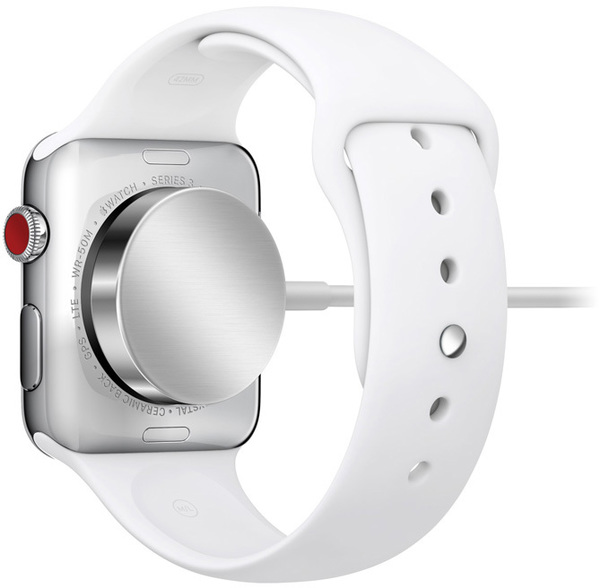
Apple recommends that your Apple Watch be connected to its charger and have at least a 50% battery charge before beginning the update process. It is also recommended that your iPhone remains next to your watch to ensure it is in range at all times during the update process.
Place your Apple watch on its charger.
Open the Apple Watch app.
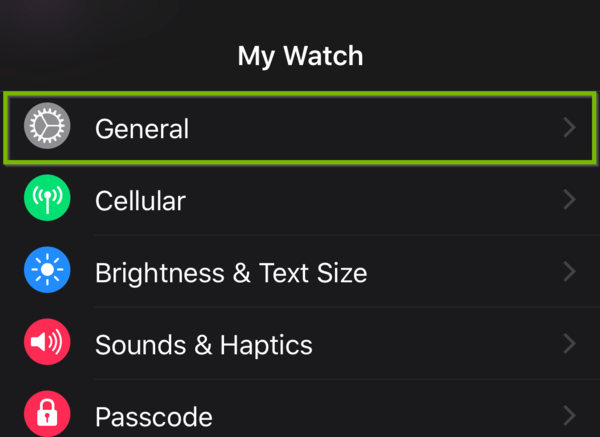
Select the My Watch tab across the bottom of the app.
Select General.
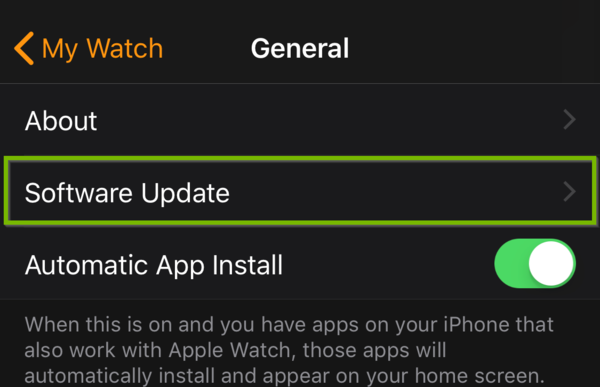
Select Software Update.
The Watch app will perform a search for available updates for watchOS.
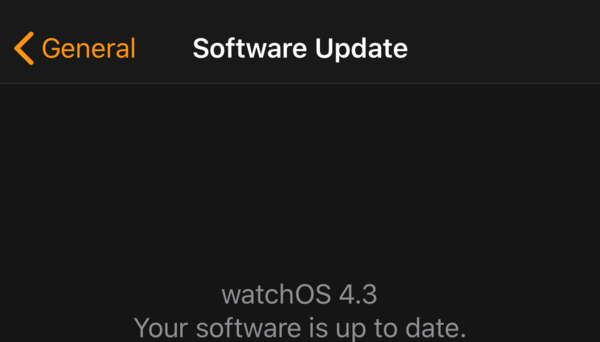
If no update is available, it will display your current version of watchOS and inform you that your software is up to date.
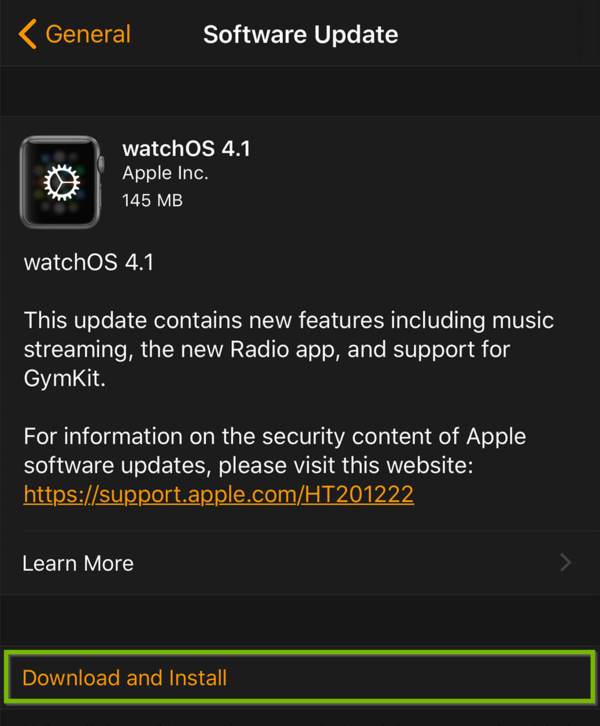
If an update is available, it will be displayed.
Select Download and Install to begin the update process.
If prompted, enter your passcode to proceed.
Wait for the progress wheel to appear on your Apple Watch. It could take from several minutes to an hour for the update to complete.
Leave your Apple Watch on its charger while the update completes. Don't restart your iPhone or Apple Watch, and don't quit the Apple Watch app. When the update completes, your Apple Watch will restart on its own.
Any of the above can interrupt the update while it is applying, and cause severe problems to the software on your Apple Watch, requiring you to either send the watch to Apple or visit an authorized service tech to get it to work again.
5. Connect to Wi-Fi
Depending on what device (iPhone, iPad or iPod Touch) and which generation you have, the menu theme and options might look slightly different on your screen. However, the steps should be the same across all iOS devices and generations.
From the main screen of your device, look for and open Settings.
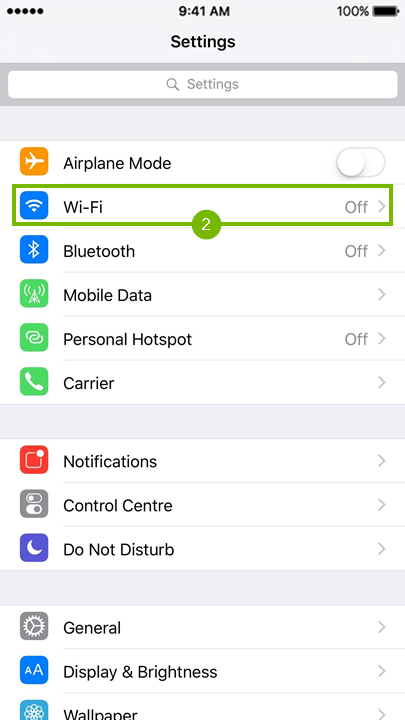
After that, go to Wi-Fi. You will see that this option also shows one of three statuses to the right:
Off - the Wi-Fi feature is disabled
Not Connected - there is no Wi-Fi connection establishe
the Wi-Fi connections name - there is a Wi-Fi connection already established.
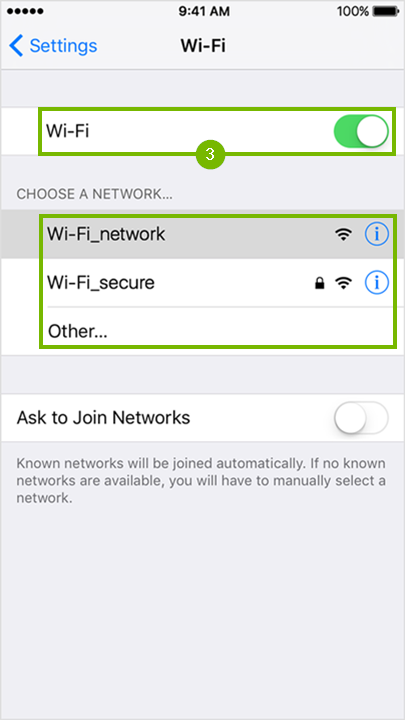
Make sure that the Wi-Fi feature is enabled by flipping the On/Off switch to the green position. Locate and tap the Wi-Fi networks name that you wish to connect to from the list.
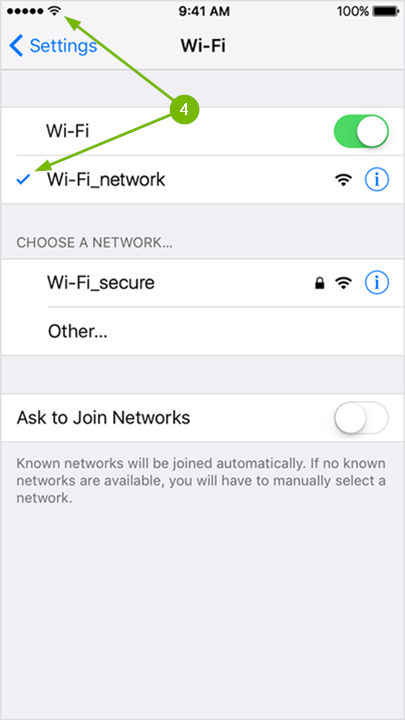
Your iOS device will automatically connect to the network if there is no security enabled, or you have connected to it in the past. The checkmark and Wi-Fi symbol indicate you are connected.
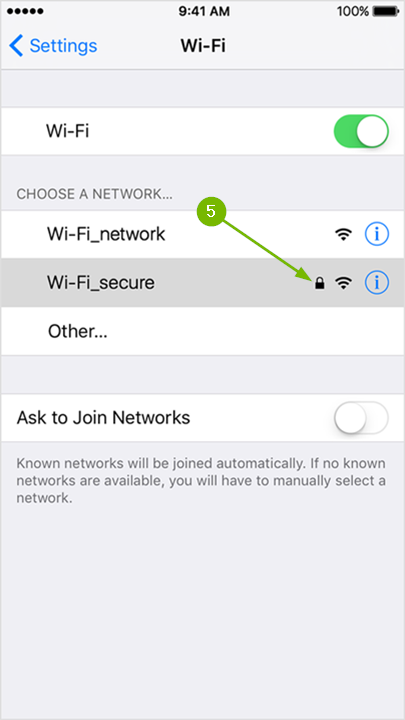
If the Wi-Fi network requires a password, then you will see a small padlock to the right of its name, which also means the connection is secure.
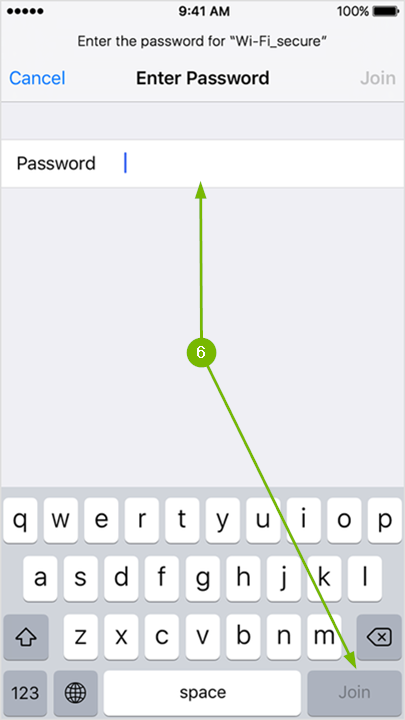
Tapping on a secured Wi-Fi networks name will prompt you to enter the password. Passwords are always case sensitive. Type it in using the on screen keyboard then tap Join on the bottom right corner. If tapping it does nothing, then it means the password you typed in is too short.
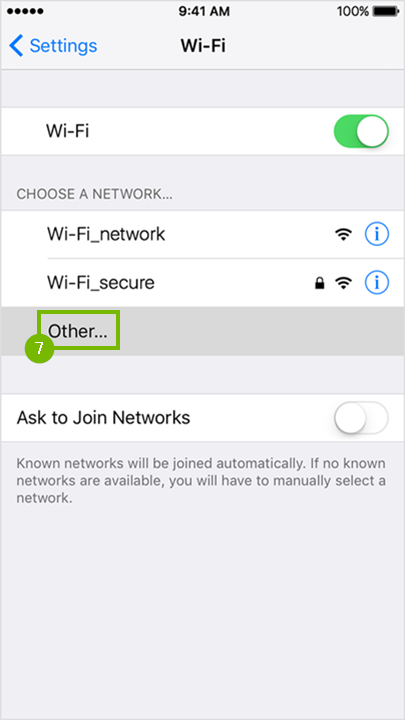
If the Wi-Fi network you are trying to connect to is hidden, then tap the Other... option.
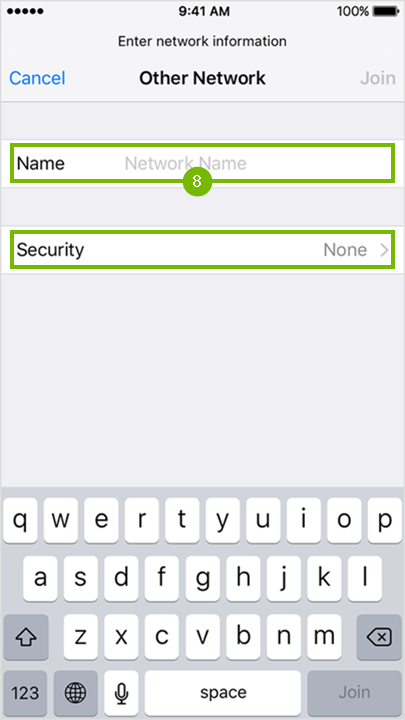
Enter the Wi-Fi networks name using the on screen keyboard and tap Join at the bottom right if no password is required to connect. If a password is needed to connect to the Wi-Fi network then tap on Security.
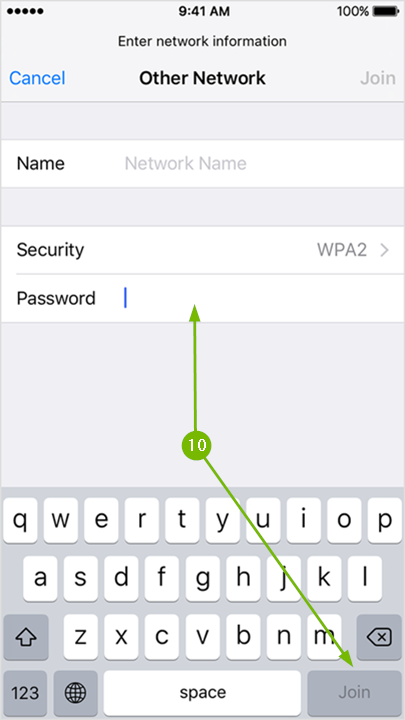
Choose the type of security the Wi-Fi network has by tapping on it.
Finally, type in the required Wi-Fi password and tap Join at the bottom right corner to connect.
At this point your iOS device should be connected to Wi-Fi.
Remove Hidden Spyware In Minutes For Free
Detect and remove spyware, keyloggers, tracking cookies, and other
threats that slow down your PC or steal your data.
65+ Million Downloads
Spyware scanner with AI-powered detection engine + database
.png)