How to Update the Remote for YUNEEC Typhoon 4K Drone
Authored by: Support.com Tech Pro Team
1. Introduction
In This Guide
You'll Learn How To:
Download and install the firmware for your drone's remote control.
Before We Begin:
Have a working computer.
2. Download and Install Firmware
Downloading the Firmware
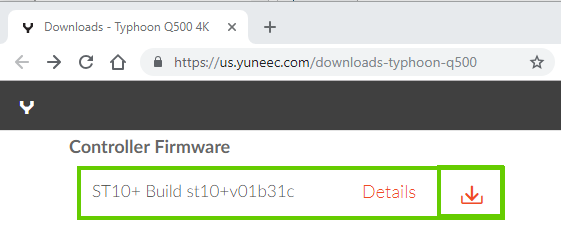
Open your browser, type in https://us.yuneec.com/downloads-typhoon-q500 and press Enter or Return.
Scroll down and select the CGO3 Camera STD download.
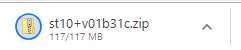
Your download will be a bin file. Keep track of where this file is downloaded, you'll need it in a moment.
Unzip and Copy Your Firmware to microSD on Windows
Prepare a formatted microSD card with more available free space than the file.
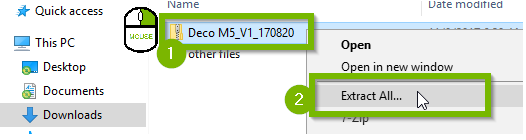
Locate the file you downloaded.
Right-click the file and select Extract All....
The extract window will appear.
Take note of the extract location (folder). If you wish to extract to another location such as a USB drive or a different folder on the computer, click Browse and pick a new location.
Click Extract when you are done.
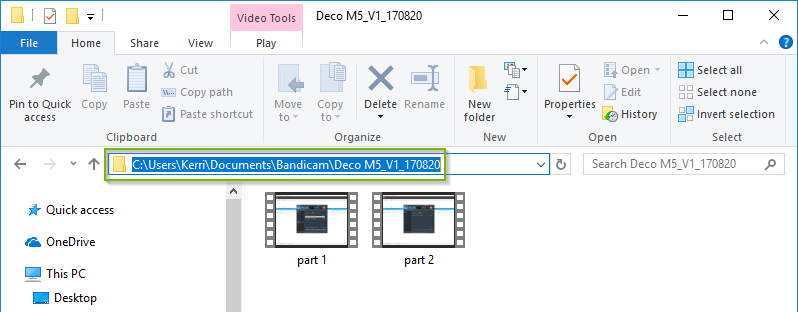
Once the files are extracted, a new Explorer window will appear with the uncompressed files. The location will be shown in the address bar while the extracted files files will appear below.
The ST10 firmware files include a 'firmware' document and an 'update' zip. The 'update.zip' is the ST10 system firmware. Do not extract it. The firmware document, includes a 'rf' and 'tx' folder that should never be renamed. The 'rf' folder contains the firmware 'st10_rf_vXX.XX.bin' and the 'tx' folder contains the firmware 'st10_tx_bXX.bin'.
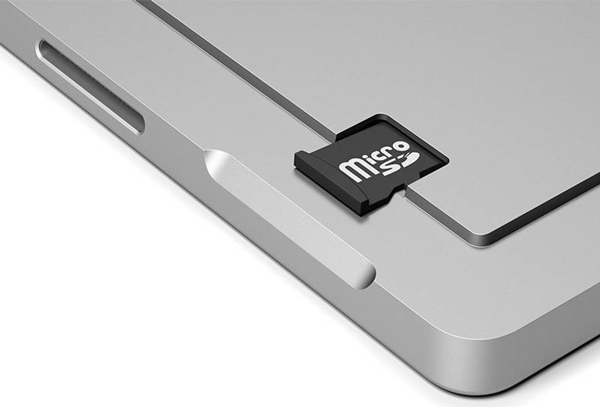
Insert a microSD card into an available slot on your computer. You may need an adapter.
Open microSD card.
Locate the file that you extracted earlier.
Copy or drag and drop the firmware file to the root of your microSD card. Make sure the file is not inside a folder on the card. Root is the first directory or top-most directory in the hierarchy of your drive. For example: The Sandisk 32GB SD Card (H:) would have a root directory of H:. If you make sure your file is not within an additional folder, you will be in the root directory.
Unzip and Copy Your Firmware to microSD on Mac
Prepare a formatted microSD card with more available free space than the file.
Double click on the archive that you just downloaded to extract its contents.
The extracted files should appear in the same folder as the original archive.
The ST10 firmware files include a 'firmware' document and an 'update' zip. The 'update.zip' is the ST10 system firmware. Do not extract it. The firmware document, includes a 'rf' and 'tx' folder that should never be renamed. The 'rf' folder contains the firmware 'st10_rf_vXX.XX.bin' and the 'tx' folder contains the firmware 'st10_tx_bXX.bin'.
Sometimes you may not see the Zip file. Safari may have extracted the file for you if you downloaded the file with it. Just look for the unzipped file or folder.
Insert a microSD card into an available slot on your mac.
Open microSD card.
Drag and drop the firmware file to the root of your microSD card. Make sure the file is not inside a folder on the card
Root directory = The first or top-most directory in the hierarchy.
Installing the Firmware
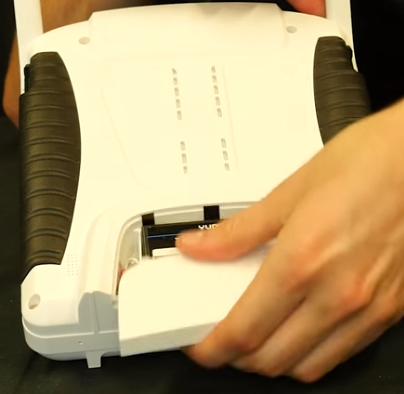
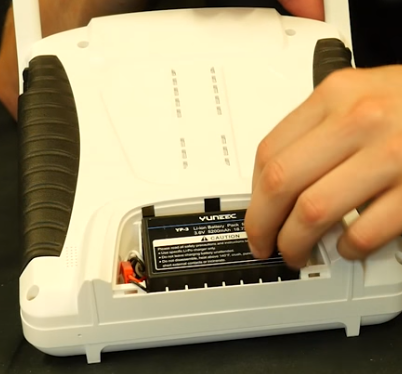
With your remote control off, flip it over and remove the battery cover.
Remove the battery.
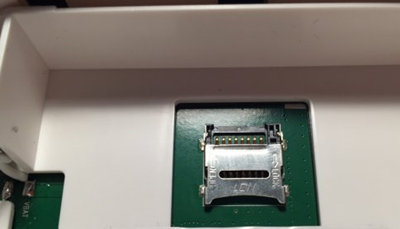
Locate the SD card slot inside the battery compartment.
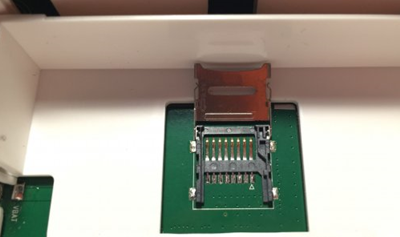
Flip the container open.
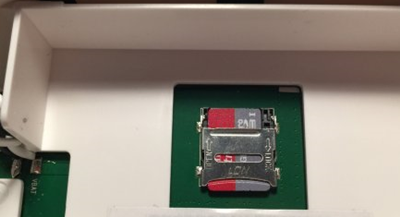
Insert your SD card.
Reinstall your battery and close up the compartment.
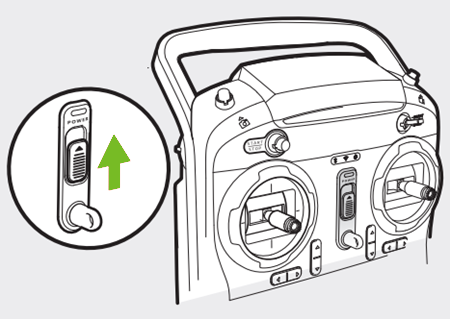
Turn your remote on.
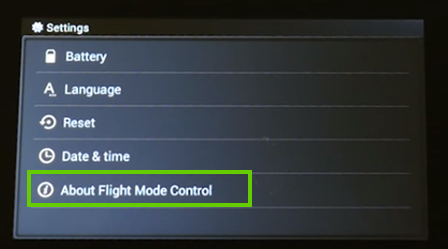
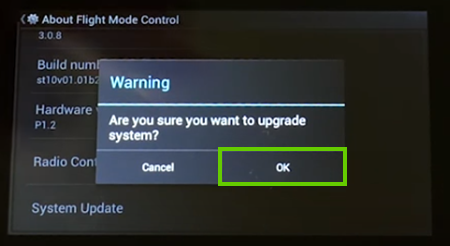
On your ST10+ screen, tap SystemSettings.
Tap OK.
Tap About Flight Mode Control.
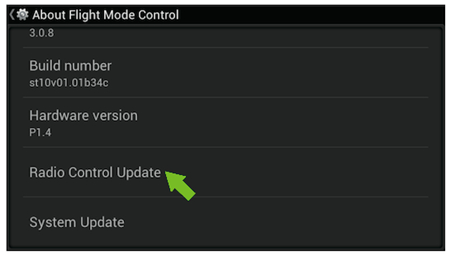
Tap RadioControlUpdate.
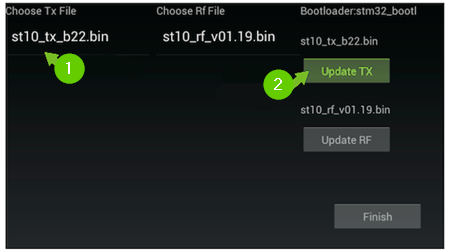
Select the _tx_.bin file and tap UpdateTX.
Afterwards, select the_rf_.bin file and tap UpdateRF. Tap Finish when done.
.png)