Clicking this button will open a new guide that will provide you with steps to resolve your issue.
5. Retrieve Wi-Fi Credentials
In order to connect to a range extender's Wi-Fi you need to know the Wi-Fi credentials set on that range extender. They are the Wi-Fi network name (SSID) and the Wi-Fi password (security key).
To retrieve the Wi-Fi credentials set on your D-Link DAP-1520 AC750 Range Extender you need to use a computer:
Launch the browser that you use to go online.
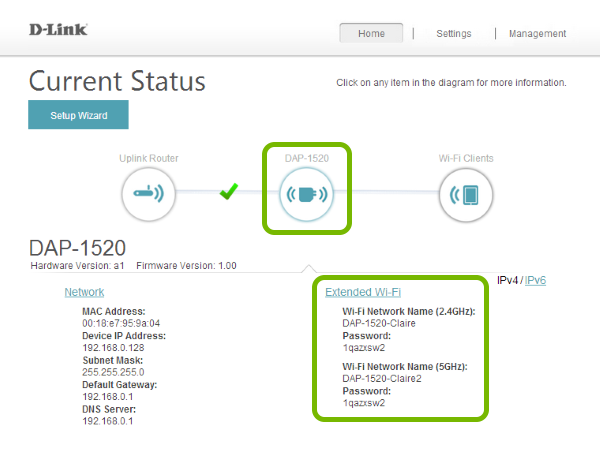
Navigate to http://dlinkap.local and login with the admin password set on your range extender.
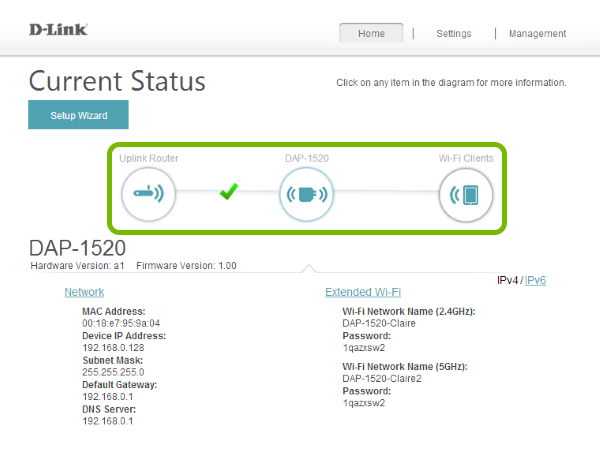
On the Home tab click your range extender in the middle and it will show the Wi-Fi credentials under the Extended Wi-Fi heading.
You can then use the retrieved Wi-Fi credentials to connect any device to the range extender's Wi-Fi.
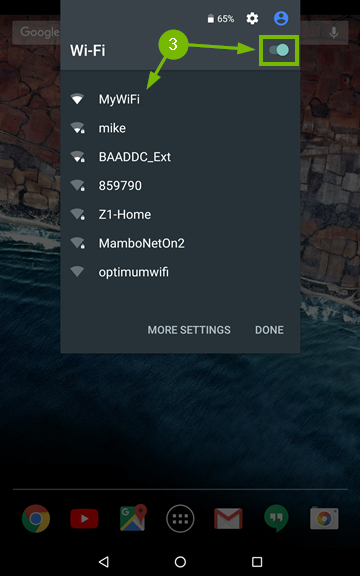
6. Connect to Wi-Fi
Depending on what device (Smartphone or Tablet) and which generation you have, the menu theme and options might look slightly different on your screen. However, the steps should be similar across all Android devices and generations.
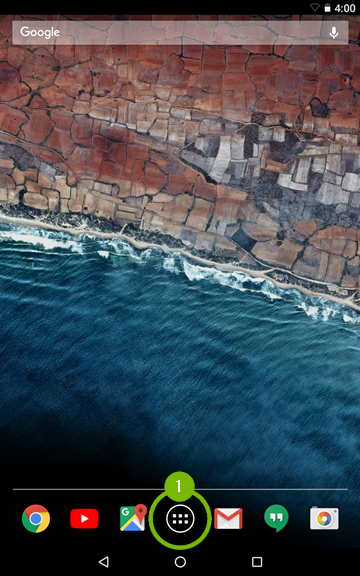
From the main screen of your Android device, tap on the Apps button.
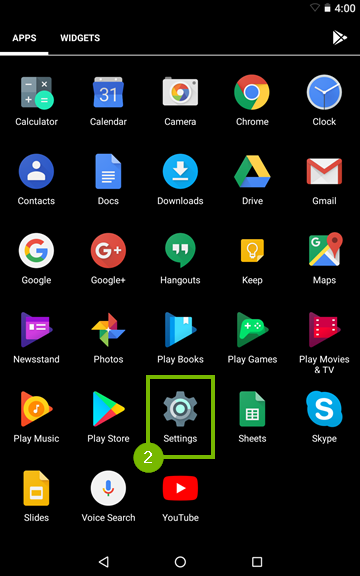
Then look for and tap on Settings.
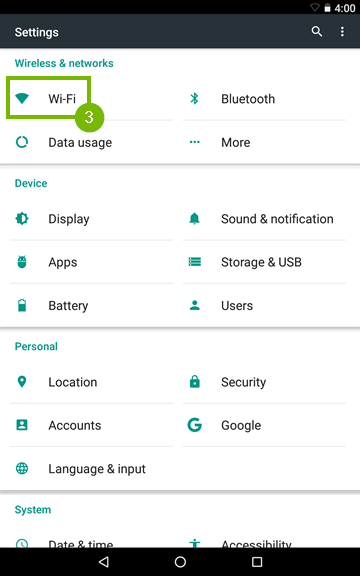
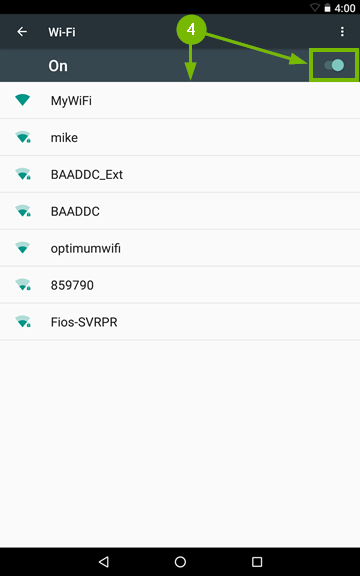
Go to Wi-Fi.
Make sure the Wi-Fi feature is enabled by flipping the On / Off switch to the On position then wait for the network list to populate and tap on the Wi-Fi network that you want to connect to.
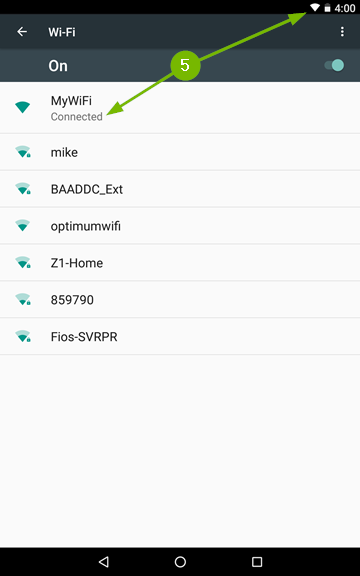
Your Android device will automatically connect to the network if there is no security enabled, or you have connected to it in the past. The Wi-Fi network name will show Connected underneath and the Wi-Fi symbol will fill up in the top right corner of the screen.
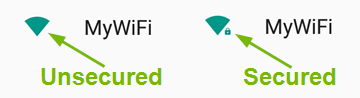
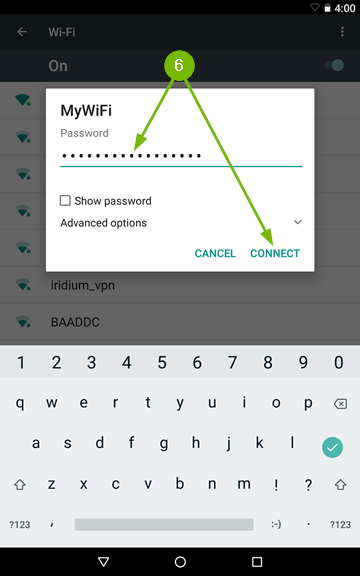
If the Wi-Fi network requires a password, then you will see a small padlock next to the Wi-Fi symbol, which also means the connection is secure. Tapping on a secured Wi-Fi networks name will prompt you to enter the password. Passwords are always case sensitive. Type it in using the on screen keyboard then tap Connect.
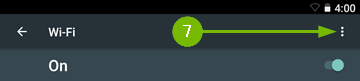
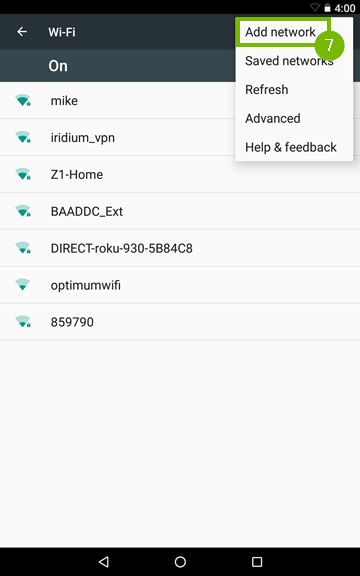
If the Wi-Fi network you are trying to connect to is hidden, then tap the More option which looks like three dots positioned vertically, on the top right corner of the screen, then tap Add network.
Enter the Wi-Fi networks name using the on screen keyboard and tap Save if no password is required to connect. If a password is needed to connect to the Wi-Fi network then tap on Security and select the security type. Type in the password, then tap Save.
At this point your Android device should be connected to Wi-Fi.
As an alternate way you can also try the following method:
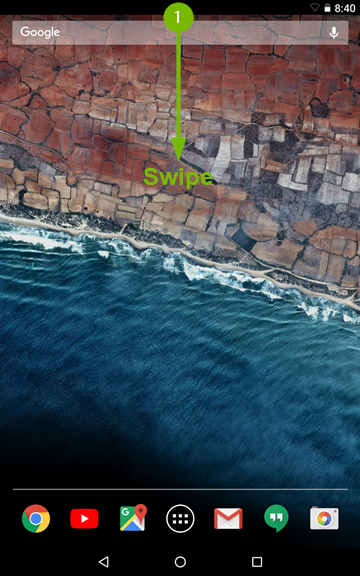
Swipe downwards from the top side of the screen.
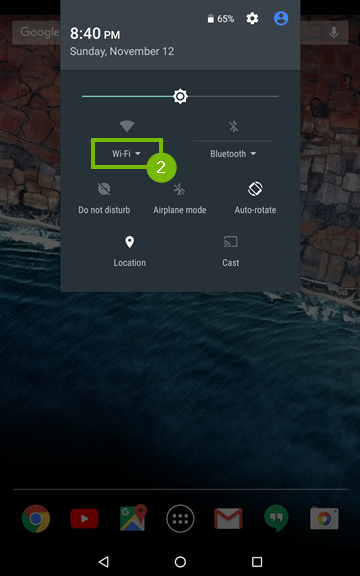
Look for the Wi-Fi symbol in the drop down menu and tap on the word below it. If you're not connected to any network, it will say Wi-Fi. If you're already connected to a network, it will show its name.
Make sure the Wi-Fi feature is enabled by flipping the On / Off switch to the On position then wait for the network list to populate and tap on the Wi-Fi network that you want to connect to.
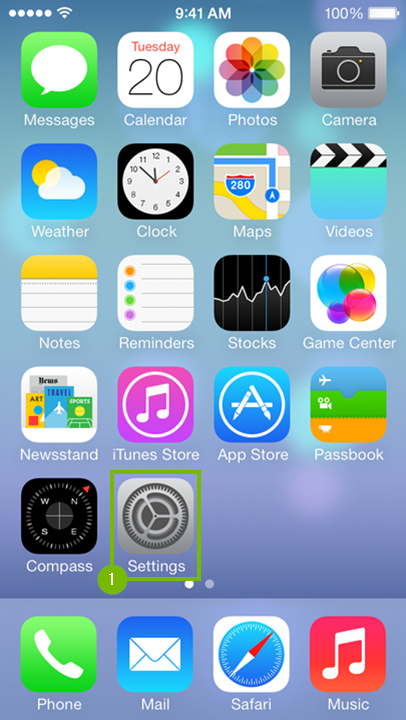
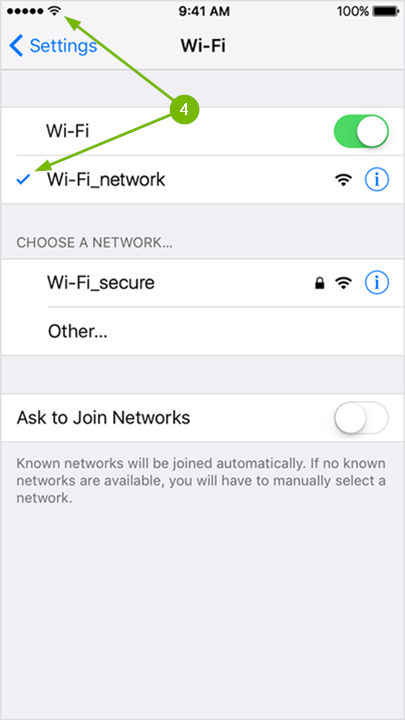
7. Connect to Wi-Fi
Depending on what device (iPhone, iPad or iPod Touch) and which generation you have, the menu theme and options might look slightly different on your screen. However, the steps should be the same across all iOS devices and generations.
From the main screen of your device, look for and open Settings.
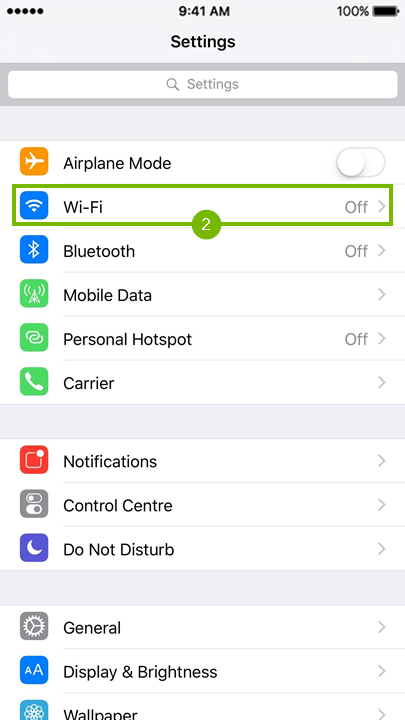
After that, go to Wi-Fi. You will see that this option also shows one of three statuses to the right:
Off - the Wi-Fi feature is disabled
Not Connected - there is no Wi-Fi connection establishe
the Wi-Fi connections name - there is a Wi-Fi connection already established.
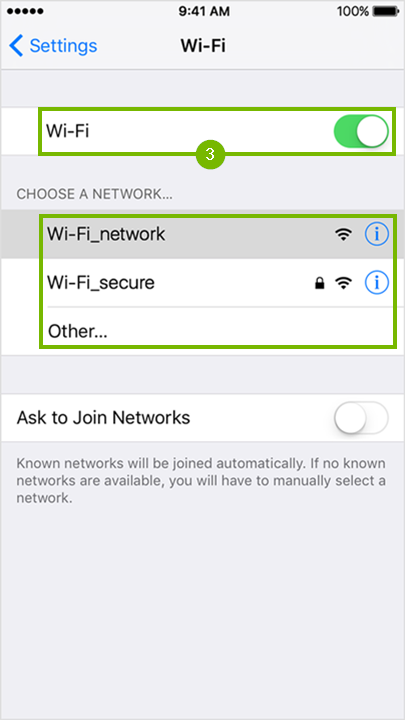
Make sure that the Wi-Fi feature is enabled by flipping the On/Off switch to the green position. Locate and tap the Wi-Fi networks name that you wish to connect to from the list.
Your iOS device will automatically connect to the network if there is no security enabled, or you have connected to it in the past. The checkmark and Wi-Fi symbol indicate you are connected.
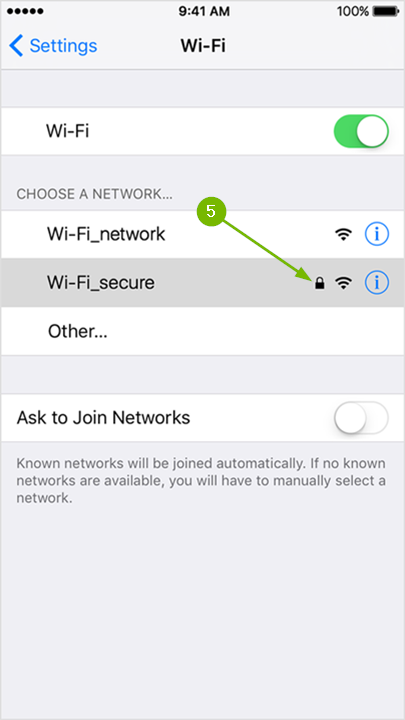
If the Wi-Fi network requires a password, then you will see a small padlock to the right of its name, which also means the connection is secure.
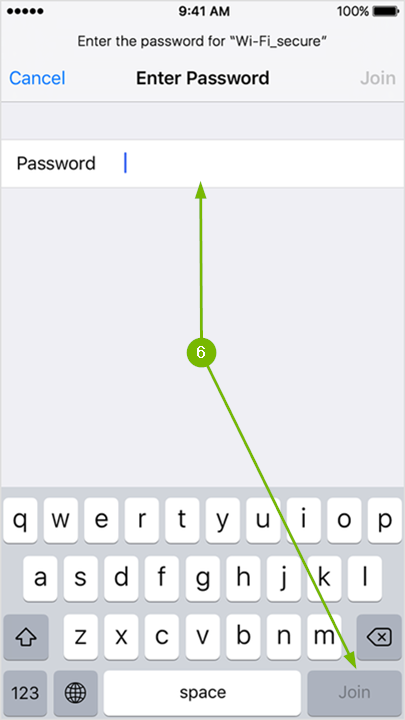
Tapping on a secured Wi-Fi networks name will prompt you to enter the password. Passwords are always case sensitive. Type it in using the on screen keyboard then tap Join on the bottom right corner. If tapping it does nothing, then it means the password you typed in is too short.
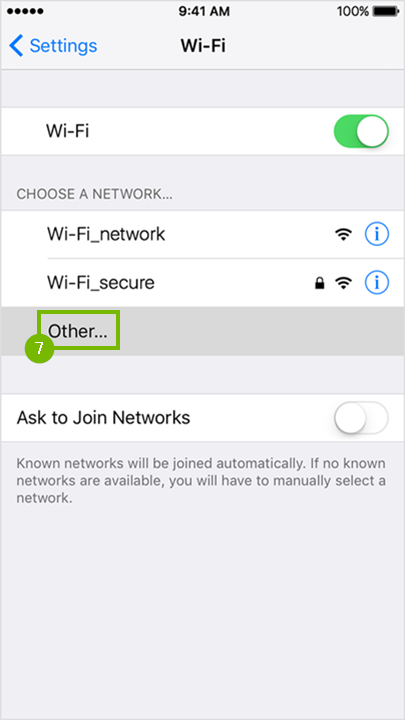
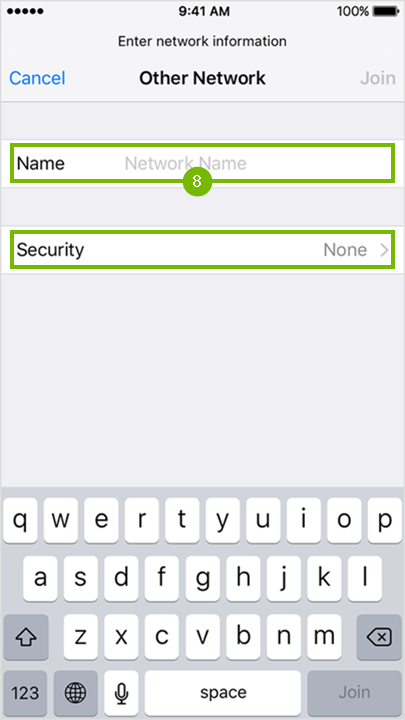
If the Wi-Fi network you are trying to connect to is hidden, then tap the Other... option.
Enter the Wi-Fi networks name using the on screen keyboard and tap Join at the bottom right if no password is required to connect. If a password is needed to connect to the Wi-Fi network then tap on Security.
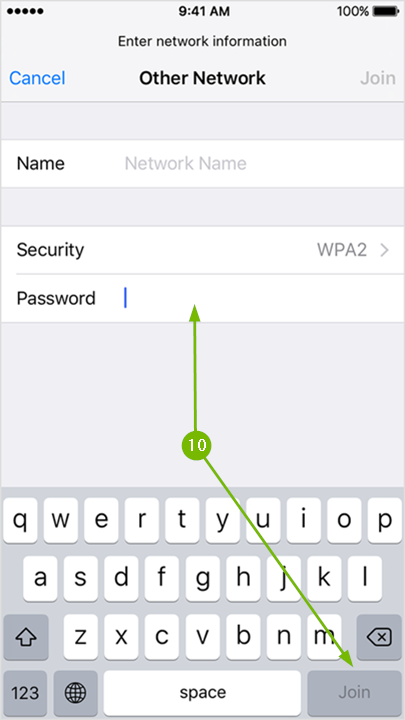
Choose the type of security the Wi-Fi network has by tapping on it.
Finally, type in the required Wi-Fi password and tap Join at the bottom right corner to connect.
At this point your iOS device should be connected to Wi-Fi.
8. Connect to Wi-Fi
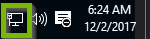
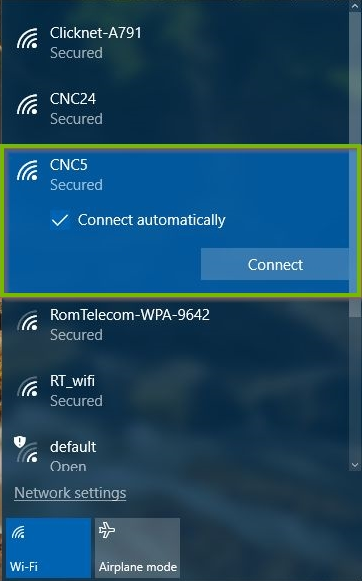
Click the network icon in the system tray. By default, it will be in the lower right corner of the screen near the time and date.
or
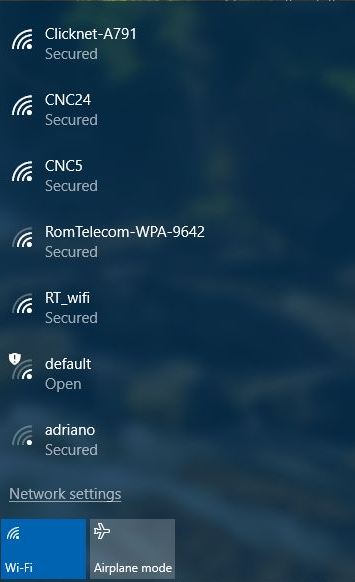
You will be presented with a list of available networks above the icon you just clicked.
Identify your wireless network from this list, and click on it. Then click the Connect button.
If your Wi-Fi network requires a password, you will be prompted to enter it. Type your password and click Next.
After this, you may be prompted to allow sharing options on the network you've chosen to connect to. Click Yes to continue.
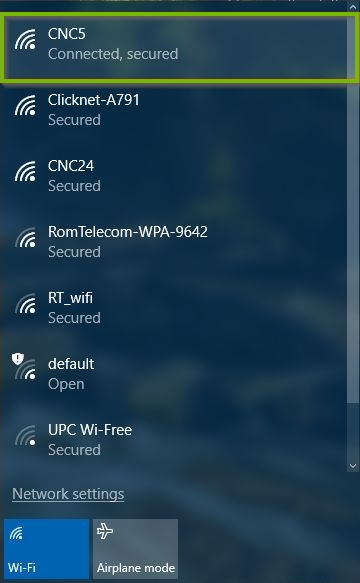
You should now be able to see your personal Wi-Fi network within this list and verify that it's status shows "Connected" or "Connected, secured."
Congratulations! You are now connected to your wireless network.
9. Connect to Wi-Fi
Click the Wi-Fi icon in the menu bar. By default it will be in the upper right corner near the time and date.
If Wi-Fi is off, choose Turn Wi-Fi on.
The strength of each nearby network is shown next to its name. More darkened bars indicate a stronger network connection.
Select the Wireless Network Name (SSID) of the network you want to connect to.
Networks that have a lock icon next to their name require a password. After you select your network, enter the network password when you're prompted. If you don't know the network password, check with the owner of the Wi-Fi network you're trying to join.
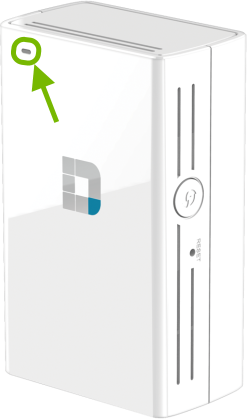
10. Indicator Light
The D-Link DAP-1520 AC750 Range Extender has one indicator light and has the following meanings:
Solid Green
Successfully connected to wireless router.
Blinking Green
Establishing connection when WPS button is pushed.
Solid Orange
Poor connection to wireless router.
Blinking Orange
Not connected to wireless router.
Solid Red
Range extender is starting up.
Off
Range extender is not receiving power.
11. Check Status
You can check the status of your D-Link DAP-1520 AC750 Range Extender in three ways:
On the device itself,
On a computer.
The type and amount of network related information that you get depends on which method you use.
On Your Range Extender
Check the indicator light on the front of the range extender:
Green light
Solid - indicates an excellent wireless signal
Blinking - indicates a connection is being established when WPS button is pushed
Amber light
Solid - indicates a weak wireless signal
Blinking - indicates no connection with the wireless router
On Your Computer
Open your preferred browser, and navigate to the D-Link Range Extender Administrator Page, and login with the admin password set on your range extender.
D-Link Range Extender Administrator Page This page is only accessible when you are connected to your D-Link range extender or on your home network.
The Home tab will display the status or your range extender.
The status will show the range extender's connection to the router and connection to your devices. Click each item to show more details about it.
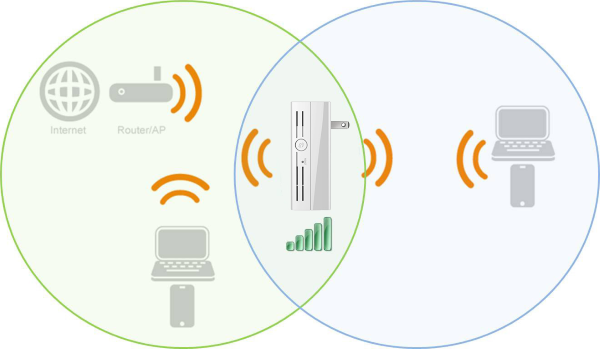
12. Find Optimal Position
The purpose of a Wi-Fi range extender is to expand the Wi-Fi coverage in your home, by capturing the signal from your wireless router and expanding it further. To accomplish this, you need to place the range extender within the existing coverage area of your wireless router. However, to maintain an excellent wireless signal for your Wi-Fi devices, the range extender needs to be positioned within optimal distance from the wireless router. Here's how to accomplish this:
Plug your range extender into an available power outlet in the area you'd like to expand your home's Wi-Fi coverage to.
Check the indicator light on the front of the range extender:
Green solid light indicates an excellent wireless signal,
Amber solid light indicates a weak wireless signal.
If the Wi-Fi indicator light shows a weak signal, plug the range extender into a power outlet that's a bit closer to your wireless router.
Repeat this process until the range extender indicates an excellent signal.
.png)