Within this guide you will learn how to use your TP-Link Kasa Cam using the Kasa Smart app. View the live camera feed while you're away from home, check detected motion events and triggered recordings, and configure camera settings to best suit your needs.
Available features and options may vary slightly based on the camera's model number.The mobile app layout may also vary based on the installed version or mobile operating system.
Launch the Kasa Smart app.
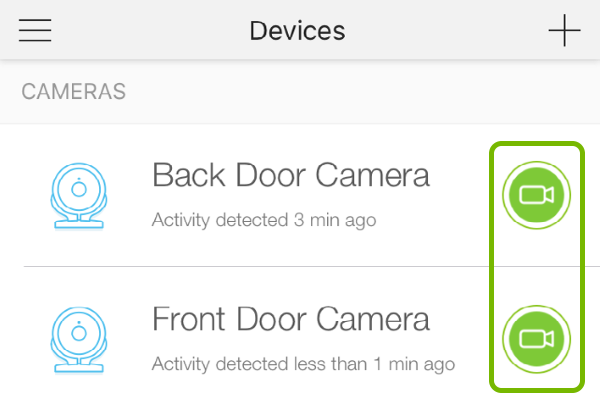
When you launch the app, it will show all your smart home devices including your cameras. From this view you can turn the cameras on or off by tapping the toggle buttons on the right side.
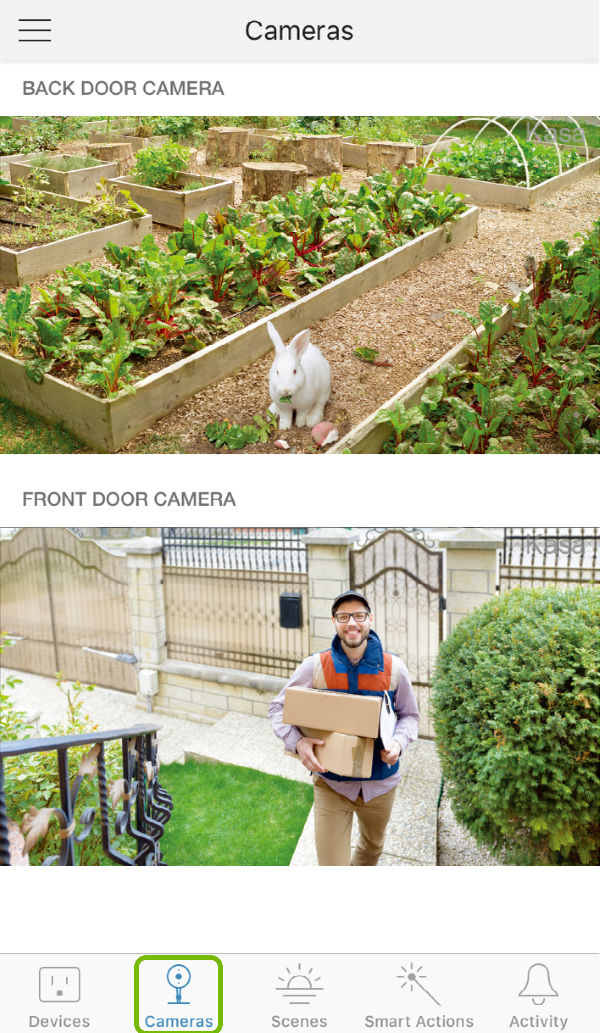
To view the cameras only, go to the Cameras tab. There you'll see a live feed of all your cameras.
Tap a camera name in the Devices tab or a live feed in the Cameras tab for more options.
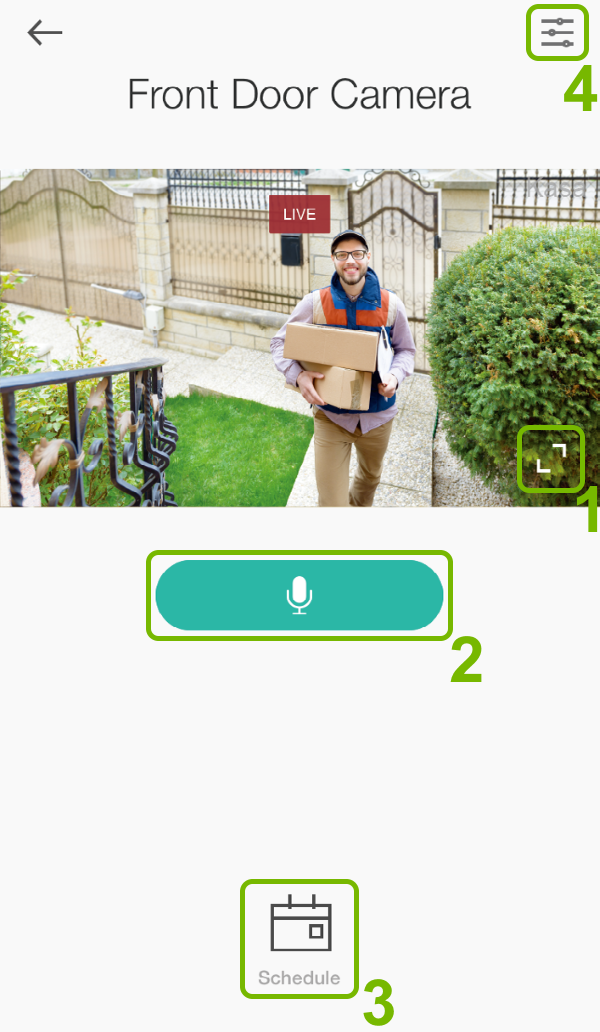
From there you can:
View the live camera feed in fullscreen (1)
Have a two-way conversation (2) with anyone in front of the camera
Schedule (3) automatic turn on or off events for the camera
Or configure the camera settings (4).
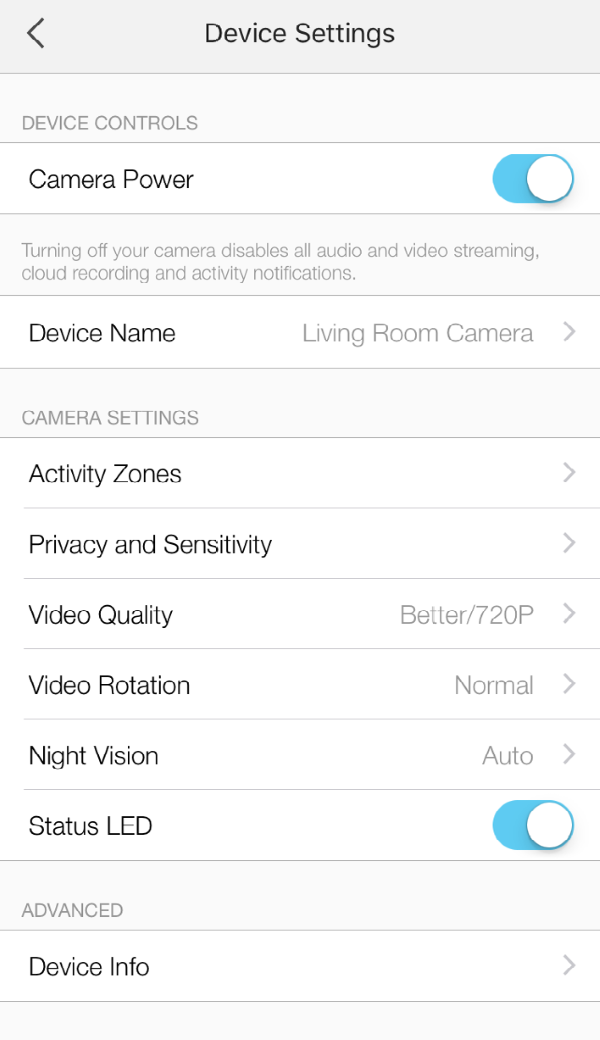
From the Device Settings screen you can configure the camera the way you prefer.
You can configure several settings such as:
Camera Power - Turn the camera on or off
Device Name - Set the camera name and location
Activity Zones - Set areas on the camera view that should be monitored for movement
Privacy and Sensitivity - Choose whether you want to record video or audio, set the motion detection sensitivity and recording frequency
Video Quality - Choose the video resolution and quality
Video Rotation - Choose whether the camera is installed normally or on a ceiling
Night Vision - Choose how you want the night vision to kick in
Status LED - Turn the status light on the front of the camera on or off.
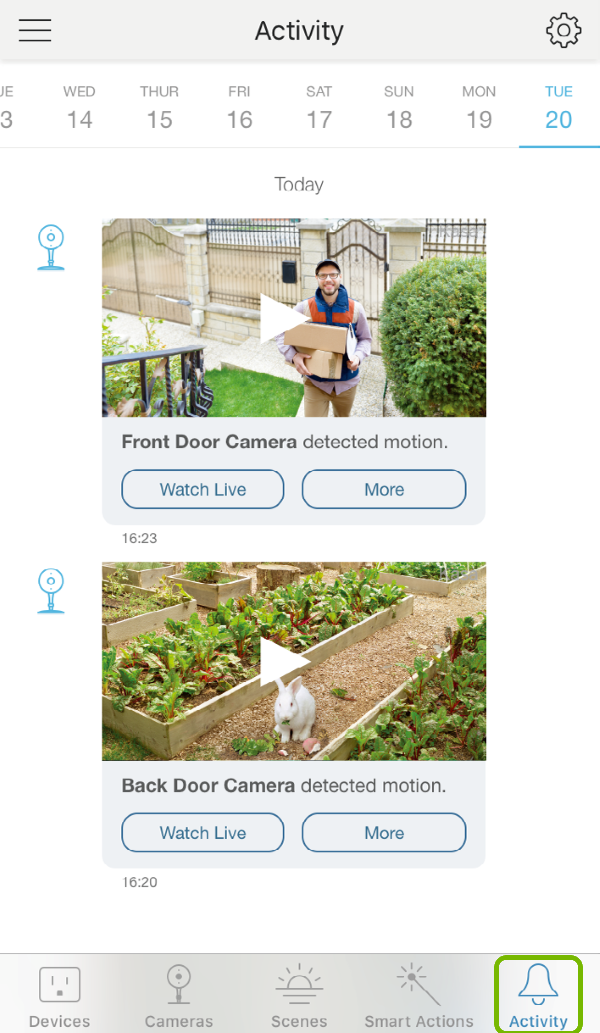
To check your camera's history go to the Activity tab where you'll see all the detected motion events and triggered recordings.
Remove Hidden Spyware In Minutes For Free
Detect and remove spyware, keyloggers, tracking cookies, and other
threats that slow down your PC or steal your data.
65+ Million Downloads
Spyware scanner with AI-powered detection engine + database
.png)