.png)
Authored by: Support.com Tech Pro Team
Learn how to capture life in 4K with incredible detail and unparalleled realism using the using the two dedicated buttons on your Yuneec ST10+ Remote Control.
Tools You'll Need:
Supplies You'll Need:
-->
Before You Begin:
Your drone's camera must be up to date
Your drone must be set up and ready to fly
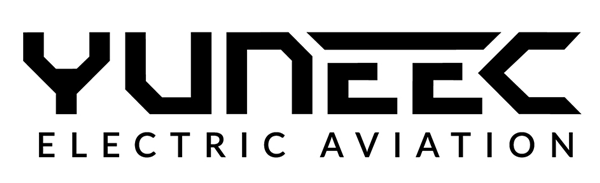
Keep in mind that you can easily set the pitch/tilt of your camera at any time by using the slider on the left side of your remote.
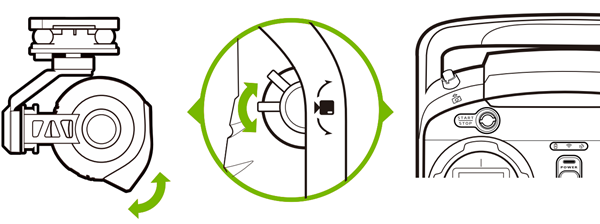
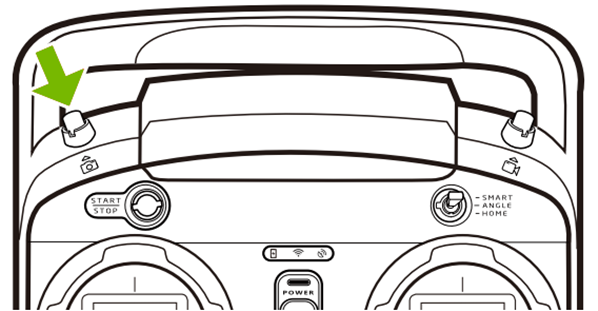
You cannot take still photos while recording video. You must stop recording video in order to take still photos.

Support.com is committed to your privacy
We do not share or sell your data to third parties. We do use cookies and other third-party technologies to improve our site and services. The California Consumer Privacy Act (CCPA) gives you the ability to opt out of the use of cookies, third-party technologies and/or the future sale of your data. Do not sell my personal information.

Support.com is committed to your privacy
Read our Privacy Policy for a clear explanation of how we collect, use, disclose and store your information
