Smartphone photography keeps getting better. The Camera and Gallery apps that come with Android devices have evolved into powerful tools for taking, viewing, editing, and sharing photos. In this guide, we will go over basic usage for your Android smartphone's camera app.
2. How to Use Camera
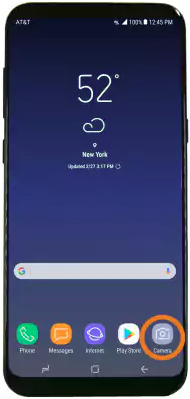
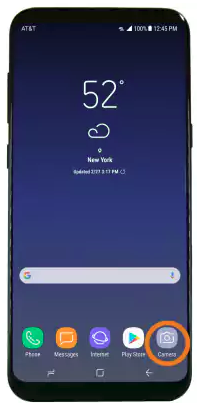
Select the Camera app from the home screen of your device.
To switch between front-facing and rear-facing cameras, tap the Change Camera icon.
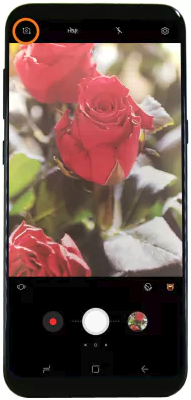
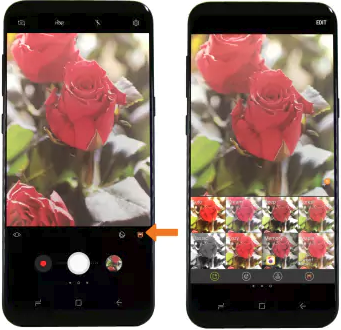
To access different camera effects such as filters, stamps and stickers - tap the Effects icon.
To focus the camera, touch the desired area of the frame you'd like to focus on. A circle will appear on screen, and the camera will attempt to focus on the spot you've tapped on.
To zoom-in or zoom-out when taking a photo, place two fingers on the screen and use a "pinching" motion/gesture. Move your fingers apart from one another to zoom-in, or closer together to zoom-out.
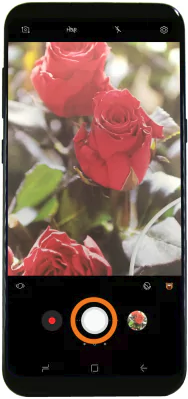
To actually take the photo you currently have framed on the screen, press the Shutter button.
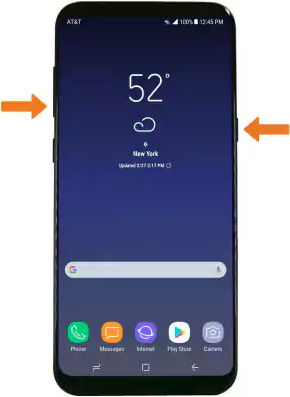
To take a screenshot of the contents of your entire screen, press and hold the Power/Lock and Volume Down buttons at the same time. This will capture an image of everything that's currently on your screen.
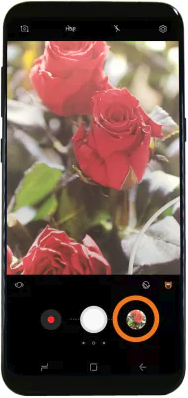
To access the photos you've recently taken, tap the Gallery icon.
3. Introduction
The remainder of steps will go over alternative settings and features of the Android's Camera app. Feel free to test each one of these features as you go, and skip ahead to the end of the guide if you find you have covered all additional features you wish to learn about.
4. Camera App Icon Legend
Below are some of the most common icons you will see within your Android device's camera app. As each Android device can be a bit different depending on the model and version of Android it is running, you may not see every icon listed here on your individual device.
Flash
:
The LED flash gives your photo extra light when you need it.
Tap to turn it on or off.
HDR:
When you turn on HDR, several photos at different exposures are automatically combined to give you a single beautifully lit photo.
Timer:
Tired of always taking the pictures and never being in them?
Set your device somewhere sturdy, frame your shot, then tap.
Choose a 3 or 10 second countdown, tap the Shutter button, then get into place.
Frontcamera:
Take a selfie with your Android's front camera. Tap, find the perfect angle, then tap the Shutter button.
On some android devices, you can use the Volume Buttons on the side as the shutter button.
Shutter / Image Capture:
This is the main function button for capturing images.
Zoom:
Use the Camera app digital zoom feature to make something that's far away seem close by.
Before you take the photo, pinch anywhere to make the image in the center of the screen bigger and remove the outside edges
Zoom:
If you want to zoom more than 2x or finely control the image, touch and hold 1x or 2x to get a slider that lets you zoom all the way to the limit of your device's capability.
5. How to Record a Video
Select the Camera app from your device's home screen.
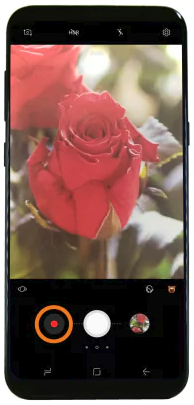
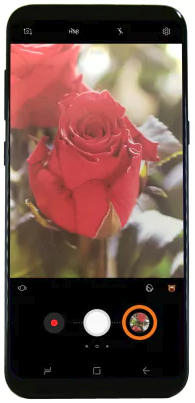
To enter video recording mode, press the Record icon.
To focus the camera, touch the desired area of the frame you'd like to focus on. A circle will appear on screen, and the camera will attempt to focus on the spot you've tapped on.
To zoom-in or zoom-out when taking a photo, place two fingers on the screen and use a "pinching" motion/gesture. Move your fingers apart from one another to zoom-in, or closer together to zoom-out.
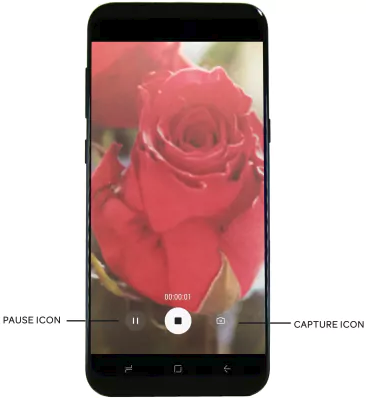
To capture a still photo while recording a video, press the Capture icon. To pause video recording, press the Pause icon.
To access recently taken photos and videos, select the Gallery icon.
6. Camera and Video Settings
Select the Camera app from your device's home screen.
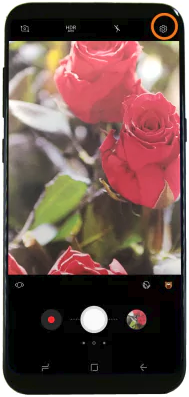
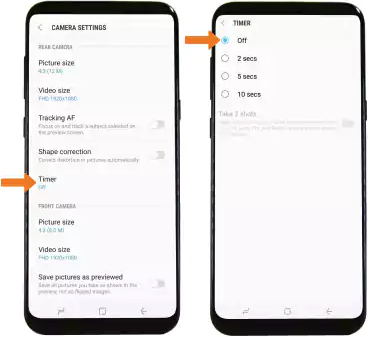
Select the Settings icon.
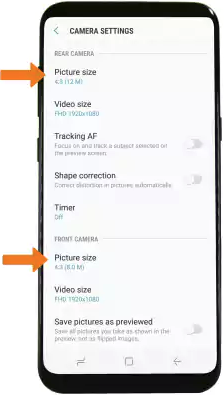
You can change the Picture Size of images captured on both the front-facing and rear-facing cameras. This may be necessary if you find photos are taking up too much storage space when being taken. Lowering their size will decrease the amount of storage space they consume, allowing you to store greater numbers of photos before running out of space.
You can also set a timer by selecting Timer from the settings menu and then choosing the desired timer length.
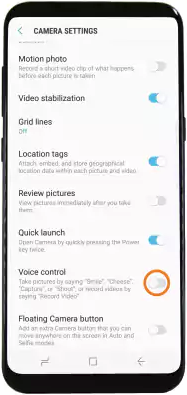
Turn on voice control by tapping the Voice control switch. This will allow you to instruct your device take photos or record videos by activating it with specific voice commands instead of pressing the shutter buttons on-screen.
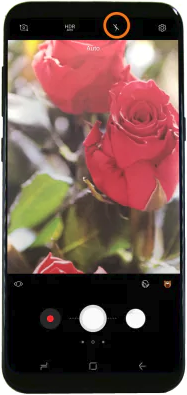
To change flash settings, select the Flash icon across the top of the camera app's interface.
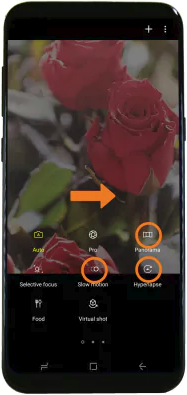
To access additional camera modes, Swipe right on the camera app's interface, and additional options will appear on screen. Available options will change depending on the model device you have. You may see options such as Slow Motion, Panorama, or Hyperlapse.
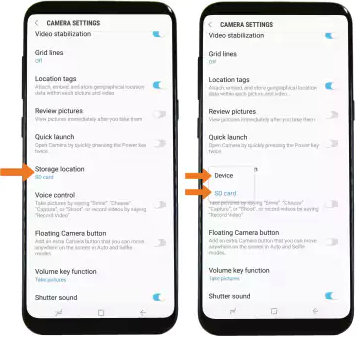
To change the storage location of where your photos are saved, select Storage location from the settings menu and then set your desired save location. This may be necessary if you would rather have your device save photos to a large SD card you've inserted. This option will vary depending on the model device you have, as some devices do not offer SD memory card slots.
.png)