Chromebooks are user-friendly and efficient laptops that run on Google's Chrome OS. Whether you're a newcomer or just looking to improve your Chromebook skills, this comprehensive guide will help you navigate, customize, and utilize your device effectively.
1. Getting Started with Your Chromebook:
Power on your Chromebook and follow the initial setup process.
Sign in with your Google account or create one if you don't have it.
2. Navigating Chrome OS:
Learn how to use the touchpad, keyboard shortcuts, and gestures.
Understand the Shelf, Taskbar, and system tray in the user interface.
3. Customizing Your Chromebook:
Personalize your desktop background and theme.
Configure the system settings, including display, sound, and touchpad preferences.
4. Managing Files and Storage:
Use the Files app to manage files and folders on your Chromebook.
Ensure your data is backed up to Google Drive.
5. Using Chrome Browser:
Get the most out of the Chrome browser, including bookmarks, extensions, and settings.
6. Utilizing Google Workspace:
Learn how to use Google Docs, Sheets, Slides, and other productivity apps.
Collaborate with others in real-time using Google Drive.
7. Installing and Managing Apps:
Install apps from the Chrome Web Store and Google Play Store.
Organize and customize your app launcher.
8. Printing from Your Chromebook:
Set up and print documents from your Chromebook to compatible printers.
9. Connecting External Devices:
Connect external displays, keyboards, mice, and other peripherals.
Use Bluetooth devices and headphones with your Chromebook.
10. Troubleshooting Common Issues:
Resolve common problems such as Wi-Fi connectivity, sound, and display issues.
Perform a Powerwash (factory reset) if necessary.
11. Security and Updates:
Keep your Chromebook secure by enabling automatic updates and using a strong password.
Learn about Chrome OS's built-in security features.
12. Advanced Tips and Tricks:
Explore advanced techniques like running Linux apps and accessing developer tools.
Use keyboard shortcuts and advanced Chrome flags for improved productivity.
With this comprehensive guide, you should have a solid understanding of how to use your Chromebook effectively. Regularly explore new features and stay updated with the latest Chrome OS developments to make the most of your device. Enjoy your Chromebook experience!
Contact Support.Com
If you are still having trouble, refer to the Step-By-Step Guide below, or Contact Support.Com for Personalized Assistance.
Authored by: Support.com Tech Pro Team
1. Introduction: Chromebook: Using Your Chromebook
This guide will take you through the basics of using your Chromebook.
2. Chromebook: App Drawer
Pinning an AppPinning an app you use a lot to the task bar can make it much easier to open and use that app.
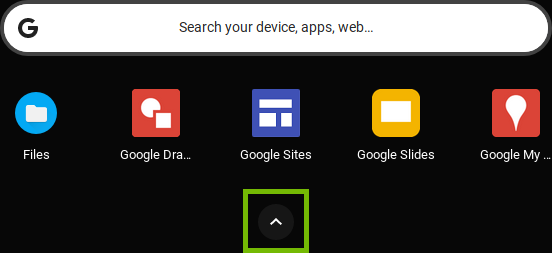
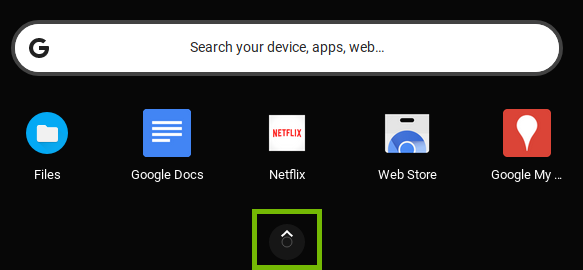
Select the Apps menu in the bottom-left corner.
Select the up arrow ^ to show all your apps.
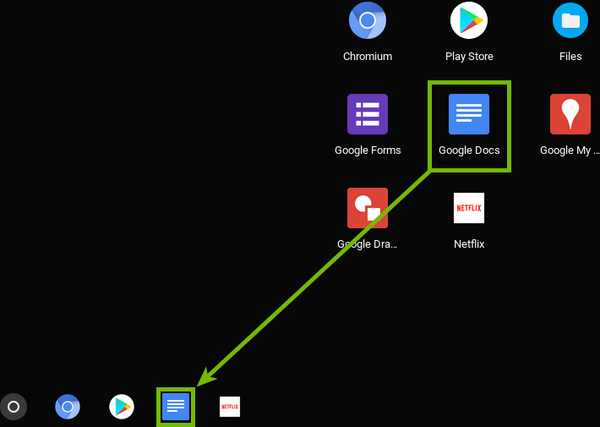
Click and hold the app you want, drag it to the task bar, then release the mouse button. The app will pin, or remain on the task bar.
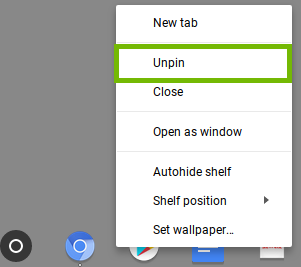
Unpinning an App
Using your right mouse button, right click on the app you want to unpin.
From the menu that opens, select Unpin.
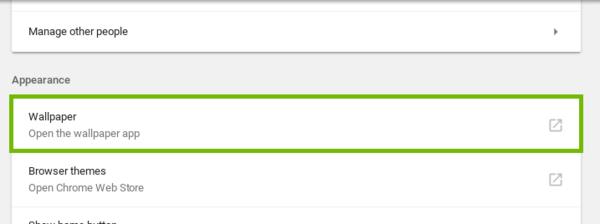
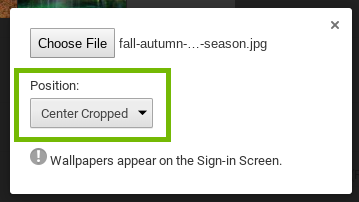
3. Chromebook: Change Background
Select your profile picture in the lower-right corner.
Select Settings.
Scroll down, and select Wallpaper.
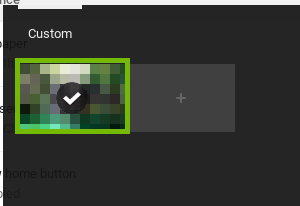
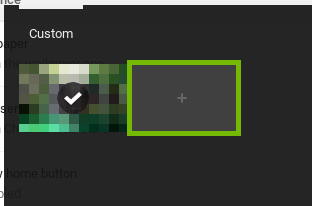
You may select an image displayed here.
To add your own image, select the square with the + symbol.
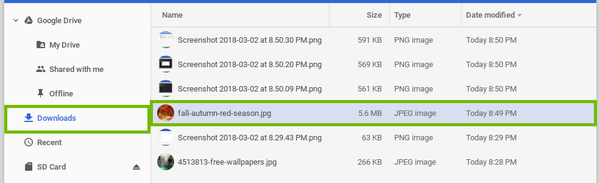
Select the location you'd like to browse on the left. Then, select the image you want, then select Open.
Select how you'd like the image scaled. Center Cropped will make it fill the screen.
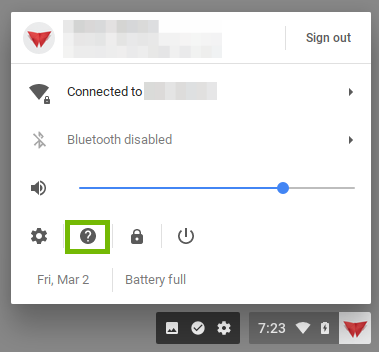
4. Chromebook: More Information
Built-in help for your Chromebook is never more than 2 clicks away.
Select your profile picture in the lower-right corner.
Select the question mark ? icon.
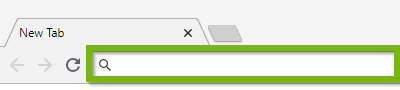
5. Chrome Browser: Basic Use
The primary function and feature of your Chromebook is to get you online, and provide you with a modern, easy-to-use web browser, for all your needs. The Chromebook does this using the Google Chrome browser.
Your Chromebook comes with the Google Chrome browser. The icon is on the bottom, near the left.
Type a web page, or a search term in the bar at the top to go to that page, or search the web.
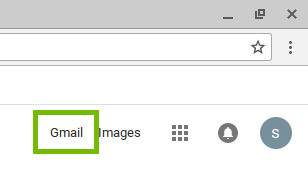
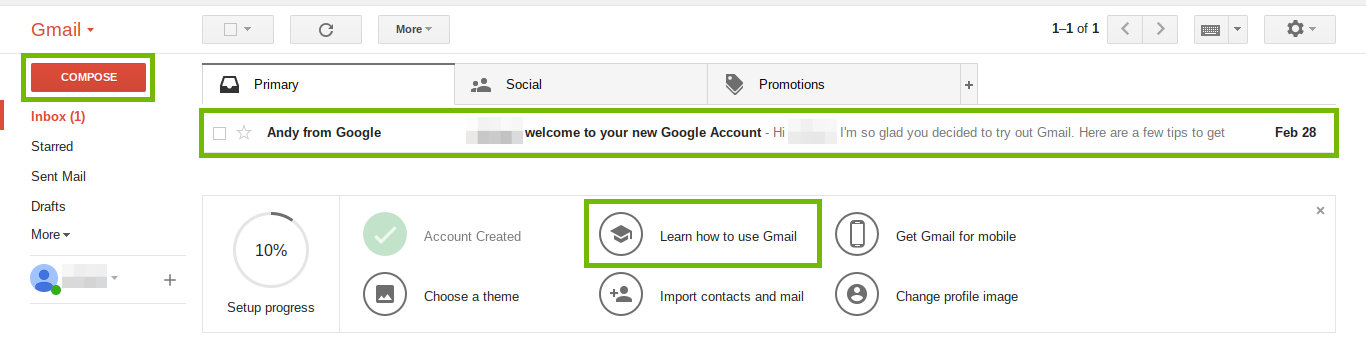
6. Chromebook: Using E-Mail App
Open the Chrome Browser.
Select Gmail in the top-right.
Select Compose on the left to write a new E-Mail message. Select a message in the main part of the window to read it. Further information on all the features of Gmail are available at the Learn how to use Gmail link at the bottom.
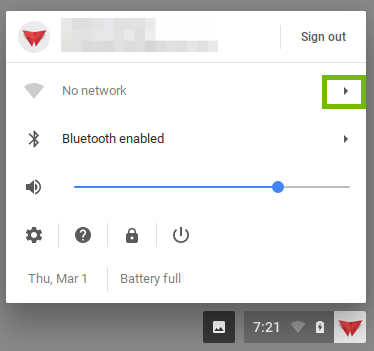
7. Chromebook: Connect to Wi-Fi
Select the User menu by clicking your profile picture in the bottom-right corner.
Select the triangle > next to the network option.
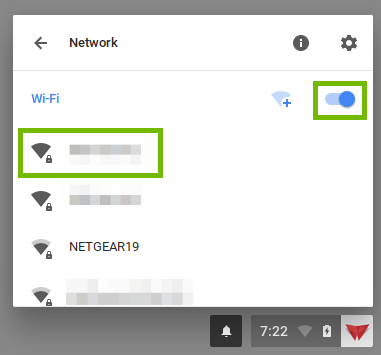
Make sure Wi-Fi is turned on at the top of the menu. Then, select your Wi-Fi network, it will usually be at or near the top.
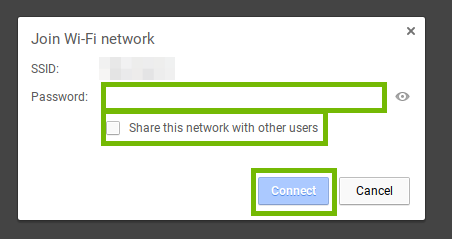
Enter your Wi-Fi password. You may also want to place a check mark next to Share this network with other users, so other people who use this Chromebook can connect to this Wi-Fi network as well. Then, select Connect.
When you are connected, the Wi-Fi icon will show as filled in in the bottom right-hand corner.
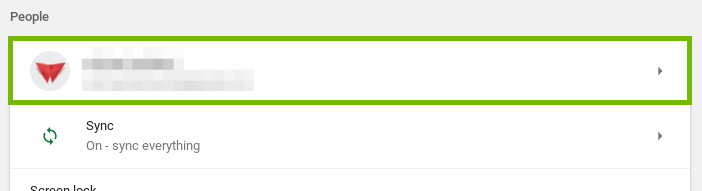
8. Chromebook: Manage Accounts
Select your profile picture in the lower-right corner.
Select Settings.
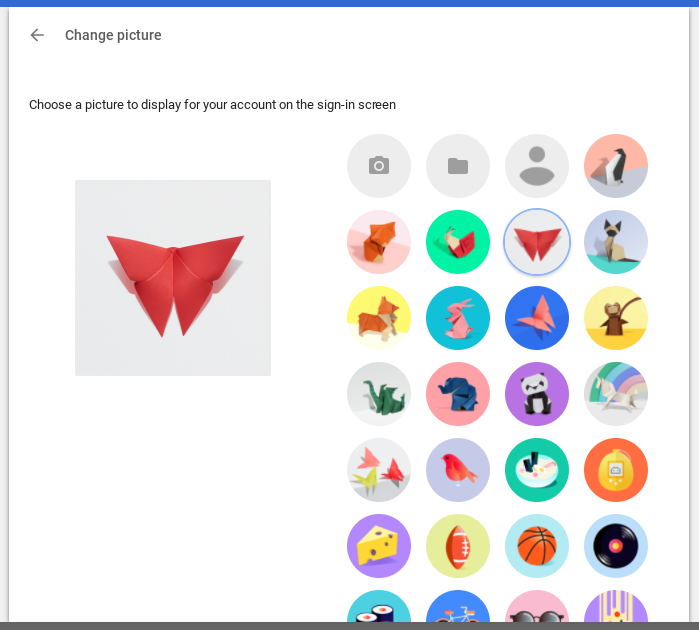
Select your profile to change your icon.
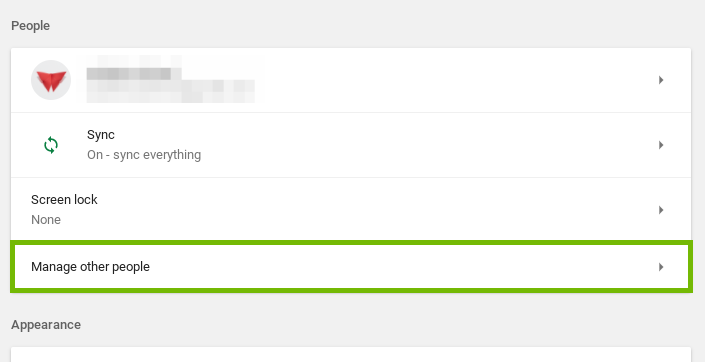
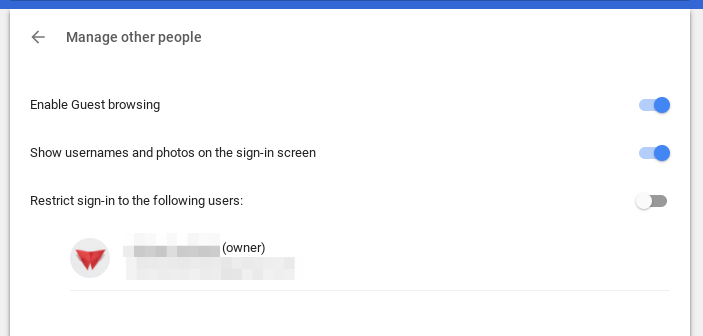
Select Manage other people to remote other people's sign-ins from your Chromebook.
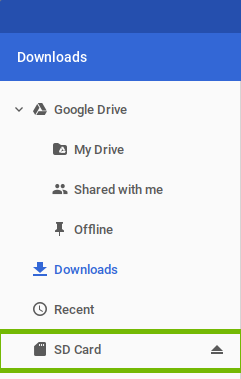
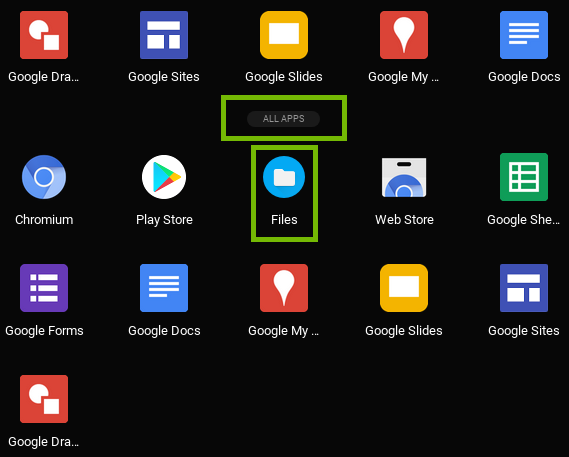
9. Chromebook: Manage Files
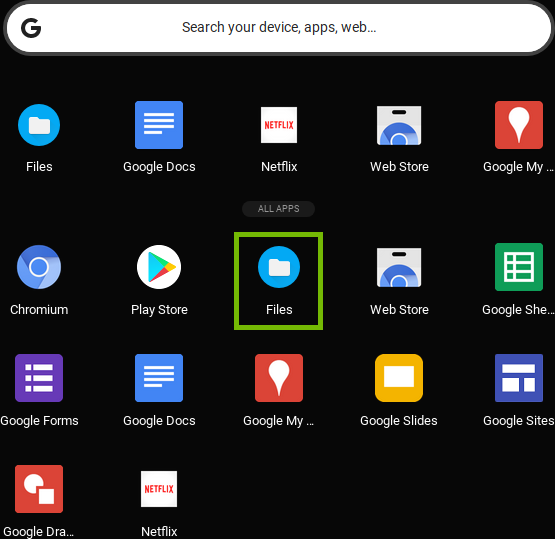
Select the Apps menu in the bottom-left corner.
Select the up arrow ^ to show all your apps.
Select Files.
From here, you'll be able to manage your files.
Downloads
These are all the files stored on your Chromebook itself.
Google Drive
These files are stored online for you by Google. If anything happens to your Chromebook, these files are safe. You can access them from any computer using your Google account at https://drive.google.com/.
SD Cards
These are files stored on external USB drives, or storage cards connected to your Chromebook.
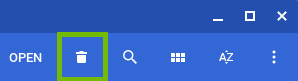
To delete a file, select the file you want to delete, then select Delete at the top.
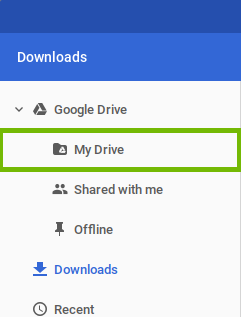
To copy a file from your Chromebook to your Google Drive to keep it safe, click and hold the file, drag it to My Drive, and release the mouse button.
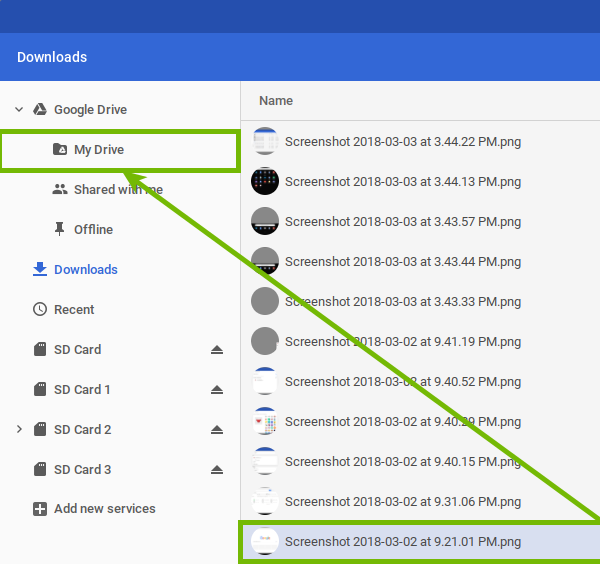
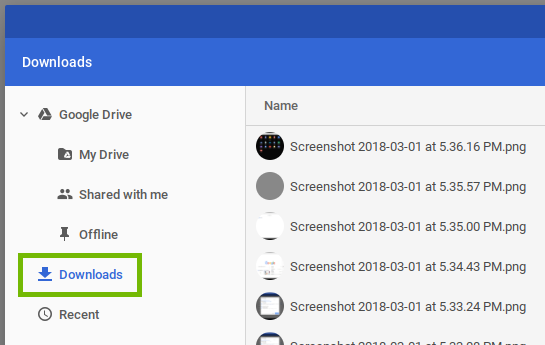
10. Chromebook: Backup to Google Drive
Your Chromebook does not save files locally in most cases. The only exception to this is any files you've downloaded that you may wish to save. This step will guide you through checking your Downloads, and saving them to Google's servers to keep them safe.
Select the Apps menu in the bottom-left corner.
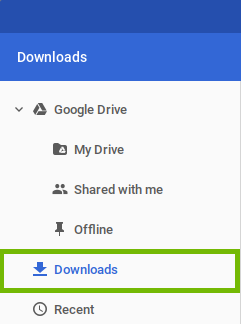
Select All Apps > Files.
Select Downloads on the left. These are the only files stored on your Chromebook.
You can open a file by double-clicking on it.
You can copy files to your Google Drive by dragging them to My Drive on the left. Copying a file to Google Drive places them on Google's servers, so they won't be lost if your Chromebook is restored.
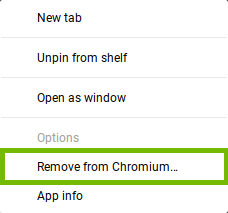
11. Chromebook: Manage Apps
Select the Apps menu in the bottom-left corner.
Select the up arrow ^ to show all your apps.
To delete an app, using your right mouse button, right click on the app. A menu will open. Select Remove from Chrome, or Remove from Chromium.
Select Remove.
12. Chromebook: Update
Your Chromebook automatically checks for updates on startup. This step will walk you through checking manually.
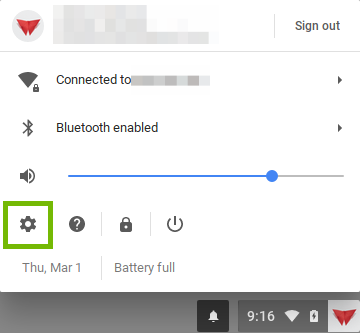
Select the User menu by clicking your profile picture in the bottom-right corner.
Select Settings.
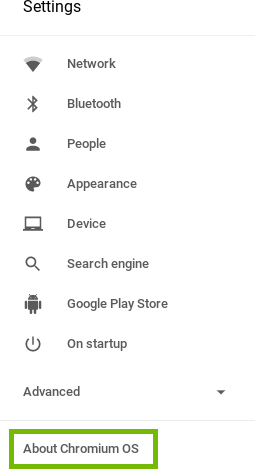
Select the Menu in the top-left.
Select About Chrome OS or About Chromium OS on the bottom left of the menu.
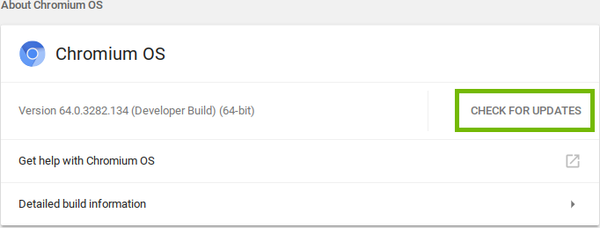
Select Check For Updates.
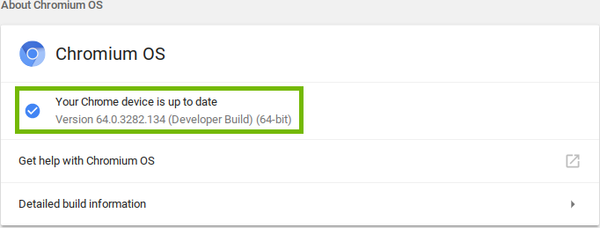
If your device is up-to-date, it will show that here.
If there is an update pending, you will be asked to reboot. Choose to reboot, and your device will reboot and update on its own.
13. Google: Manage Account
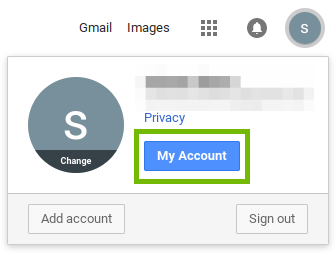
Select the Chrome Browser. The icon is on the bottom, near the left.
Select the profile button in the top-right corner.
Select My Account.
From here, you'll be able to make changes to your entire Google account.
.png)