The Fitbit Versa is one of the most advanced Fitness trackers on the market. With it you can track your health, exercise, and even play music while you run.
Tools You'll Need:
A paperclip
iPhone charging cable
Access to a computer with iTunes installed
Any other non-consumable tools needed
Comment out tools section if no tools are necessary
-->
Supplies You'll Need:
Zip ties
Any other consumable supplies
Comment out supplies section if no supplies are necessary
-->
Before You Begin:
You must have the Fitbit App installed and your Versa set up.
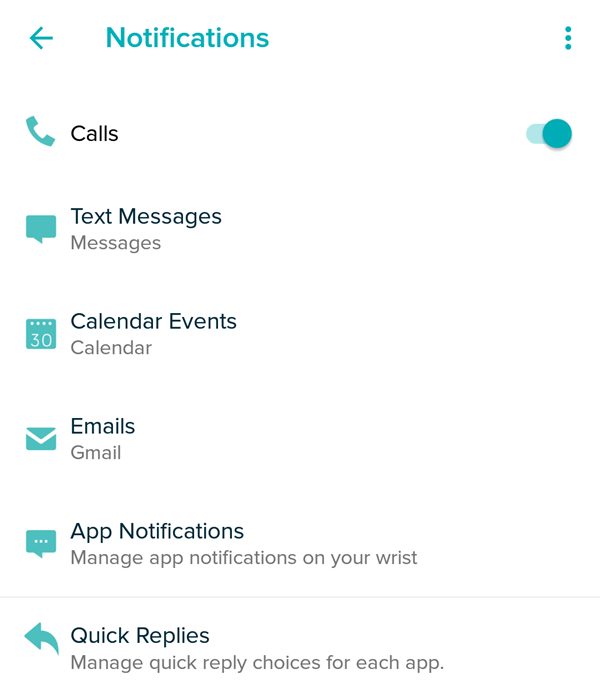
Select any of the settings to adjust them. From here you can turn off notifications for specific apps as well as edit your quick replies.
3. More Information
You have finished the current topic. You may wish to explore other available topics.
4. Messaging on Fitbit Versa
Quick replies are small pre-selected messages that you use to reply on your Fitbit.
Quick replies are automatically turned on for any supported apps that send notifications from your phone to your Fitbit device.
Versa stores up to 30 notifications, after which the oldest are replaced as you receive new ones.
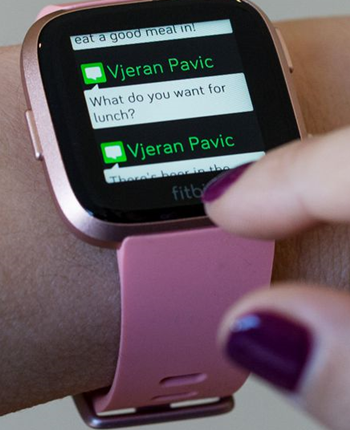
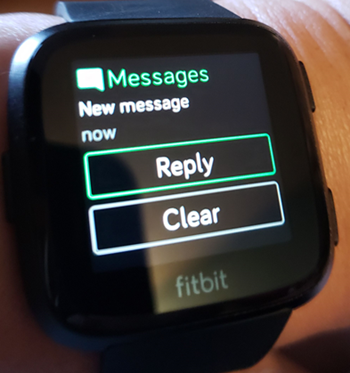
Tap the Notification you want to answer.
Tap Reply.
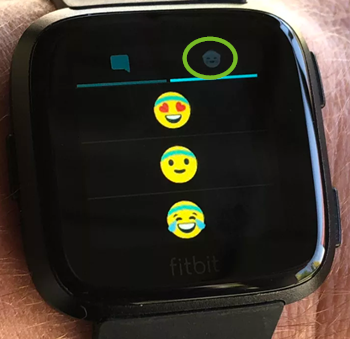
Select the Speech Bubble to quick reply with text.
Select the Smiley Face to reply with an emoji.
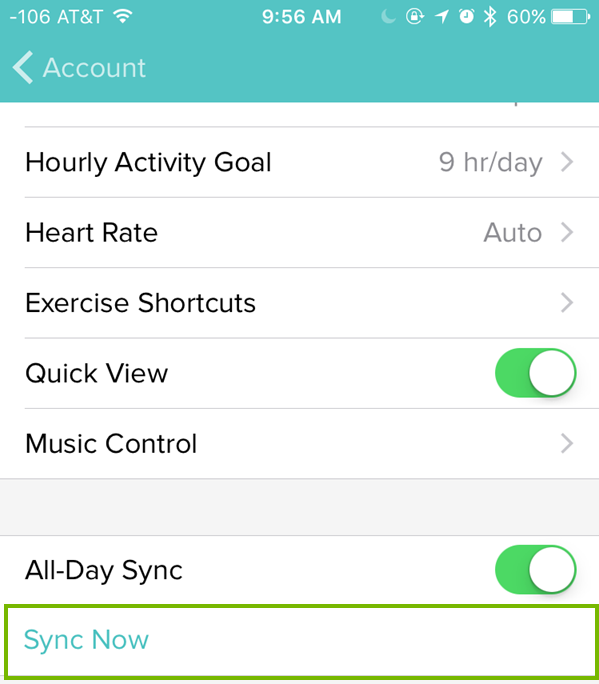
5. How to Sync Your Watch
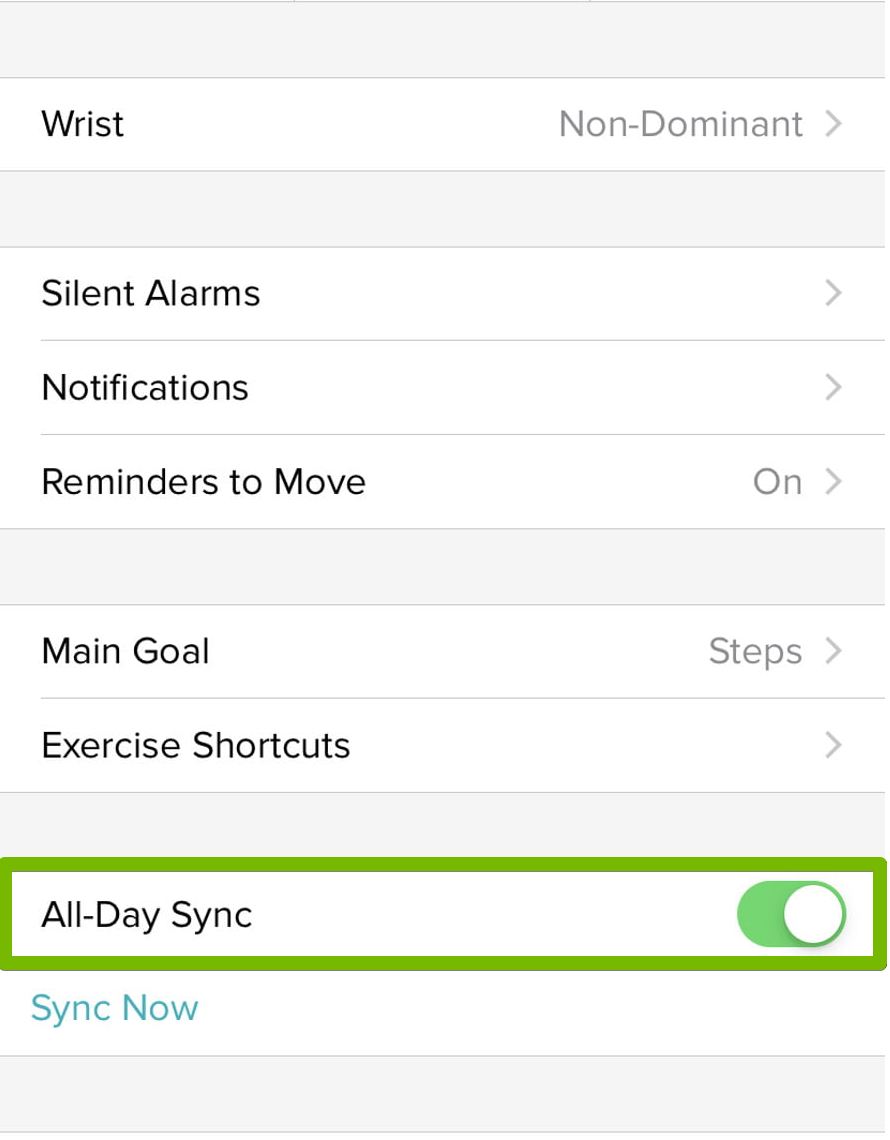
The easiest way to synchronize your Fitbit is to utilize the All-Day Sync feature. All-Day Sync periodically and automatically syncs your Fitbit's data with the Fitbit app throughout the course of the day, so long as your mobile device is in range.
To Automatically Sync
Open the Fitbit app.
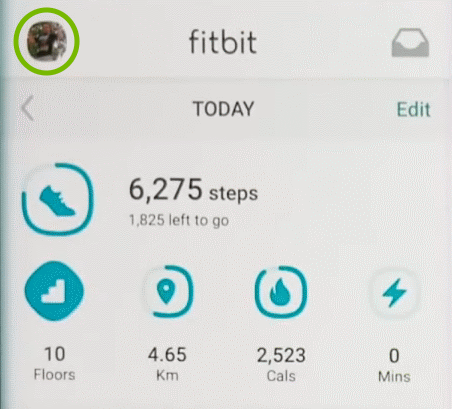
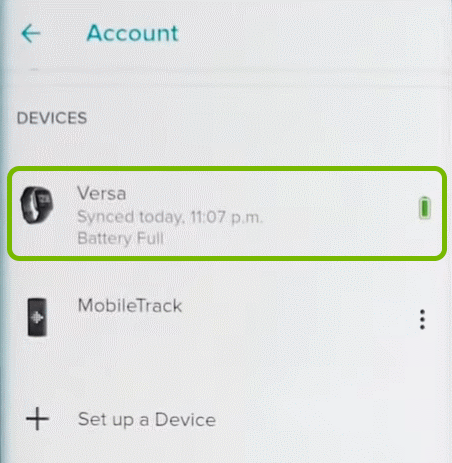
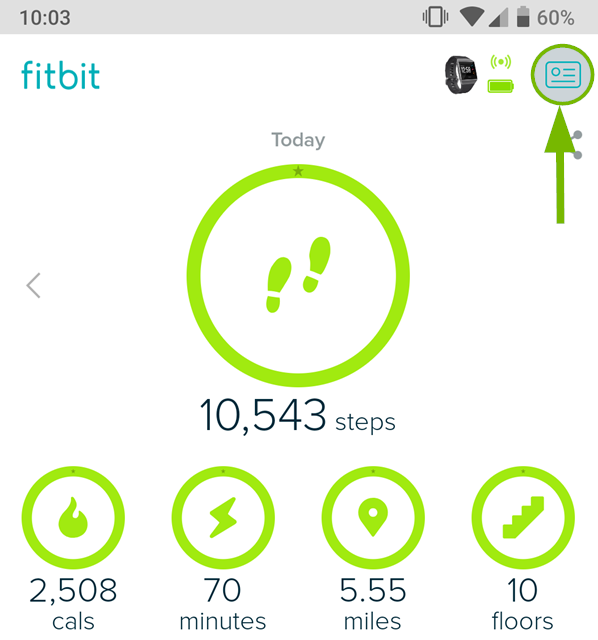
After launching the app, the Fitbit app dashboard will appear. Tap the Account icon.
Then, select your Fitbit.
Ensure that the All-Day Sync toggle is in the ON position.
If you do not wish for automatic syncing to take place all day long, manual synchronization can be done from the same screen.
To Manually Sync
Tap Sync Now to begin a manual sync of your Fitbit to the app.
If you elect to turn off the All-Day Sync feature, Fitbit recommends that your device be synchronized at least once a day. Each time you open the Fitbit app, your device will sync automatically if it's nearby. Manual syncing can be performed at any time thereafter.
6. Charging and Powering Your Versa
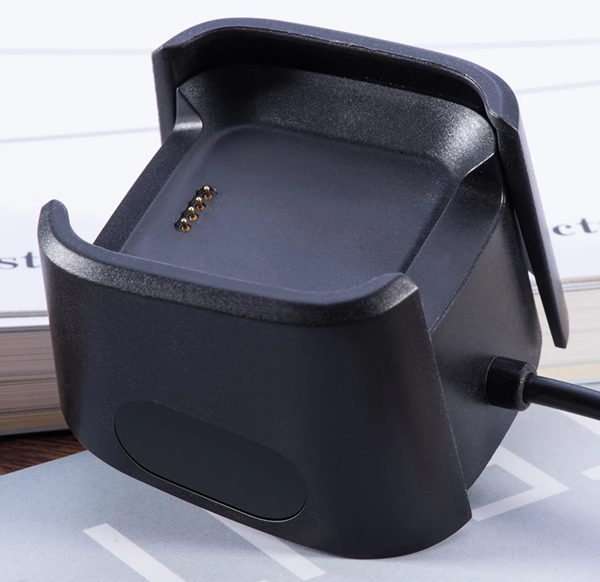
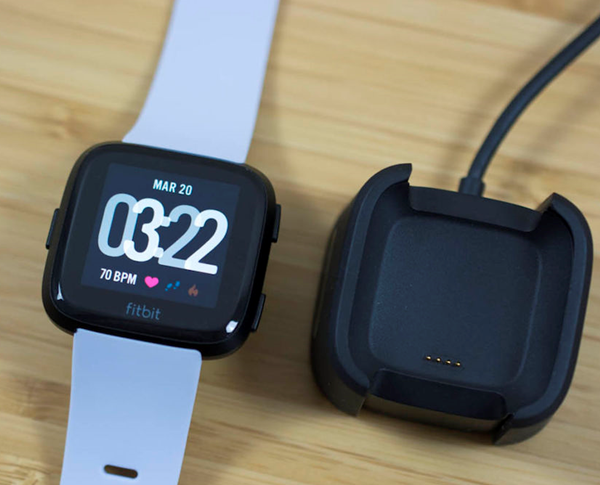
Plug the charging cable into the USB port on your computer or a UL-certified USB wall charger.
Pinch the clip at the buttons on the side and place Versa in the charging cradle.
The pins on the charging cradle must align with the gold contacts on the back of the watch.
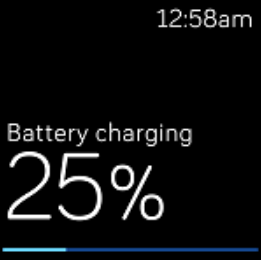
The percent charged appears on screen. While the watch charges, tap the screen twice to check the battery level. Tap again to use Versa.
Once your Fitbit has charged you're ready to open the app and pair it with your mobile device.
Fully charged the Fitbit Versa's battery can last up to 4 days. As long as your Fitbit has a charge it is considered turned on.
7. Connect Fitbit Versa to WiFi
Open the Fitbit app.
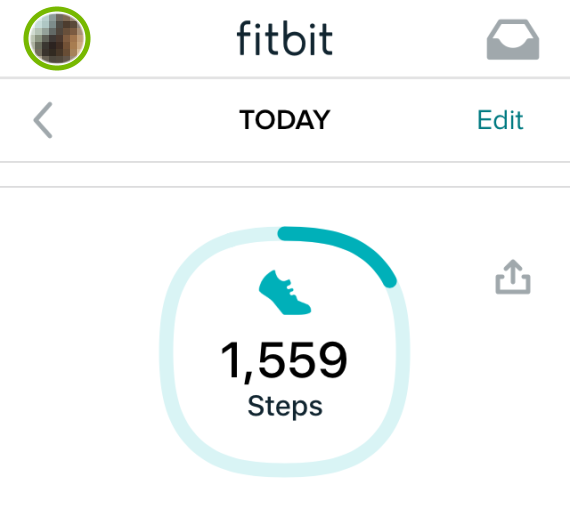
Select Today at the bottom.
Go to your Account icon in the top left.
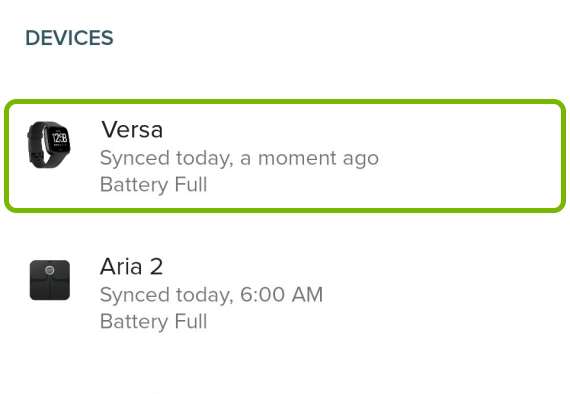
Select Versa from the account pane.
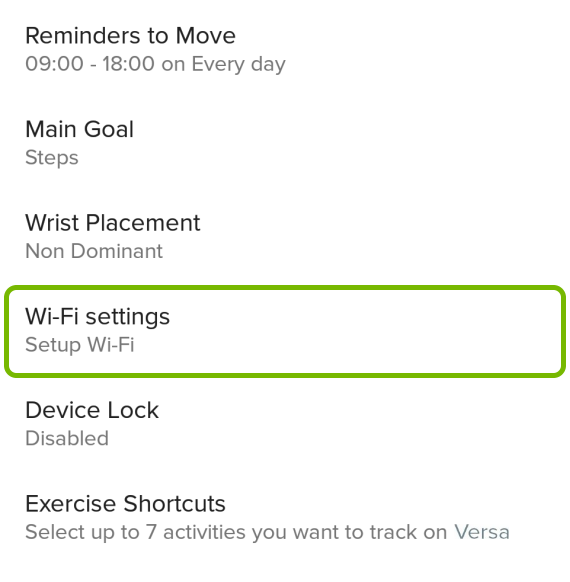
Then go to WiFi Settings.
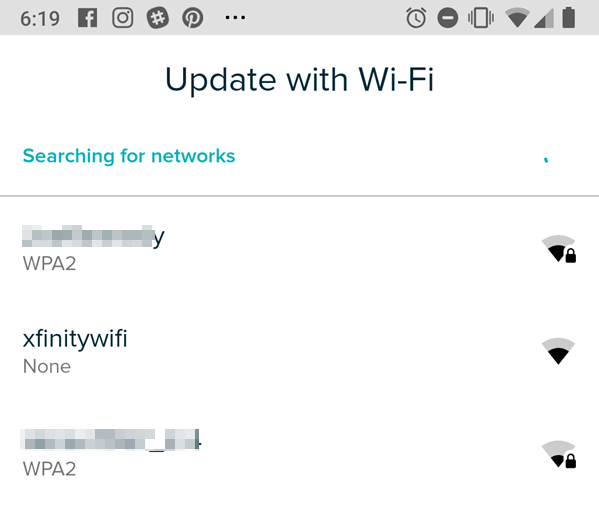
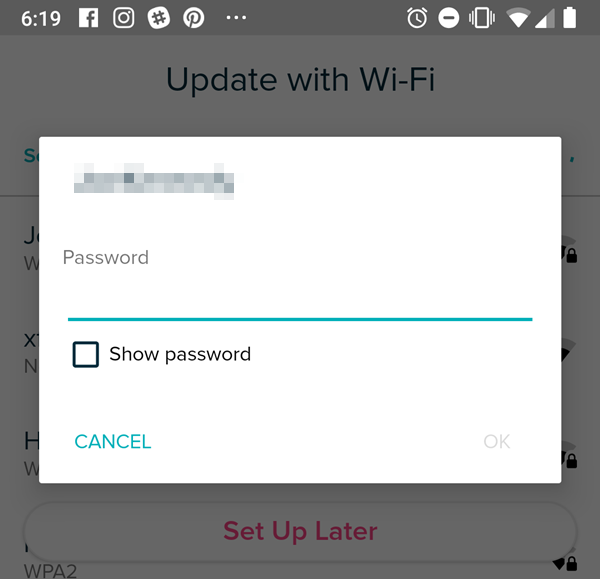
Choose a WiFi Network from the list and enter the Password if required.
Your Fitbit Versa is now connected to WiFi.
8. Pair Your Fitbit Versa to Your Mobile Device
Launch the Fitbit app.
If you've never had a Fitbit before tap Join Fitbit.
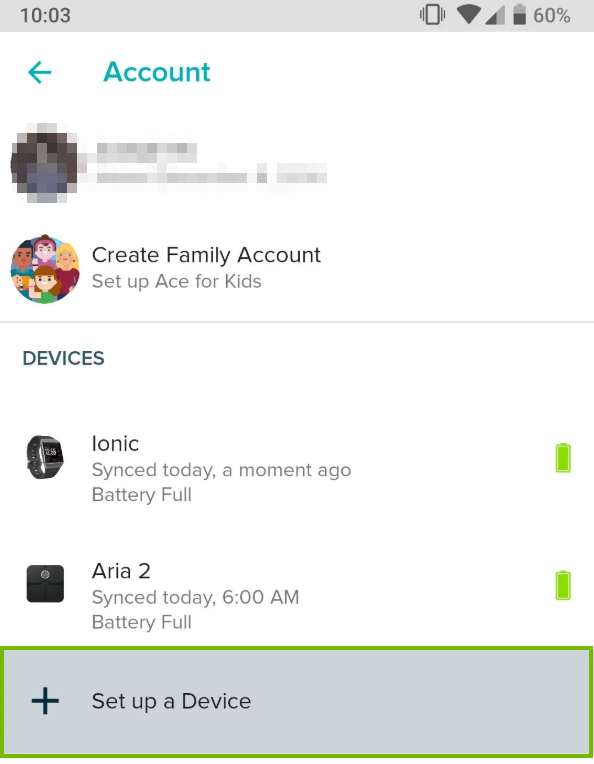
Otherwise, from your Dashboard, tap the Account icon.
Select Set up a Device.
Scroll through the list and tap the Fitbit device you're using.
Tap on Set Up Your Fitbit or if you already had a Fitbit device, select Switch to Versa.
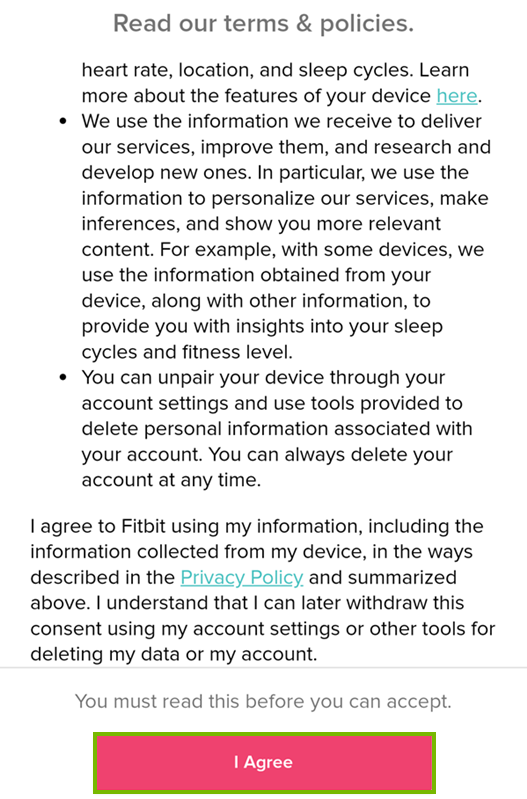
Agree to the TOS by tapping I Agree.
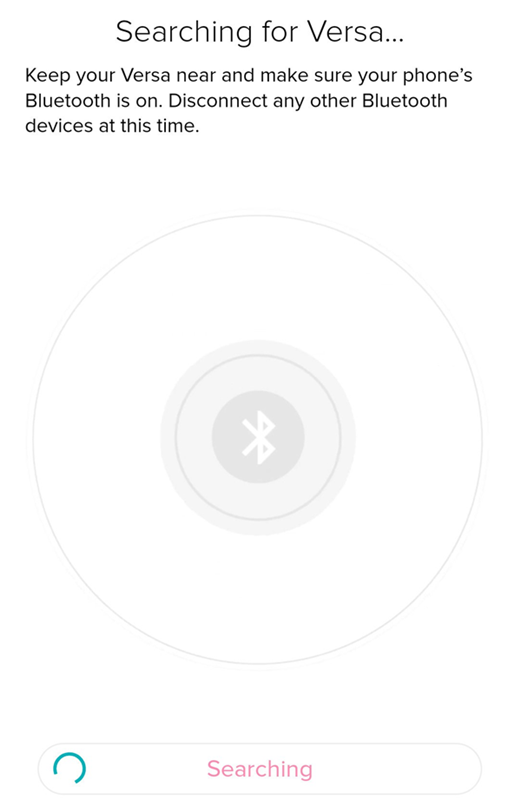
Tap Next.
The app will begin searching for your Fitbit.
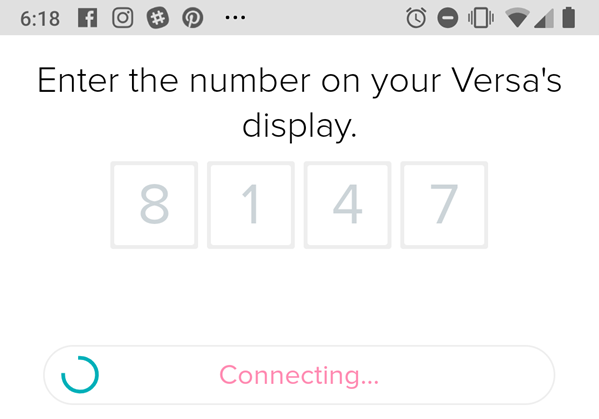
Once connected, enter the number that shows up on your Versa.
Tap Next.
Select your WiFi network.
Type in your WiFi password.
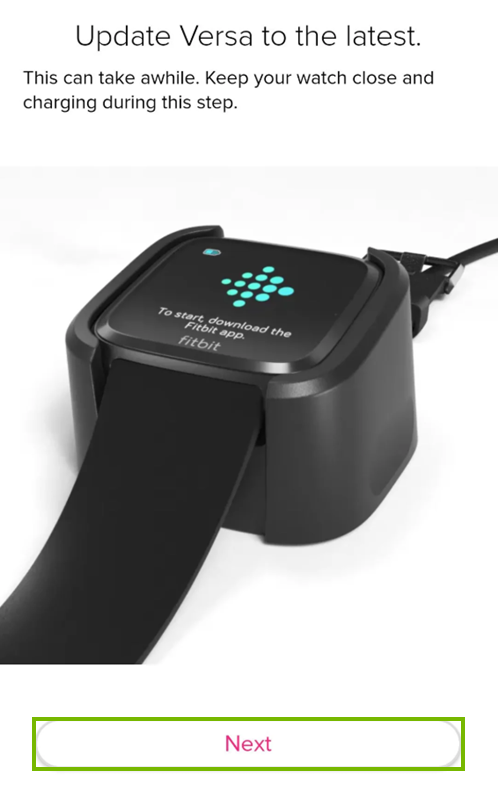
Tap Next to update your Versa.
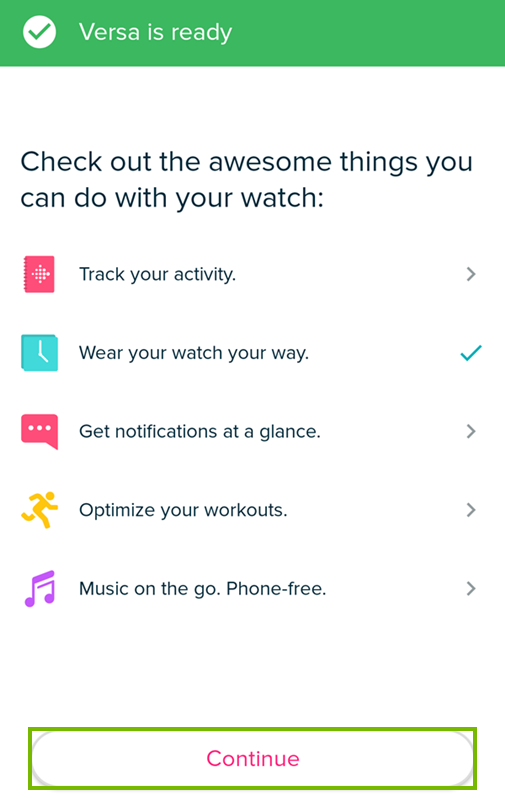
Tap Continue once your Versa is updated.
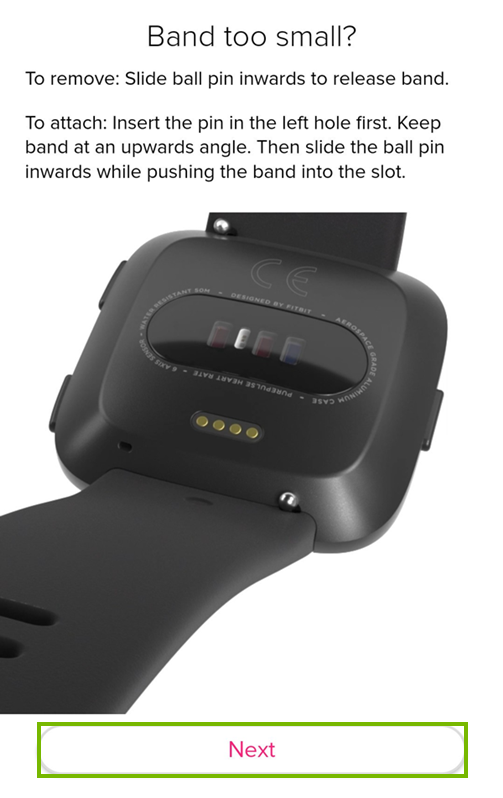
Tap Next to go through the tutorials for resizing the watch band, viewing your stats, and accessing apps.
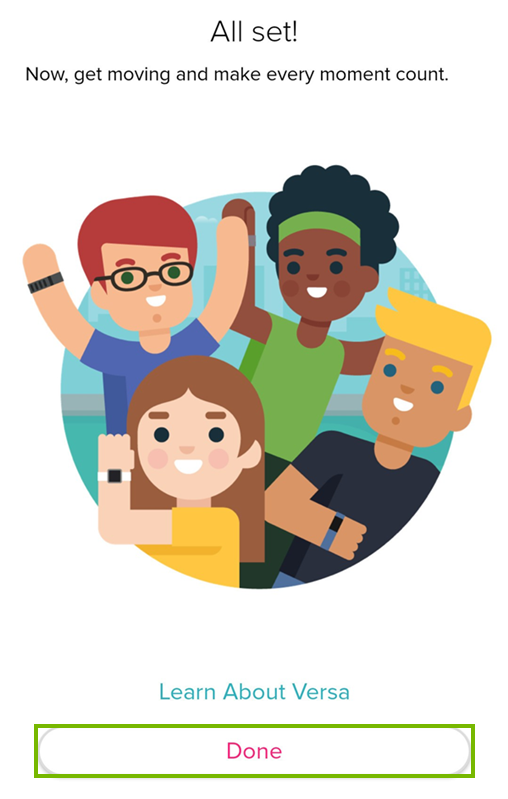
Tap Done to finalize the set up.
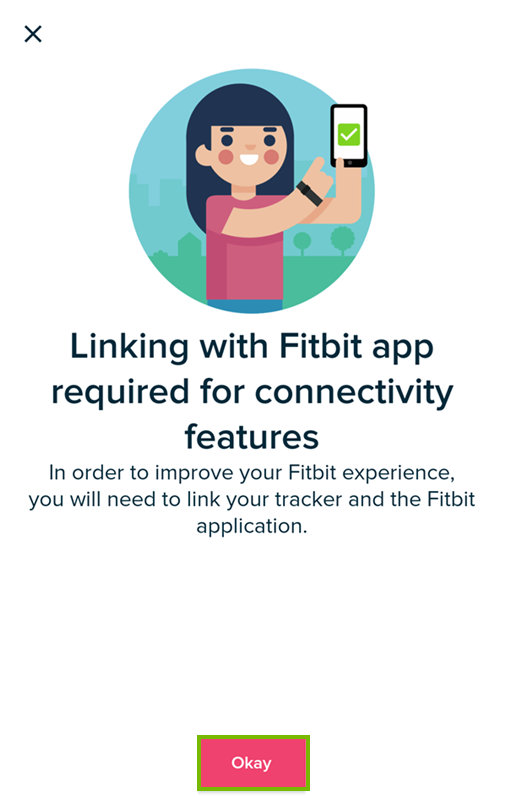
Tap Okay to link your Versa and your Fitbit app together.
9. Factory Reset
Open the Settings App on your device.
Select the About tab.
Select Factory Reset.
Select Reset.
Your device will now begin the factory reset process. Once completed, your device will begin the initial setup process as if it were being removed from its packaging for the first time.
10. Change Your Clock Face on a Fitbit Versa
Launch Fitbit.
Tap the Today tab.
Tap your Profile Picture.
Select Your Fitbit from the account pane. In this case we are selecting Versa.
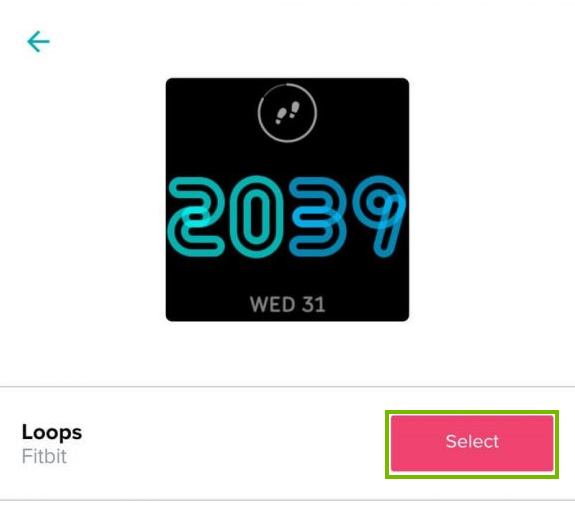
Tap ClockFaces.
Tap All Clocks.
Browse the available clock faces. Tap the clock face you want and tap Select to install it.
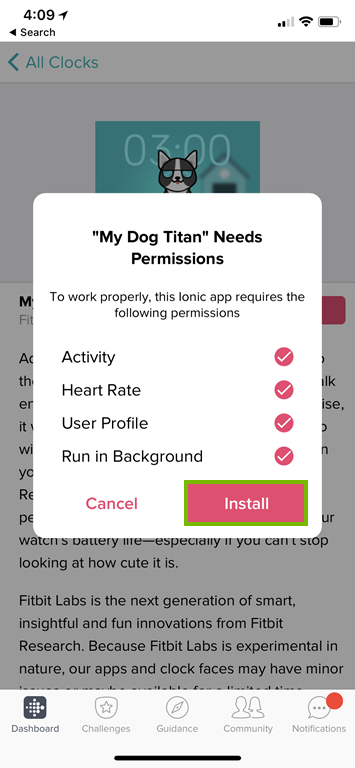
If your clock face needs special permissions you'll be asked to review and approve them. Tap Install.
11. Manage Alarms on Your Fitbit Versa
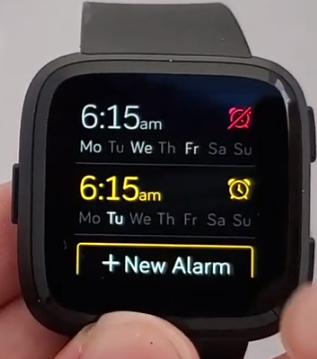
Add an Alarm
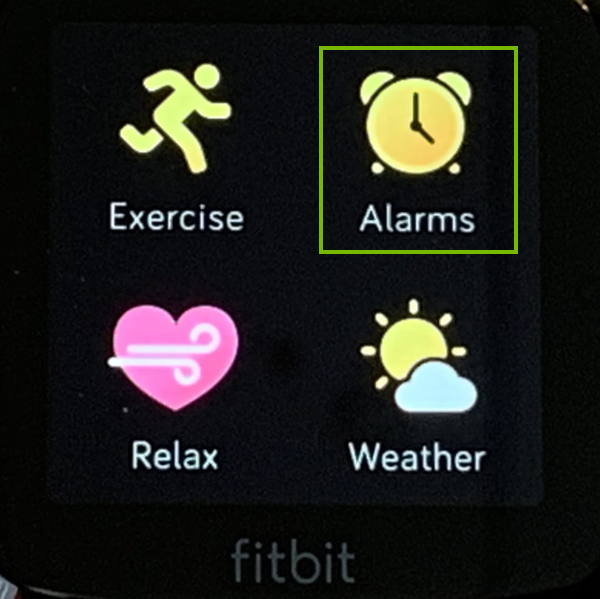
On your Fitbit, open the Alarms app.
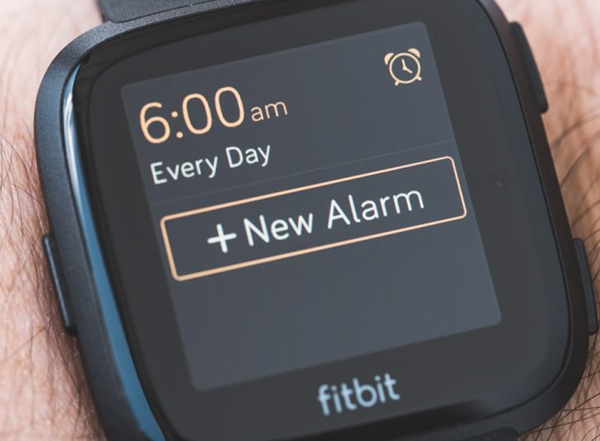
Tap +New Alarm.
Tap the Time, and swipe to set the alarm time. Don't forget to set am or pm.
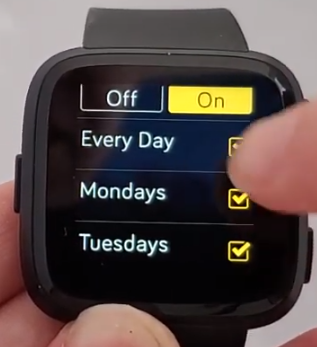
Press the back button on your device, and tap to choose the days you want to be alerted.
Press the back button to see your alarms. To turn off an alarm, tap the alarm icon.
How to Dismiss an Alarm
Your device vibrates and flashes when a silent alarm goes off. This notification repeats several times or until dismissed by tapping the button. If you don't dismiss an alarm, it repeats in 9 minutes.
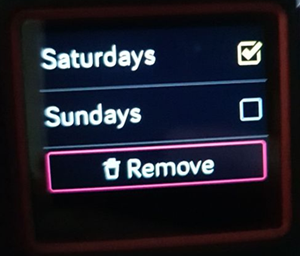
Delete an Alarm
On your Fitbit, open the Alarms app.
Tap the Alarm.
Select Remove.
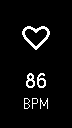
12. Read Your Heart Rate on Fitbit Versa
On your Fitbit Versa, swipe up to open Fitbit Today.
This will show your current heart rate and either your heart-rate zone or resting heart rate (if not in a zone).
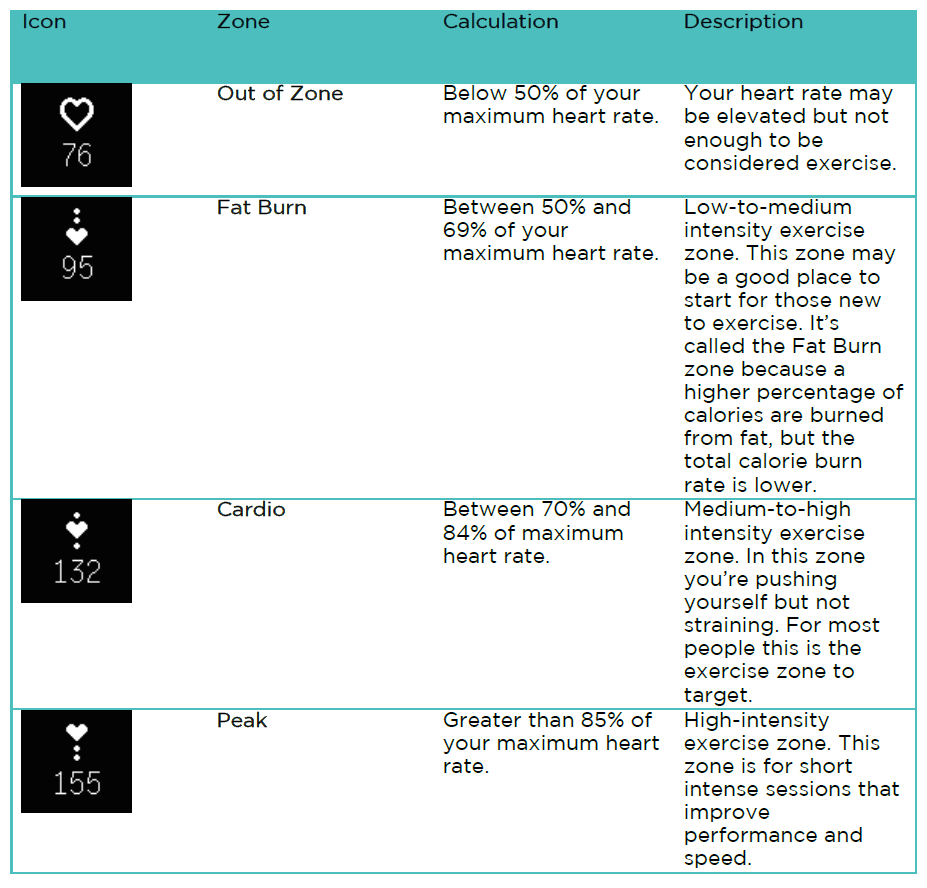
Heart Rate Zones:
Heart-rate zones help you target the training intensity of your choice. Default heart-rate zones are calculated using your estimated maximum heart rate.
Fitbit calculates your maximum heart rate with the common formula of 220 minus your age.
The heart icon you see above your current heart rate tells you your zone. Refer to the following table for an explanation of the different heart rate zones.
13. Activity Tracking
View All Day Stats:
Press the button to wake up your Charge 2 and see the time of day. Tap the screen to see each of these all-day stats.
Steps taken
Current heart rate
Distance covered
Calories burned
Floors climbed
Active minutes
Hourly activity
On your Fitbit dashboard you can find other information captured by your tracker, such as:
Your sleep history, including hours slept and sleep patterns
The hours of your day that you were stationary vs. active (walked at least 250 steps)
Your exercise history and progress towards a weekly exercise goal
Your beats per minute (BPM), average resting heart rate, and time spent in heart-rate zones
View Heart Rate:
To view your heart rate, press the button until you get to the Heart rate screen where you’ll see your current heart rate. Tap to see your resting heart rate.
Heart Rate Zones:
Heart-rate zones help you target the training intensity of your choice. Default heart-rate zones are calculated using your estimated maximum heart rate.
Fitbit calculates your maximum heart rate with the common formula of 220 minus your age.
The heart icon you see above your current heart rate tells you your zone. Refer to the following table for an explanation of the different heart rate zones.
Daily Activity Goals
Set Activity Goals: Android & iOS
Tap on the Account icon.
Under Goals, tap on Activity.
Tap on the item you wish to modify and set a new goal.
Set Activity Goals: Fitbit Dashboard:
Log in to your Fitbit account from a web browser.
Click the Today frame and click the settings gear below.
Adjust your activity goals and click Done to save them.
Monitor Activity:
You can view your progress on your tracker, your watch, or on your Fitbit Dashboard.
14. Track Exercise
SmartTrack
The SmartTrack feature automatically recognizes select exercises to ensure you get credit for your most active moments of the day.
You can choose from over a dozen exercise types to customize the Exercise menu with your favorites. Some exercises, like running, biking, and hiking have a GPS option.
On your tracker, press the button until you get to the Exercise screen and then tap to find the exercise of your choice.
Press and hold the button to start the exercise. If you see a phone icon at the top, that exercise offers connected GPS and your device is connected to a GPS signal. If the phone icon is crossed out, a GPS connection isn’t available. An animated dashed line means your device is trying to find a GPS signal.
During your workout, tap your tracker to scroll through your real-time stats or check the time of day.
To pause your workout, press the button. Then press the button again to resume the exercise.
When you’re done with your workout, press and hold the button to stop recording. You’ll see a flag icon and a congratulatory message.
Press the button to see a summary of your results. With each button press you’ll cycle to a different set of stats. You can view your exercise summary one time.
15. Sleep Tracking
You can wear your Charge 2 to bed and it will track your time spent asleep and your sleep quality.
View Sleep Data: Android & iOS
In the morning, open the Fitbit app and wait a few moments for your device to send your sleep details to your dashboard.
Tap the sleep tile (If it says "How did you sleep?", your device's data hasn't synced with your dashboard) and then tap Today or another day to see details.
Swipe through the graphics at the top to see your sleep stats.
Tap the expander icon in the top right to open and close more detailed views.
View Sleep Data: Windows 10
In the morning, open the Fitbit app and wait a few moments for your device to send your sleep details to your dashboard.
Tap the sleep tile (If it says "How did you sleep?", your device's data hasn't synced with your dashboard) and then tap Today or another day to see details.
Swipe through the graphics at the top to see your sleep stats.
Change sleep goal: Android & iOS
From the Fitbit app dashboard, tap the sleep tile. This is the tile that says "How did you sleep?" or, if you tracked sleep the night before, shows how many hours and minutes you slept.
Tap the gear in the top right.
Adjust your sleep goal and save.
Change Sleep goal: Windows 10
On the Fitbit app dashboard, tap or click the sleep tile. This is the tile that says "How did you sleep?" or, if you tracked sleep the night before, shows how many hours and minutes you slept.
Tap or click the moon icon on the bottom.
Adjust your sleep goal and save.
Set Bedtime Reminder: Android & IOS
From the dashboard, tap the sleep tile. This is the tile that says "How did you sleep?" or, if you tracked sleep the night before, shows how many hours and minutes you slept.
Tap the gear icon in the top right.
Turn on the bedtime reminder and set the time and frequency.
Set Bedtime Reminder: Windows 10
From the Fitbit app dashboard, tap the sleep tile. This is the tile that says "How did you sleep?" or, if you tracked sleep the night before, shows how many hours and minutes you slept.
Tap the moon icon on the bottom.
Find the option to turn on the reminder and set the time and frequency.
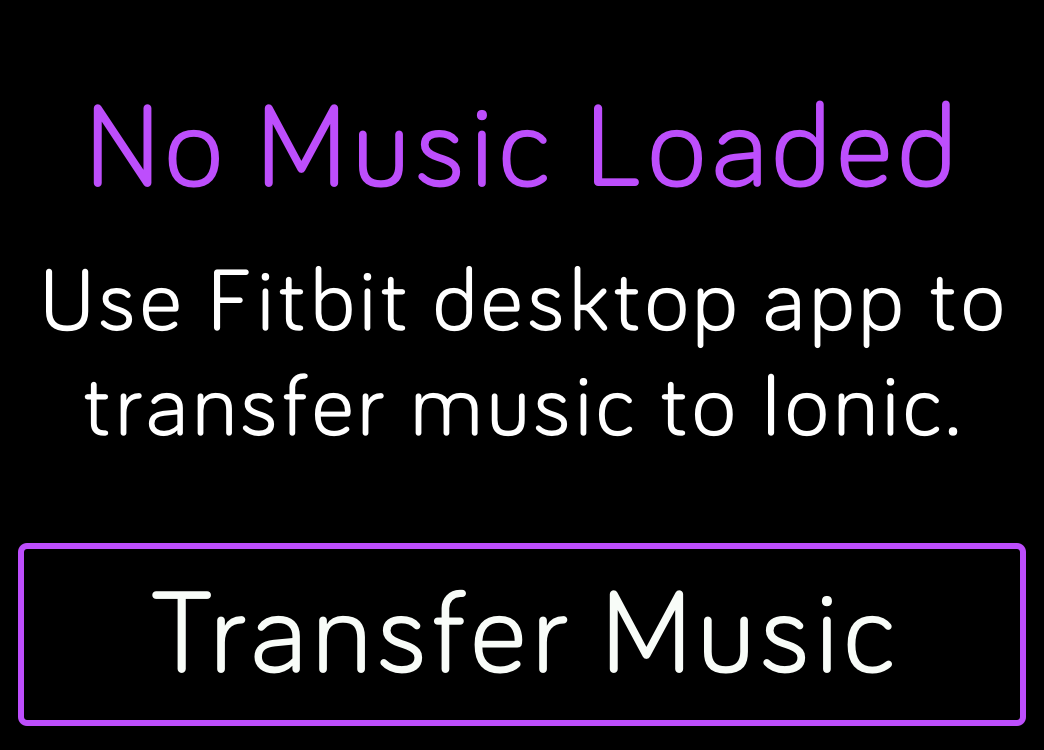
16. Listen to Music on Your Versa
To download your playlists to your Versa you need a WiFi connected computer.
You can only transfer music that you own.
Transfer Music
The music and podcast file types you can download to your watch depend on whether you use a PC or a Mac. Note that some older songs may not transfer due to copyright protections (known as DRM encryption).
PC:
MP3 files
MP4 files with AAC audio
WMA files
Mac:
MP3 files
MP4 files with AAC audio
Plug your watch into the charger.
On your computer, open Fitbit Connect and then choose Manage My Music.
If prompted, log in to your Fitbit account.
On your watch, open the Music app, and then tap Transfer Music. Note that you may need to scroll down to see the transfer button.
Wait a few moments for your watch to connect. Note this can sometimes take a minute or two.
When prompted, follow the on-screen instructions on your computer to choose the playlists you want to download to your watch. After you choose a playlist, the download starts automatically.
Note that if you take several minutes to pick your first playlist, Wi-Fi may disconnect to preserve your battery. Tap the Transfer Music button again to reconnect and continue choosing your playlists.
Play Music
After you download at least 1 playlist, connect a Bluetooth audio device, such as Fitbit Flyer headphones or a Bluetooth speaker, to your watch.
.png)