Over time, you may notice your Mac is slowing down. Keeping it up to date and running smoothly is a relatively simple task when you know what to do. This guide aims to walk you through several ways to maintain your system.
In this guide we'll cover:
Enabling Automatic Updates
Checking for Updates
Use iCloud to optimze storage
Storage Cleanup
Removing a program
Run First Aid
2. macOS: Automatic Updates
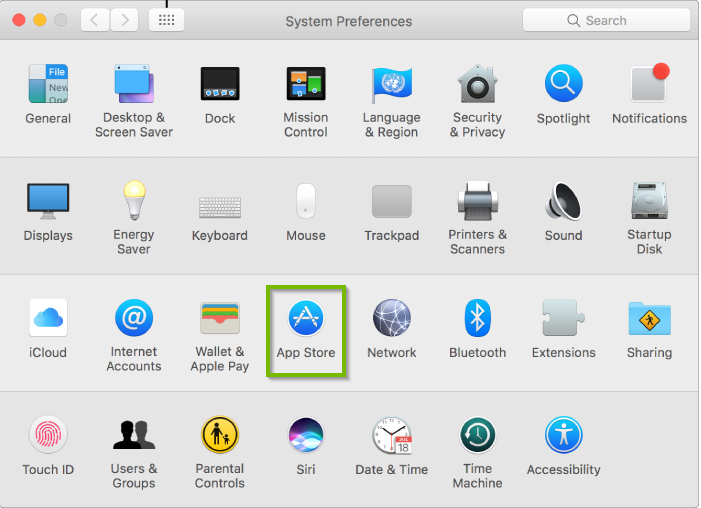
Click on the Apple Menu and click on System Preferences.
Click App Store.
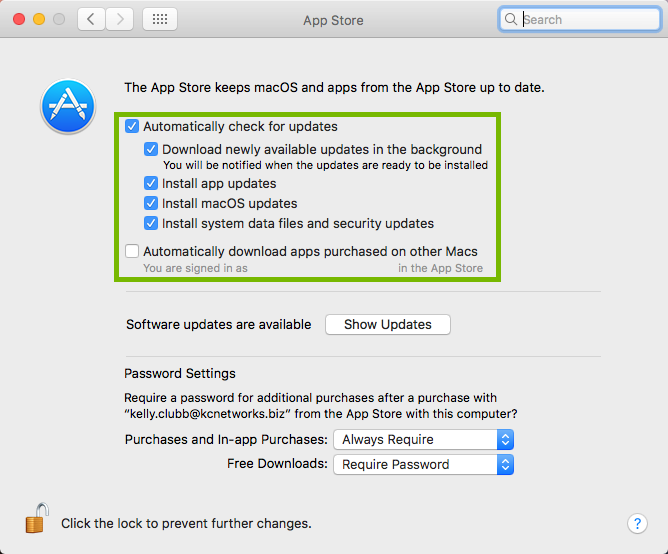
Ensure all items in this section are checked. This will allow for Automatic updates to happen and for them to install automatically.
MacBook, MacBook Pro, and MacBook Air must have the power adapter plugged in to automatically download updates.
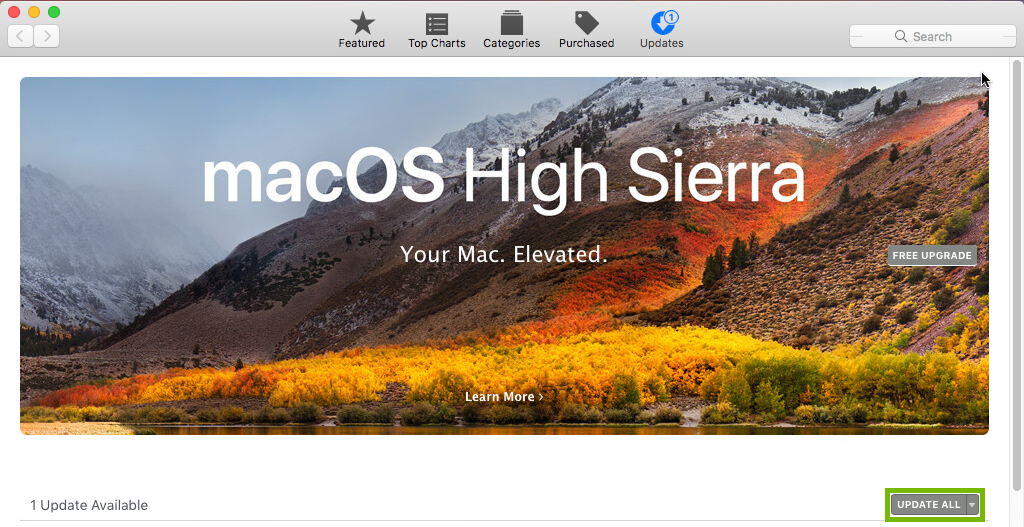
3. macOS: Software Updates
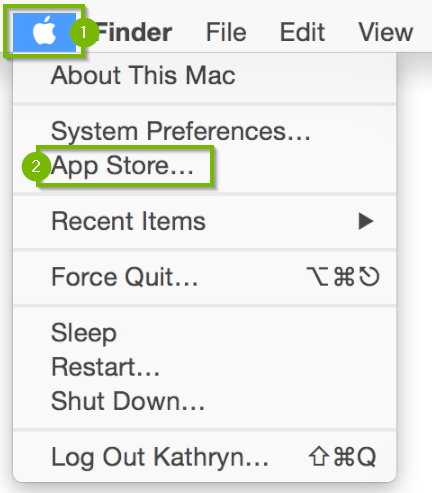
Click on the Apple Menu and click on App Store.
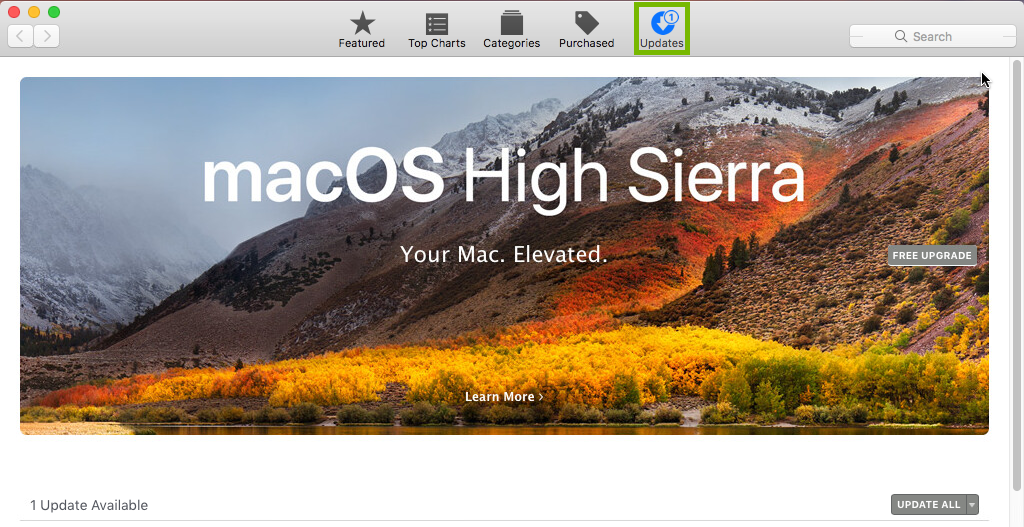
Click Updates on the top-right.
Click Update All to perform your software updates.
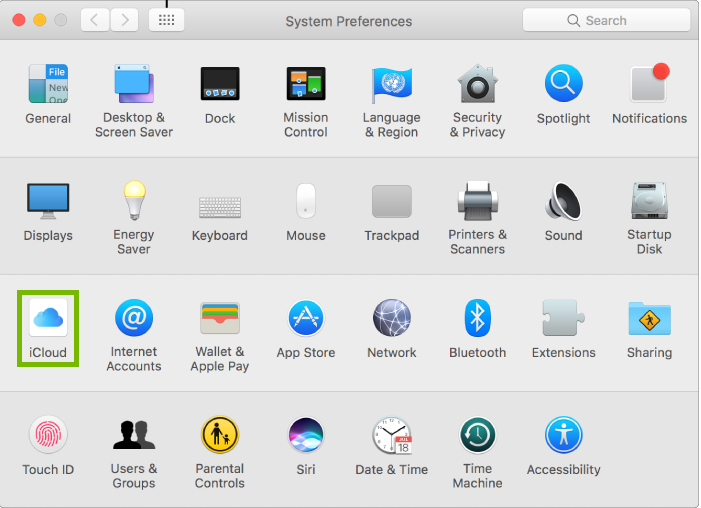
4. macOS: iCloud Storage Setup
iCloud securely stores your photos, videos, documents, music, apps, and more. iCloud can also be used to manage your storage.
First, we need to log into iCloud.
Click on the Apple Menu and click on System Preferences.
Click on iCloud.
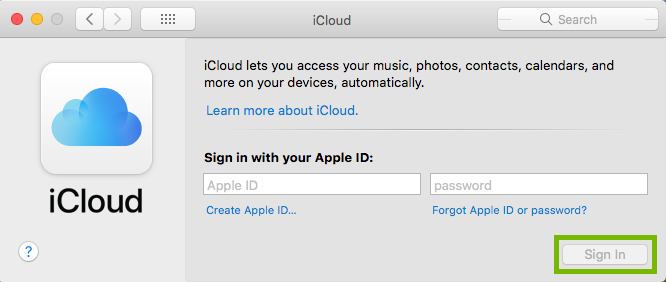
If you are not already signed into iCloud, enter your Apple ID and password, and then click Sign In.
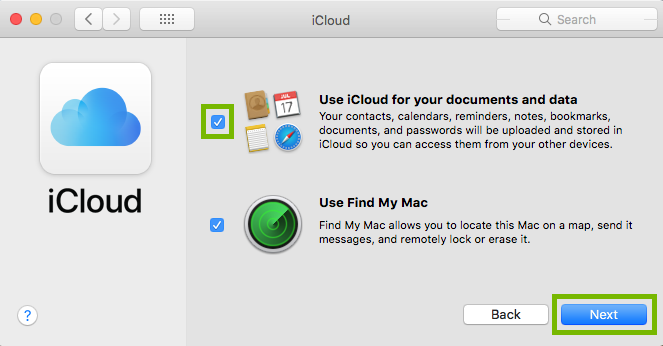
Ensure to check the box that says "Use iCloud for your documents and data" and choose whether or not you want to use iCloud to locate your device. Click Next to continue.
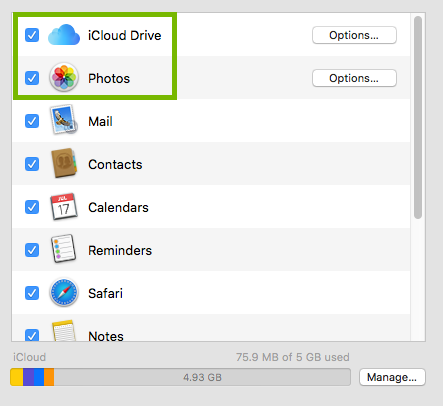
Now we will pick what you wish to sync with iCloud. We want to be sure that iCloud Drive and Photos are both checked.
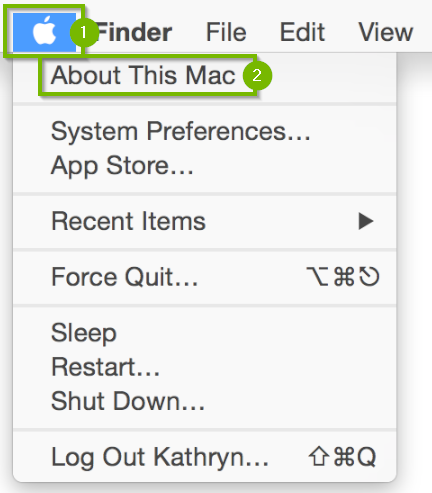
Open the Apple menu and click About This Mac.
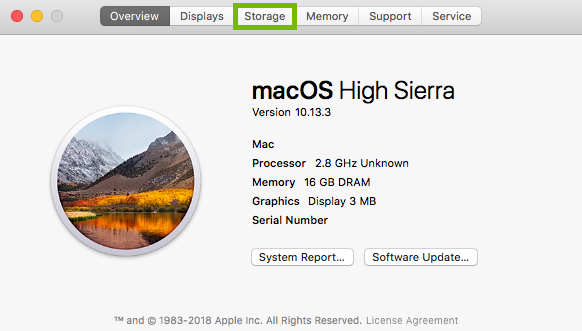
Click on Storage.
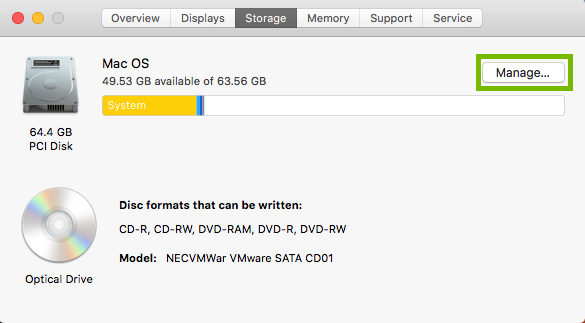
Click on Manage.
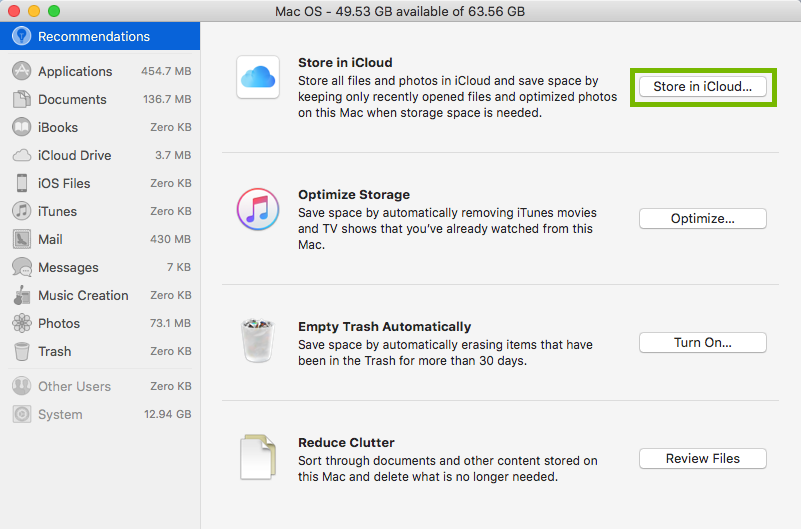
Click Store in iCloud and choose from the options below.
Desktop and DocumentsWill store all files in these locations in iCloud. If you get low in storage, only recently used items will remain on the computer. You can download any file back to the computer by clicking the cloud icon.PhotosWill store full resolution images and videos in iCloud. When space is needed, only optimized versions remain on the computer. You can download the original item by opening it.
Storing files in iCloud uses the storage space in your iCloud storage plan.
5. macOS: Storage Cleanup
Open the Apple Menu and click About This Mac.
Click on Storage.
Click on Manage.
Optimize Storage
Click on Optimize.
When storage space is needed, iTunes movies or TV shows that you already watched are removed from your Mac. Click the cloud icon next to a movie or TV show to download it again.
Empty Trash Automatically
To automatically delete your trash, click Turn On.
Enabling this feature will permanently delete any items that have been in the trash for 30 days.
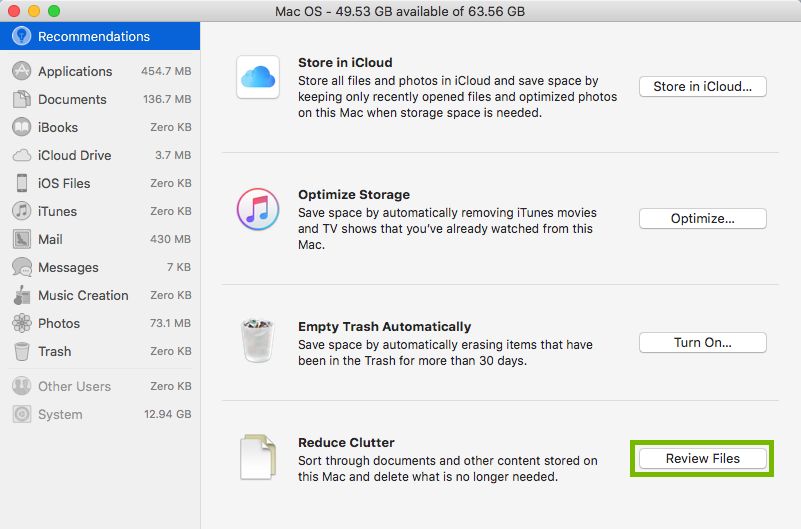
Reduce Clutter
Click the Review Files button, then choose any of the categories in the sidebar, such as Applications, Documents, GarageBand, iOS Files, iTunes, or Trash.
You can delete files or programs by either clicking on the "x" when hovering over the item or by right clicking and choosing delete.
6. macOS: Uninstall a Program
You may need to remove an app because you need the space or simply don't need it anymore. The following steps show you how to easily remove an app.
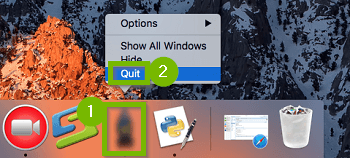
Before uninstalling, we must exit the program we wish to uninstall.
Right click the icon of the program you wish to exit and then click Quit.
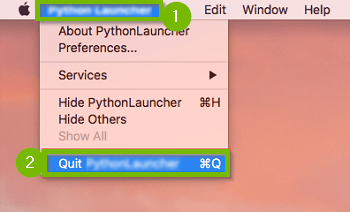
Alternatively, you can click the TitleName of the program in the upper-left-hand corner of your screen, near the Apple logo, and then click Quit.
Make sure the application leaves your Dock at the bottom or no longer has a dot underneath it.Running ApplicationClosed Application
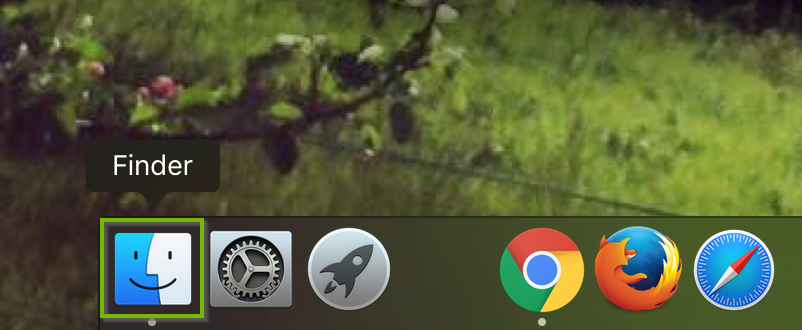
Click Finder from the Dock across the bottom of your screen.
Click Applications from the left-hand column, then locate the program you wish to uninstall. Click and hold the mouse button on the program you wish to uninstall and drag it to the Trash Bin. You can let go of the mouse button once you are hovering over the Trash Bin.
7. macOS: First Aid
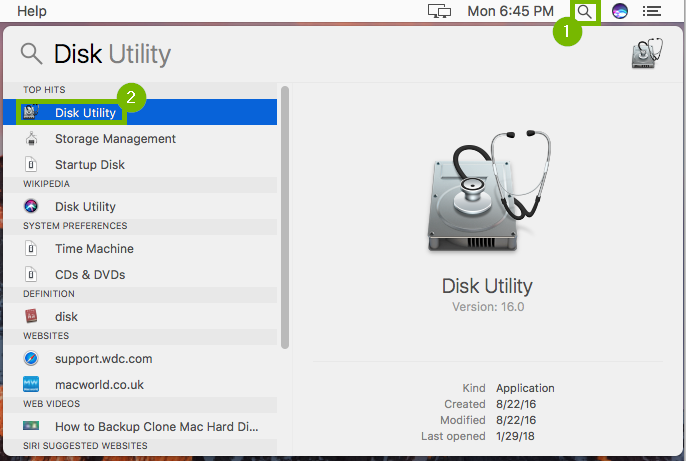
In the Spotlight Search, type in Disk Utility & click on Disk Utility.
Select the Drive to check and then click on First Aid.
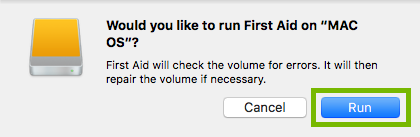
Click on Run.
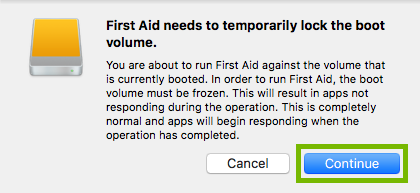
If you are checking a drive with files in use (such as your boot drive), then you will be prompted to temporarly lock the drive. Click Continue.
.png)