Managing profiles on your Apple MacBook Pro is crucial for maintaining your personalization, privacy, and security settings. This comprehensive guide will walk you through the steps to create, edit, and manage profiles on your MacBook Pro, ensuring you can tailor your device to your specific needs and preferences.
Profile Management for MacBook Pro
Understanding Profiles
Learn the concept of user profiles and how they help customize the MacBook Pro experience for different users.
Managing User Profiles:
Access "System Preferences" > "Users & Groups" to manage existing user profiles.
Add, delete, or modify user accounts.
Set user account types (Standard, Administrator, etc.).
Creating and Editing User Profiles:
Create a new user profile for yourself or others. With it, You can customize user settings, such as desktop backgrounds, preferences, and accessibility options.
Enable the Standard User profile and any restrictions and privileges.
Parental Control Profiles:
Implement Parental Controls to manage and restrict your child's MacBook Pro usage.
Set content and app restrictions for child profiles.
iCloud Profile Management:
Connect your user profile to your iCloud account to sync data and settings across Apple devices.
Manage iCloud settings within "System Preferences."
Profile Privacy and Security:
Protect your user profile with a strong password.
Enable FileVault to encrypt your profile's data.
Configure security preferences like automatic login and screen locking.
Advanced Profile Management:
Explore advanced user management options for business or educational environments.
Set up network user accounts.
With this comprehensive guide, you should be well-equipped to manage profiles on your Apple MacBook Pro. Whether it's creating personalized user accounts, implementing parental controls, or ensuring the security of your profiles, effective profile management enhances your MacBook Pro experience and keeps your device organized, secure, and tailored to your needs.
Contact Support.Com
If you are still having trouble, refer to the Step-By-Step Guide below, or Contact Support.Com for Personalized Assistance.
If your Mac has multiple users, you should set up an account for each person so each can personalize settings and options without affecting the others. You can let occasional users log in as guests without access to other users files or settings. You can also create groups. You must be an administrator of your Mac to perform these tasks.
This guide will assist with:
Creating and deleting user profiles
Changing your password and user picture
Converting standard user to an administrator
2. macOS: Create New User Profile
Choose Apple menu > System Preferences.
Click Users & Groups.
Click the lock icon to unlock it, then enter an administrator name and password.
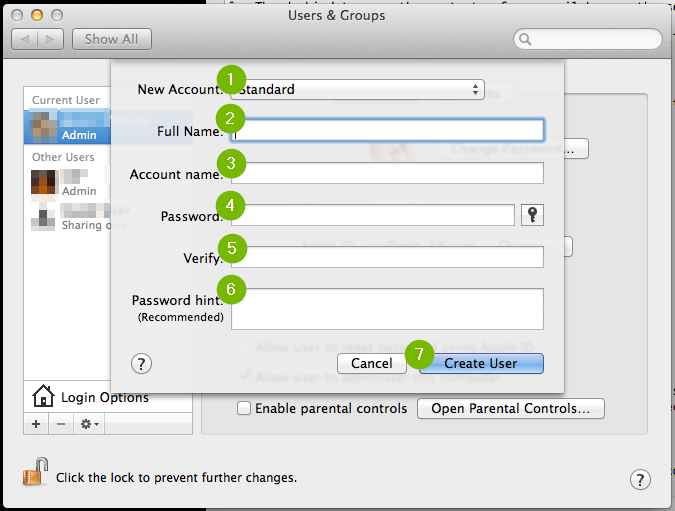
Click the Add button below the list of users.
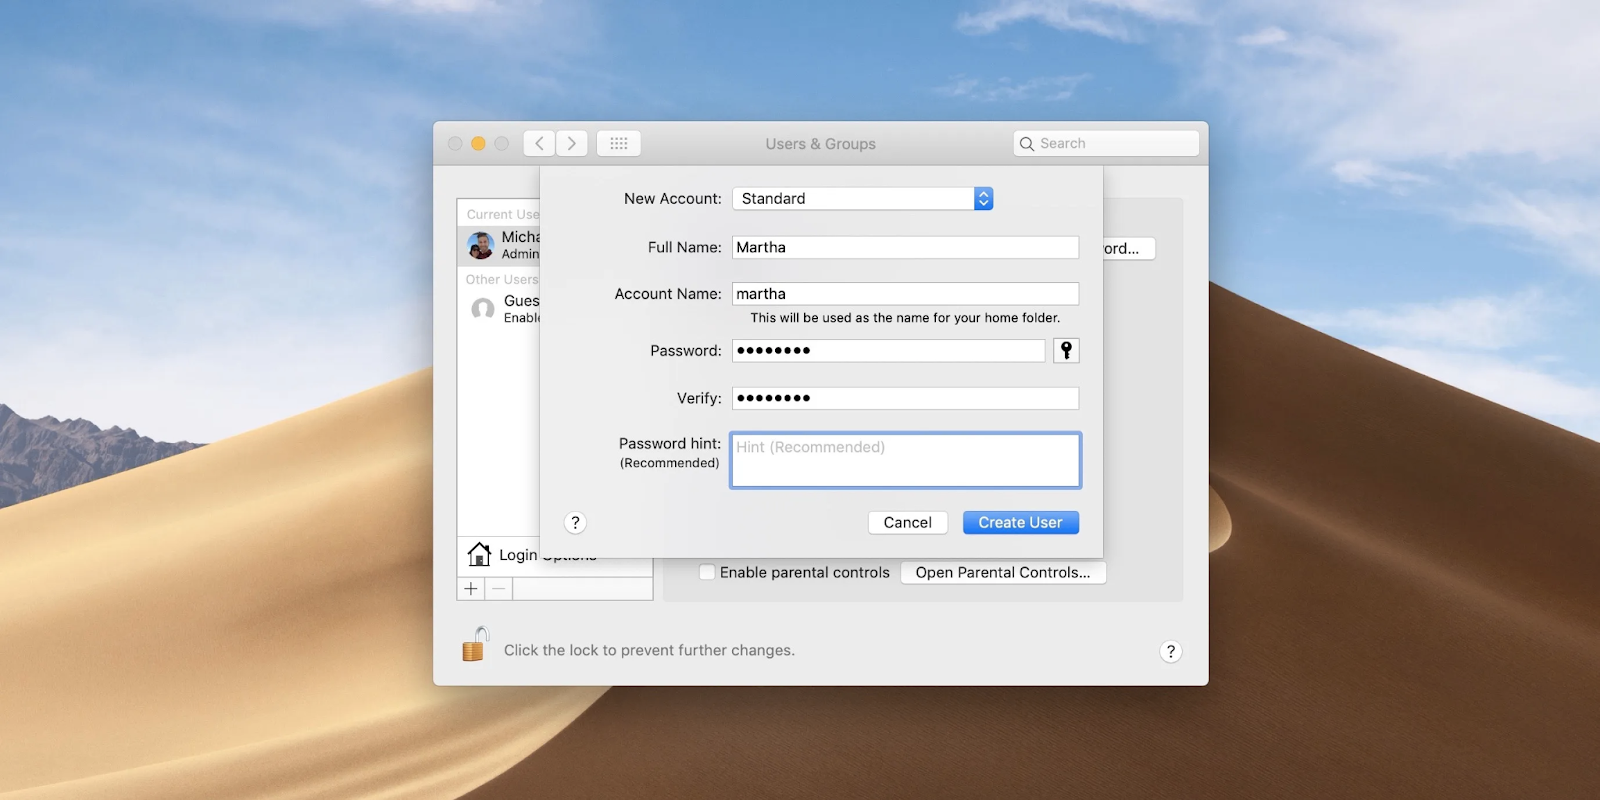
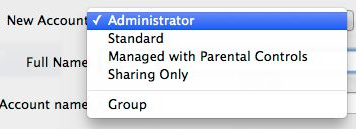
Click the New Account pop-up menu, then choose a type of user.
Administrator: An administrator can add and manage other users, install apps, and change settings. The new user you create when you first set up your Mac is an administrator. Your Mac can have multiple administrators. You can create new ones, and convert standard users to administrators. Don't set up automatic login for an administrator. If you do, someone could simply restart your Mac and gain access with administrator privileges. To keep your Mac secure, don't share administrator names and passwords.
Standard: Standard users are set up by an administrator. Standard users can install apps and change their own settings, but can't add other users or change other users settings.
Managed with Parental Controls: Users who are managed with parental controls can access only the apps and content specified by the administrator managing the user. The administrator can restrict the user's contacts and website access, and place time limits on computer use.
Sharing Only: Sharing-only users can access shared files remotely, but can't log in to or change settings on the computer. To give the user permission to access your shared files or screen, you may need to change settings in the File Sharing, Screen Sharing, or Remote Management panes of Sharing preferences.
Enter a full name for the new user. An account name is generated automatically. To use a different account name, enter it now as you can't change it later.
Enter a password for the user, then enter it again to verify. Enter a password hint to help the user remember their password.
Click Create User.
Click the user you just created.
Depending on the type of user you create, you can also do any of the following:
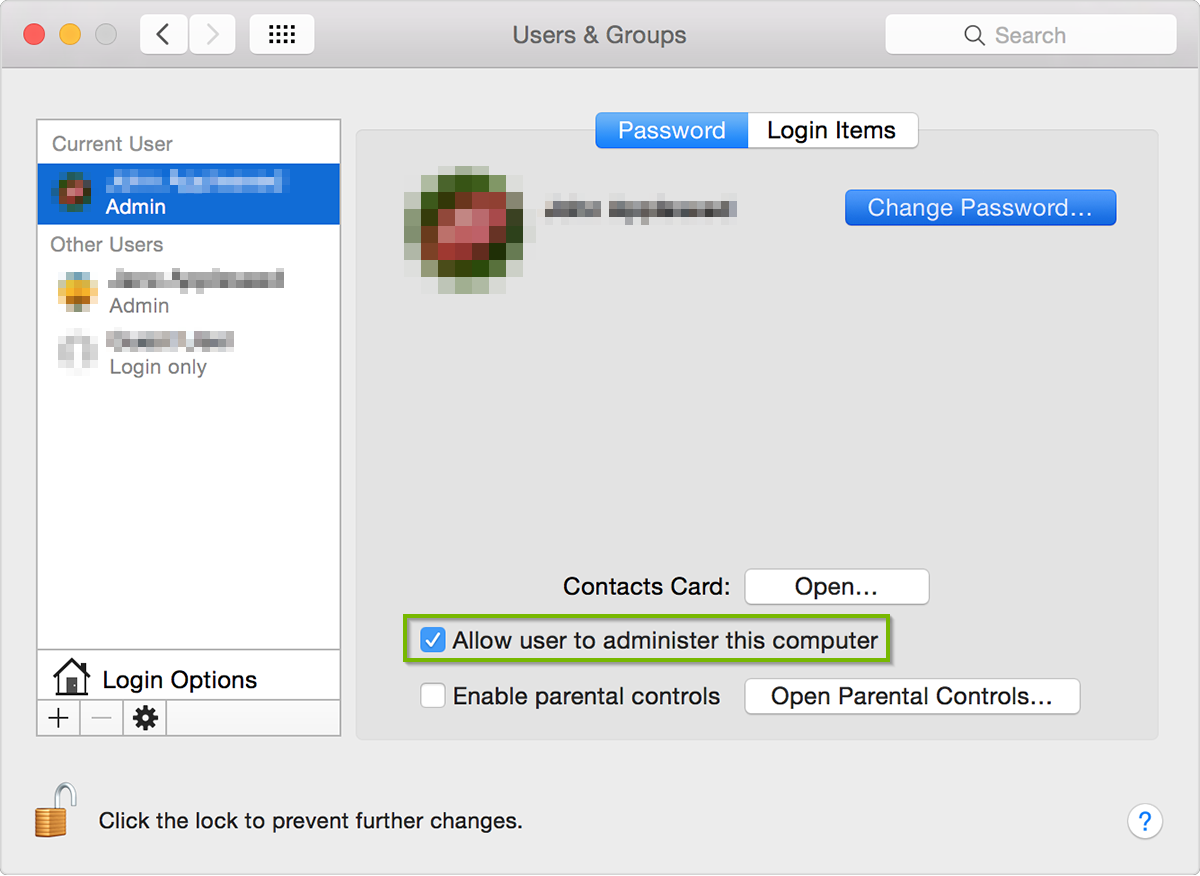
For an administrator, select Allow user to administer this computer.
For a child or other managed user, select Enable parental controls. Click Open Parental Controls, then set up restrictions for the user.
Use Sharing preferences to specify whether the user can share your files and share your screen.
The new user is now ready to be used. Log off and then log back in to get started.
3. macOS: Delete User Profile
If you're an administrator, you can delete users that you no longer want to have access to your Mac. You can also delete groups you don't want.
When you delete a user, you can save the users home folder, which contains the users files and settings, or delete it. A sharing-only user doesn't have a home folder.
Choose Apple menu > System Preferences.
Click Users & Groups.
Click the lock icon to unlock it, then enter an administrator name and password.
Select the user or group you want to delete, then click the Remove button below the list of users.
If other users are logged in to this Mac now, you can't select them.
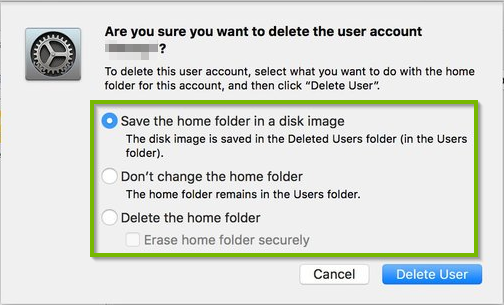
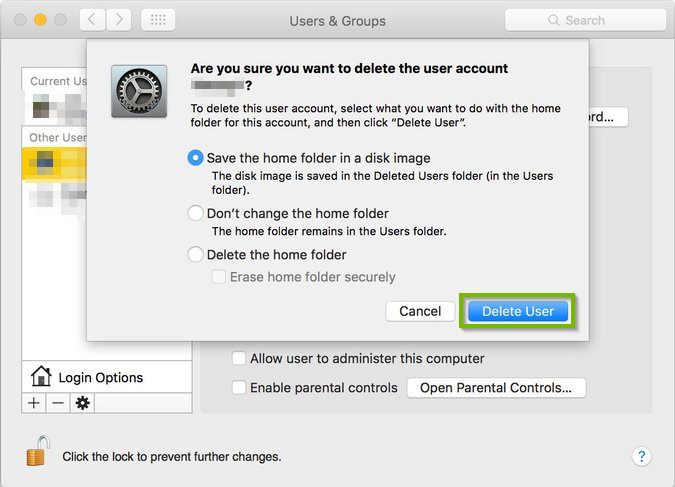
Do one of the following:
Save the home folder in a disk image: This archives all the user's documents and information so the user can be restored later if needed. The disk image is saved in /Users/Deleted Users/.
Don't change the home folder: The user's documents and information remain and the user can be restored later if needed. The home folder remains in /Users/.
Delete the home folder: The user information is deleted and the storage space is freed.
Delete a sharing-only user or a group: Click OK.
Click Delete User.
Deleting a user may take a few minutes to complete.
If you don't delete a users home folder, you can restore the user and the contents of the home folder.
4. macOS: Change User Settings
If you are a standard user or an administrator, you can change your user account settings. If your user account is managed with parental controls, you may be able to change your user settings depending on the settings in Parental Controls preferences.
Choose Apple menu > System Preferences.
Click Users & Groups.
Do any of the following:
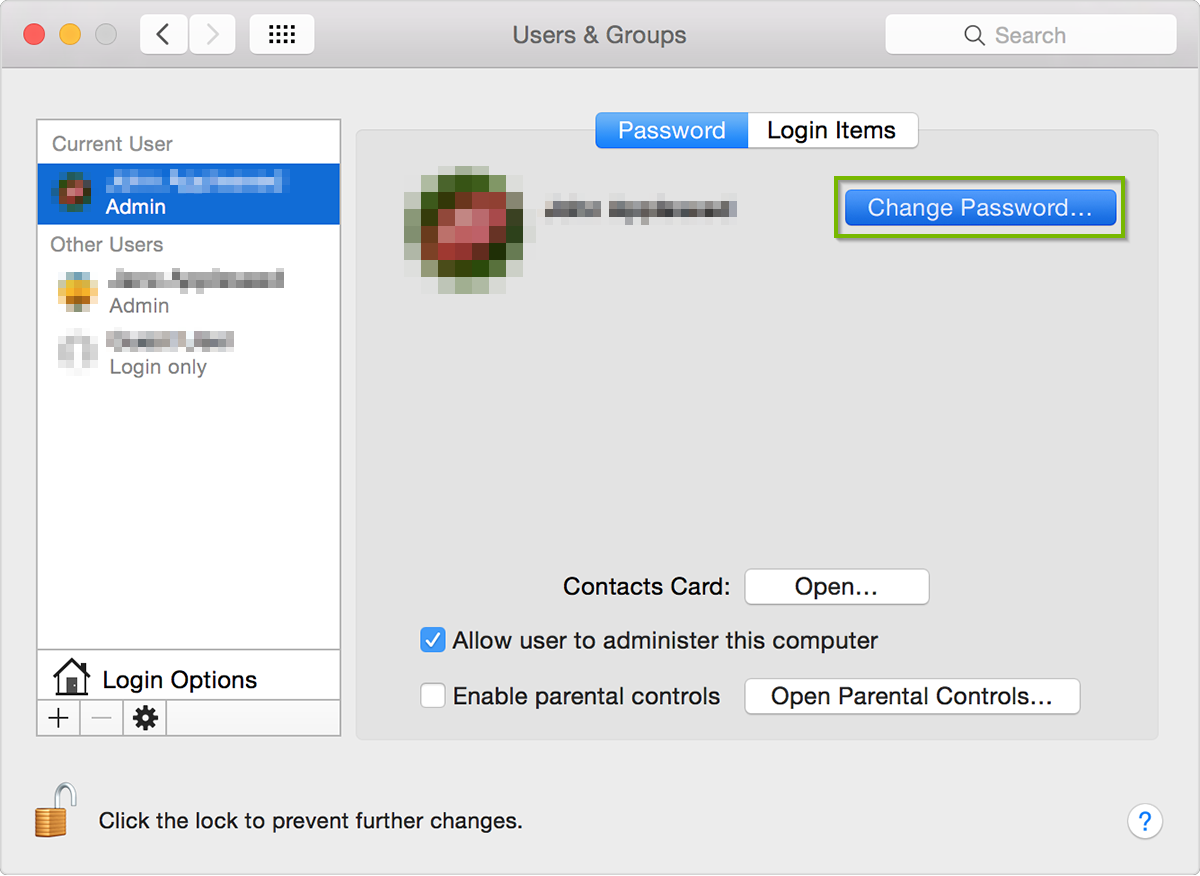
Click Password to change the login password
Click the picture to change the user picture.
5. macOS: Change User Password
It's important to change your login password from time to time to protect your privacy.
Choose Apple menu > System Preferences.
Click Users & Groups.
Click Change Password.
Enter your current password in the Old Password field.
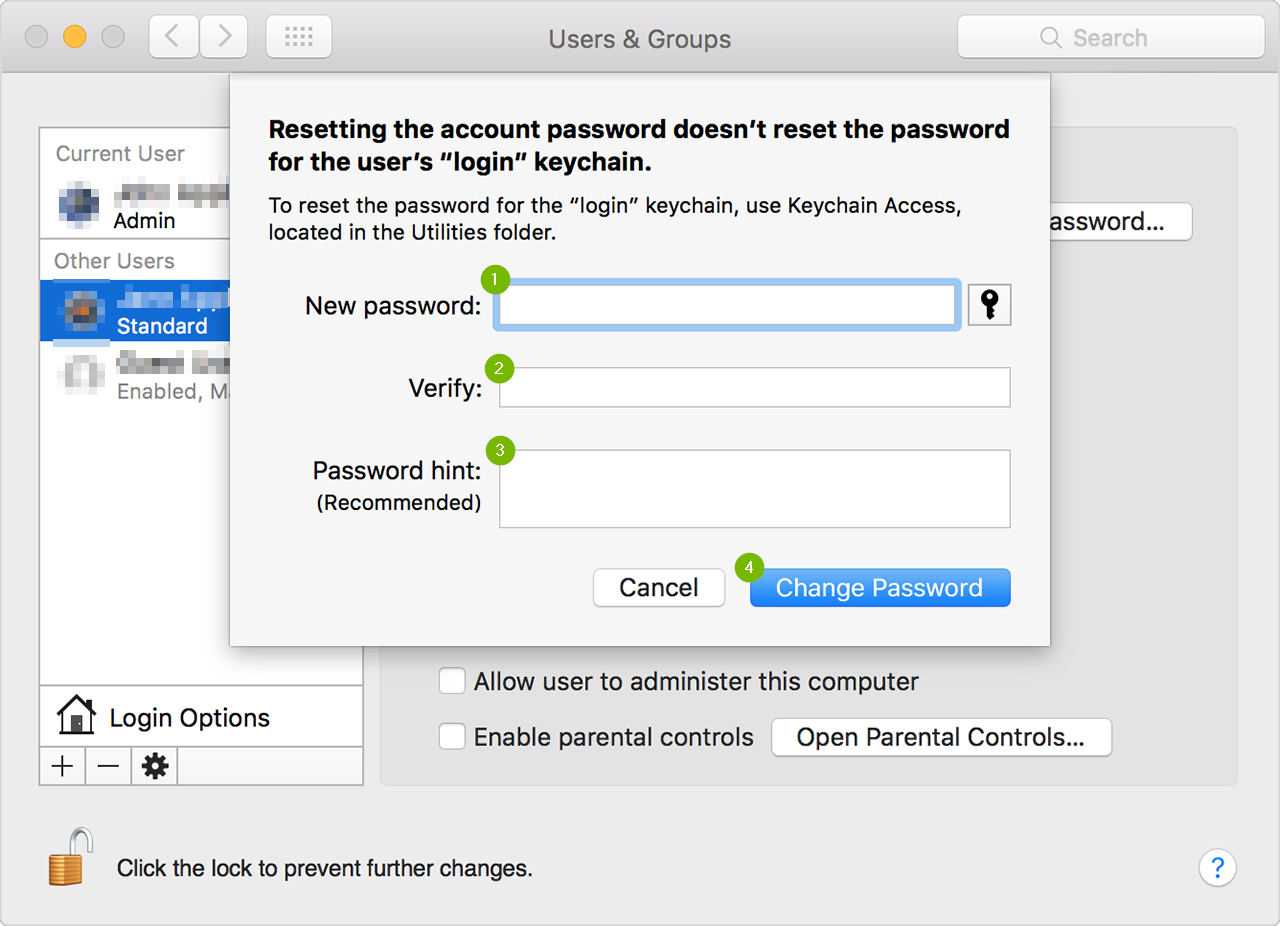
Enter your new password in the New Password field, then enter it again in the Verify field.
For help choosing a secure password, click the Key button next to the New Password field.
Enter a hint to help you remember the password.
The hint appears if you enter the wrong password three consecutive times, or if you click the question mark in the password field in the login window.
Click Change Password.
6. macOS: Change User Picture
You can change the picture that appears next to a user name in the login window.
Choose Apple menu > System Preferences.
Click Users & Groups.
If you want to change another users picture, click the lock icon to unlock it, then enter an administrator name and password. You can change your own picture without unlocking Users & Groups preferences.
Select the user account on the left, then click the picture on the right.
Instead of clicking the picture, you can drag an image file from the Finder onto the picture.
If other users are logged in to this Mac now, you can't select them.
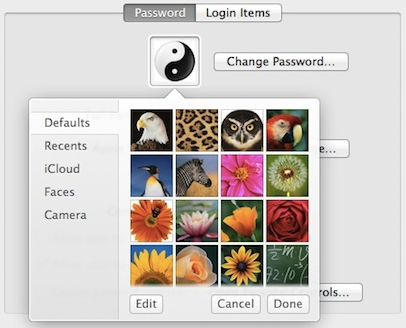
Do one of the following:
Use a picture included with macOS: Click Defaults, then select a picture.
Take your picture using your Mac: Click Camera; when you're ready, click Take Photo.
Use a picture from the Photos app: Click Photos. To see specific photos from a time, place, or album, click a disclosure triangle below photos, then select a group of photos. Select a picture, then click Next.
Use a picture from the Photo Booth app: Click Photo Booth to see pictures you've taken using your Mac and the Photo Booth app. Select a picture, then click Next.
Adjust the picture.
Zoom in or out: Drag the slider left or right.
Move the picture: Drag the picture around within the circle.
7. macOS: Convert User to Administrator
Convert a standard or managed user to an administrator
Choose Apple menu > System Preferences.
Click Users & Groups.
Click the lock icon to unlock it, then enter an administrator name and password.
Select a standard user or managed user in the list of users, then select Allow user to administer this computer.
You've successfully converted the standard user to an administrator.
.png)