.png)
Authored by: Support.com Tech Pro Team
Screenshots, a snapshot of what's currently on your display, are indispensable tools in this digital era. They provide a more accessible and faster form of getting the message across, proving a point, and documenting vital pieces of information that might be handy for future reference. The iPhone, like most modern smartphones, comes with a built-in feature to capture screenshots, making it super easy to capture any on screen content within seconds.
However, if you are capturing screenshots frequently, it might soon clutter your photo's library and consume a significant chunk of your device's storage space. Therefore, managing your screenshots becomes crucial to ensure the orderly organization of important ones and getting rid of those unnecessary.
Using the screenshot feature can make your digital life way more convenient. Screenshots are essentially real-time visual evidence. For example, if you encounter an unpredictable error or a fleeting scene that soon disappears, you can document it with a screenshot for future reference. Also, if you're discussing a confusing topic with someone, a screenshot can assist you to illustrate your point more effectively, sparing you the trouble of detailed verbal explanations. Thus, screenshots are invaluable when you need to record or share specific moments, details, messages and images, to facilitate problem-solving or record sharing.
Screenshots accumulate quickly over time and can take up significant storage space on your device. If you utilize your iPhone's screenshot feature frequently, managing them is inevitable. Deleting unnecessary screenshots is a handy way to free up space on your iPhone. All taken screenshots are stored in a separate folder on your iPhone's Photos app, making them easy to locate and manage. However, remember that deleted screenshots are not gone forever; they can be recovered from the Recently Deleted folder for a while. To get rid of them permanently, they need to be removed from this folder as well. Therefore, effectively managing and deleting unwanted screenshots can help maintain your device's storage space while keeping your photos organized.
Managing screenshots taken on your iPhone involves deleting those which are no longer needed. This process is simple and straightforward. Whether you want to delete a single screenshot or multiple at a time, iPhone's Photos app makes it easy. Here's how you can do it:
When you no longer need a specific screenshot, you can easily delete it following these steps:
Open the Photos app on your iPhone.
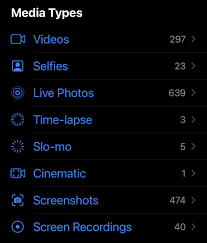
Proceed to the "Library" tab or the "Albums" tab, and under the "Media Type" section, select "Screenshots"
Tap on the specific screenshot you wish to delete and hit the trash icon located at the bottom right corner of the screen.
A prompt message will appear, then tap on "Delete Photo" to confirm the action.
Deleting multiple screenshots at once involves a very similar process. Here's how to do it:
Open the Photos app on your iPhone.
Go to the "Library" tab or the "Albums" tab. Under "Media Type", select "Screenshots".
At the top right corner of the screen, tap on "Select." Select the screenshots you wish to delete. If you wish to delete all screenshots, tap on "Select All" at the top left corner and then hit the trash icon at the bottom right corner of the screen.
Confirm the action by tapping on "Delete Photos".
Deleting a screenshot or multiple screenshots from your iPhone's Photos app does not permanently delete these files. They are only transferred to the 'Recently Deleted' folder, where they are stored temporarily for 30 days before automatic deletion. For immediate and complete removal, you have to manually delete them from the 'Recently Deleted' folder.
To ensure complete removal of unnecessary screenshots, follow these steps to empty the 'Recently Deleted' folder:
Open the Photos app on your iPhone.
Navigate to the "Albums" tab. Under the "Utilities" section, tap on the "Recently Deleted" folder.
Select the screenshots intended for permanent removal. Tap on the trash icon to delete.
To confirm the action, tap on "Delete Photo".
The steps for permanently deleting single or multiple screenshots are very similar. For multiple screenshots, you just need to select all that apply. Follow these steps:
Open the Photos app on your iPhone.
Go to the "Albums" tab. Under "Utilities", tap on the "Recently Deleted" folder. At the top right corner, tap on "Select".
Select the screenshots you want to delete. If you wish to delete everything in the folder, tap on "Delete All". Tap on "Delete" at the bottom left corner of the screen. Confirm the action by tapping on "Delete (number) Items".
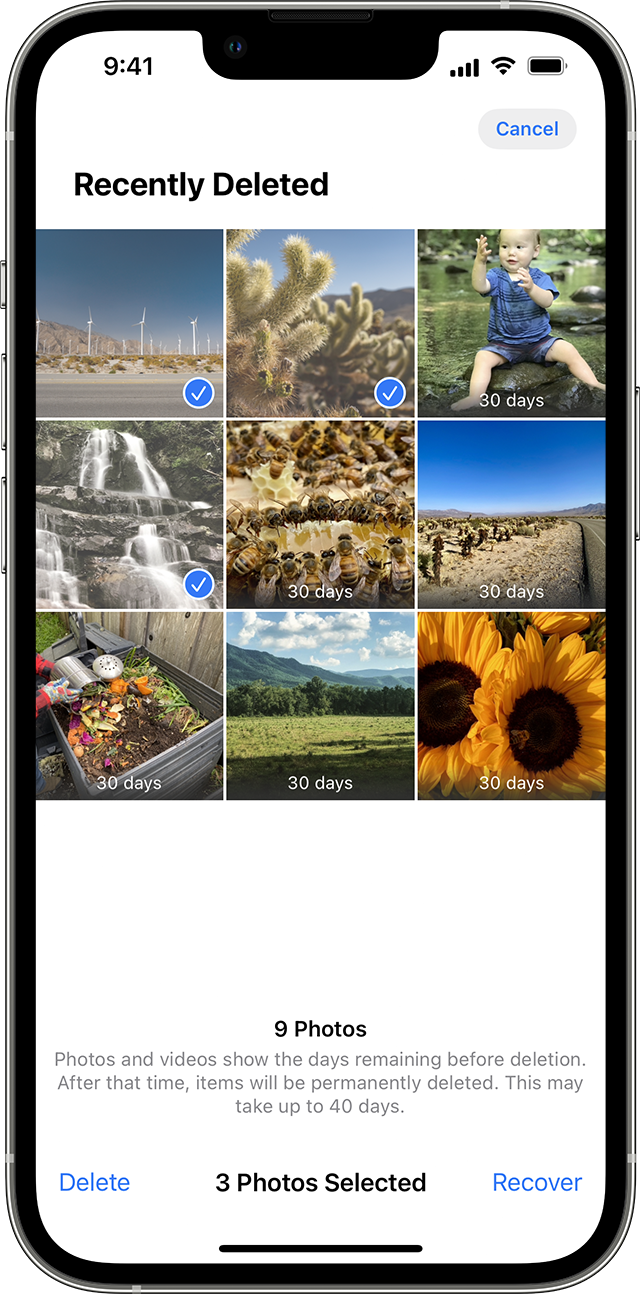
If you accidentally delete a screenshot that you need, don't worry. iPhone users have the possibility of recovering deleted screenshots, given they act within a specific timeframe, as deleted photos (including screenshots) are stored in the 'Recently Deleted' folder for 30 days before they are permanently deleted.
When a screenshot is deleted, it is not immediately and utterly removed from your iPhone. It is moved to the 'Recently Deleted' album where it stays for up to 30 days before it is erased forever, allowing a grace period for users to recover it if they realize it's needed.
If you need to recover deleted screenshots, follow these steps:
On your iPhone, navigate to the Photos application and find the 'Albums' tab.
Under 'Utilities', you'll find the 'Recently Deleted' album. Open this. Once here, you'll see all the pictures and screenshots that have been deleted in the past 30 days.
Select 'Photos' and then carefully review those saved here to find your desired screenshots. Once you have located the screenshots you wish to recover, tap on them to highlight. Click or tap Recover at the bottom right of the screen to restore the selected screenshots. Your recovered screenshots will reappear in the 'Screenshots' album and overtake their original slot in your main 'Photos' timeline.
Do remember that this recovery process is bound by time, and you can only recover screenshots deleted within the past 30 days.
If you require additional assistance, contact Support.Com for personalized help.

Support.com is committed to your privacy
We do not share or sell your data to third parties. We do use cookies and other third-party technologies to improve our site and services. The California Consumer Privacy Act (CCPA) gives you the ability to opt out of the use of cookies, third-party technologies and/or the future sale of your data. Do not sell my personal information.

Support.com is committed to your privacy
Read our Privacy Policy for a clear explanation of how we collect, use, disclose and store your information
