Migrating your data from your old computer to your new Mac is fast and easy. Apple's Migration Assistant makes the whole process simple.
This guide will walk you through using Migration Assistant to move your data from your old Windows or Mac computer to your new Mac.
2. Networking: Same Network
In order to proceed, both of your devices need to be connected to the same network.
Make sure both of your devices can access the Internet, and neither is connected to any 'guest' Wi-Fi network created by your home router.
3. Computer: OS Choice
To continue, we need to know what Operating System your computer is using.
There are 2 main Operating Systems for personal computers currently available, Microsoft Windows and Apple macOS.
Microsoft WindowsApple macOSMicrosoft Windows runs on computers produced by multiple companies, such as Lenovo, Asus, Dell, Toshiba, Hewlett Packard, Acer, and Sony.Apple is the only company that makes macOS computers.
4. macOS: Migrate from Windows
This guide will be taking you back and forth between your old and new Mac. Pay special attention to the heading for the step you are working on to avoid potential problems.
On Your New Mac
Save and close any documents or data you are working with. The Migration Assistant must be run by itself.
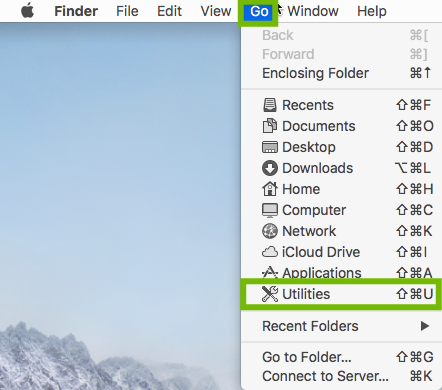
Select Finder from your Dock.
Select Go > Utilities.
Select Migration Assistant.
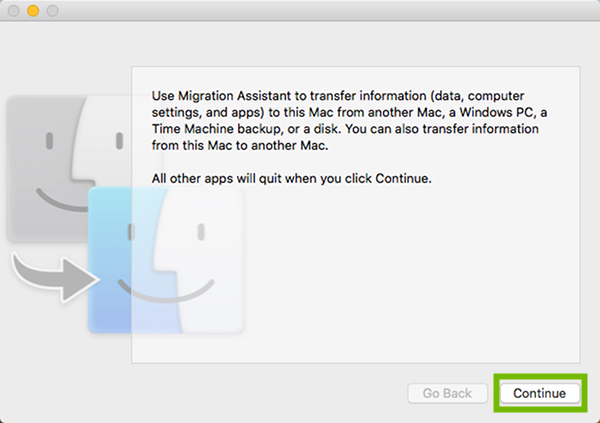
Migration Assistant will remind you that it will quit your other apps. Select Continue.
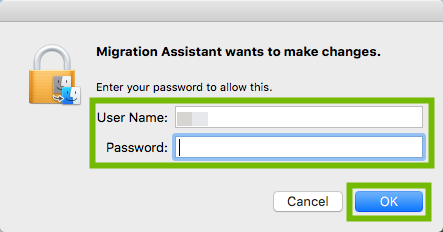
Migration Assistant makes major changes to your Mac, so it requires authorization to continue. Enter your new Mac's username and password, then select OK.
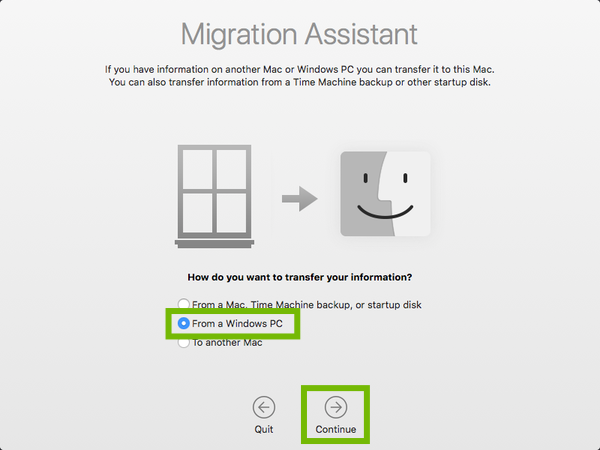
This is your new computer, you are transferring your information from your old Windows computer. Select the second option, From a Windows PC, then select Continue.
On Your Old Windows Computer
Open the browser you prefer on your old computer, for example Microsoft Edge or Internet Explorer.
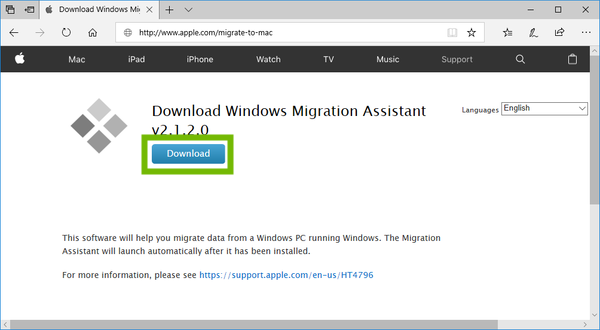
Type http://www.apple.com/migrate-to-mac in the address bar at the top, then push enter on your keyboard.
Select Download to download the Migration Assistant.
If you are using Edge or Internet Explorer, you can simply select Run. For other browsers, download then run the program.
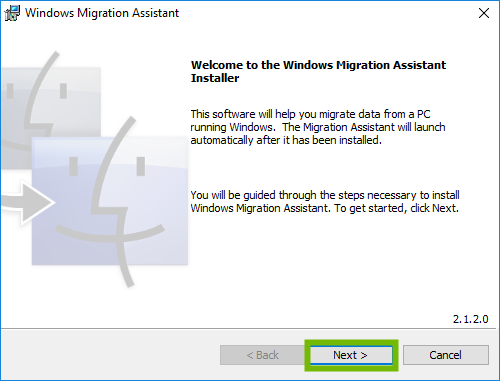
Once the Migration Assistant welcome screen opens, select Next.
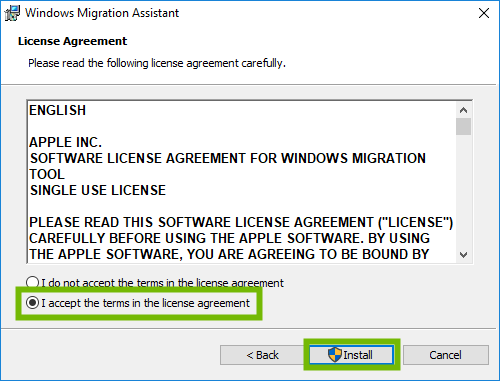
Read carefully, then accept the license agreement. Then select Install.
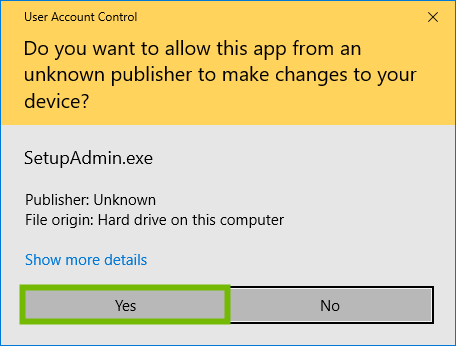
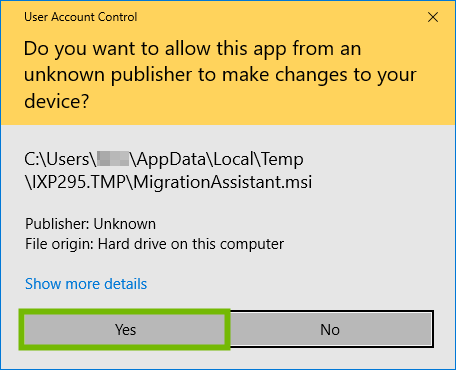
Windows will ask if the downloader program is allowed to run, select Yes.
Windows will ask if the Migration Assistant installer may run, select Yes.
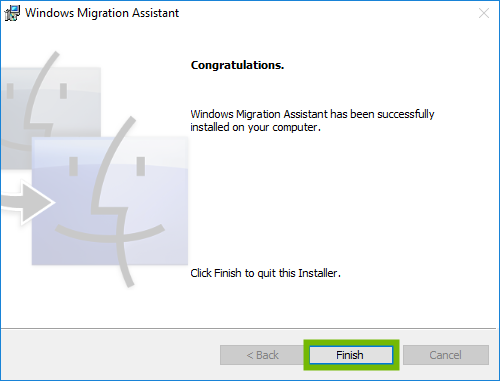
Select Finish.
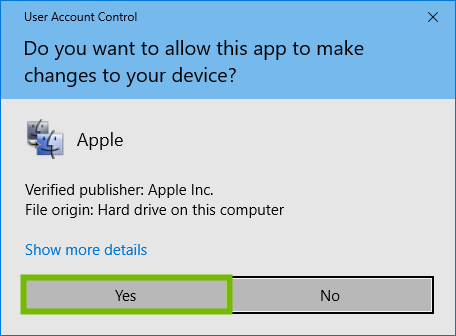
Windows will ask if Migration Assistant may run, select Yes.
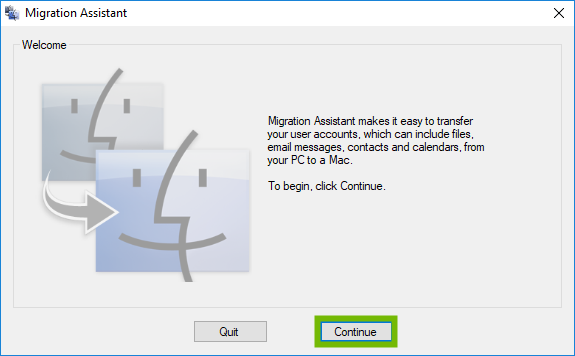
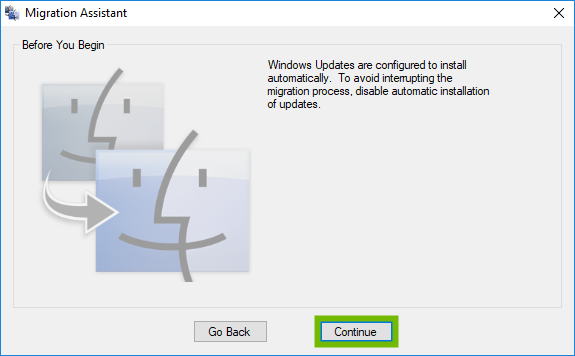
Select Continue.
You may be prompted that Windows Updates are configured to install automatically. Select Continue.
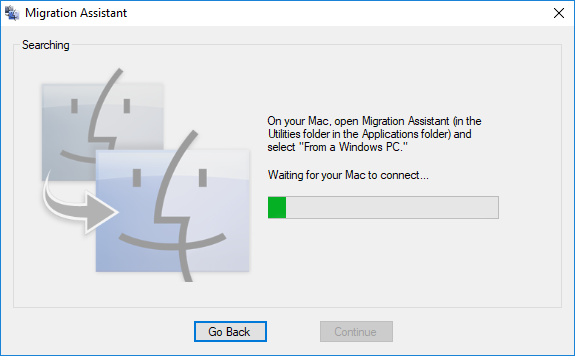
Migration Assistant will now make your Windows computer visible to your new Mac.
On Your New Mac
Select your Windows computer in Migration Assistant, then select Continue.
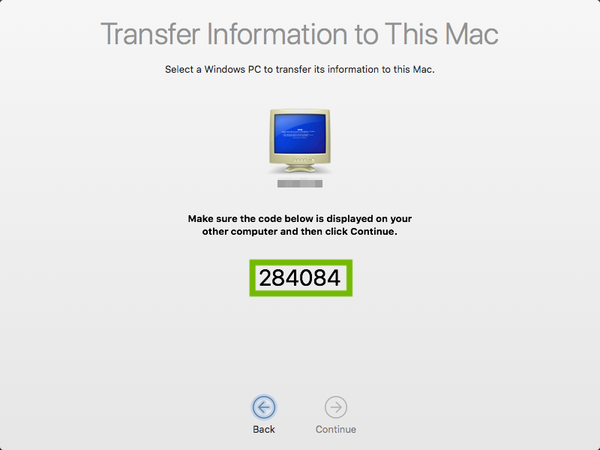
A code will be displayed to authorize this migration. Make note of this number.
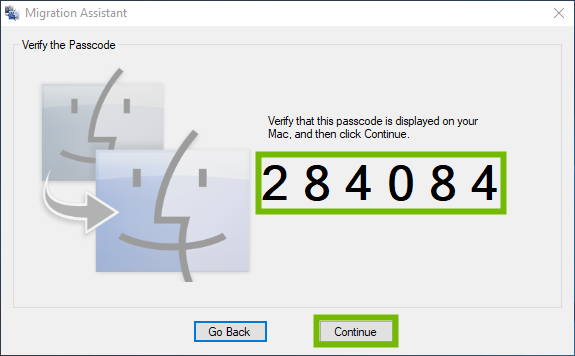
On Your Old Windows Computer
Make sure the same number is displayed as on your new computer. Select Continue.
On Your New Mac
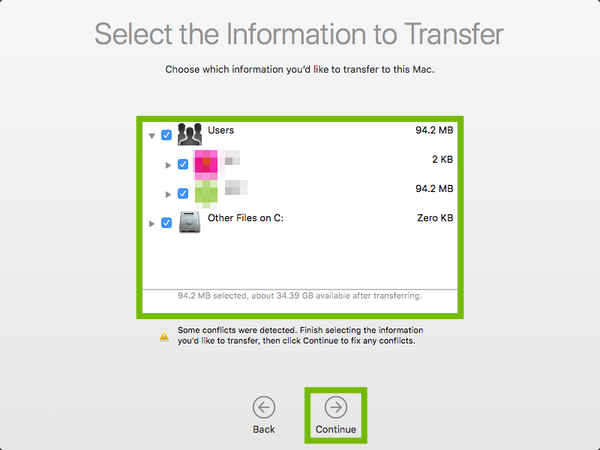
You'll be asked to select the users and files on your old computer that you want to transfer to your new Mac. Select the items you want copied, then select Continue.
If you have the same username on both computers, you'll be asked to give a new username. Enter a new username, then select Continue.
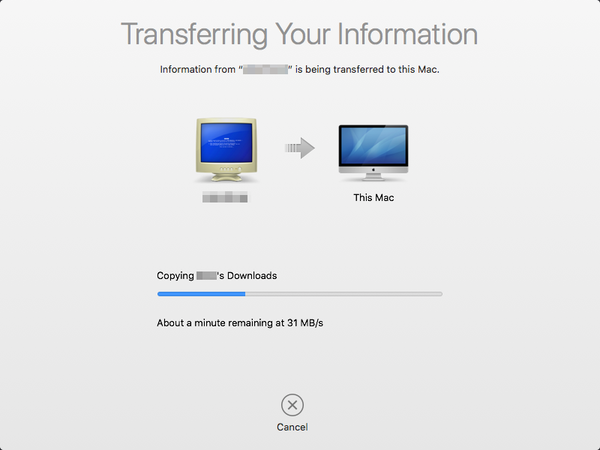
Your files will copy over to your new Mac, and you'll see an estimate of how long the process will take.
On Your Old Windows Computer
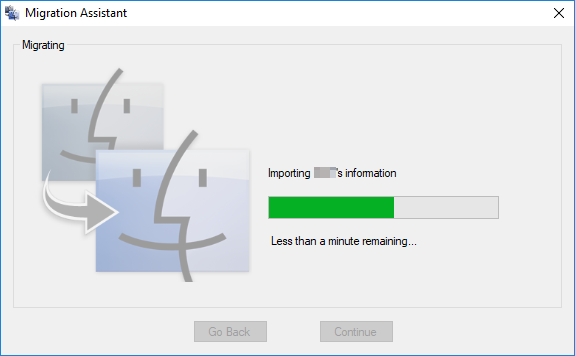
You'll see the same progress bar on your old computer as files are copied.
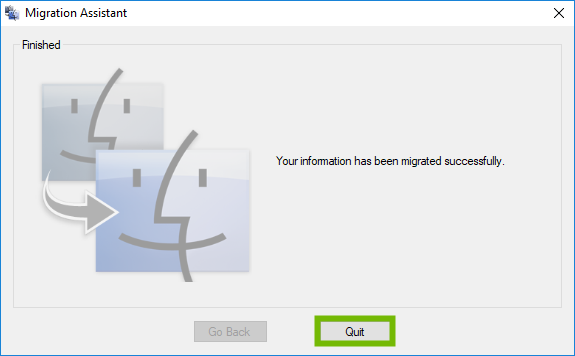
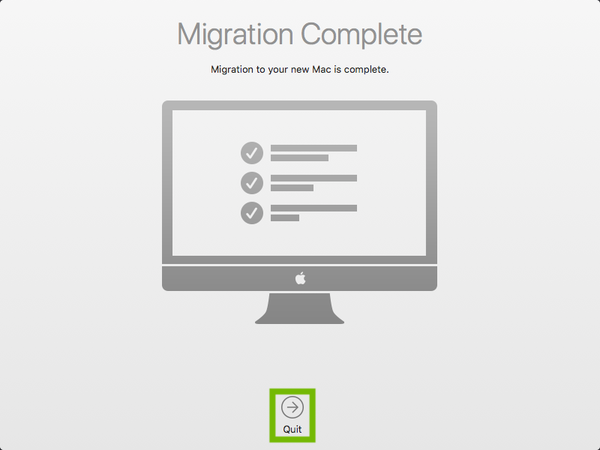
Once complete, select Quit.
Nothing has been removed from your old Windows computer, only copied. You are free to continue using your old computer for as long as you like, with all your data still in-place, just as it was.
On Your New Mac
When the transfer is done, you'll get a message letting you know the migration is complete. Select Quit.
You will be prompted to log into your Mac. Select one of the new users you just migrated, and the files, you're used to will be in place and ready!
5. macOS: Migrate From macOS
This guide will be taking you back and forth between your old and new Mac. Pay special attention to the heading for the step you are working on to avoid potential problems.
On Your New Mac
Save and close any documents or data you are working with. The Migration Assistant must be run by itself.
Select Finder from your Dock.
Select Go > Utilities.
Select Migration Assistant.
Migration Assistant will remind you that it will quit your other apps. Select Continue.
Migration Assistant makes major changes to your Mac, so it requires authorization to continue. Enter your new Mac's username and password, then select OK.
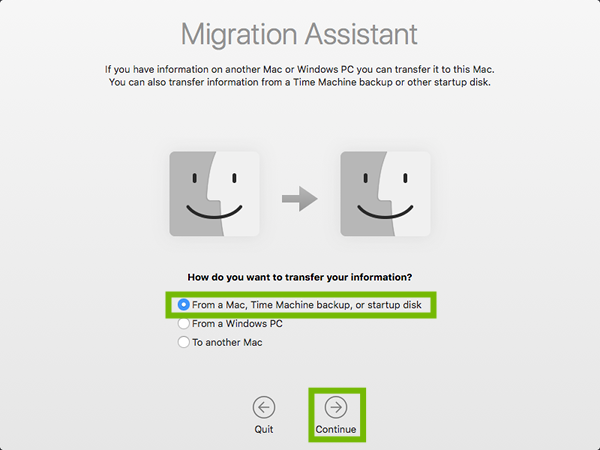
This is your new computer, you are transferring your information from your old Mac. Select the first option, From a Mac, Time Machine backup, or startup disk, then select Continue.
On Your Old Mac
Save and close any documents or data you are working with. The Migration Assistant must be run by itself.
Select Finder from your Dock.
Select Go > Utilities.
Select Migration Assistant.
Migration Assistant will remind you that it will quit your other apps. Select Continue.
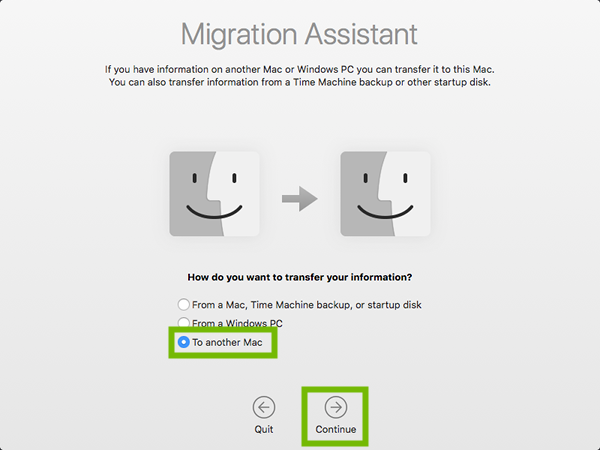
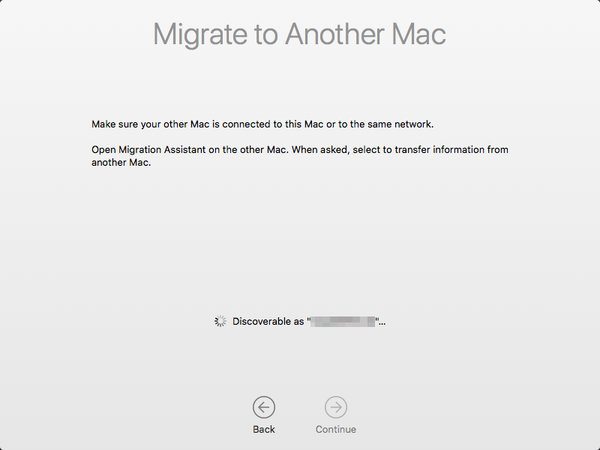
Select To another Mac, then select Continue.
Your old Mac will become "Discoverable", and state the name it's using on the screen.
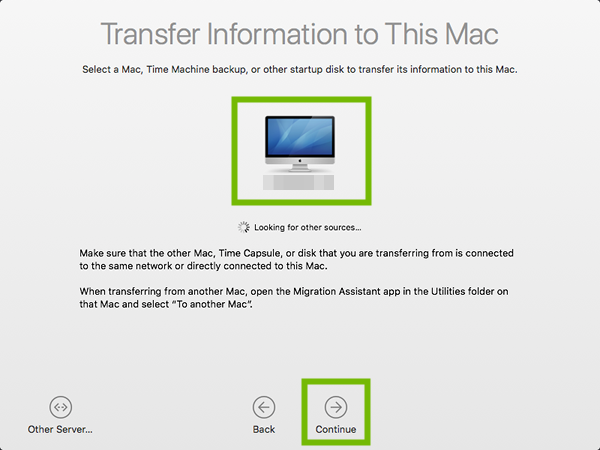
On Your New Mac
Migration Assistant will locate your old machine. Select it, then select Continue.
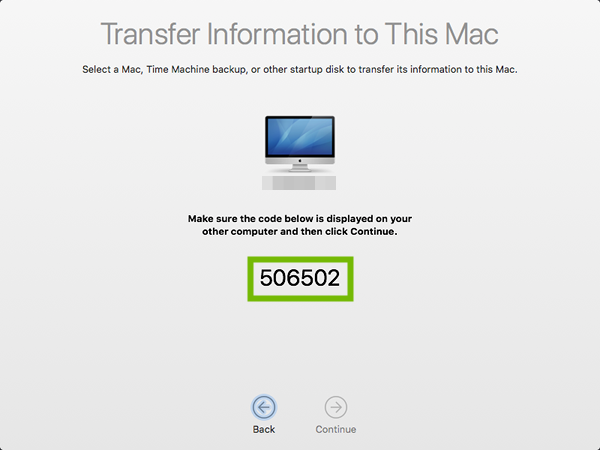
A random code will be displayed. Take special note of this code, and make sure it matches what is shown on your old computer.
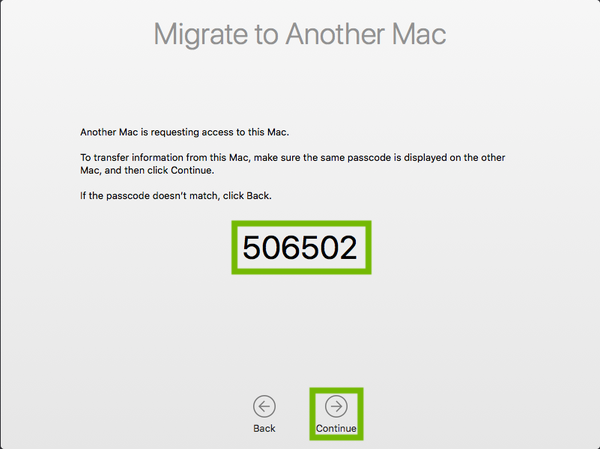
On Your Old Mac
Look on the screen, it should display the exact same number, for verification. Then, select Continue.
Your old Mac will connect to your new Mac, and allow your new Mac to choose what files and settings to transfer.
On Your New Mac
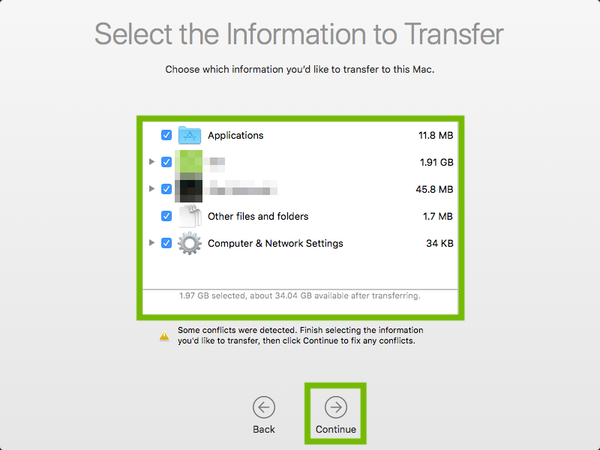
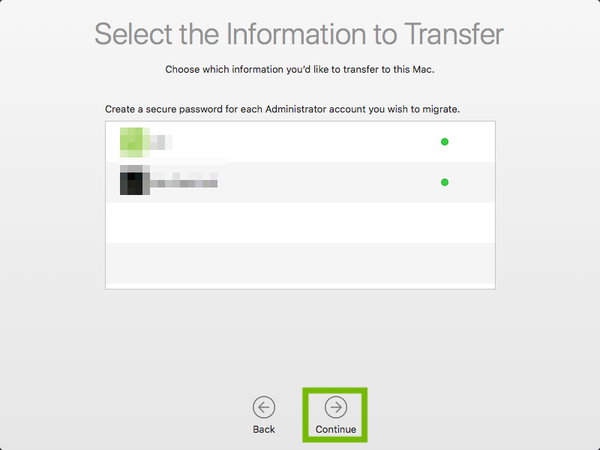
Select the items you'd like to transfer from your old computer to your new computer. In most cases, you'll want to check all items. Then select Continue.
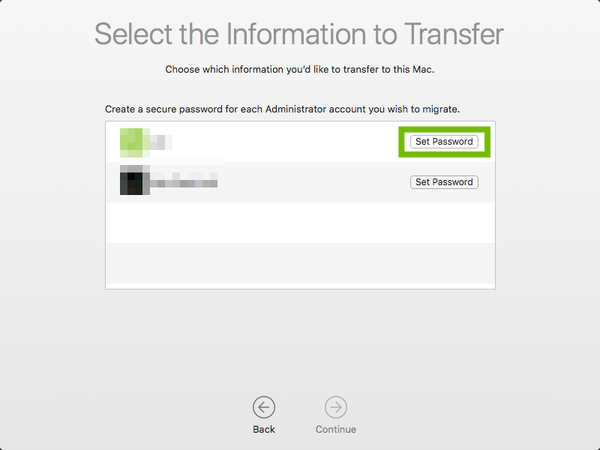
When you migrate a user account, you must set a new password for each account. Select Set Password.
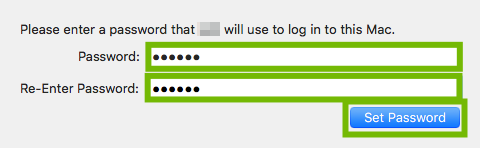
Enter and confirm the password, then select Set Password.
Once you've assigned a password for each account you're importing, select Continue.
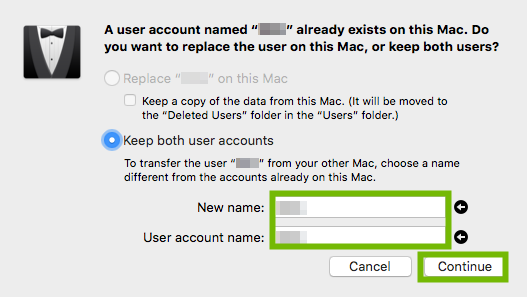
If you're using the same username already on your new Mac, you'll be given an option to copy the account from your old computer by renaming it. Give it a new name, then select Continue.
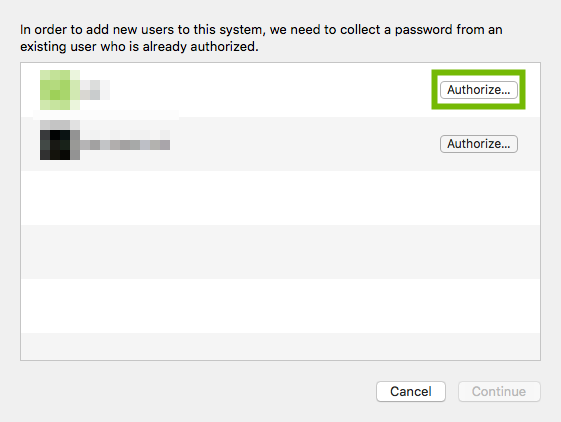
You'll be asked to authorize this transfer. Select the Authorize button next to one of the usernames already on your new Mac, then enter the password.
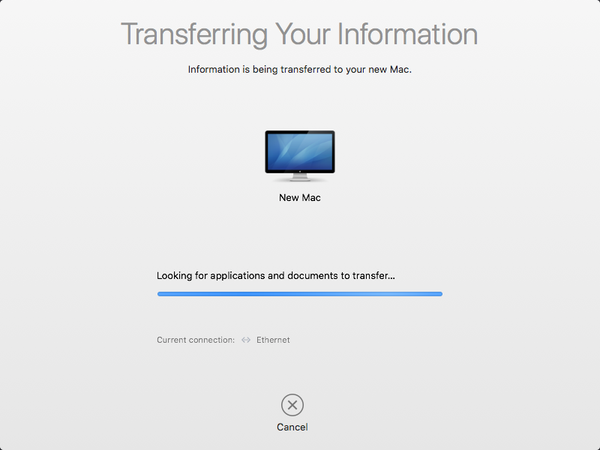
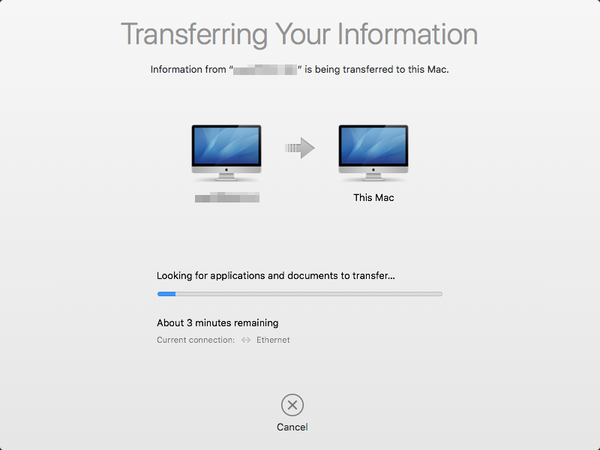
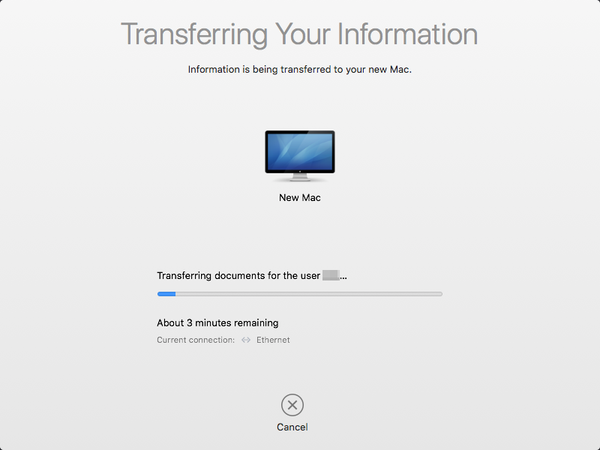
Your Mac will begin copying files, settings, and data from your old Mac to your new Mac. A time estimate will show at the bottom during the transfer.
On Your Old Mac
Your old Mac will show a similar screen as files are copied over.
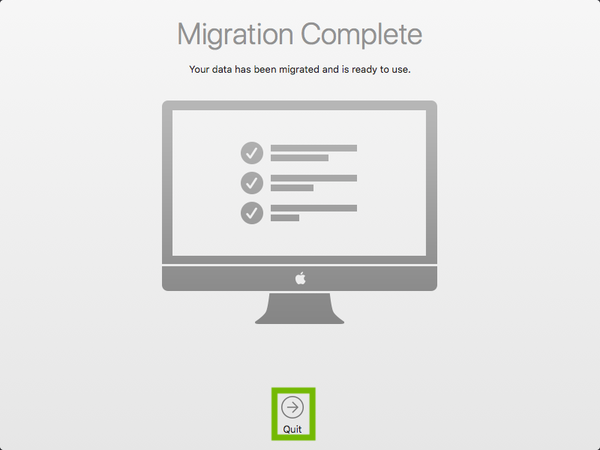
When the transfer is done, you'll get a message letting you know the migration is complete. Select Quit.
Nothing has been removed from your old Mac, only copied. You are free to continue using your old Mac for as long as you like, with all your data still in-place, just as it was.
On Your New Mac
When the transfer is done, you'll get a message letting you know the migration is complete. Select Quit.
You will be prompted to log into your Mac. Select one of the new users you just migrated, and the files, programs, and settings you're used to will be in place and ready!
6. Networking: New Device Check
On your new computer, make sure you can browse web pages, and make sure you recognize the Wi-Fi network you are connected to.
If you are not sure about the Wi-Fi network, choose "no" below for help checking.
7. Networking: Old Device Check
On your old computer, make sure you can browse web pages, and make sure you recognize the Wi-Fi network you are connected to.
If you are not sure about the Wi-Fi network, choose "no" below for help checking.
8. Computer: OS Choice
To continue, we need to know what Operating System your computer is using.
There are 2 main Operating Systems for personal computers currently available, Microsoft Windows and Apple macOS.
Microsoft WindowsApple macOSMicrosoft Windows runs on computers produced by multiple companies, such as Lenovo, Asus, Dell, Toshiba, Hewlett Packard, Acer, and Sony.Apple is the only company that makes macOS computers.
9. Windows 10: Connect to Wi-Fi
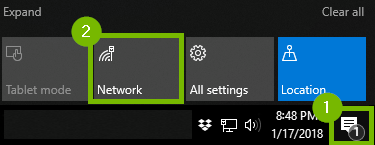
Click on the Notifications icon and then click on Network.
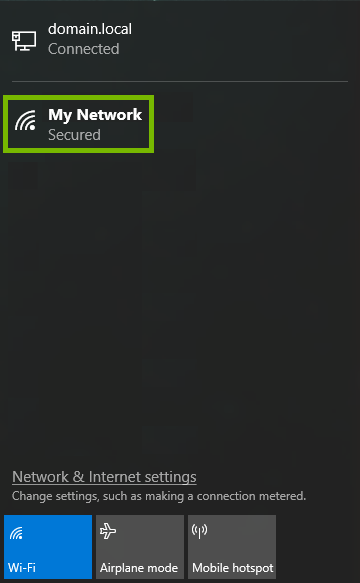
Click the network you wish to connect to.
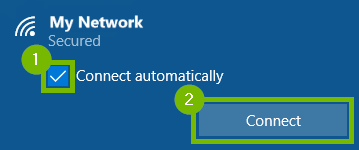
Choose if you wish to automatically connect to your network, and then click on Connect.
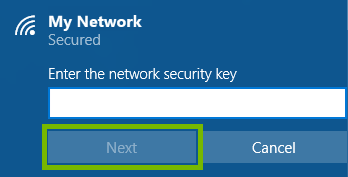
Enter in your security key and click Next.
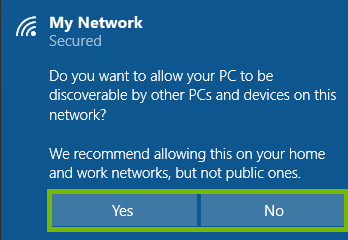
Choose whether or not you want to be visible to the network.
It is recommended to allow your PC to be discovered on private home networks because that allows you to see other wireless devices on the Network. If you're at a public location it is suggested to select "No".
You can verify your connection by checking to see if it now says "Connected" next to the network.
10. macOS: Connect to Wi-Fi
Click the Wi-Fi icon in the menu bar. By default it will be in the upper right corner near the time and date.
If Wi-Fi is off, choose Turn Wi-Fi on.
The strength of each nearby network is shown next to its name. More darkened bars indicate a stronger network connection.
Select the Wireless Network Name (SSID) of the network you want to connect to.
Networks that have a lock icon next to their name require a password. After you select your network, enter the network password when you're prompted. If you don't know the network password, check with the owner of the Wi-Fi network you're trying to join.
11. macOS: Connect to Wi-Fi
Click the Wi-Fi icon in the menu bar. By default it will be in the upper right corner near the time and date.
If Wi-Fi is off, choose Turn Wi-Fi on.
The strength of each nearby network is shown next to its name. More darkened bars indicate a stronger network connection.
Select the Wireless Network Name (SSID) of the network you want to connect to.
Networks that have a lock icon next to their name require a password. After you select your network, enter the network password when you're prompted. If you don't know the network password, check with the owner of the Wi-Fi network you're trying to join.
.png)