Performance issues can be tricky to diagnose and troubleshoot. They could be due to several variables like new hardware, failed updates, or as simple as an aging system.
This guide will help you diagnose and troubleshoot performance issues on your PC or Mac.
2. Introduction: PC: Resolving Performance Issues
Diagnosing performance issues on Windows 10 can be difficult. This guide will take you, step by step, through Microsoft-recommended checks and fixes to help make sure your computer is performing as best it can.
3. Windows 10: Check for Updates
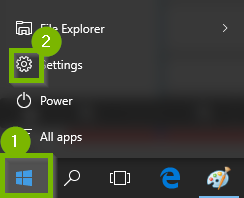
Select the Start menu.
Select the Settings button on the left side of the start menu.
Select Update and Security.
Select Windows Update on the left, then select Check for updates.
Once the system has finished checking for updates, it will automatically download and install the latest applicable updates.
The system also may prompt you to restart, if it does, please do so at your earliest convenience, otherwise the update process will not complete.If you system was already recently updated, chances are that no further updates are available and your Update status will indicate: Your device is up to date.
4. Windows 10: Disk Cleanup
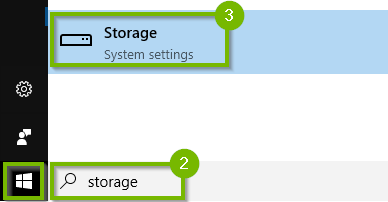
Click Start, type storage in the search box, then click Storage.
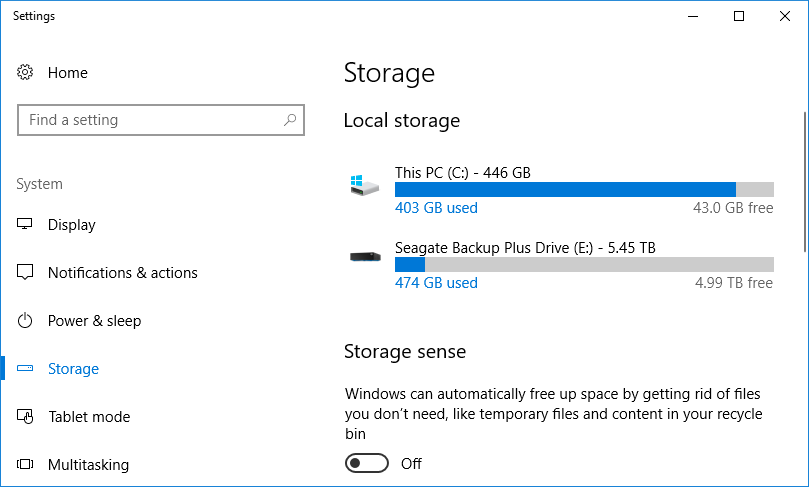
Under Local storage on the right, you will see a list of drives. In the example below, C: has a 446 GB capacity with 403 GB used and 43 GB free space. You need to have some space available for Windows to function properly.
5. Windows 10: Uninstall an App
You may need to remove an app because you need the space or simply don't need it anymore. The following steps show you how to easily remove an app.
Click Start then Settings.
Next, Select Apps.
Scroll down and locate the app you wish to remove, and click on Uninstall.
Carefully read any prompts in case there are special instructions. Proceed until the application is removed.
Some applications may require that you reboot.
6. Windows 10: Restart Your PC
Before your restart or shut down your PC, make sure to save all necessary work to prevent data loss.
Using the Mouse
Select the Start menu.
By default it is in the lower left corner of your screen.
Select Power, then select Restart.
Using the Keyboard
Press the Windows and X keys at the same time. This minimizes any open windows you may have.
Press the Alt and F4 keys at the same time. This tells Windows to close the desktop.
Select Restart, then OK.
7. Windows 10: Check Memory Usage
Memory is the first hardware limitation we need to check to help diagnose and increase system performance. We need to find out how much memory you have in your computer, and how much you're using, first.
In general, Windows 10 requires 2 GB of memory to work, but performance and stability will be limited. Windows 10 runs better with 4 GB. If you use a lot of programs at the same time, or very large programs (such as games), you may require more memory, such as 6 GB or 8 GB or more.
You can choose to use fewer programs, or add more memory to your computer if you find yourself regularly using up all available memory.
Press the CTRL + ALT + DEL keys on your keyboard at the same time.
Choose Task Manager from the screen that comes up.
Click on More details at the bottom.
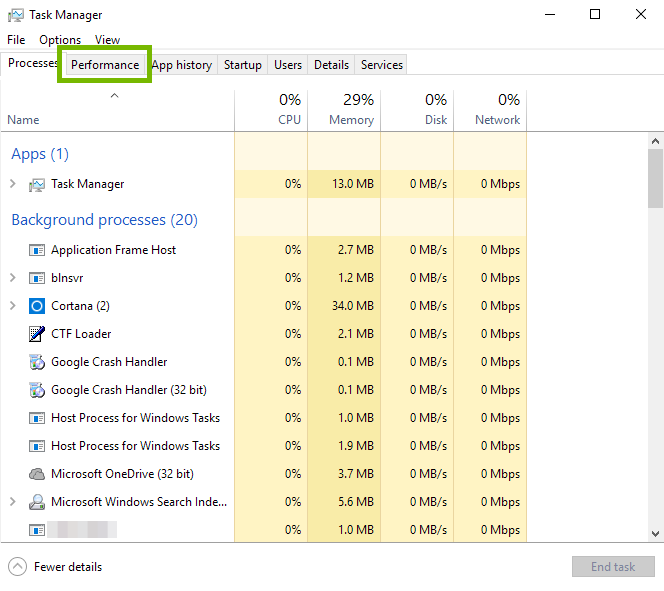
Click on the Performance tab at the top.
Click on Memory on the left.
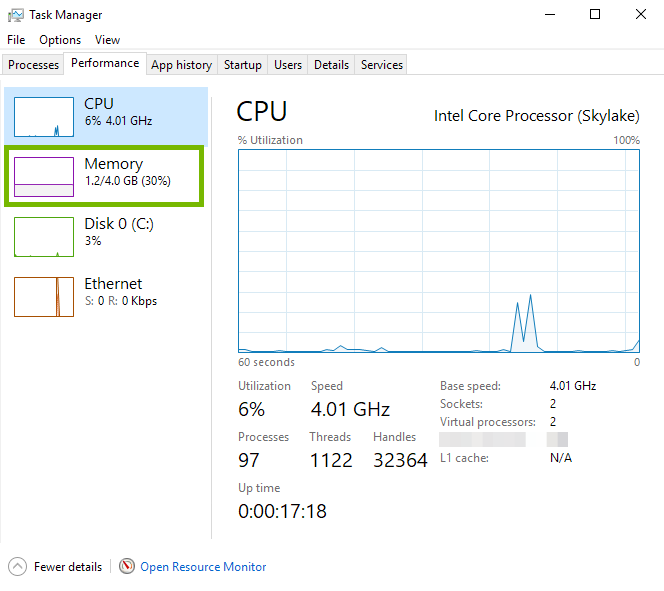
Look at the amount of memory you have on your computer, and how much is in use.
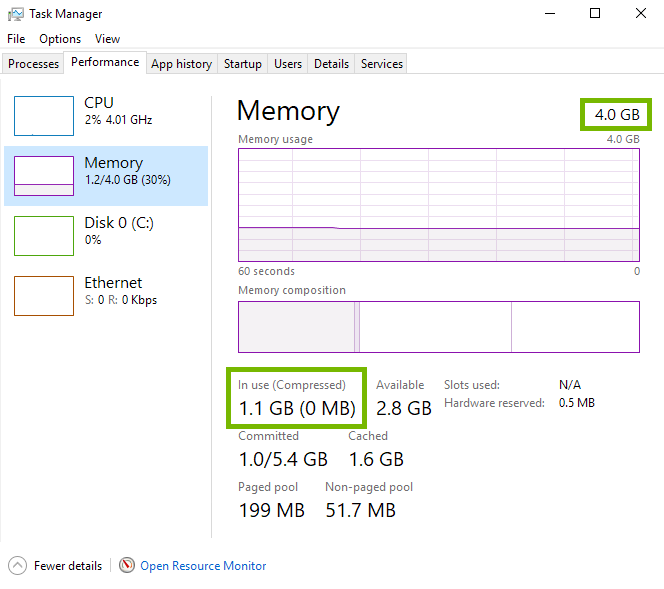
In the top-right corner, you'll see how much memory is physically installed in your computer.
In the list at the bottom, you'll see how much is in-use by Windows, and the programs you have open.
You can check this information when you have your normal programs open. Open a few programs you usually use, and return to this window. See if you're using more memory than you have; this indicates Windows is using some of your hard drive space as memory, which is very slow.
This is a physical part of your computer, not something you can download or modify through software. If you want to add more memory to your computer, contact the company you purchased your computer from, or a local technical support service.
8. Windows 10: System Restore
Turning the system off while System Restore is running can cause corruption. If your device is battery-operated, connect it to a power outlet first as System Restore may take time and should not be interrupted.
System restore will remove any programs installed and settings made after the selected date.
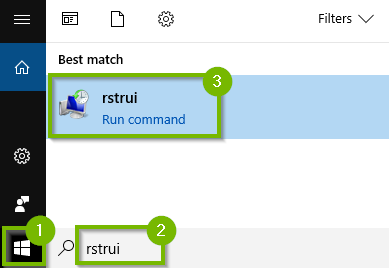
Open the Start Menu, type "rstrui" in the search box and then click rstrui.
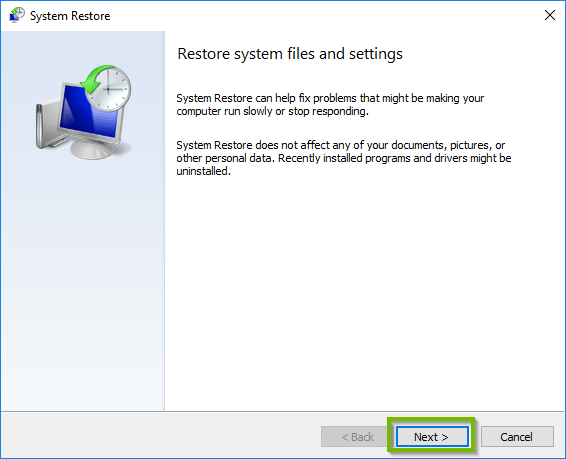
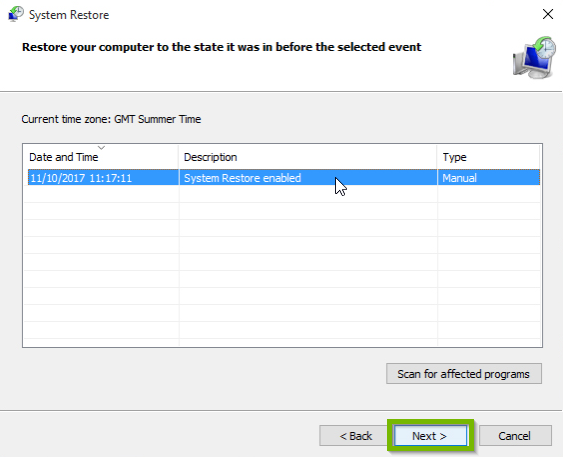
System Restore will open. Click Next.
Select a date before the issue started, you may see more than 1 restore point. Click Next afterwards.
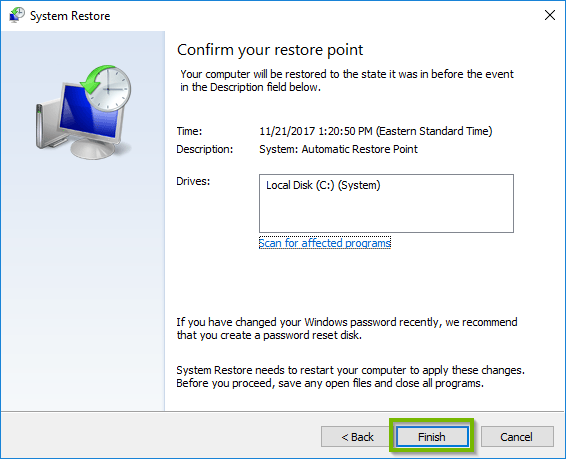
Confirm your restore point by clicking Finish. Click Back if you wish to change the restore point.
The process will take some time to finish. The system will also reboot shortly.
9. Windows 10: Startup Check
Press the CTRL + ALT + DEL keys on your keyboard at the same time.
Choose Task Manager from the screen that comes up.
Click on More details at the bottom.
Click on the Startup tab at the top.
Look carefully through this list. If you see an item you do not want to startup whenever you turn on your computer, highlight it, and choose Disable at the bottom.
10. Windows 10: Restart Your PC
Before your restart or shut down your PC, make sure to save all necessary work to prevent data loss.
Using the Mouse
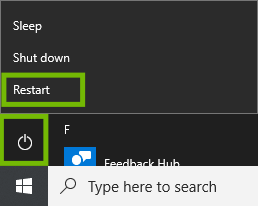
Select the Start menu.
By default it is in the lower left corner of your screen.
Select Power, then select Restart.
Using the Keyboard
Press the Windows and X keys at the same time. This minimizes any open windows you may have.
Press the Alt and F4 keys at the same time. This tells Windows to close the desktop.
Select Restart, then OK.
11. Windows 10: Repair Windows Image (DISM)
Make sure you are connected to the Internet before beginning these steps.
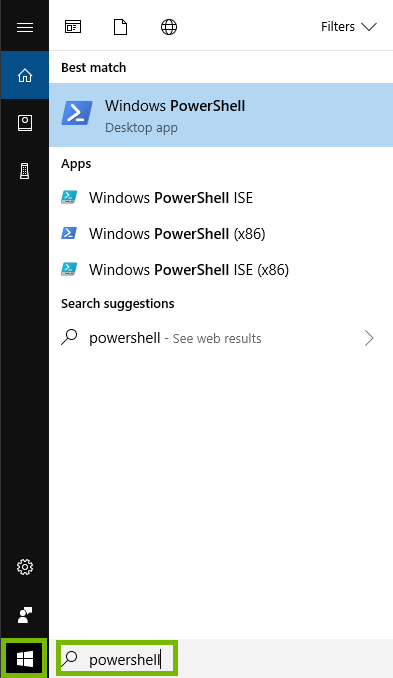
Choose the Start menu, and type PowerShell into the search.
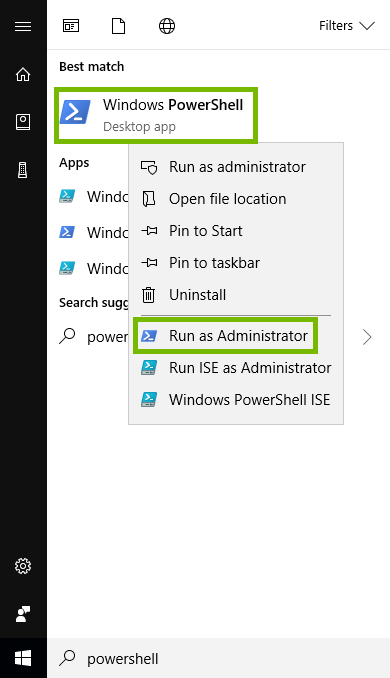
Using your right mouse button, right click on PowerShell in the list above. A special menu will open. Choose Run as Administrator.
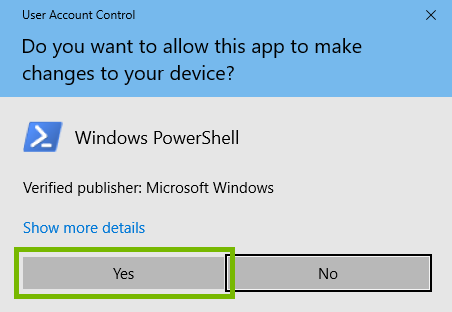
Windows will ask if PowerShell may make changes, click Yes.
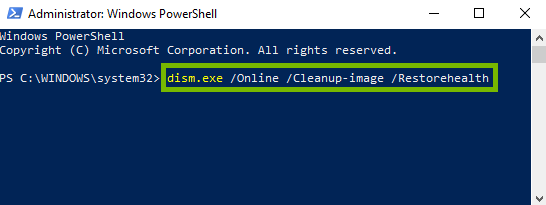
At the prompt, enter the following command, then press enter on your keyboard: dism.exe /Online /Cleanup-image /Restorehealth
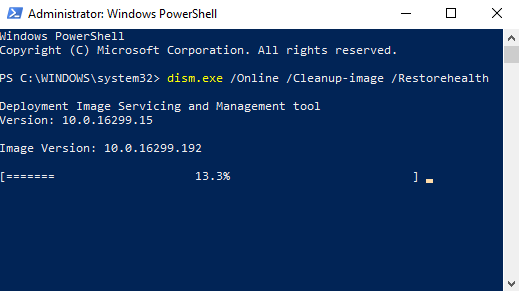
Windows will automatically go through every system file, make sure they are valid, and replace any corrupted files.
12. Windows 10: Adjust For Best Performance
Select the Start menu, search for Performance. Then, select Adjust the appearance and performance of Windows from the menu.
Select Adjust for best performance at the top, then click OK at the bottom.
13. Windows 10: Restart Your PC
Before your restart or shut down your PC, make sure to save all necessary work to prevent data loss.
Using the Mouse
Select the Start menu.
By default it is in the lower left corner of your screen.
Select Power, then select Restart.
Using the Keyboard
Press the Windows and X keys at the same time. This minimizes any open windows you may have.
Press the Alt and F4 keys at the same time. This tells Windows to close the desktop.
Select Restart, then OK.
14. Windows 10: Reset Windows
Performing a Windows 10 Reset keeps your personal files, settings, and apps that came installed on your machine in-tact.
For portable devices: Before proceeding with a Reset, make sure the device is connected to a power outlet to avoid power loss during the reset process.
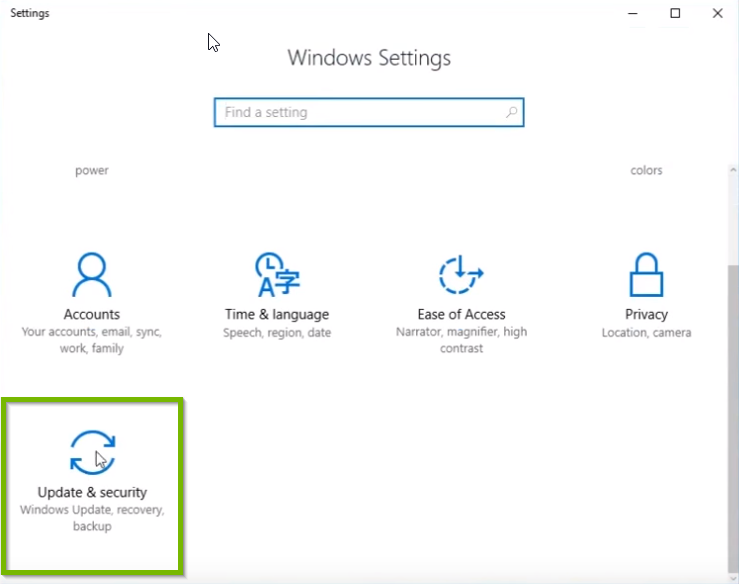
Open the Start Menu, and select the Settings icon.
Scroll down and select Update & Security.
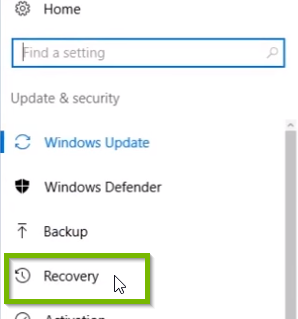
Select Recovery.
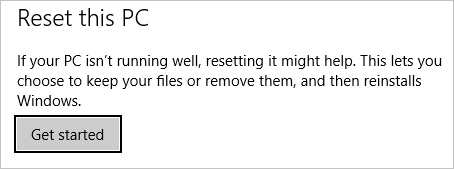
Click Get started under Reset this PC.
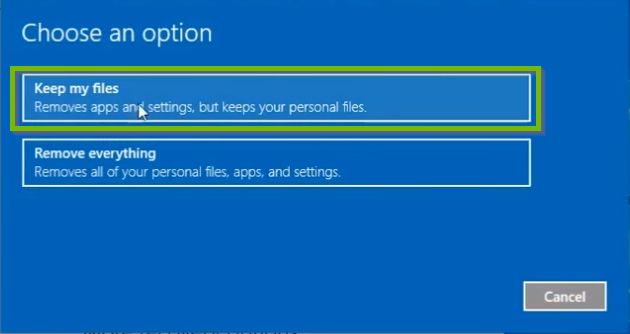
Select Keep my files.
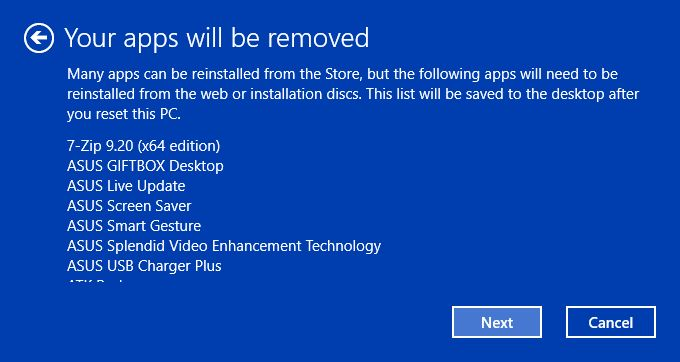
Take note of any apps that will need to be reinstalled. Click 'Next'.
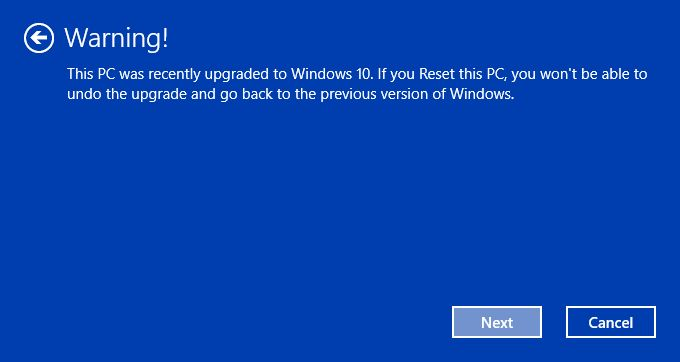
If prompted with a Warning, click 'Next'.
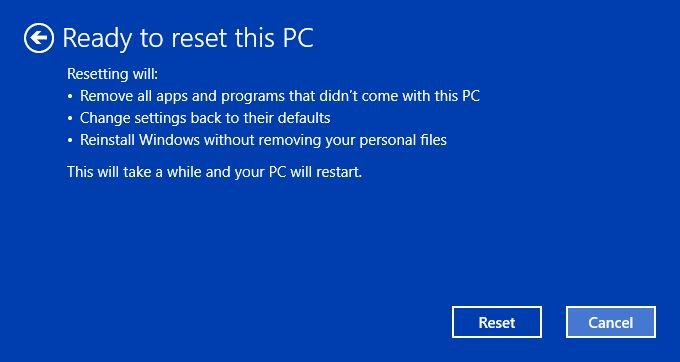
At this point, the system is ready to be reset. This process may take quite a while, and the system will automatically restart when needed. Click Reset when ready.
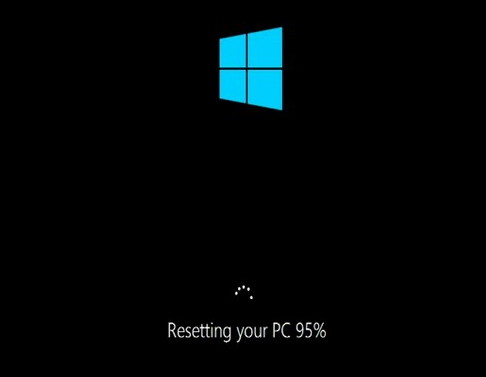
Windows 10 will start the reset process and may reboot several times while running. Follow any on-screen instructions that may require your attention.
Once the process is complete, you may use your system again.
15. What's next?
16. Windows 10: Adding More RAM
Your system doesn't seem to meet requirements to run Windows 10. We recommend finding a local shop to get an upgrade if possible.
Depending on the age of your system, it may not be possible to upgrade the RAM.
17. Introduction: Mac Performance Issues
Mac OS X does a very good job of taking care of itself; for the most part, you do not need 3rd party utilities to help keep your Mac running well.
This guide will walk you through a series of simple steps, using the built-in tools with your Mac, to make sure it's running as well as it can.
18. macOS: Check Startup Programs
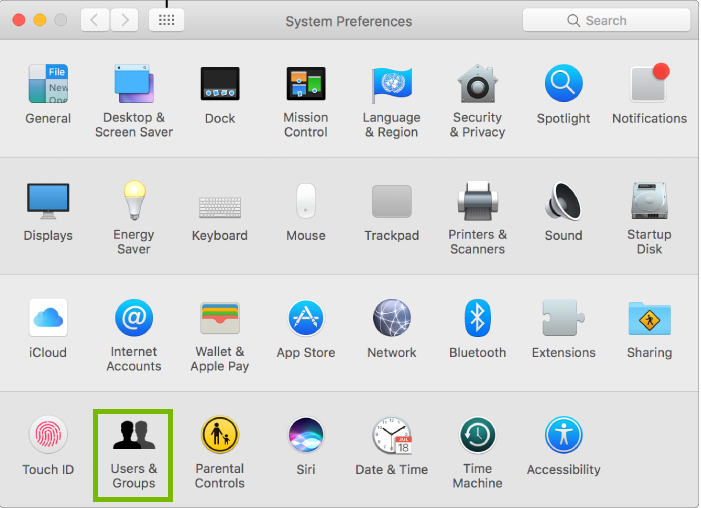
Click on the Apple Menu, then click System Preferences.
Choose Users & Groups.
Choose Login Items at the top. Then, choose your username on the left. Then, click the Lock icon at the bottom. You may need to type in your Mac password to unlock this screen.
Look through the list on the right. If you see an item you don't recognize, or an item you don't use frequently, highlight it by clicking its name, then click the Remove – button below to remove it.
19. macOS: Check for Updates
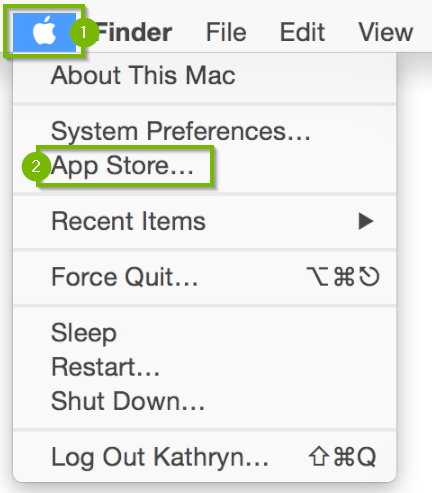
Click the Apple menu, then click onApp Store.
Select Updates on the bar at the top.
Any pending updates for your Mac will be listed here. Select Update All to apply these updates.
MacBook, MacBook Pro, and MacBook Air must have the power adapter plugged in to automatically download updates.
20. MacOS: Reset NVRAM
NVRAM (nonvolatile random-access memory) is a cache of settings specific to your Mac. Resetting NVRAM is safe, however you will need to reset some of your minor customizations, such as volume, time zone, or screen resolution.
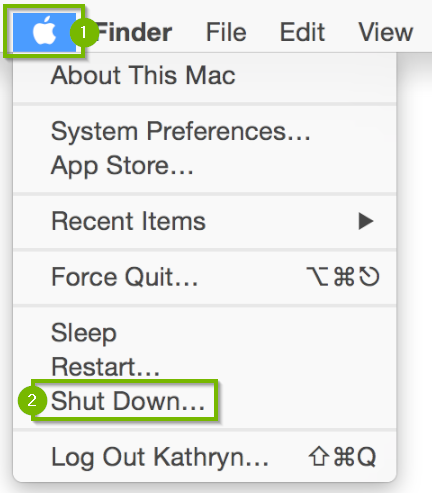
From the menu bar across the top of the screen, select the Apple menu (1), then select Shut Down... (2).
Wait for your computer to shut down, and turn off.
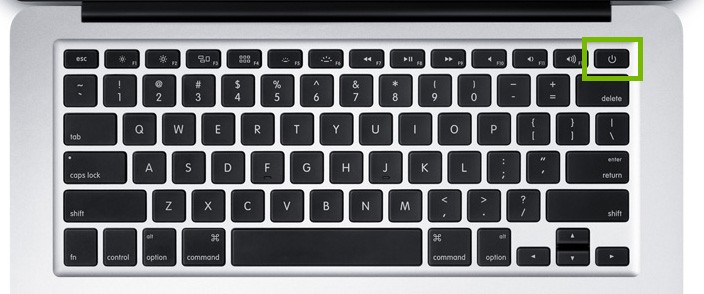
Turn your Mac back on by pushing the Power button.
Immediately push and hold the option, command ⌘, P, and R keys on your keyboard.
If your Mac plays a startup sound, release the keys after the second time it plays.
If there is no startup sound, release the keys after the second time the Apple logo disappears.
21. macOS: Adjust Eye Candy
Make the Dock work faster
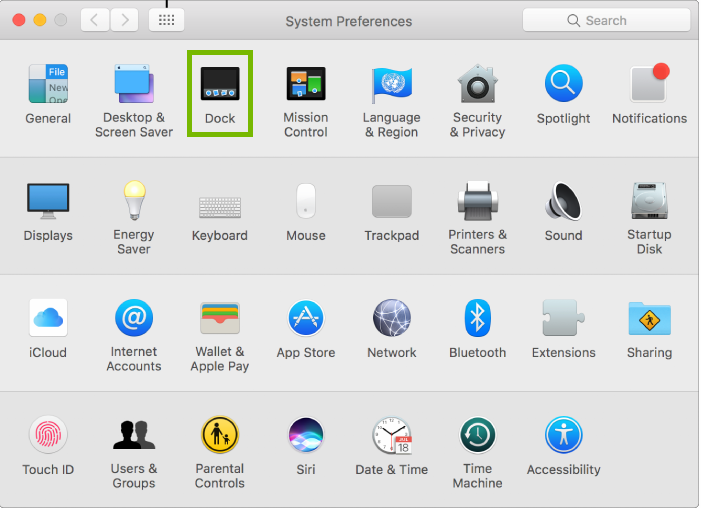
Choose Apple menu > System Preferences.
Choose Dock.
For Minimize windows using, choose Scale Effect. Remove the check for Animate opening applications.
Desktop Background
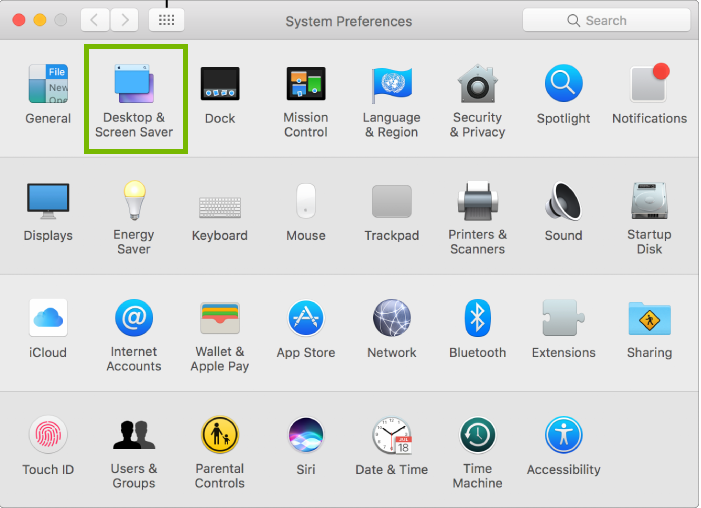
Choose Apple menu > System Preferences.
Choose Desktop & Screen Saver.
Choose a single image (not an animated one), and remove the check mark for Change picture at the bottom.
Close unnecessary Dashboard Widgets
Open the Dashboard from the icon on your Dock.
Click the Remove – button in the lower-left corner.
Click the Close X button for any unwanted widgets.
22. macOS: Check Drive Space
Click the Apple menu, then click on App Store.
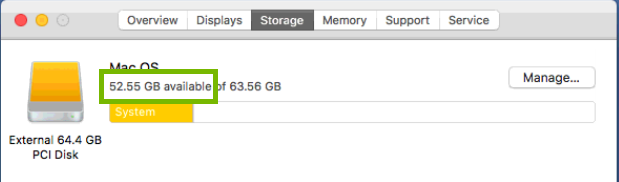
Click the Storage tab.
Free space is the first number you see below the name of your hard drive.
Disk space needs will vary depending on how you use your computer. In general, if you have over 15 GB of free space, you should be fine for updates and upgrades. Only proceed if you have less than 15 GB of free space.
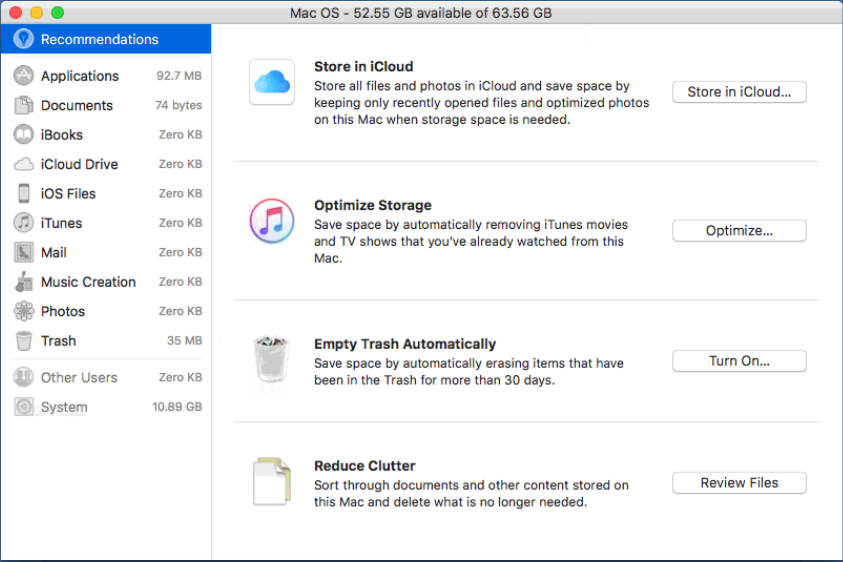
Click Manage... to the right of your hard drive.
Under Recommendations on the left, you'll see some very easy-to-use tools to help optimize and clean up your disk space, such as optimizing the files already stored in iCloud, removing items from iTunes you've already watched or listened to, emptying the Trash automatically, and reviewing the files stored on your Mac to delete unused or old ones.
23. macOS: Disk Utility
Disk Utility is designed to be easy to run, and help fix many small issues with your Mac's storage disk. Keep in mind, though, it is also designed to do major repairs and has the capabilities to cause problems if not used correctly. This guide will walk you through the proper options to select to use it safely.
Running Disk Utility can take a long time, especially on larger hard drives. Please make sure you won't need your computer for at least 1 hour before beginning this step.
From the menu bar across the top of the screen, select the Apple menu (1), then select Restart... (2).
Immediately after your Mac restarts (some Mac computers play a startup sound), press and hold the command ⌘ and R keys until the Apple logo appears, then release the keys.
Click Disk Utility, then Continue.
In the bar on the left, highlight your hard disk.
Click the First Aid button at the top.
Click Run.
Disk Utility will scan your hard drive, and attempt to repair any issues it has.
If you are prompted to complete the repairs yourself, or get an error about disk failure, reach out to Apple Support immediately.
24. macOS: Reinstall macOS
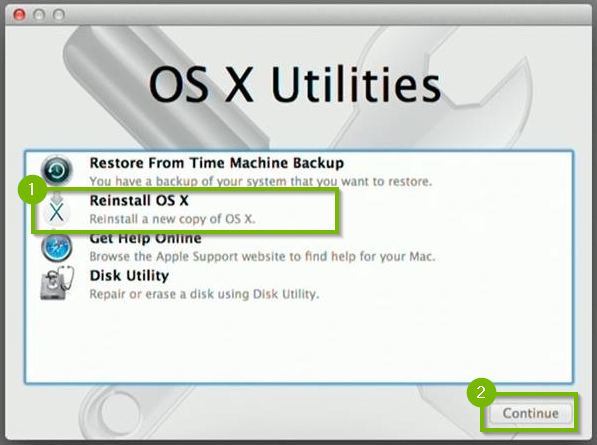
From macOS Utilities, select Reinstall macOS, click Continue.
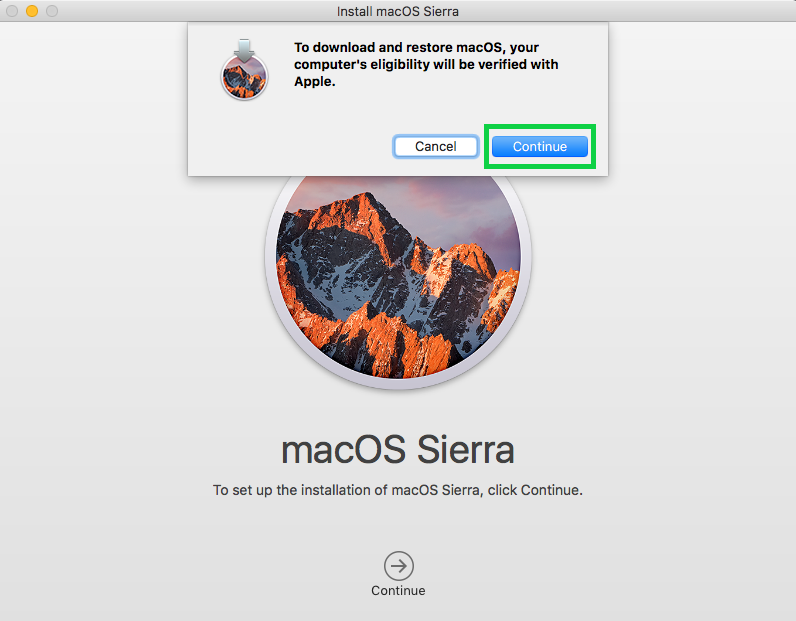
After the computer reboots, Click on Continue.
Click Continue to verify your computer's eligibility.
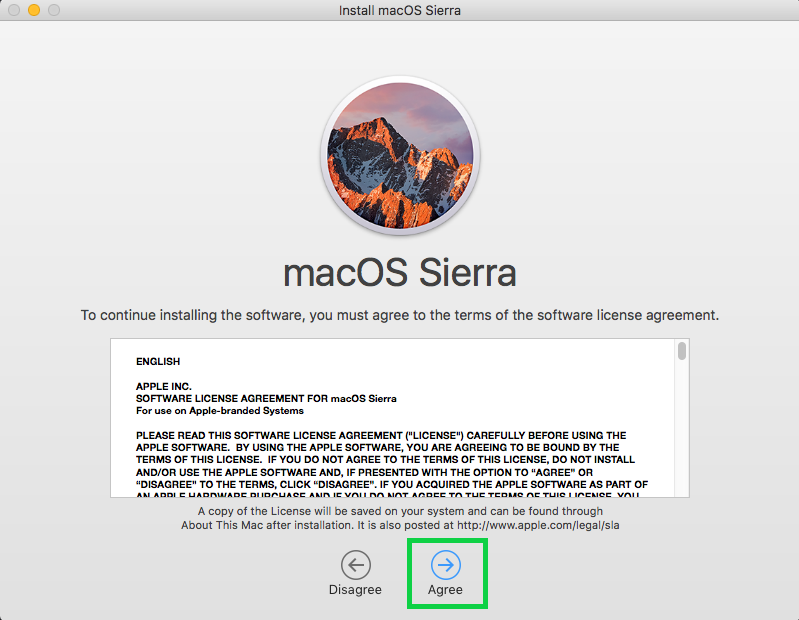
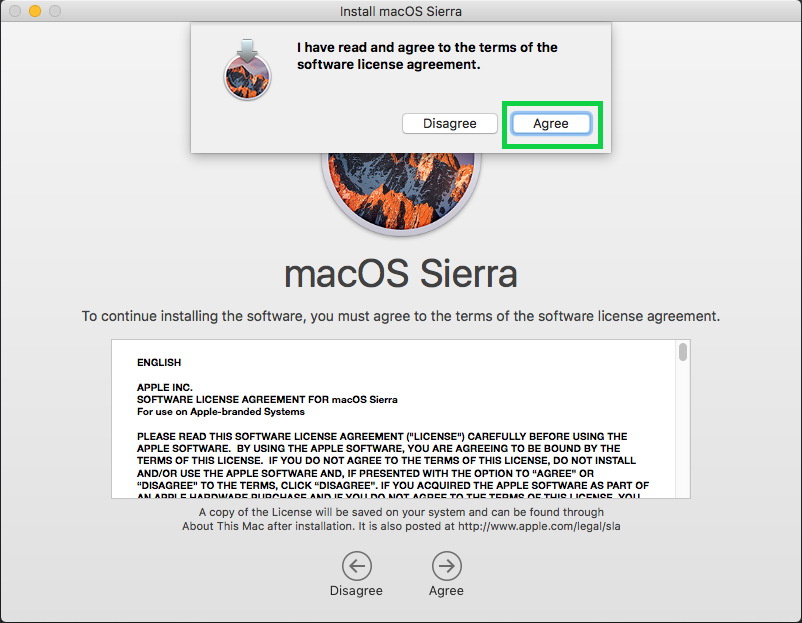
Click Agree to accept the Terms of Service.
Click Agree to confirm you agree with Terms of Service
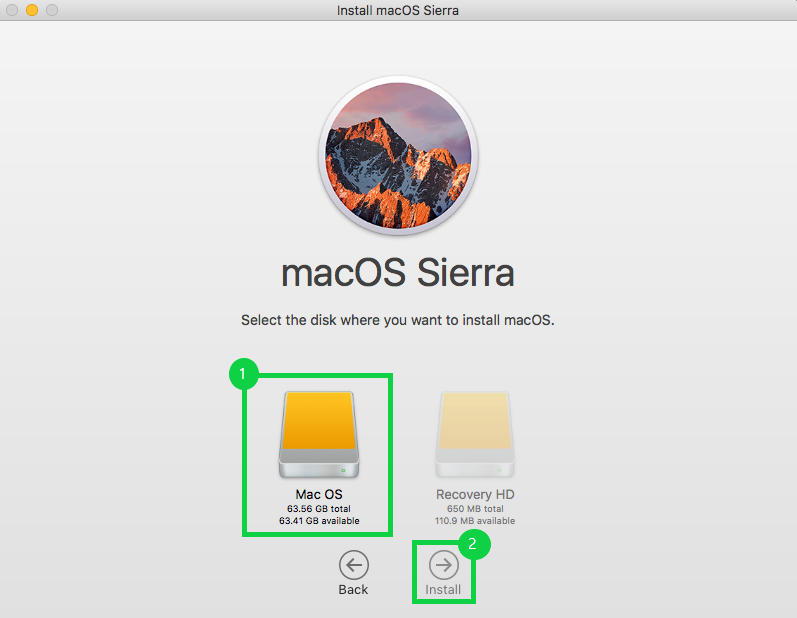
Select a Drive to install macOS on and click Install.
Install will now start and this will take some time. The computer will reboot during this process.
25. What's next?
26. macOS: Create Time Machine Backup
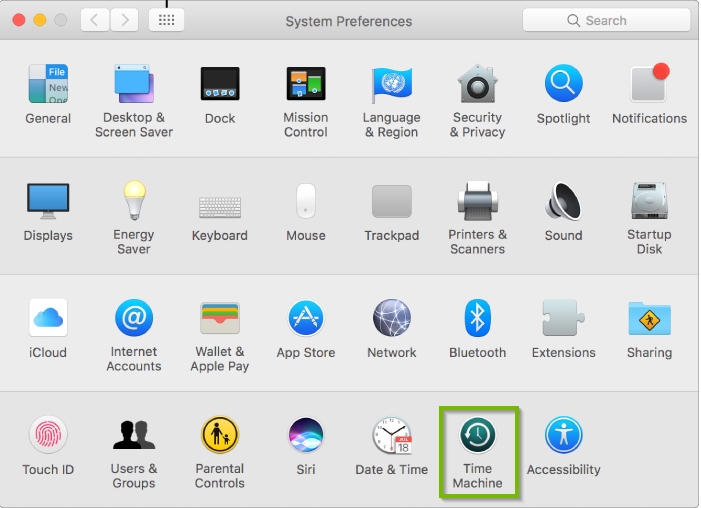
Choose Apple menu > System Preferences.
Click Time Machine.
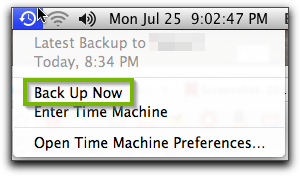
To back up now, choose Back Up Now from the Time Machine menu.
Your first backup may take a long time, depending on how many files you have.
You can continue using your Mac while a backup is underway.
Remove Hidden Spyware In Minutes For Free
Detect and remove spyware, keyloggers, tracking cookies, and other
threats that slow down your PC or steal your data.
65+ Million Downloads
Spyware scanner with AI-powered detection engine + database
.png)