The most common way that a computer fails to "turn on" is when your machine actually does power on, but doesn't display anything on the screen. You may see lights on the computer itself, you may also hear fans running from the inside, and may even hear sounds - but nothing at all shows up on your screen. Obviously, this is a frustrating situation that will prevent you from using your machine altogether.
There are a few things we can help you check to get your computer back into a usable state.
Dealing with a computer screen that won't turn on can be a distressing experience, whether you're using a Mac or a PC. This issue can arise due to various reasons ranging from simple power supply problems to more complex hardware issues. In this blog post, we'll explore a range of troubleshooting steps for both Mac and PC users to help you resolve the issue of a non-responsive computer screen.
For Mac Users
1. Check the Power Source
Ensure your Mac is properly plugged into a working power outlet.
For laptops, check if the battery is charged and the charger is functioning correctly.
2. Try a Simple Restart
If the screen is black but the computer sounds like it's running, try a force restart by holding down the power button for about 10 seconds.
3. Adjust Brightness Levels
It might sound basic, but sometimes the screen brightness is turned all the way down. Use the brightness keys to increase it.
4. Check External Displays
If you're using an external monitor, ensure that it's turned on and the cables are securely connected.
Try disconnecting and reconnecting the display.
5. Reset the System Management Controller (SMC)
This is particularly useful for MacBooks. The method to reset the SMC varies depending on whether your MacBook has a removable battery or not. You can find instructions on Apple's support website.
6. Reset NVRAM or PRAM
Restart your Mac and immediately press and hold Option, Command, P, and R keys simultaneously for about 20 seconds.
7. Boot in Safe Mode
Turn on your Mac and immediately press and hold the Shift key. Release the key when you see the login window.
8. Seek Professional Help
If none of the above steps work, it’s advisable to contact Apple Support or visit an Apple Store for professional assistance.
For PC Users
1. Check the Power Supply
Ensure your PC is connected to a working power outlet.
For laptops, verify that the battery is sufficiently charged.
2. Inspect the Monitor
If you're using a desktop, make sure the monitor is turned on and correctly connected to the PC.
Check the monitor's power cable and connection cables.
3. Perform a Hard Reboot
Hold down the power button for about 10 seconds to turn off the computer, then turn it back on.
4. Check for Signal Issues
If your monitor displays a "no signal" message, it could be an issue with the video cable or the port on your computer.
5. Try a Different Monitor or Cable
Sometimes, the issue could be with the monitor or the cable. Testing with a different one can help isolate the problem.
6. Boot in Safe Mode
Start your PC and press the F8 key (or Shift + F8) as it boots to enter Safe Mode. This can help if the issue is related to software or drivers.
7. Check for Hardware Issues
Open the PC case and check for any loose components, especially the video card and RAM sticks.
8. BIOS/UEFI Check
On boot, check if you can access the BIOS or UEFI firmware settings. If you can, the issue might be with the operating system.
9. Consult a Technician
If the problem persists, it's advisable to seek help from a professional technician.
Preventive Measures
Regularly update your operating system and drivers.
Keep your computer and its components clean to avoid dust-related issues.
Use surge protectors to safeguard your equipment against power surges.
Conclusion
A computer screen that won't turn on can be caused by a variety of issues, but in many cases, it can be resolved with some basic troubleshooting steps. For both Mac and PC users, start with simple solutions like checking power sources and connections, and then proceed to more advanced troubleshooting if needed. If all else fails, seeking professional help is the best course of action. Regular maintenance and updates can also help prevent such issues from occurring in the first place.
Contact Support.Com
If you are still having trouble, refer to the Step-By-Step Guide below, or Contact Support.Com for Personalized Assistance.
2. Computer: OS Choice
To continue, we need to know what Operating System your computer is using.
There are 2 main Operating Systems for personal computers currently available, Microsoft Windows and Apple macOS.
Microsoft WindowsApple macOSMicrosoft Windows runs on computers produced by multiple companies, such as Lenovo, Asus, Dell, Toshiba, Hewlett Packard, Acer, and Sony.Apple is the only company that makes macOS computers.
3. Go To: Resolve Black Screen Errors for Windows 10
Make sure the screen brightness on your Mac wasn't turned down too far accidentally.
On your keyboard, look in the top-left. The F1 and F2 keys usually have sun symbols. The symbol on the right has longer rays, indicating it makes the screen brighter.
Try tapping the brighter key.
Try holding the FN key on the bottom-left, then tapping the brighter key.
5. macOS: Form Factor Choice
Apple produces 3 different forms of Mac computers.
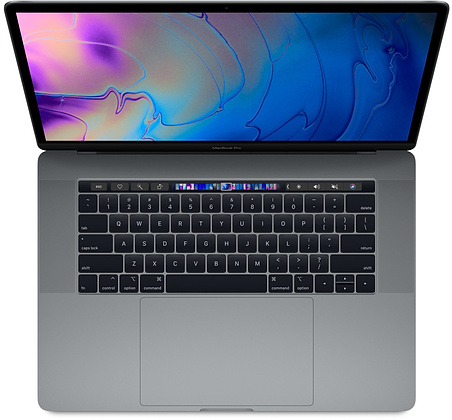
MacBookLaptops that are portable and have a battery, track pad, and keyboard built-in. This includes the MacBook, MacBook Air, and MacBook Pro.
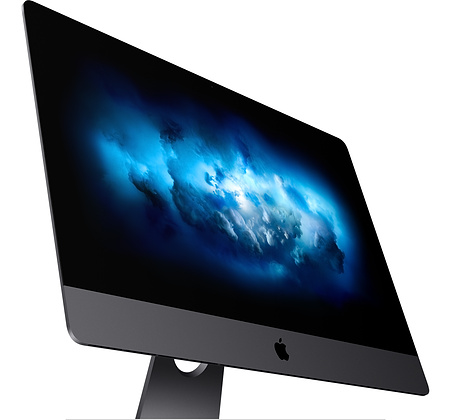
iMacDesktops computers with the computer itself built-in to the screen. This includes the iMac and iMac Pro.
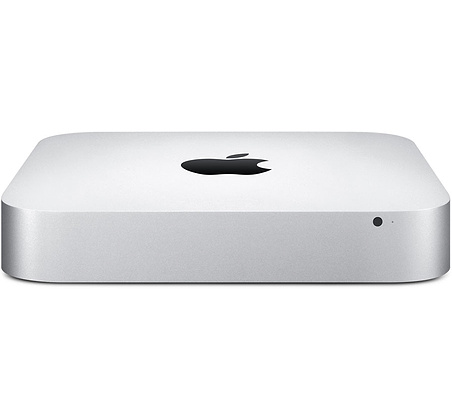
Mac Pro & Mac miniDesktop computers without a monitor. This includes the Mac Pro and Mac mini.
6. Mac: MacBook: Check Power
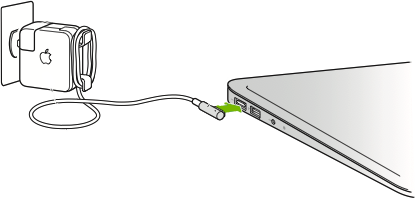
There are two ways to power up a MacBook:
Using the power supply without the extension cord:
Examine the cable and connectors for visible damage. If they are damaged, they may need to be replaced.
Make sure the power supply is firmly plugged into the power socket and power connector into the computer.
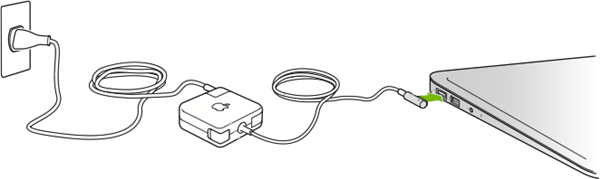
Using the power supply with the extension cord:
Examine all cables and connectors for visible damage. If they are damaged, they may need to be replaced.
Make sure the power supply is firmly plugged into the power socket, the extension cord into the power supply and power connector into the computer.
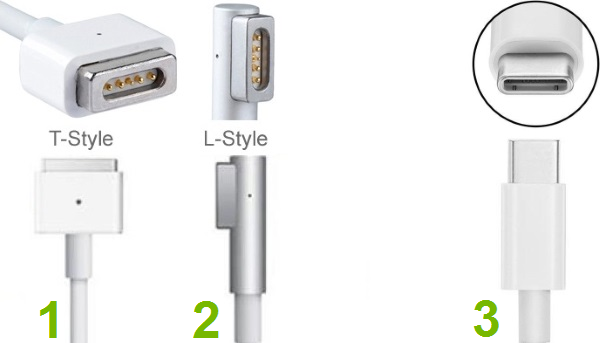
The power adapter shapes and way of connecting them have stayed the same over the years, however the connector types that plug into the computer have changed somewhat and can be of the following types:
Magnetic T style
Magnetic L style
USB-C style
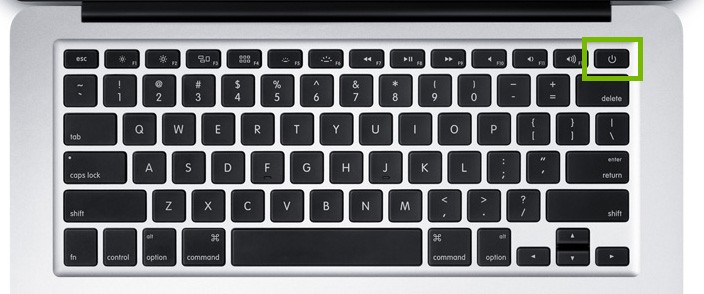
7. Mac: Discharge Capacitors
Unplug the computer from the power outlet.
Press and hold the power button for 10 seconds then release it.
Plug the computer back into the power outlet and press the power button to turn it on.
8. MacOS: Reset NVRAM
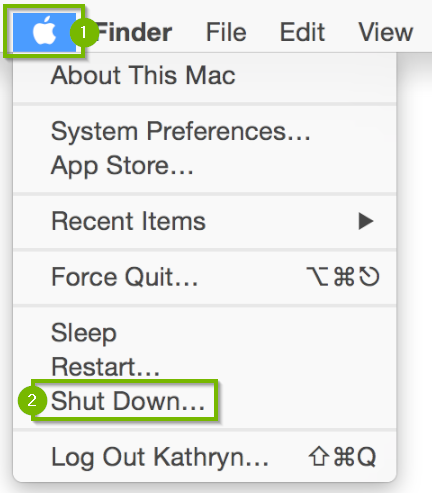
NVRAM (nonvolatile random-access memory) is a cache of settings specific to your Mac. Resetting NVRAM is safe, however you will need to reset some of your minor customizations, such as volume, time zone, or screen resolution.
From the menu bar across the top of the screen, select the Apple menu (1), then select Shut Down... (2).
Wait for your computer to shut down, and turn off.
Turn your Mac back on by pushing the Power button.
Immediately push and hold the option, command ⌘, P, and R keys on your keyboard.
If your Mac plays a startup sound, release the keys after the second time it plays.
If there is no startup sound, release the keys after the second time the Apple logo disappears.
9. What's next?
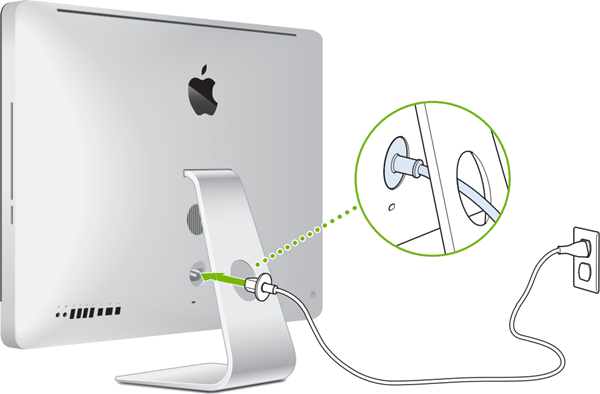
10. Mac: iMac: Check Power
An iMac is powered up by plugging it in directly into a power socket.
Examine the cable and connectors for visible damage. If they are damaged, they may need to be replaced.
Make sure one end is firmly plugged into the back panel of the iMac and the other end into a power socket.
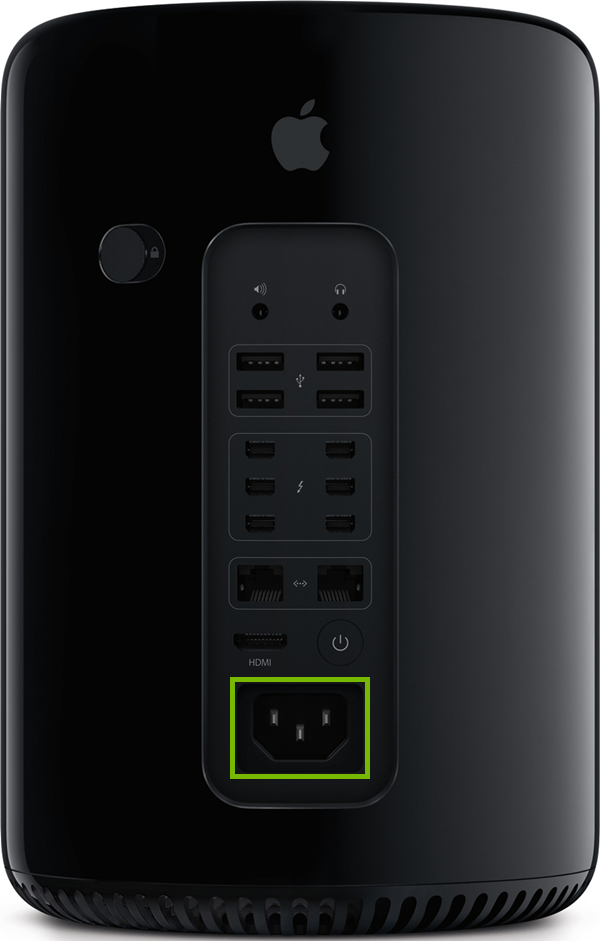
11. Mac: Pro: Check Power
A Mac Pro has an internal power supply included in the case.
The power cable looks like below. Examine the cable and connectors for visible damage. If you find any damage, the cable may need to be replaced.
Make sure one end of the cable is firmly plugged into a wall outlet.
Make sure the other end is firmly plugged into the power socket on the rear side of the case.
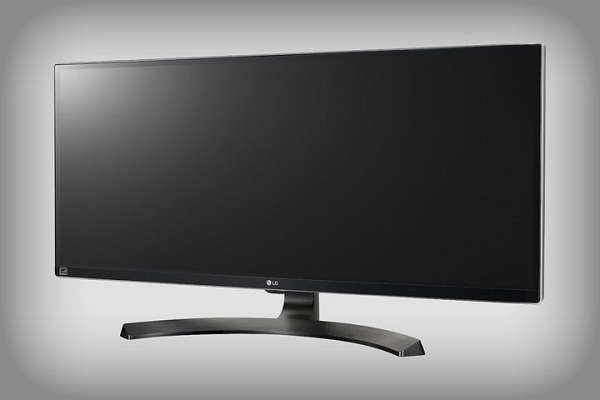
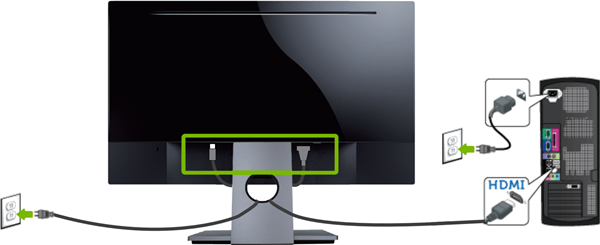
12. Monitor: Check Connections
Examine all cables and connectors for visible damage. If they are damaged, they may need to be replaced.
Make sure one end of the power cable is firmly connected to the back panel of the monitor and the other end into a power socket.
Make sure one end of the video cable is firmly connected to the back panel of the monitor and the other end into video source device, such as a computer, gaming console, media player, etc.
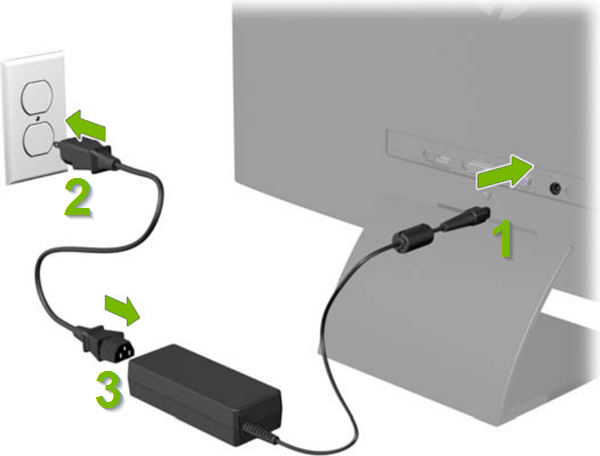
If the monitor has an external power supply, make sure all connectors are firmly plugged in:
One connector (1) plugs into the monitor
The other connector (2) plugs into a power socket
And sometimes, a third (3) connector plugs into the supply itself
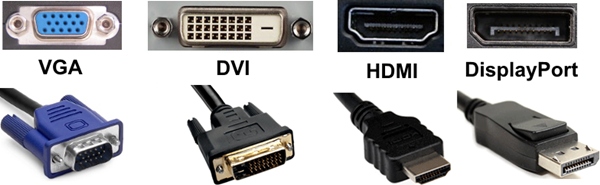
Monitors can be connected to video source devices through a variety of connection types. The most common ones are shown below:
Make sure the monitor is powered on and set to the video input source matching the connection type. This varies greatly by brand and model. If you're unsure how to do this please refer to the monitors documentation.
13. Mac: Mini: Check Power
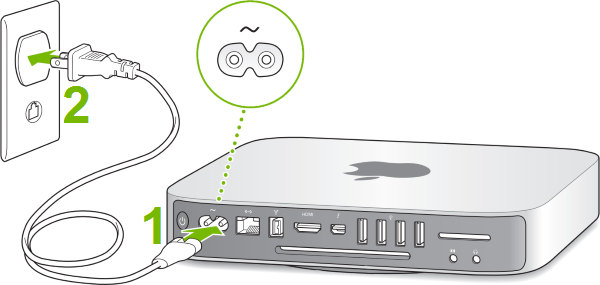
Mac Mini with internal power supply
Some Mac Mini computers have an internal power supply:
One connector (1) plugs into the computer
The other connector (2) plugs into a power socket
Examine all cables and connectors for visible damage. If they are damaged, they may need to be replaced.
Make sure all connectors are firmly plugged in.
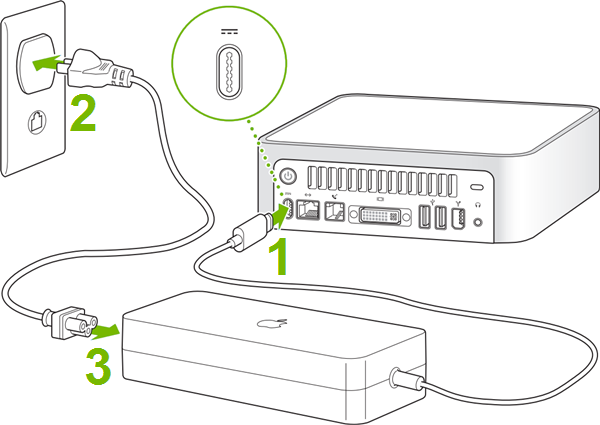
Mac Mini with external power supply
Other Mac Mini computers have an external power supply and plugs in like below:
One connector (1) plugs into the computer
The other connector (2) plugs into a power socket
A third (3) connector plugs into the supply itself
Examine all cables and connectors for visible damage. If they are damaged, they may need to be replaced.
Make sure all connectors are firmly plugged in.
Remove Hidden Spyware In Minutes For Free
Detect and remove spyware, keyloggers, tracking cookies, and other
threats that slow down your PC or steal your data.
65+ Million Downloads
Spyware scanner with AI-powered detection engine + database
.png)