.png)
Authored by: Support.com Tech Pro Team
Don't forget to mark steps complete as you go through GPs.

Don't forget to ask the guest how they heard about us and document it in the Session Properties.

Pro tip: If you feel it would be beneficial to see what the customer sees, feel free to use SeeSupport. Check out the guide here: How to Use SeeSupport.
Is this an initial setup or helping the guest with a setup that they already started?

Does the guest know their Wireless Network name (SSID) and Key?
Pro tip: If you feel it would be beneficial to see what the customer sees, feel free to use SeeSupport. Check out the guide here: How to Use SeeSupport.
Unless you're familiar with the range extender in question, we recommend that you download the product manual before you begin service.
Below is a list of some of the more common support sites. If the site you need is not listed below please use your Googlefu.
ManufacturerSupport SiteBelkinhttp://www.belkin.com/us/supportLinksyshttp://www.linksys.com/us/support/Netgearhttps://www.netgear.com/support/TP-Linkhttp://www.tp-link.us/support
Don't forget to mark steps complete as you go through GPs.
Pro tip: If you feel it would be beneficial to see what the customer sees, feel free to use SeeSupport. Check out the guide here: How to Use SeeSupport.
As they say location, location, location. Location is key when it comes to the placement of a range extender. Please follow the guidelines below to ensure the range extender is located in a place that will maximize its potential.
The key thing here to remember is that you are going to be repeating/extending the signal based off the signal the range extender is getting. If the range extender itself has a poor connection to the main router/gateway, the signal it extends will be weak in regards to its throughput.
A very common mistake a lot of people make when configuring a range extender is that they put it right at the edge of their router's coverage area and then all the devices that are connected through the extender in turn also have a weak signal.
Don't forget to mark steps complete as you go through GPs.
Pro tip: If you feel it would be beneficial to see what the customer sees, feel free to use SeeSupport. Check out the guide here: How to Use SeeSupport.
We are going to be using the device's specific manual for the setup and configuration but before we get into that let's just cover the typical basics of configuring a range extender.
Don't forget to mark steps complete as you go through GPs.
Pro tip: If you feel it would be beneficial to see what the customer sees, feel free to use SeeSupport. Check out the guide here: How to Use SeeSupport.
Now that we understand the basics and have an idea of what to expect, let's use the instructions from the manual we previously downloaded to configure the extender.
Don't forget to mark steps complete as you go through GPs.
Take this opportunity to inform the guest that Target has a large inventory of IoT devices and can be a one-stop shop for the modern connected home!
Don't forget to mark steps complete as you go through GPs.
Disposition the Session
1. Ask the guest if they would like to participate in a survey for the service they received.
If the guest accepts, warm transfer them to 1-855-302-1599, enter the Session # from this Cloud session and then complete the transfer ensuring the guest hears the rest of the IVR prompts. Do not give the guest the aforementioned phone number. That number is only intended for us to transfer to.
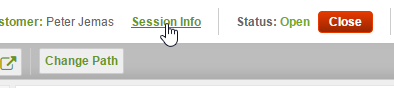
2. Click "Session Info" at the top of the session window and update all of the applicable fields to the best of your ability.
3. Click Done in the left pane

4. Click Close at the top of this session window.
A. Resolved: All calls where a service or path to a resolution was provided.
B. Not Resolved: Dropped calls / Ghost Calls / Guest needs to call back

If the guest does not know their SSID and Key we will need to refer them to either their ISP, Router OEM or 3rd party Network support to obtain the information before we can proceed.
Please kindly inform the guest that we are here to help but without the required information we cannot proceed with the connection. Kindly refer them appropriately to obtain their network credentials and ask them to call us back once they have the information in hand.
Don't forget to mark steps complete as you go through GPs.
Pro tip: If you feel it would be beneficial to see what the customer sees, feel free to use SeeSupport. Check out the guide here: How to Use SeeSupport.
Please have the guest do the following in this order:

Support.com is committed to your privacy
We do not share or sell your data to third parties. We do use cookies and other third-party technologies to improve our site and services. The California Consumer Privacy Act (CCPA) gives you the ability to opt out of the use of cookies, third-party technologies and/or the future sale of your data. Do not sell my personal information.

Support.com is committed to your privacy
Read our Privacy Policy for a clear explanation of how we collect, use, disclose and store your information
