Having a quality sound system within your Home Theater setup can make your movie watching experiences much more enjoyable. In this guide, we will go over how to resolve common sound issues you may experience with your Home Theater system and possible solutions.
Because most home theater setups contain multiple different kinds of hardware components made by a variety of different manufacturers, many of the steps in this guide will be generic. While not all buttons or options that you will see will match your specific equipment, this guide will take you through the process of what to look for and certain steps you can take.
2. Introduction
After installing a new home theater or surround sound system, you may experience a situation where you can see picture on your screen, but may not have any audio coming from any of your system's speakers. These steps will take you through some things that may help you restore audio to your system.
3. Check Input Settings
Your TV and A/V Receiver components may need to be using different "input" or "source" settings in order to be able to find sound or picture properly. This will be different in every home theater setup depending on the cables that are being used, and the different components that you have installed. These steps will touch upon how you can check and adjust the input settings of your components to make sure they're correct.
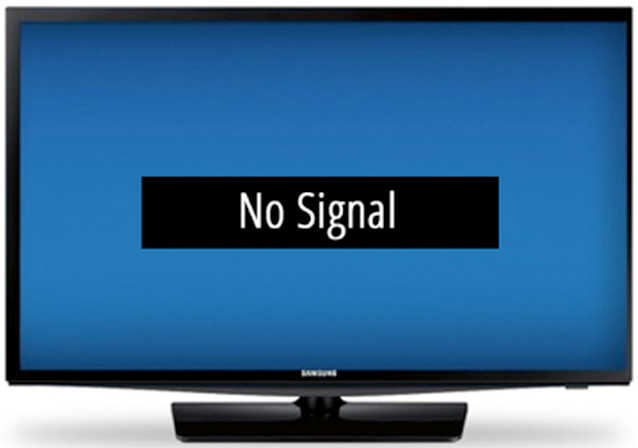
Seeing a "No Signal" image on your TV like the one above, means your TV is likely looking for picture on the wrong "Source" or "Input."
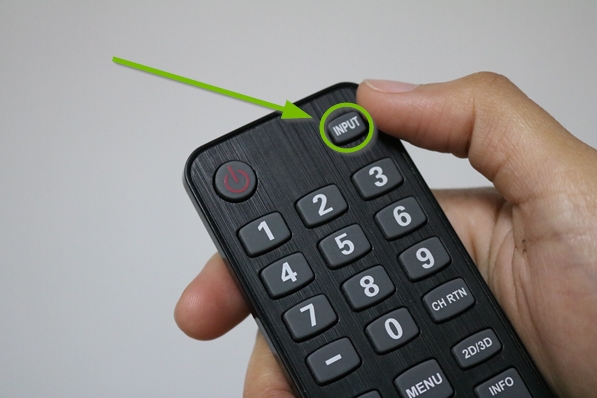
In order to check and change sources on your TV:
Locate the Input or Source button on your TV remote.
Aim the remote at the TV and press the Input or Source button to begin cycling through the available inputs on the screen.
When you've reached the input option you'd like to test, just stop pressing the input button. The TV will switch to the input option you've landed on automatically after a few seconds.
Repeat this process to try all available inputs on your TV.
To check and change sources on your A/V Receiver:
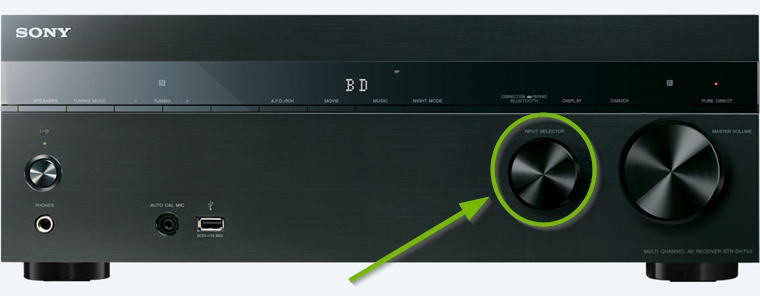
Some A/V Receivers will have knobs dedicated to changing the input or source it is using.
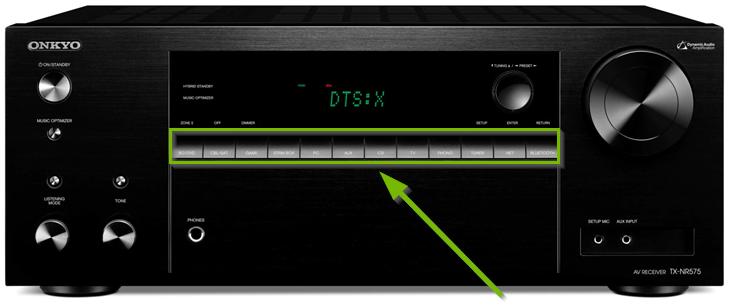
Others will have physical buttons for specific inputs rather than a knob.
Alternatively, most A/V Receivers will have Input or Source buttons on their remote controls.
Simply turn the knob or press the button of the Input or Source you would like to select.
4. Check Receiver Cabling
Before moving your equipment or checking any cabling, make absolutely sure that your A/V Receiver and any other components that are currently on are fully powered off.
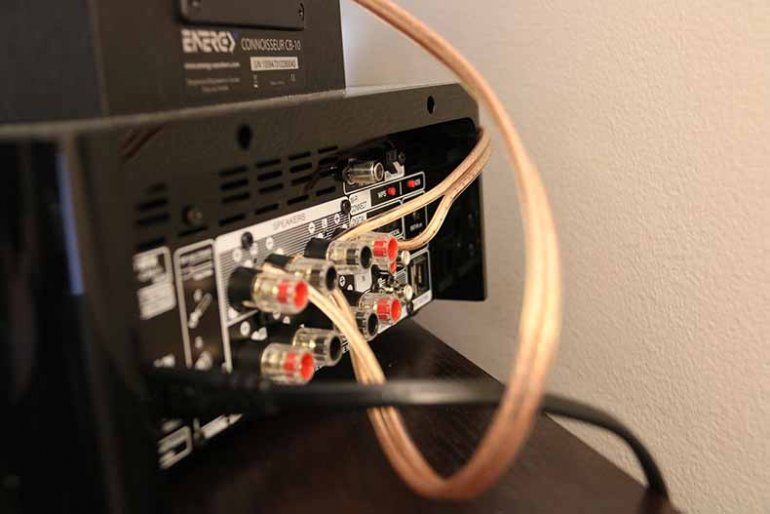
We want to make absolutely sure that all cabling on the rear of your A/V receiver is connected properly.
Speaker wires can be inserted into receivers in a few different manners. Making sure that the bare wires of each speaker cable are making good contact with the binding posts, poles or ports and has not come loose is very important.
If your A/V receiver uses binding posts or poles, ensure that the speaker wires did not slide out or come loose while tightening things down or moving the receiver in place.
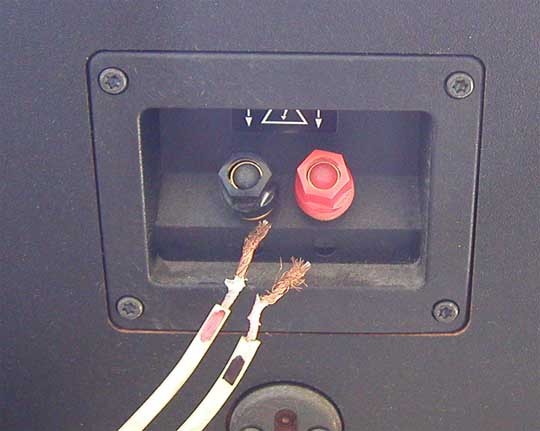
If your A/V receiver uses spring-loaded clips, ensure that the bare wire is inserted fully and making good contact with each port. This type of connection can be prone to coming loose if wires are pulled on.
Some speaker wire is not color-coded for positive and negative, and may have text labels or only a line to indicate positive from negative. Ensure that positive and negative ends are connected properly at both the receiver and each speaker.
Aside from speakers, ensure that all other connections in the rear of the receiver are firmly and fully connected where they should be.
5. Check Receiver Settings
Checking receiver settings can make a huge difference when experiencing issues with your home theater system. This guide will touch upon common things that can be checked on A/V receivers. However, depending on the manufacturer and model receiver your have within your setup, your receiver may not have the features or options that are gone over here.
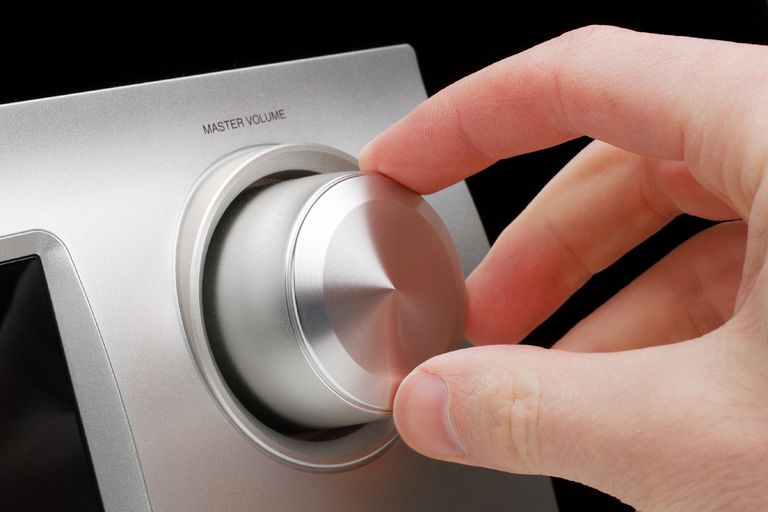
Many A/V Receivers have volume knobs that do not have a defined minimum or maximum volume, meaning they can be turned in either direction infinitely. This makes it difficult to tell what your volume level might be by simply looking at the knob. Make sure your volume level is actually high enough for you to be able to hear things across all your speakers.
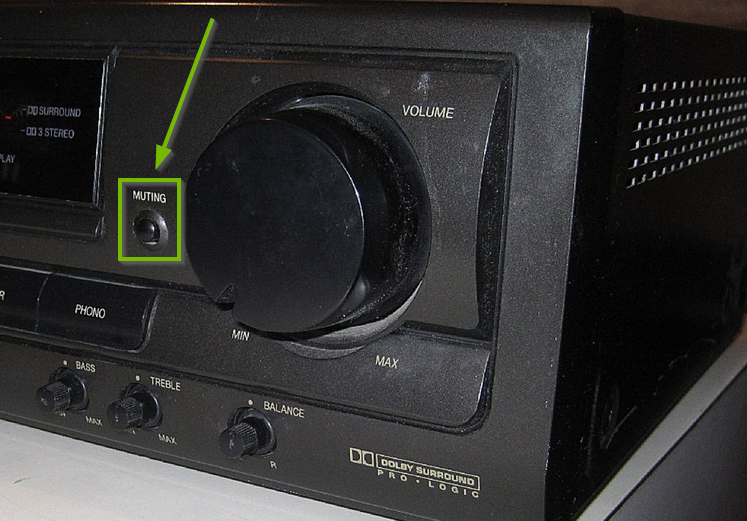
Some A/V Receivers come equipped with a Muting or Mute button that does not have an indicator lamp to let you know that it may be engaged. Ensure your receiver is not muted by pressing this button to toggle on or off.
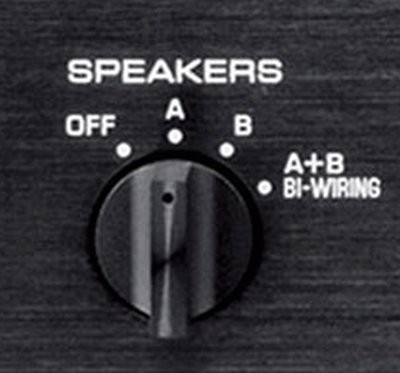
If your A/V Receiver has a speaker selector knob, you may not be hearing audio at all, or you may be hearing distorted or weak audio. Depending on where your speakers are connected in the rear of the receiver, you may need this knob to be adjusted differently.
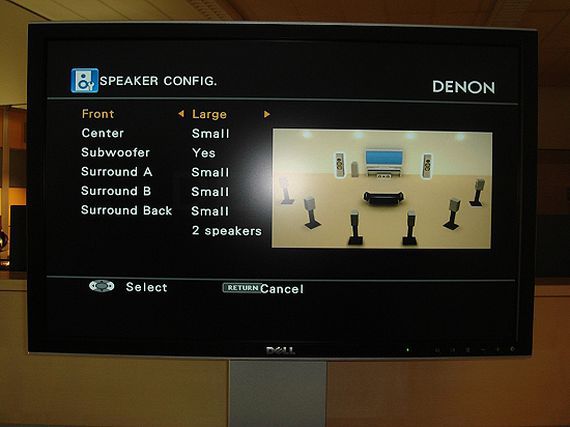
If your A/V Receiver has an on-screen menu system, you may need to check to ensure that your speaker output settings are correct. In some cases, you may need to tell your receiver that your speakers are Small or Large, which can greatly impact the way certain speakers perform. This will greatly vary depending on the manufacturer and model of receiver you have.
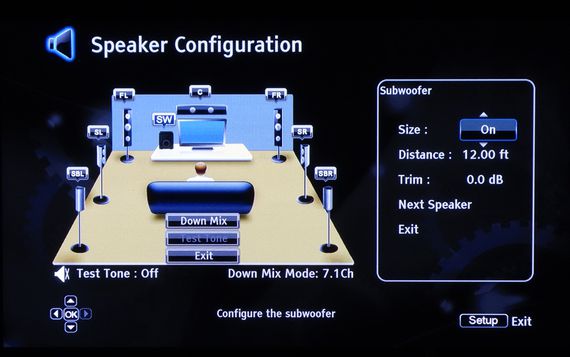
If your A/V Receiver does have the on-screen menu system as discussed above, more speaker configuration options may need to be adjusted such as speaker Distance or Trim which defines how much louder or softer an individual speaker will be by default. For example, rear surround sound speakers are traditionally used for ambience and will not sound as loud as front speakers, so you may prefer to give those a bit of a boost.
6. Power Cycle Component
This is a general guide for rebooting Home Theater or Surround Sound components. This can be any component within your Home Theater system including your TV, A/V Receiver, Cable Box, DVD or Blu-Ray player, etc. Most devices can be power cycled by using their remote controls. However, certain unresponsive devices may need to be unplugged from power if the remote does nothing or does not completely shut the component off.
To power cycle a component using its remote control:
Press the power button on the remote control of the component you need to power cycle.
The component should turn off and can then be turned back on at any time using the same button on the remote control.
If power cycling via the component's remote control does not work:
First, attempt to turn off the component normally by pressing it's power button.
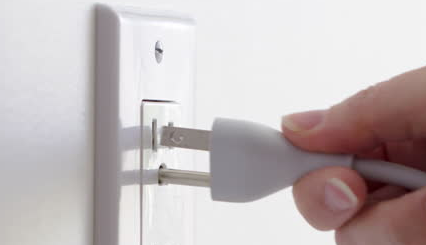
Next, unplug the component from power.
Wait at least 30 seconds.
Plug the component back into power and attempt to power it back on.
7. What's next?
8. Introduction
A common complaint about home theater systems revolves around surround-sound speakers, or more specifically, the rear-channel speakers. Most times, the surround material in a particular scene of a movie or series can be very subtle, and your initial impression of there being a lack of surround sound might be because it’s playing very quietly. However, what you're watching may not actually be capable of outputting in surround sound altogether. These steps will give you some things to try to determine if the problem is your content or your system's settings.
9. Media Check
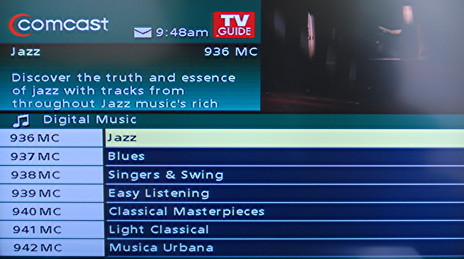
Whether it be television programming, a movie, or an audio recording that you're enjoying, ensuring that the type of media you're consuming on your system is capable of outputting the type of audio that you're expecting is important. This will vary depending on the type of media you're watching and where you're getting it from.
Sometimes the issues you may be experiencing with your home theater system have nothing to do with your equipment or the settings that are being used. You may not be hearing surround sound if the programming you're watching is not capable of surround sound output. You also might hear static or feedback on certain media that may have been poorly mixed or recorded.
Most, but not all post-1980 films are available in at least 5.1 surround sound. That being said, if you're watching a movie through your cable or satellite TV provider's equipment, you may need to contact your provider to help specifically set your box to output surround sound where available. Many of these boxes will only output stereo sound despite certain programming being available in 5.1 or 7.1 surround sound audio formats.
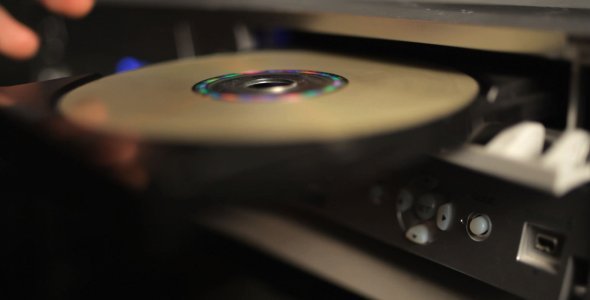
The majority of DVD and Blu-ray movies will display what audio formats are available for playback on the rear of their packaging.
Most all music and talk shows will primarily only be available for playback in stereo audio.
Certain TV shows or movies may produce feedback, hissing, static, etc. This may not be your system at all. This may simply be poorly recorded or mixed audio on a TV show or movie that you're watching. Higher-quality speakers can uncover flaws within audio that you may not have noticed before. Always try multiple audio sources before deciding that your system is to blame.
10. Check Receiver Cabling
Before moving your equipment or checking any cabling, make absolutely sure that your A/V Receiver and any other components that are currently on are fully powered off.
We want to make absolutely sure that all cabling on the rear of your A/V receiver is connected properly.
Speaker wires can be inserted into receivers in a few different manners. Making sure that the bare wires of each speaker cable are making good contact with the binding posts, poles or ports and has not come loose is very important.
If your A/V receiver uses binding posts or poles, ensure that the speaker wires did not slide out or come loose while tightening things down or moving the receiver in place.
If your A/V receiver uses spring-loaded clips, ensure that the bare wire is inserted fully and making good contact with each port. This type of connection can be prone to coming loose if wires are pulled on.
Some speaker wire is not color-coded for positive and negative, and may have text labels or only a line to indicate positive from negative. Ensure that positive and negative ends are connected properly at both the receiver and each speaker.
Aside from speakers, ensure that all other connections in the rear of the receiver are firmly and fully connected where they should be.
11. Check Receiver Settings
Checking receiver settings can make a huge difference when experiencing issues with your home theater system. This guide will touch upon common things that can be checked on A/V receivers. However, depending on the manufacturer and model receiver your have within your setup, your receiver may not have the features or options that are gone over here.
Many A/V Receivers have volume knobs that do not have a defined minimum or maximum volume, meaning they can be turned in either direction infinitely. This makes it difficult to tell what your volume level might be by simply looking at the knob. Make sure your volume level is actually high enough for you to be able to hear things across all your speakers.
Some A/V Receivers come equipped with a Muting or Mute button that does not have an indicator lamp to let you know that it may be engaged. Ensure your receiver is not muted by pressing this button to toggle on or off.
If your A/V Receiver has a speaker selector knob, you may not be hearing audio at all, or you may be hearing distorted or weak audio. Depending on where your speakers are connected in the rear of the receiver, you may need this knob to be adjusted differently.
If your A/V Receiver has an on-screen menu system, you may need to check to ensure that your speaker output settings are correct. In some cases, you may need to tell your receiver that your speakers are Small or Large, which can greatly impact the way certain speakers perform. This will greatly vary depending on the manufacturer and model of receiver you have.
If your A/V Receiver does have the on-screen menu system as discussed above, more speaker configuration options may need to be adjusted such as speaker Distance or Trim which defines how much louder or softer an individual speaker will be by default. For example, rear surround sound speakers are traditionally used for ambience and will not sound as loud as front speakers, so you may prefer to give those a bit of a boost.
12. Introduction
In certain cases, some users will experience their system not sounding "right." This could be due to an issue with improper or loose cabling, or receiver settings. Most A/V Receivers don’t have any idea if there are speakers connected to various inputs or what kind of speakers they actually are. These steps will take you through some things you can check to resolve issues with speaker output.
13. Check Receiver Cabling
Before moving your equipment or checking any cabling, make absolutely sure that your A/V Receiver and any other components that are currently on are fully powered off.
We want to make absolutely sure that all cabling on the rear of your A/V receiver is connected properly.
Speaker wires can be inserted into receivers in a few different manners. Making sure that the bare wires of each speaker cable are making good contact with the binding posts, poles or ports and has not come loose is very important.
If your A/V receiver uses binding posts or poles, ensure that the speaker wires did not slide out or come loose while tightening things down or moving the receiver in place.
If your A/V receiver uses spring-loaded clips, ensure that the bare wire is inserted fully and making good contact with each port. This type of connection can be prone to coming loose if wires are pulled on.
Some speaker wire is not color-coded for positive and negative, and may have text labels or only a line to indicate positive from negative. Ensure that positive and negative ends are connected properly at both the receiver and each speaker.
Aside from speakers, ensure that all other connections in the rear of the receiver are firmly and fully connected where they should be.
14. Check Receiver Settings
Checking receiver settings can make a huge difference when experiencing issues with your home theater system. This guide will touch upon common things that can be checked on A/V receivers. However, depending on the manufacturer and model receiver your have within your setup, your receiver may not have the features or options that are gone over here.
Many A/V Receivers have volume knobs that do not have a defined minimum or maximum volume, meaning they can be turned in either direction infinitely. This makes it difficult to tell what your volume level might be by simply looking at the knob. Make sure your volume level is actually high enough for you to be able to hear things across all your speakers.
Some A/V Receivers come equipped with a Muting or Mute button that does not have an indicator lamp to let you know that it may be engaged. Ensure your receiver is not muted by pressing this button to toggle on or off.
If your A/V Receiver has a speaker selector knob, you may not be hearing audio at all, or you may be hearing distorted or weak audio. Depending on where your speakers are connected in the rear of the receiver, you may need this knob to be adjusted differently.
If your A/V Receiver has an on-screen menu system, you may need to check to ensure that your speaker output settings are correct. In some cases, you may need to tell your receiver that your speakers are Small or Large, which can greatly impact the way certain speakers perform. This will greatly vary depending on the manufacturer and model of receiver you have.
If your A/V Receiver does have the on-screen menu system as discussed above, more speaker configuration options may need to be adjusted such as speaker Distance or Trim which defines how much louder or softer an individual speaker will be by default. For example, rear surround sound speakers are traditionally used for ambience and will not sound as loud as front speakers, so you may prefer to give those a bit of a boost.
15. Introduction
In the case of static or humming while listening to your home theater or surround sound system, this could be caused by a loose speaker connection, or even the content itself. These steps will take you through some things to try to resolve static or humming.
16. Media Check
Whether it be television programming, a movie, or an audio recording that you're enjoying, ensuring that the type of media you're consuming on your system is capable of outputting the type of audio that you're expecting is important. This will vary depending on the type of media you're watching and where you're getting it from.
Sometimes the issues you may be experiencing with your home theater system have nothing to do with your equipment or the settings that are being used. You may not be hearing surround sound if the programming you're watching is not capable of surround sound output. You also might hear static or feedback on certain media that may have been poorly mixed or recorded.
Most, but not all post-1980 films are available in at least 5.1 surround sound. That being said, if you're watching a movie through your cable or satellite TV provider's equipment, you may need to contact your provider to help specifically set your box to output surround sound where available. Many of these boxes will only output stereo sound despite certain programming being available in 5.1 or 7.1 surround sound audio formats.
The majority of DVD and Blu-ray movies will display what audio formats are available for playback on the rear of their packaging.
Most all music and talk shows will primarily only be available for playback in stereo audio.
Certain TV shows or movies may produce feedback, hissing, static, etc. This may not be your system at all. This may simply be poorly recorded or mixed audio on a TV show or movie that you're watching. Higher-quality speakers can uncover flaws within audio that you may not have noticed before. Always try multiple audio sources before deciding that your system is to blame.
17. Power Cycle Component
This is a general guide for rebooting Home Theater or Surround Sound components. This can be any component within your Home Theater system including your TV, A/V Receiver, Cable Box, DVD or Blu-Ray player, etc. Most devices can be power cycled by using their remote controls. However, certain unresponsive devices may need to be unplugged from power if the remote does nothing or does not completely shut the component off.
To power cycle a component using its remote control:
Press the power button on the remote control of the component you need to power cycle.
The component should turn off and can then be turned back on at any time using the same button on the remote control.
If power cycling via the component's remote control does not work:
First, attempt to turn off the component normally by pressing it's power button.
Next, unplug the component from power.
Wait at least 30 seconds.
Plug the component back into power and attempt to power it back on.
18. Check Receiver Cabling
Before moving your equipment or checking any cabling, make absolutely sure that your A/V Receiver and any other components that are currently on are fully powered off.
We want to make absolutely sure that all cabling on the rear of your A/V receiver is connected properly.
Speaker wires can be inserted into receivers in a few different manners. Making sure that the bare wires of each speaker cable are making good contact with the binding posts, poles or ports and has not come loose is very important.
If your A/V receiver uses binding posts or poles, ensure that the speaker wires did not slide out or come loose while tightening things down or moving the receiver in place.
If your A/V receiver uses spring-loaded clips, ensure that the bare wire is inserted fully and making good contact with each port. This type of connection can be prone to coming loose if wires are pulled on.
Some speaker wire is not color-coded for positive and negative, and may have text labels or only a line to indicate positive from negative. Ensure that positive and negative ends are connected properly at both the receiver and each speaker.
Aside from speakers, ensure that all other connections in the rear of the receiver are firmly and fully connected where they should be.
.png)