Mac has been built from the ground up to provide excellent security. This guide will assist you in enabling these security features as well help you with the setup and configuration process. You must be an administrator of your Mac to perform these tasks.
Topics this guide will cover:
Using strong passwords
Gatekeeper
FileVault
Automatic updates
Setting up backups with Time Machine
We'll begin by setting up a secure password for your user account.
2. Security: Select Password
Wherever possible, you should pick a password that is impossible to guess and is also resistant to brute-force attacks. Note that some devices or systems do not allow special characters or they may have their own requirements.
Best practices for picking a strong password:
Passwords should be around 8 to 12 characters, but can be longer.
Avoid using words that are in the dictionary.
DO NOT use information that is easy to guess or phish for such as:
Important dates such as birthdays, anniversaries, etc.
Names of pets, friends, family, locations, etc.
Add some complexity to your password by adding at least:
1 Capital letter
1 Small letter
1 Symbol
1 Number
Try replacing letters with symbols, for example:
"Abc?123!" is easier to guess than "@B(?123!"
"Password!?" is easier to guess than "P@$$w0rd!?".
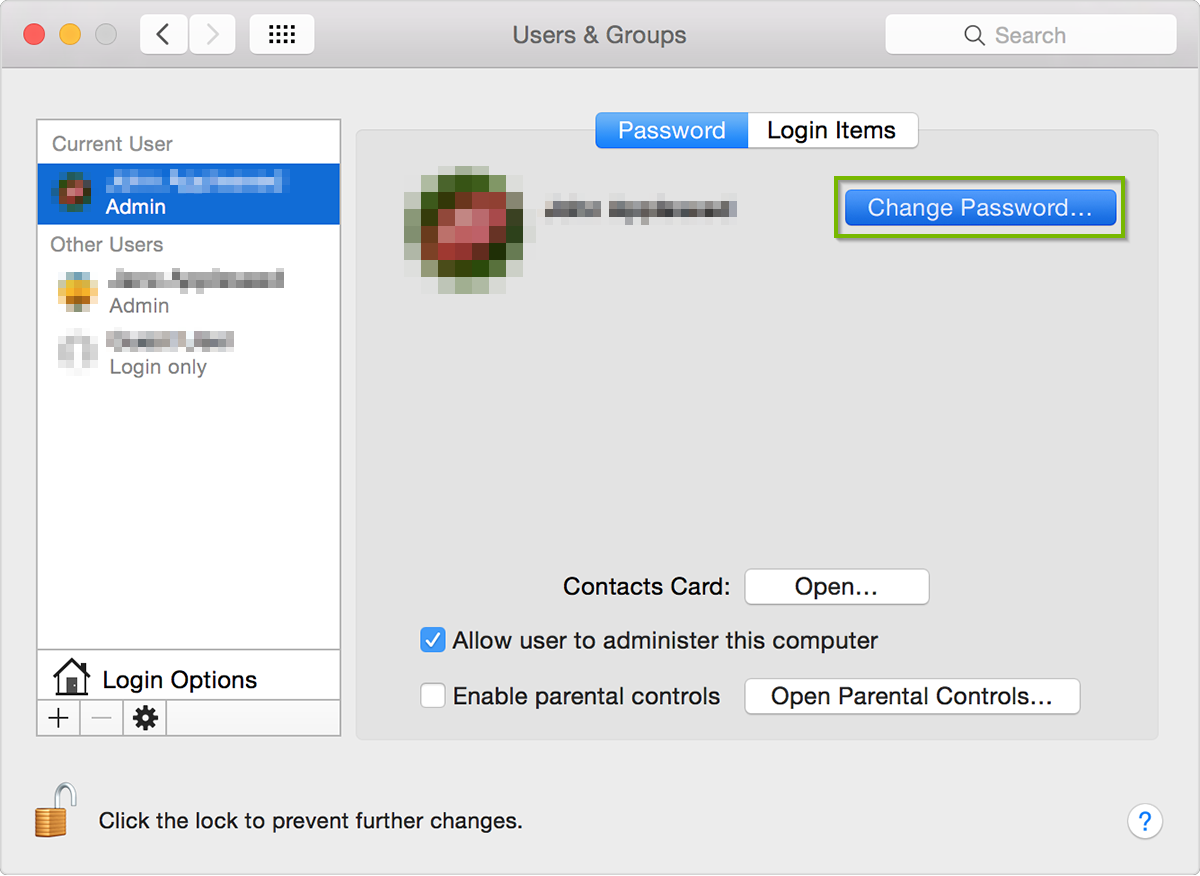
3. macOS: Change User Password
It’s important to change your login password from time to time to protect your privacy.
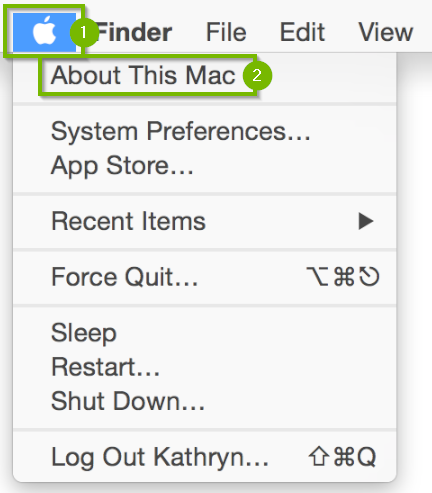
Choose Apple menu > System Preferences.
Click Users & Groups.
Click Change Password.
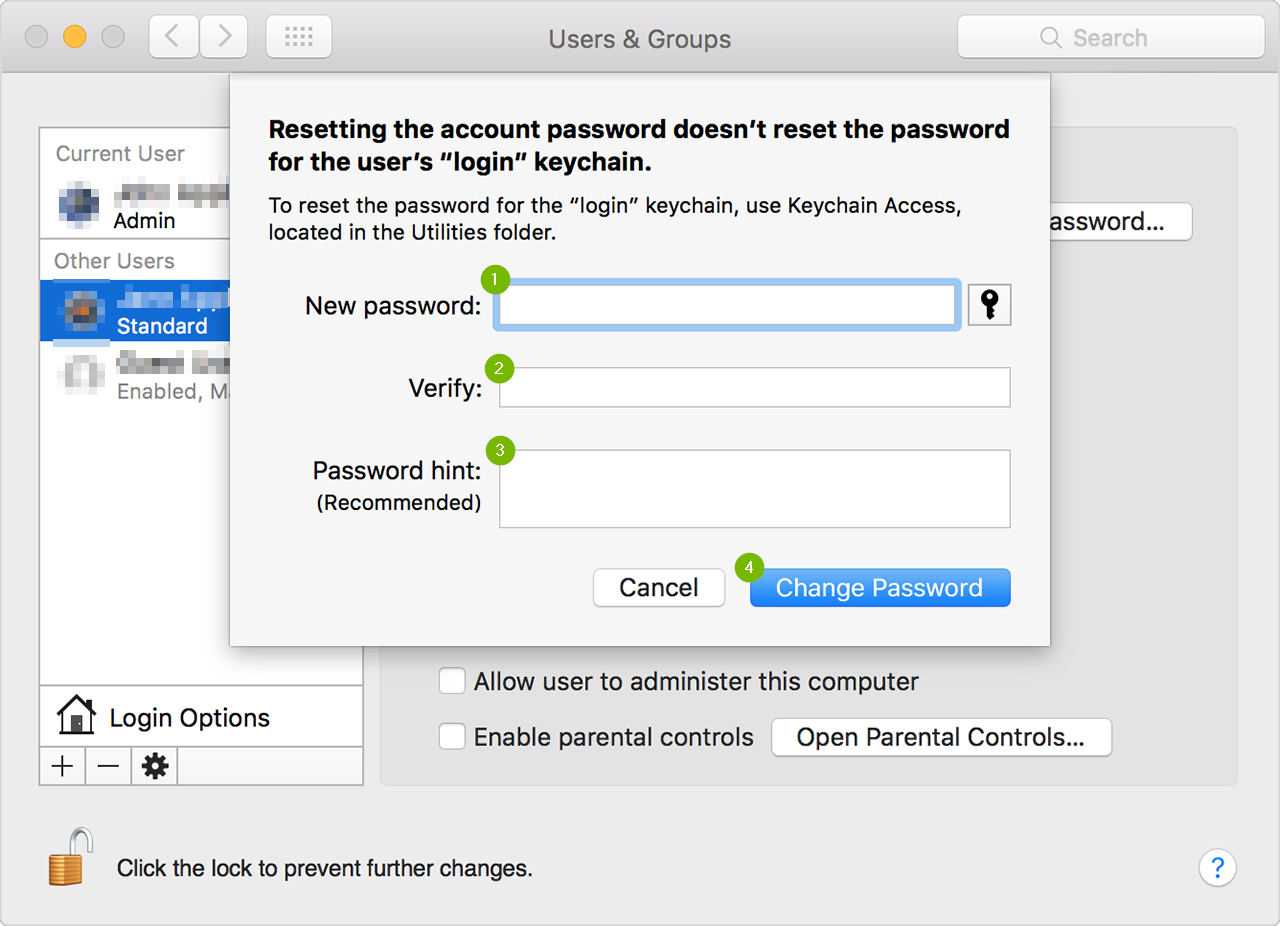
Enter your current password in the Old Password field.
Enter your new password in the New Password field, then enter it again in the Verify field.
For help choosing a secure password, click the Key button next to the New Password field.
Enter a hint to help you remember the password.
The hint appears if you enter the wrong password three consecutive times, or if you click the question mark in the password field in the login window.
Click Change Password.
4. Security: Keeping Your Password Secure
Some precautions should be taken in order to keep your password secure.
Best practices:
Do not use a master password that you use everywhere (such as email, work, school, home, network)
If possible, do not share your password with anybody.
Passwords that are shared with others, like for a home network, should only be shared if necessary.
Be aware when typing your password in public, or that in no way anyone is watching.
Some types of electronic devices like computers and smartphones can remember passwords, so beware of devices that are not yours.
Make a schedule of when to change your password. For example, every 180 days.
It is not recommended to write down passwords. But if you have to, make sure that it is neither physically nor visually accessible by others.
5. macOS: Setup TouchID
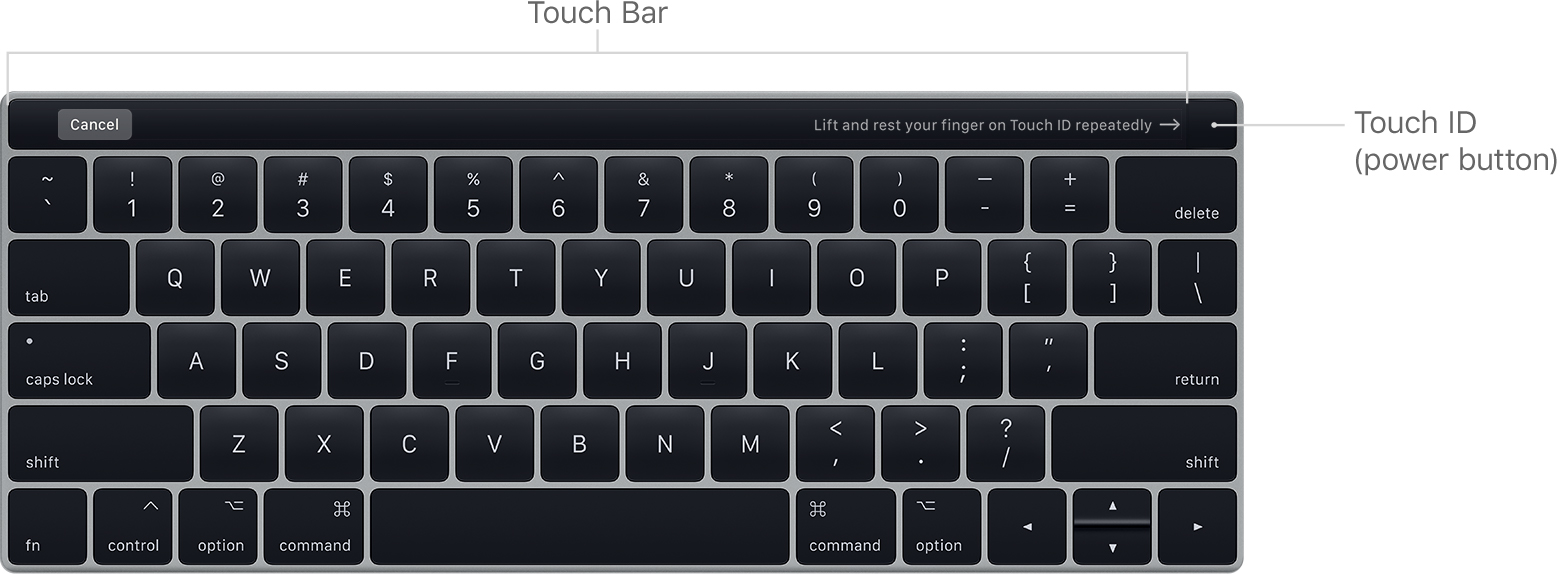
This only applies to the newer MacBooks with the Touch bar along the top. If you do not have a Touch Bar, it is okay to skip this step.
The Touch Bar, along the top of your MacBook Pro, not only provides a convenient way to access functions and menus in your favorite apps, but also provides an extra, convenient security option.
Your Touch ID button is on the far right-hand side of your Touch Bar on your Mac Book Pro.
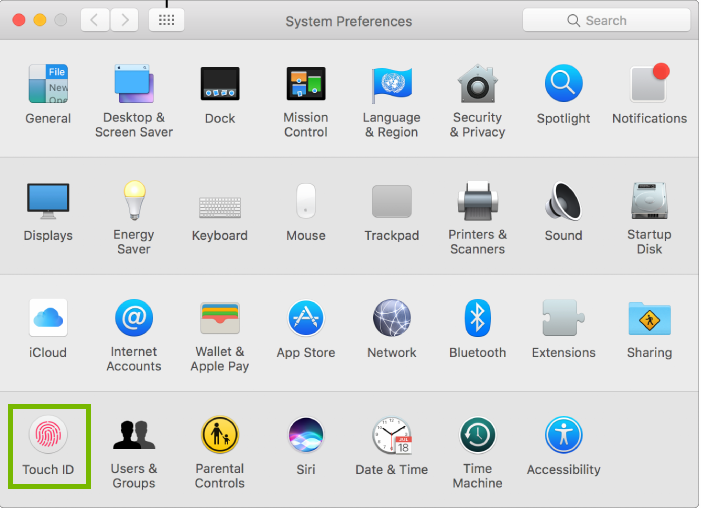
Choose Apple menu > System Preferences.
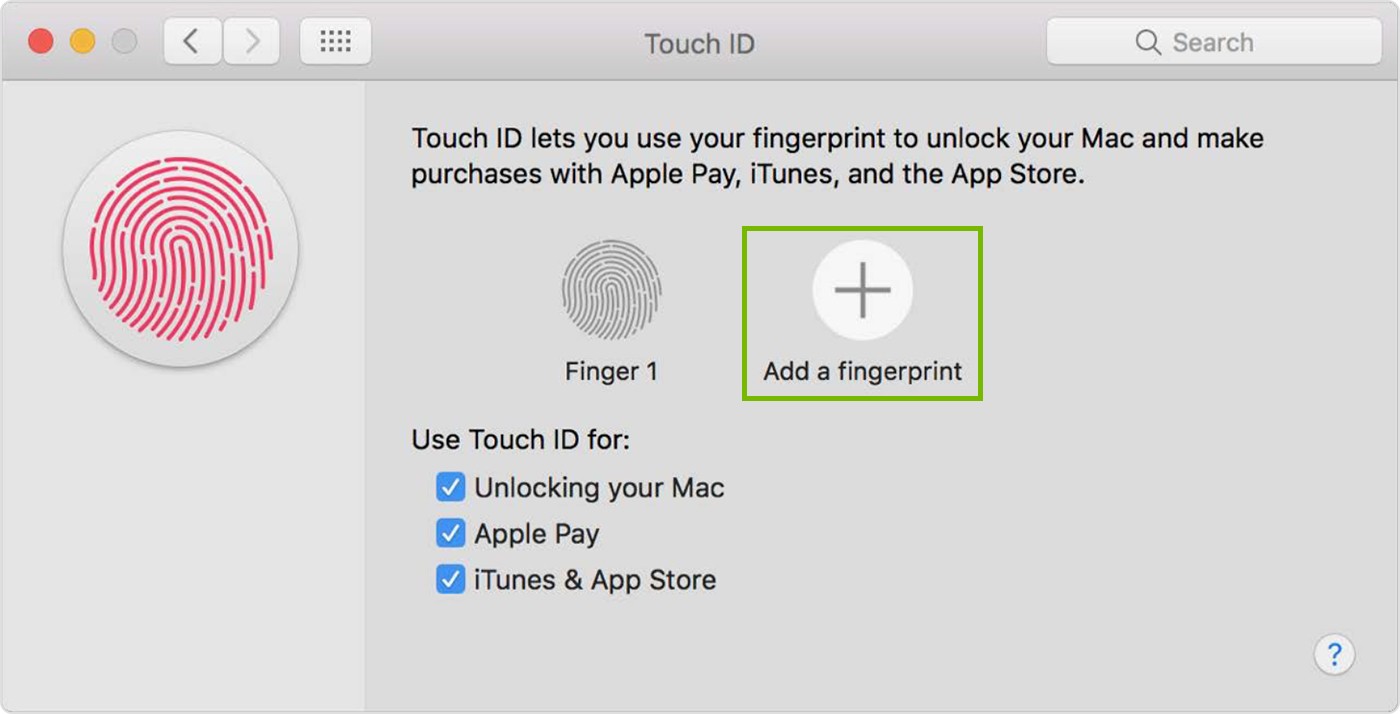
Choose Touch ID.
Click the big plus sign to add a new fingerprint.
Follow the instructions on the screen to add your fingerprint to Touch ID.
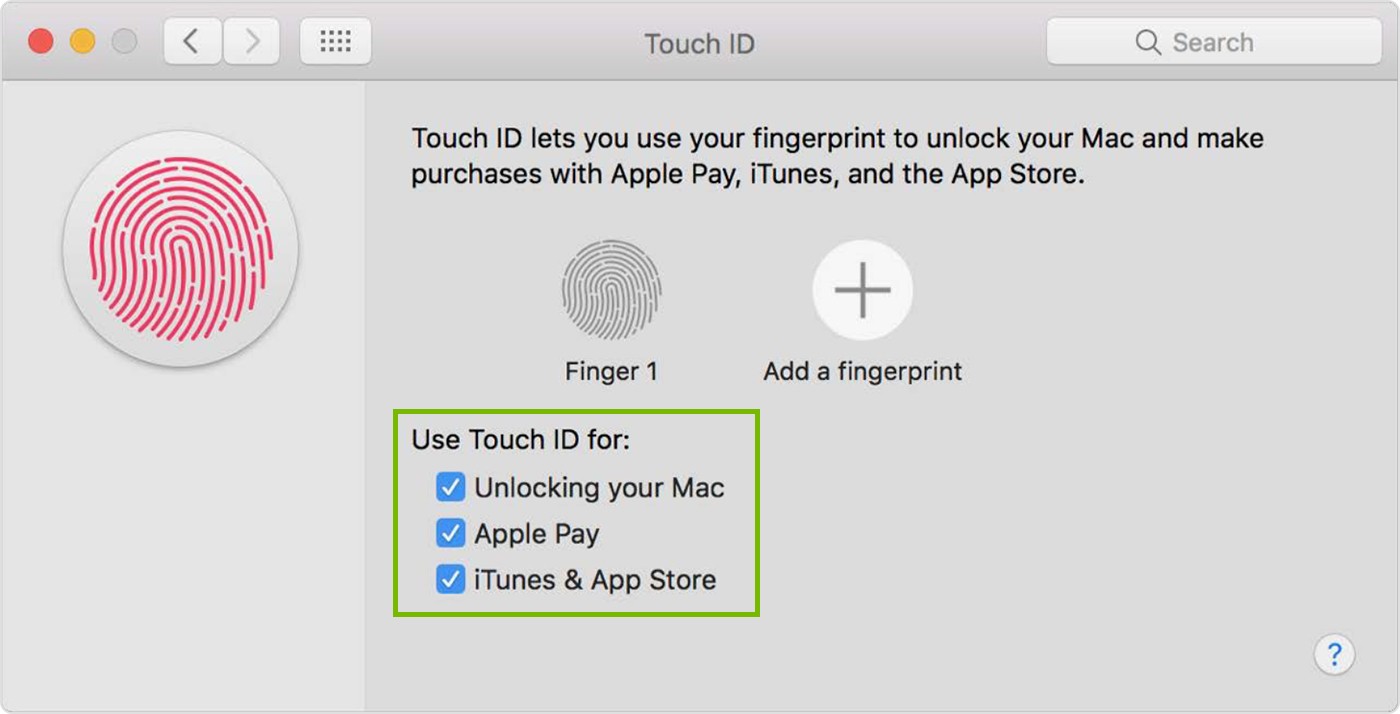
Once your fingerprint is added, you can select to use your fingerprint to Unlock your Mac, for Apple Pay, and for iTunes & App Store purchases using the check boxes below.
Touch ID does not replace your password, rather it is added to it. Do not forget your password, you will need it in other places when Touch ID won't help.
6. macOS: Setup Lockscreen
A Lock Screen will help ensure that only you can use your computer, keeping your data safe. You will need to setup the Lock Screen first, then setup when the Lock Screen is used.
Setting up Lock Screen
Choose Apple menu > System Preferences.
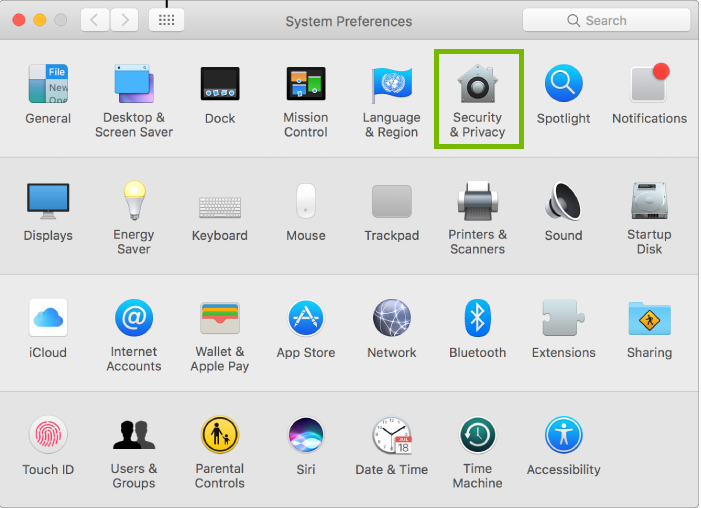
Choose Security & Privacy.
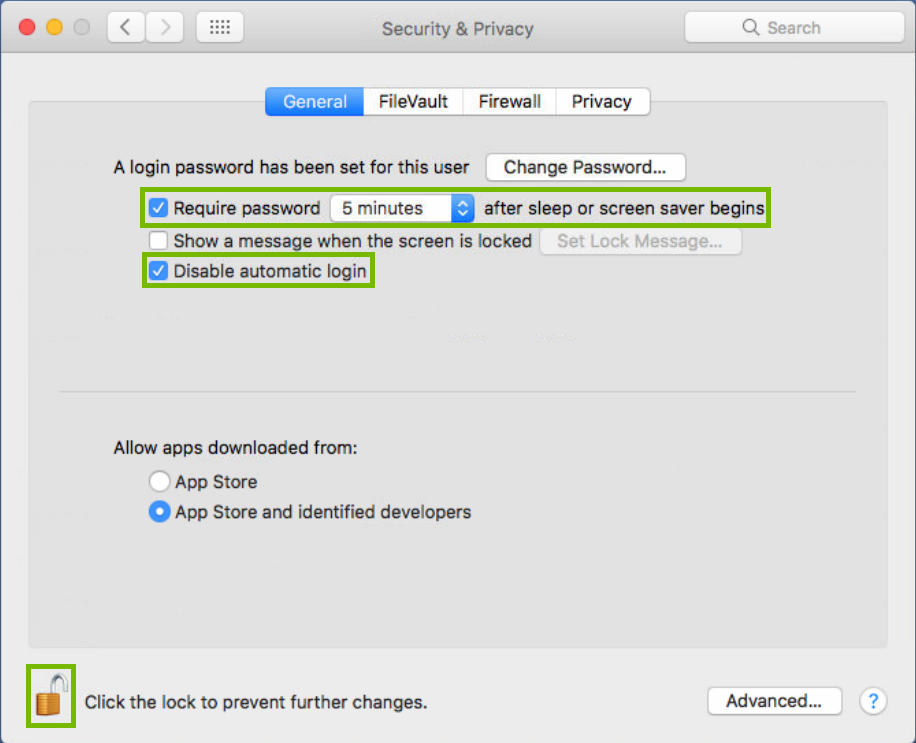
In Security & Privacy, place a check mark next to Require password, and set the timer to something you are comfortable with, 5 minutes is the default. Place a check mark next to Disable automatic login. The Lock icon in the corner allows you to prevent further changes from being made, once you're done.
Set when Lock Screen is used
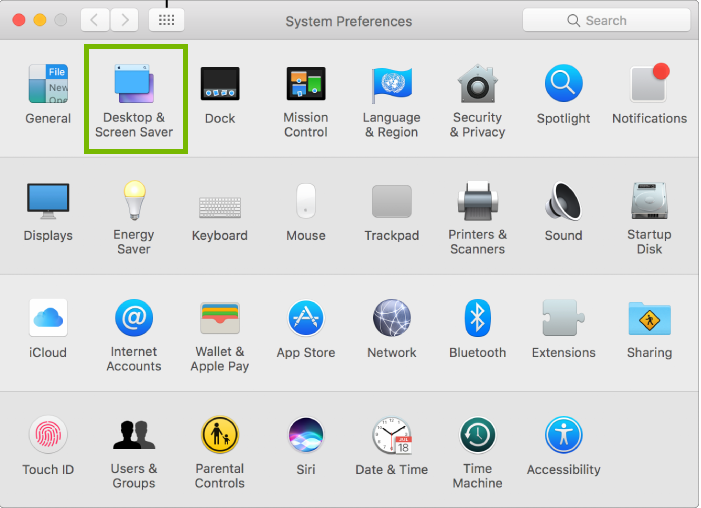
Choose Apple menu > System Preferences.
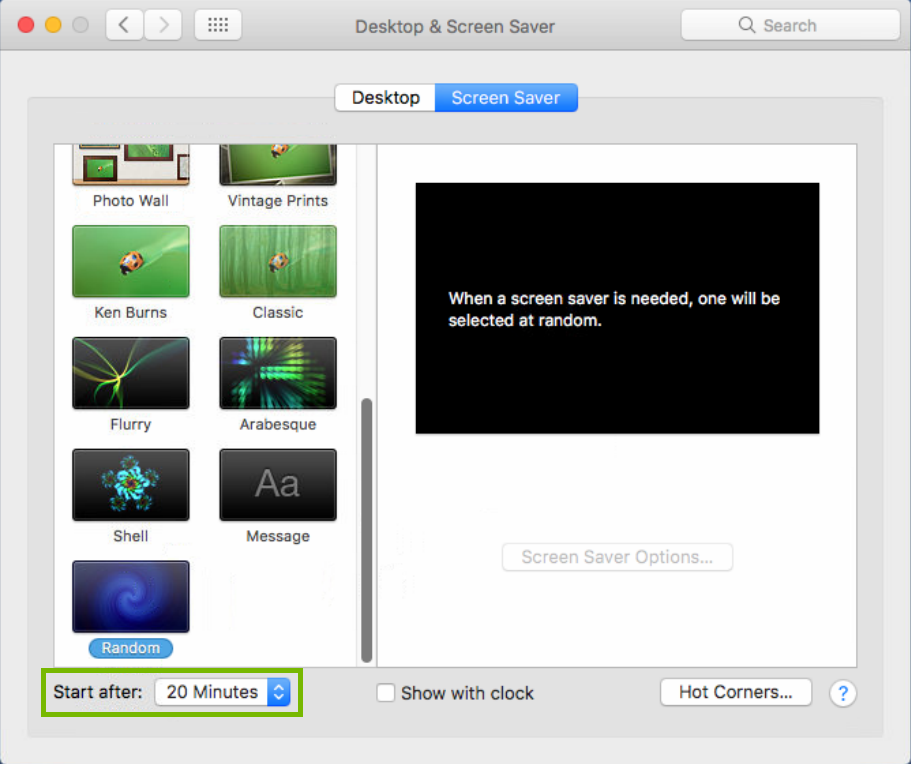
Choose Desktop & Screen Saver.
Choose Screen Saver at the top. Pick a Screen Saver you like from the list on the left, and choose a time at the bottom. 20 minutes is the default.
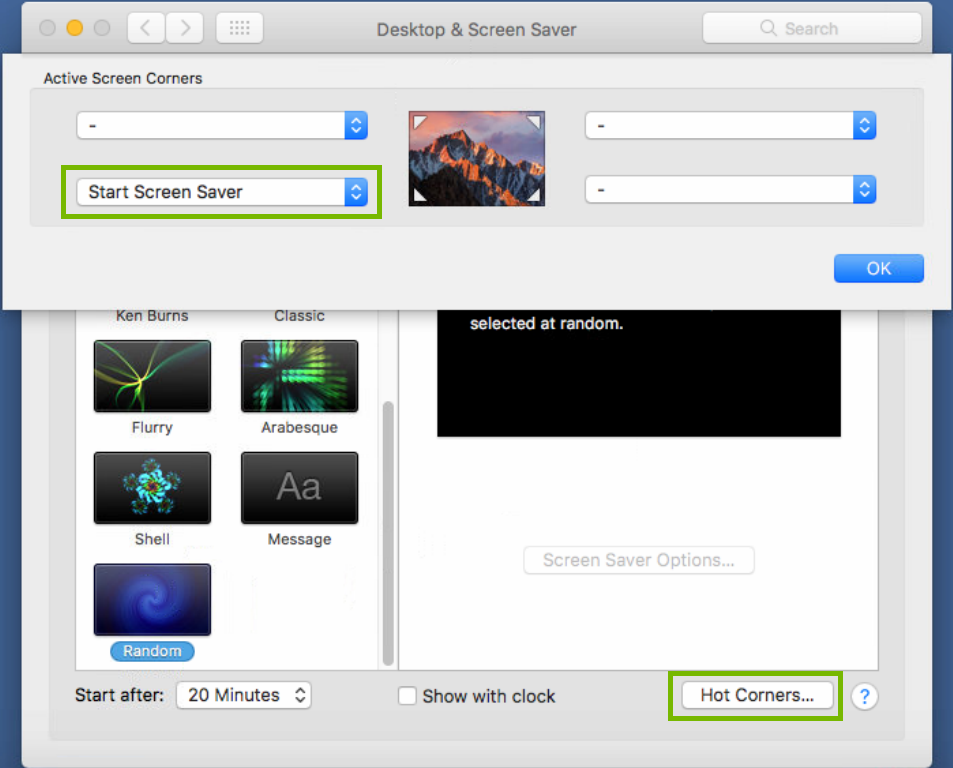
Hot Corners allows you to place your mouse cursor in that corner to instantly activate your screen saver. To configure this feature, click Hot Corners... in the bottom-right, then choose Start Screen Saver for one of the 4 corners.
Click OK to exit Hot Corners setup.
7. macOS: Configure Gatekeeper
Some apps downloaded and installed from the Internet could adversely affect your Mac. Gatekeeper helps protect your Mac from such apps. When Gatekeeper is enabled, it will only allow trusted apps to be installed.
The most reliable place to get apps is from the Mac App Store as Apple reviews each app before it's accepted by the store. If there's ever a problem with an app, Apple can quickly remove it from the store.
For apps that are downloaded from places other than the store, developers can get a unique Developer ID from Apple to digitally sign their apps. This ID allows Gatekeeper to block apps created by malicious developers and verify that apps haven't been tampered with since they were signed. If the app has no Developer ID or it has been tampered with, Gatekeeper can block the app from being installed.
To set up Gatekeeper:
Choose Apple menu > System Preferences.
Click Security & Privacy.
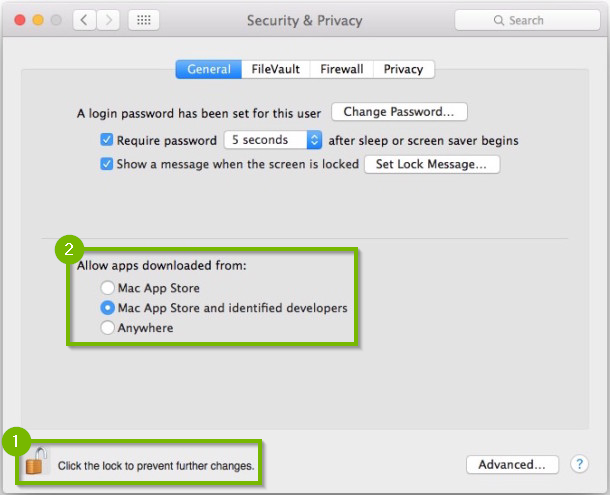
Click the General tab.
The Gatekeeper options are:
Mac App Store: Only apps that came from the Mac App Store can open.
Mac App Store and identified developers: Only allow apps that came from the Mac App Store and developers using Gatekeeper can open.
Anywhere: Turn Gatekeeper off. Allow applications to run regardless of their source on the Internet.
Unlock the page and then select the recommended option "Mac App Store and identified developers."
Close the window.
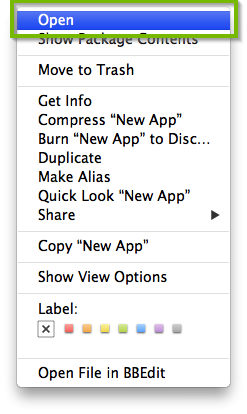
To exempt an app from Gatekeeper:
In Finder, Control-click or right click the icon of the app.
Select Open from the top of contextual menu that appears.
Click Open in the dialog box. If prompted, enter an administrator name and password.
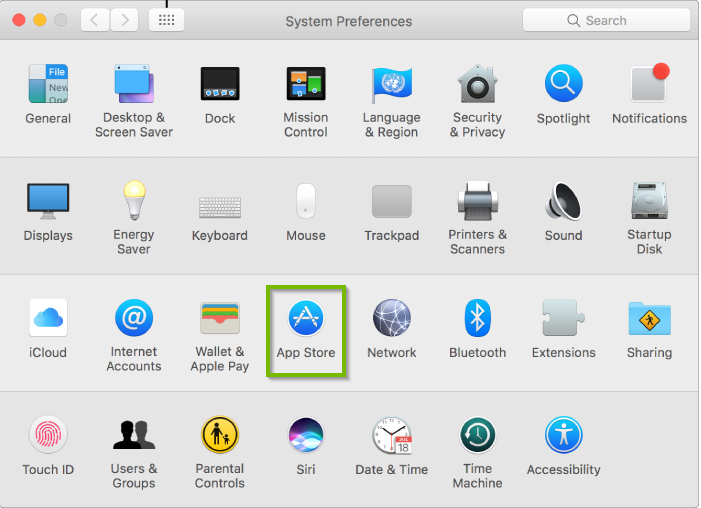
8. macOS: Configure Automatic Updates
For the best security, we recommend keeping all apps and the operating system up to date.
Choose Apple menu > System Preferences.
Click App Store.
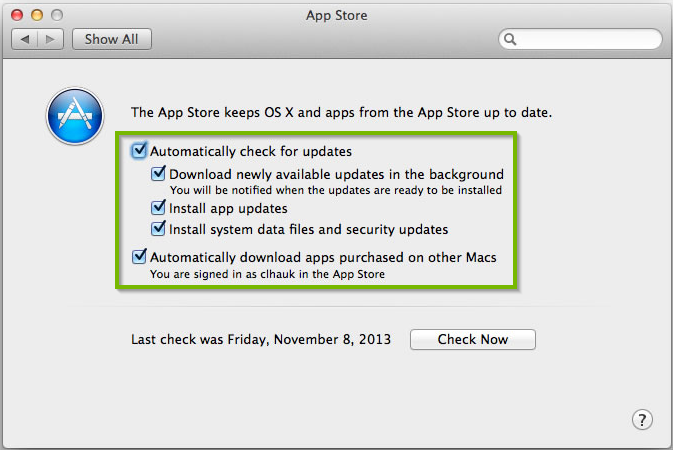
Select “Automatically check for updates.â€
To have your Mac download updates without asking, select “Download newly available updates in the background.â€
To have your Mac install app updates automatically, select “Install app updates.â€
To have your Mac install macOS updates automatically, select “Install macOS updates.â€
To have your Mac install system files and security updates automatically, select “Install system data files and security updates.â€
MacBook, MacBook Pro, and MacBook Air must have the power adapter plugged in to automatically download updates.
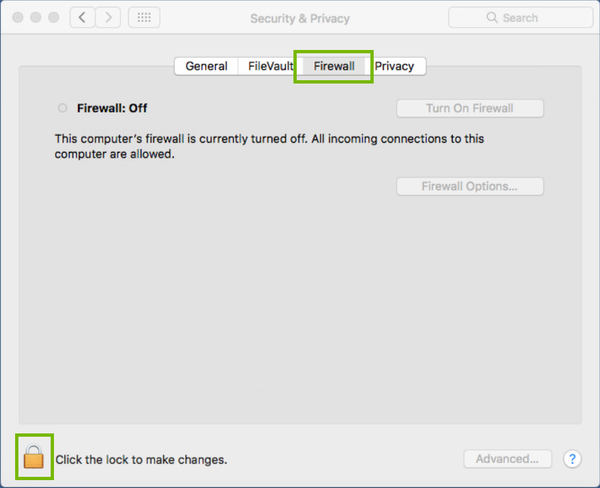
9. macOS: Firewall Setup
A firewall can help keep other computers from connecting to it when you don't want them to, such as when you're on the Internet or a network. However, it will still allow you to browse the web using Safari, for example.
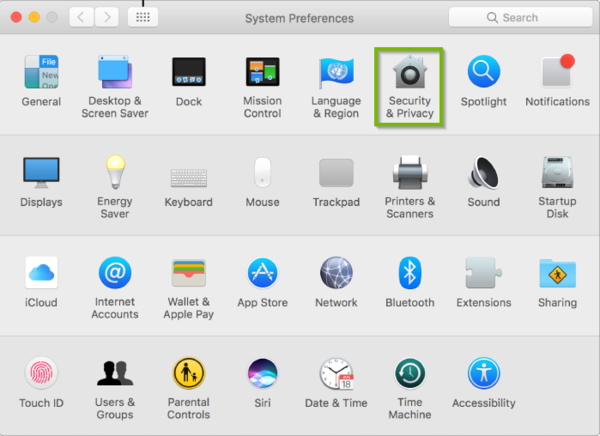
Choose Apple menu > System Preferences.
Click Security & Privacy.
Click Firewall at the top, then click the Lock icon in the bottom-left. Enter your administrator password to continue.
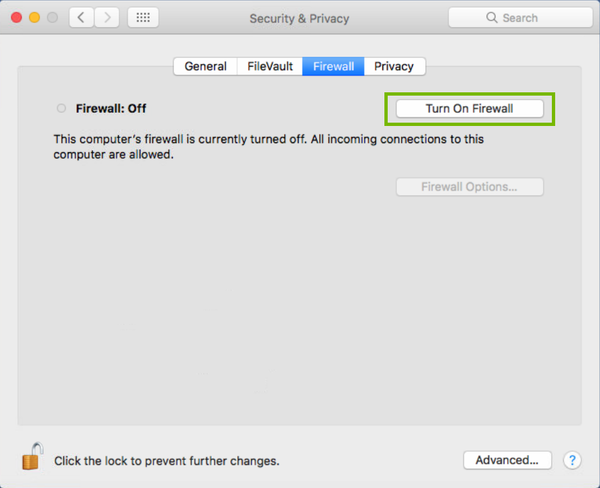
Click on Turn On Firewall.
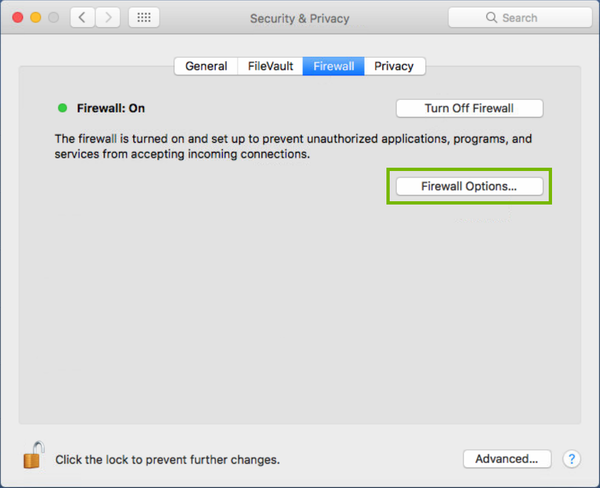
Click on Firewall Options...
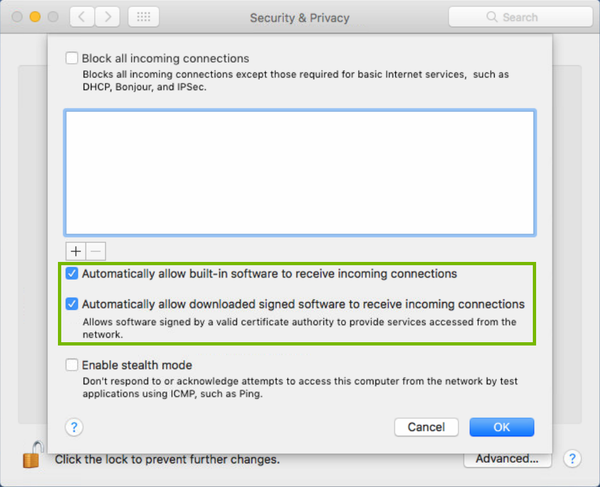
By default, the Firewall is configured to allow most signed apps (those from Apple and trusted parties), and block unsigned apps. This will allow you to use your computer normally, and give you good protection from most threats. Just make sure the only two options selected are "Automatically allow built-in software to receive incoming connections" and "Automatically allow downloaded signed software to receive incoming connections".
Click OK at the bottom to exit Firewall setup.
10. macOS: Keychain Access
Keychain Access is an app for macOS that stores and manages your passwords for other programs, such as your web browser, Safari.
The idea is to allow you to avoid password reuse. You can use a different password for each website or place, and Keychain Access will store them, and automatically fill them in for you.
Your Keychain password cannot be reset. If it is forgotten, you have to reset it to empty, and start again.
To open Keychain Access:
Choose Finder from your dock.
Click Go, Utilities from the menu at top.
Double click Keychain Access
.
From here, you can see and edit your saved passwords, and make secured notes that are only visible to you.
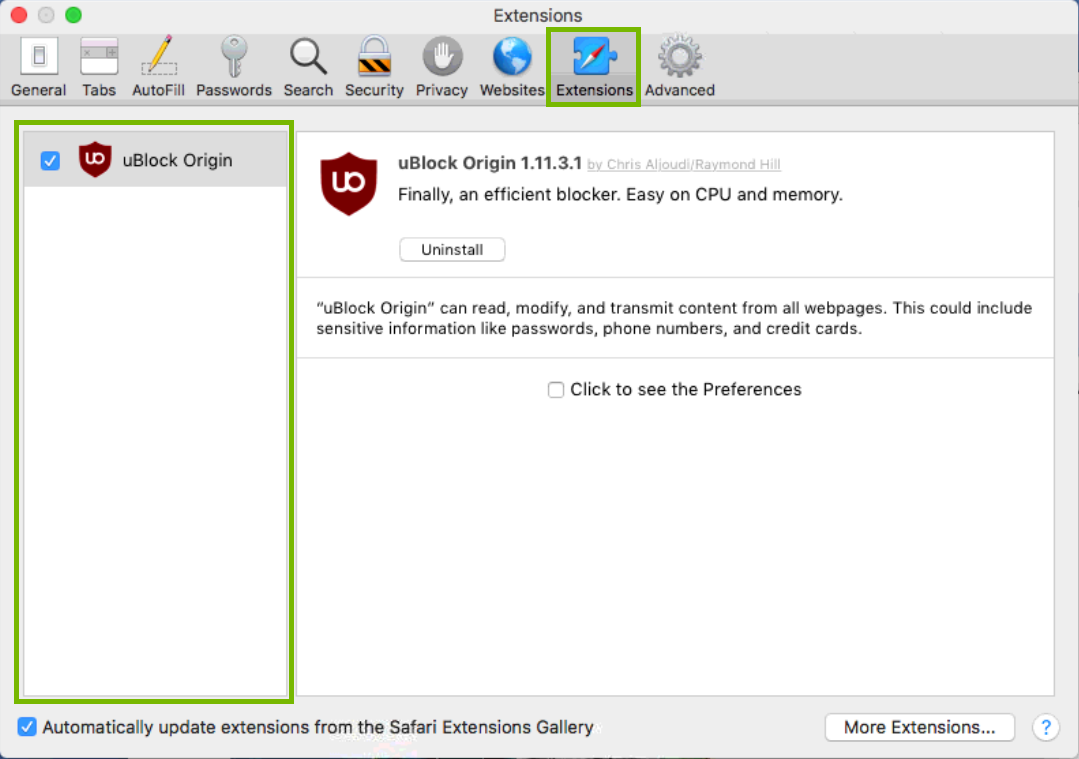
11. macOS: Securing Safari Browser
Safari, the default web browser for macOS, offers great security by default, but there are a few things that you can change to make it more secure, but still easy to use.
Open Safari from your Dock. The icon looks like a compass.
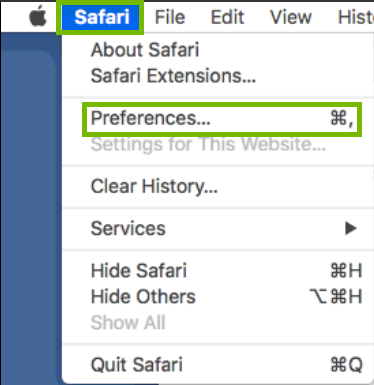
Choose Safari > Preferences from the menu at top.
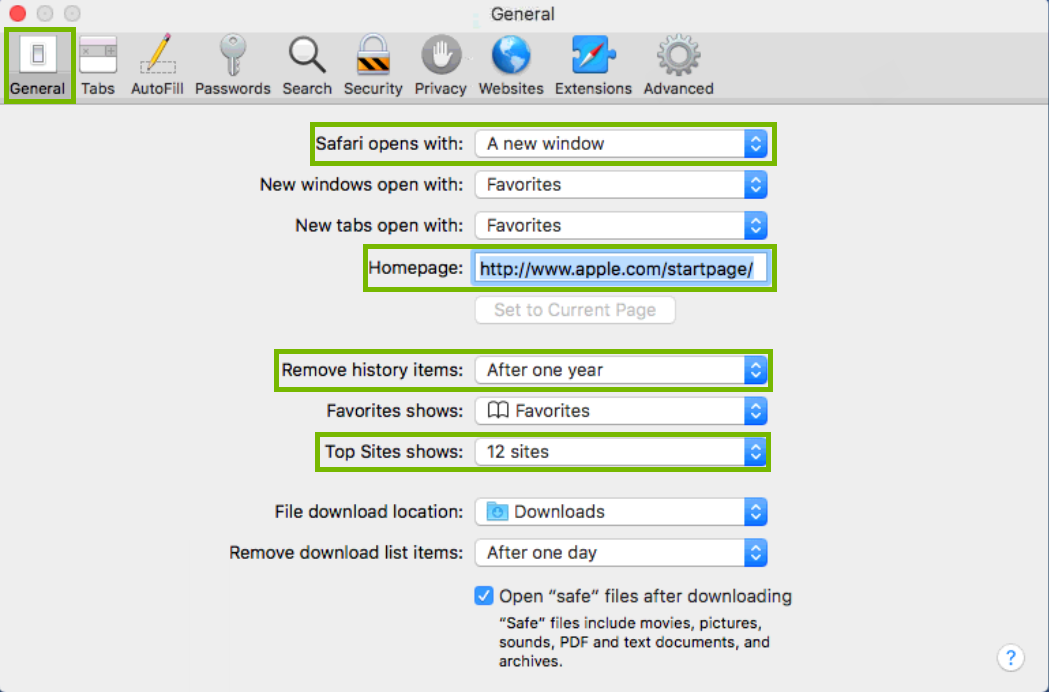
Choose General at the top. Make sure Safari opens with is set to A new window, to prevent malicious pages from loading when you start your browser. Make sure the Homepage is a page you want and recognize. You may wish to change how often History items are removed. Also, if you are regularly using your computer in public, changing Top Sites to something lower so others can't see where you go over your shoulder would be a good idea.
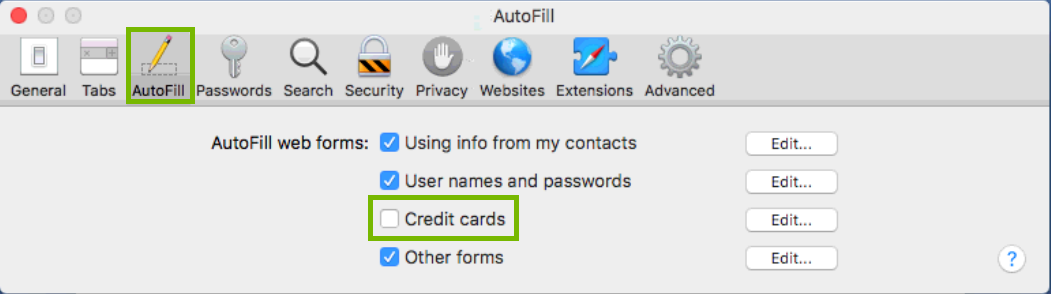
Choose AutoFill at the top. If you do not want Safari to automatically fill in some of your data, remove the check mark here.
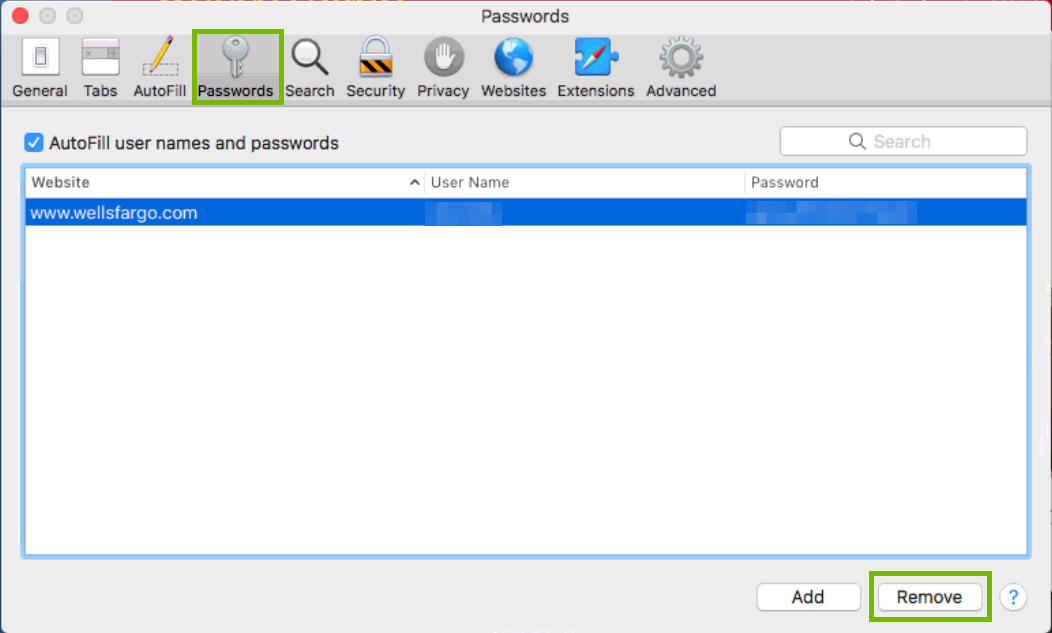
Choose Passwords at the top. You can choose not to let Safari fill in your passwords, edit, or remove any you do not recognize for websites you don't use.
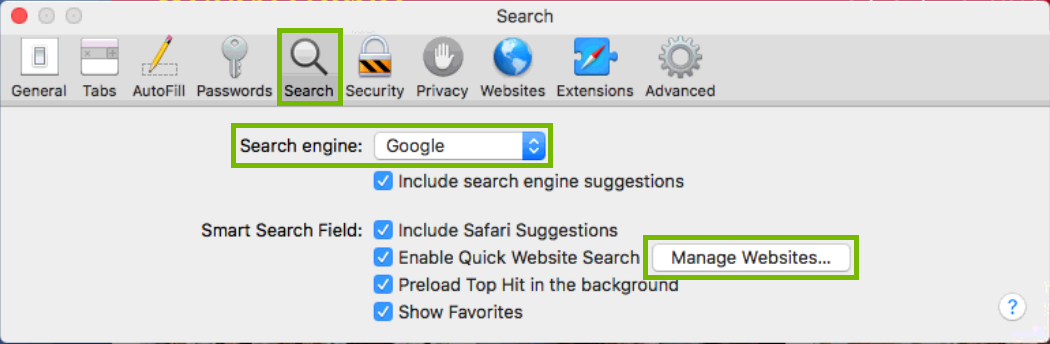
Choose Search at the top. Make sure the Search engine is one you recognize and trust. Verify quick website search doesn't remember any pages you don't want it to by clicking Manage Websites... on the right.
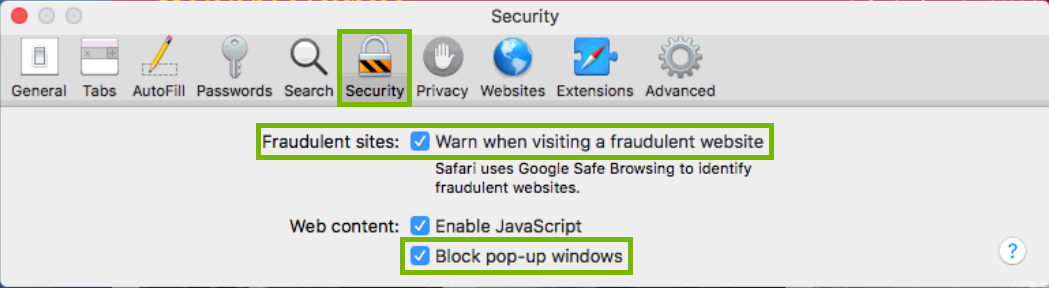
Click Security at the top. Make sure the check box for Fraudulent sites is selected. You can also choose to block pop-up windows here.
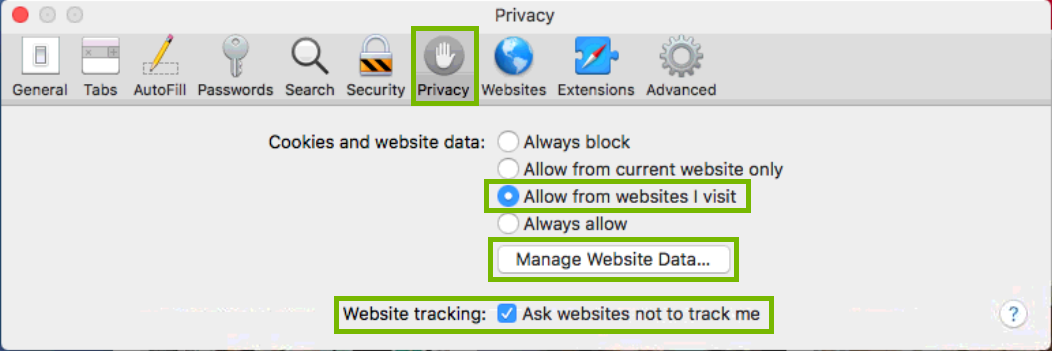
Click Privacy at the top. Cookies are used to perform most logins, so it's not advisable to block all of them, but choosing to allow only from websites you visit is best. Click Manage Website Data... to review cookies currently on your computer, and remove ones you do not want or recognize. You can also set the 'Do not track' option here, which will help.
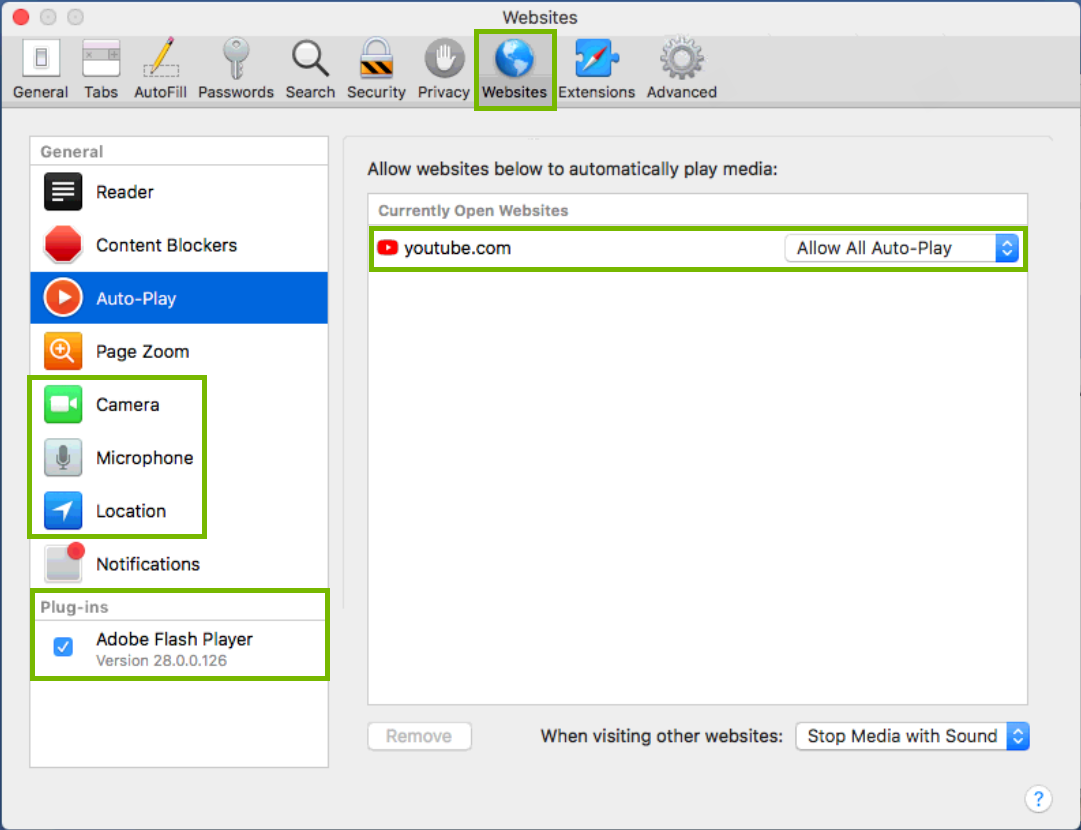
Click Websites at the top. From here, the different features of your browser are in the list on the left. Choose each, and you'll see a list of websites that can use that feature. Pay special attention to Camera, Microphone, and Location and remove websites you do not recognize or want to give that private information to. Check Auto-Play and Notifications to make sure no odd sites are listed which end up being common annoyances and advertising sources. Look through any Plug-ins you have at the bottom.
Click Extensions at the top. Look through the list of extensions here carefully, and make sure you recognize each. If you don't recognize the extension, remove it.
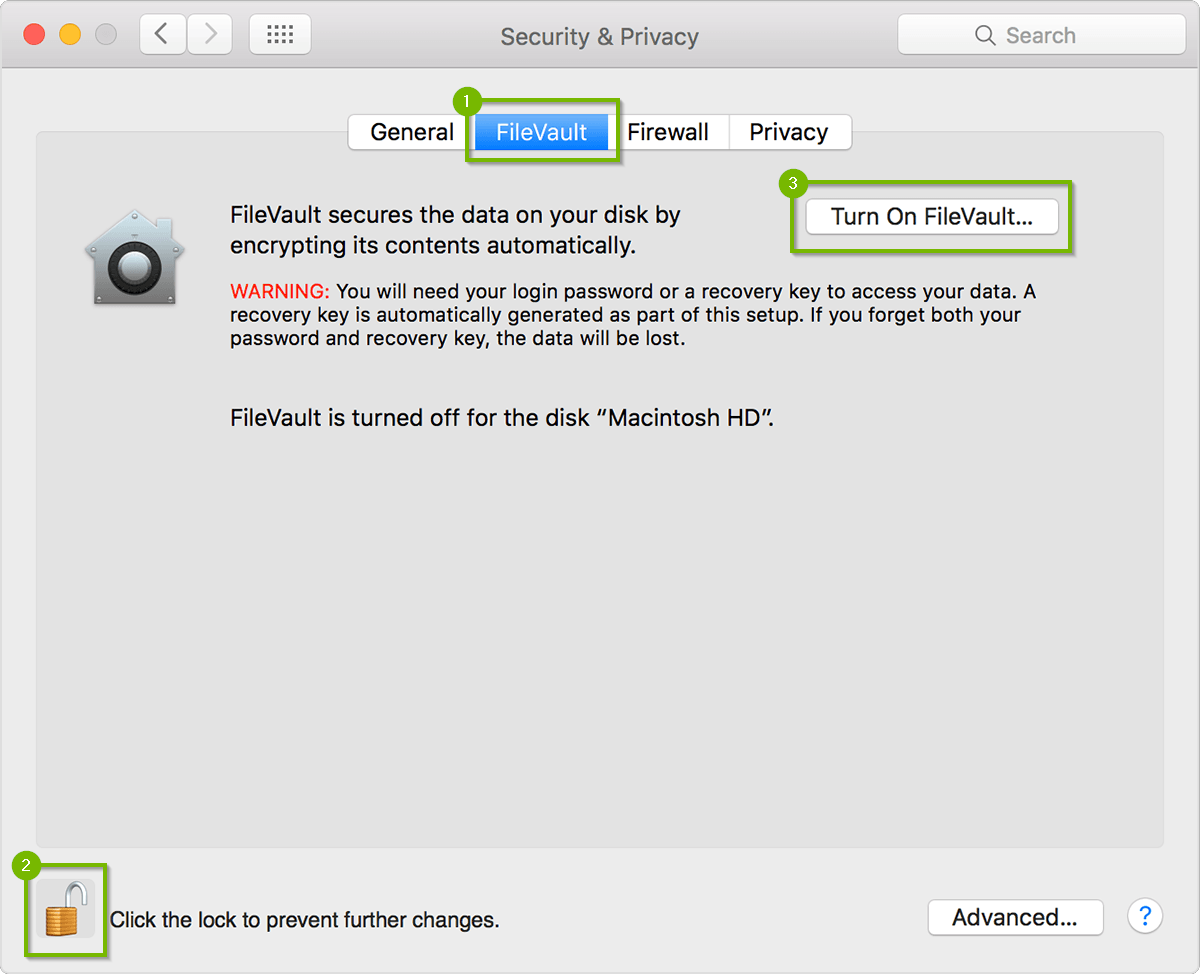
12. macOS: Configure FileVault
With FileVault 2, your data is safe and secure — even if your Mac falls into the wrong hands. FileVault 2 encrypts the entire drive on your Mac, protecting your data with XTS-AES 128 encryption. It can also encrypt any removable drive, helping you secure Time Machine backups or other external drives with ease.
To set up FileVault:
Choose Apple menu > System Preferences.
Click Security & Privacy.
Click the FileVault tab.
Click to unlock the Lock button, then enter an administrator name and password.
Click Turn On FileVault.
If other users have accounts on your Mac, you might see a message that each user must type in their password before they will be able to unlock the disk. For each user, click the Enable User button and enter the user's password. User accounts that you add after turning on FileVault are automatically enabled.
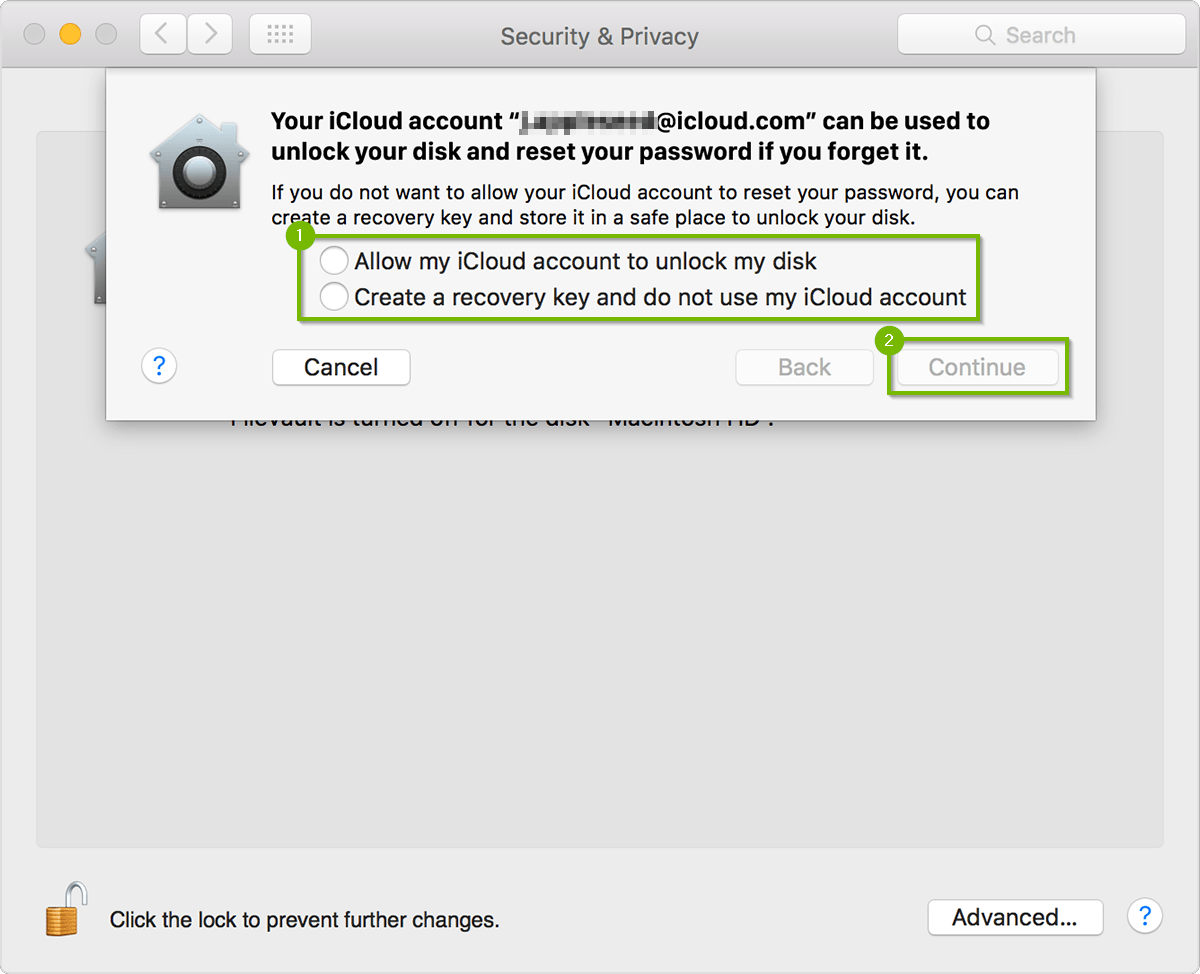
Choose how you want to be able to unlock your disk and reset your password, in case you ever forget your password:
If you're using OS X Mavericks, you can choose to store a FileVault recovery key with Apple by providing the questions and answers to three security questions. Choose answers that you're sure to remember.
If you're using OS X Yosemite or later, you can choose to use your iCloud account to unlock your disk and reset your password.
If you don't want to use iCloud FileVault recovery, you can create a local recovery key. Keep the letters and numbers of the key somewhere safe—other than on your encrypted startup disk.
If you lose or forget both your account password and your FileVault recovery key, you won't be able to log in to your Mac or access the data on your startup disk.
When FileVault setup is complete, your Mac restarts and asks you to log in with your account password. Your password unlocks your disk and allows your Mac to finish starting up. FileVault requires that you log in every time your Mac starts up, and no account is permitted to log in automatically.
13. macOS: Enable Find My Mac
Find My Mac isn't just handy for locating a missing computer, it can also be used to lock or erase a device in a worst case scenario.
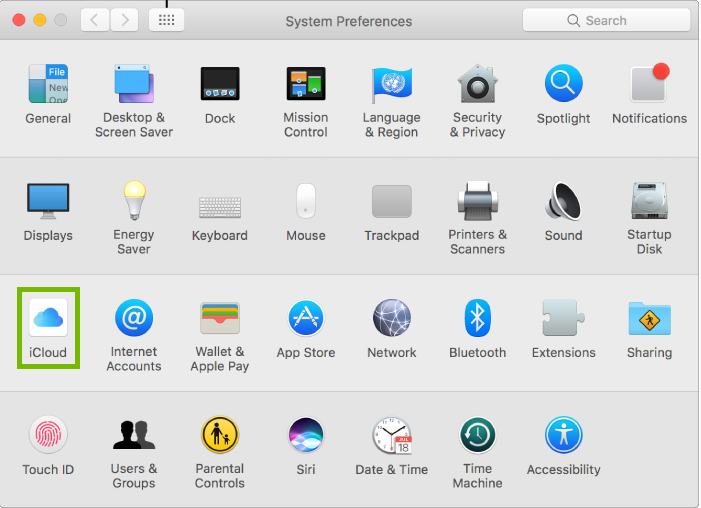
Choose Apple menu > System Preferences.
Choose iCloud.
Scroll down, and make sure Find My Mac is checked.
Use Find My Mac
Using the Find My iPhone app on another mobile device.
Using the Apple iCloud website: https://www.icloud.com/
Find My Mac will only work on a Mac if it is connected to a cellular network or wireless network. If the Mac does not have connectivity, Find My Mac will not be able to communicate with the device.
14. Data backups
Now that we've covered updates and security, let's go over some best practices for backing up your data.
First and foremost, it is always wise to backup you data and backups should be performed regularly. Even beyond the scope of malware or security, it is always prudent to have frequent backups because hard drives can fail, systems can crash, things can break, "life can happen", so you're always better off safe than sorry.
Data backups, just like any type of backup are a matter of redundancy. One backup solution is good, two or more is better.
Offsite backups are always a good idea, especially as a secondary backup. That way if an event happens such as a fire, flood or theft, you have the remote offsite backup to fall back on.
It is always prudent to set your backups to use a versioning scheme. That way if files are corrupted, infected or locked, you don't have to worry about having only one backup which may be the bad version.
If you are using a local backup such as an external hard drive it is always a good idea to disconnect the drive when it is not in use. The reason being, some forms of malware can encrypt or corrupt all data on all connected drives, so a drive that is not connected will not be affected.
15. macOS: Backup
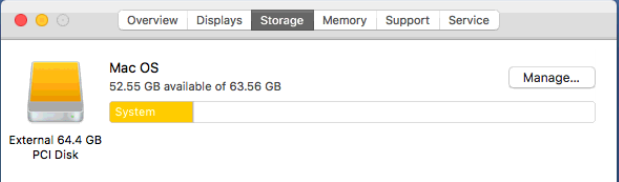
Purchase an external hard drive at least as large as how much information you have to back up. To see approximately how much space you'll need:
Choose Apple menu > About This Mac.
Click the Storage tab.
Connect the external hard drive to your computer, and power the drive, if required.
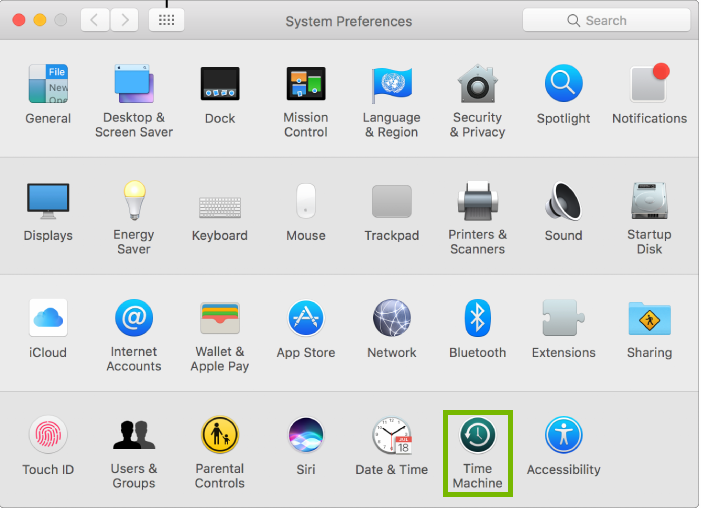
Choose Apple menu > System Preferences.
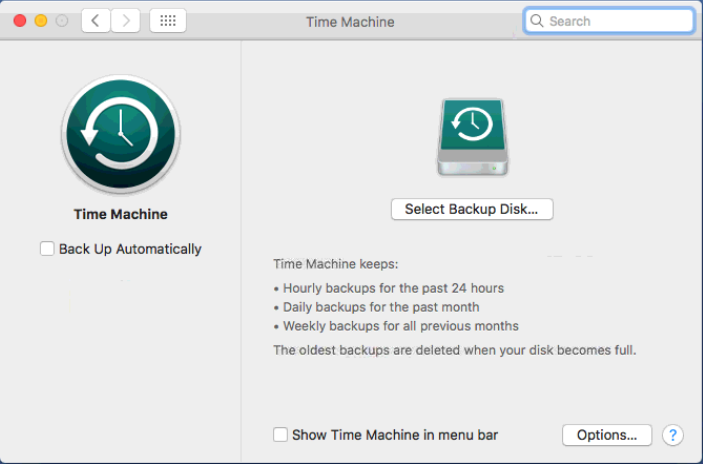
Click Time Machine.
Click Select Backup Disk, Select Disk, or Add or Remove Backup Disk.
Select a backup disk from the list, then click Use Disk.
Click the Time Machine
icon on the top-right side of your Mac, and choose Back Up Now.
Your initial backup will take a while to complete. Do not turn off your Mac, but you may continue using your Mac. A message will pop-up in the top-right corner letting you know when the backup is complete.
You can check the status of the backup by clicking on the Time Machine
icon in the top-right.
16. macOS: Summary of Security
MacOS is designed to help keep you safe. Remembering a few, simple rules allow you to keep your digital life safe.
Secure, complicated passwords that you use only once per site or program.
Not sharing your passwords, or allowing others to see your password.
Using Keychain Access to keep a large list of passwords secure.
Making sure Gatekeeper is enabled and keeping you safe.
Using file encryption with FileVault.
Making a backup and making sure it's up-to-date.
Remove Hidden Spyware In Minutes For Free
Detect and remove spyware, keyloggers, tracking cookies, and other
threats that slow down your PC or steal your data.
65+ Million Downloads
Spyware scanner with AI-powered detection engine + database
.png)