Set Up Parental Controls iPhone, iPad, or iPod Touch
Authored by: Support.com Tech Pro Team
1. Introduction
In This Guide
You'll Learn How To:
Set up and enable Family Sharing.
Set up your iOS device's Screen Time.
Set Downtime and App Limits.
Set Content and Privacy Restrictions.
Prevent iTunes & App Store purchases
Prevent explicit content and content ratings
Review Screen Time audits.
Before We Begin:
Have a working iOS device updated to iOS 12.
Have an Apple ID account.
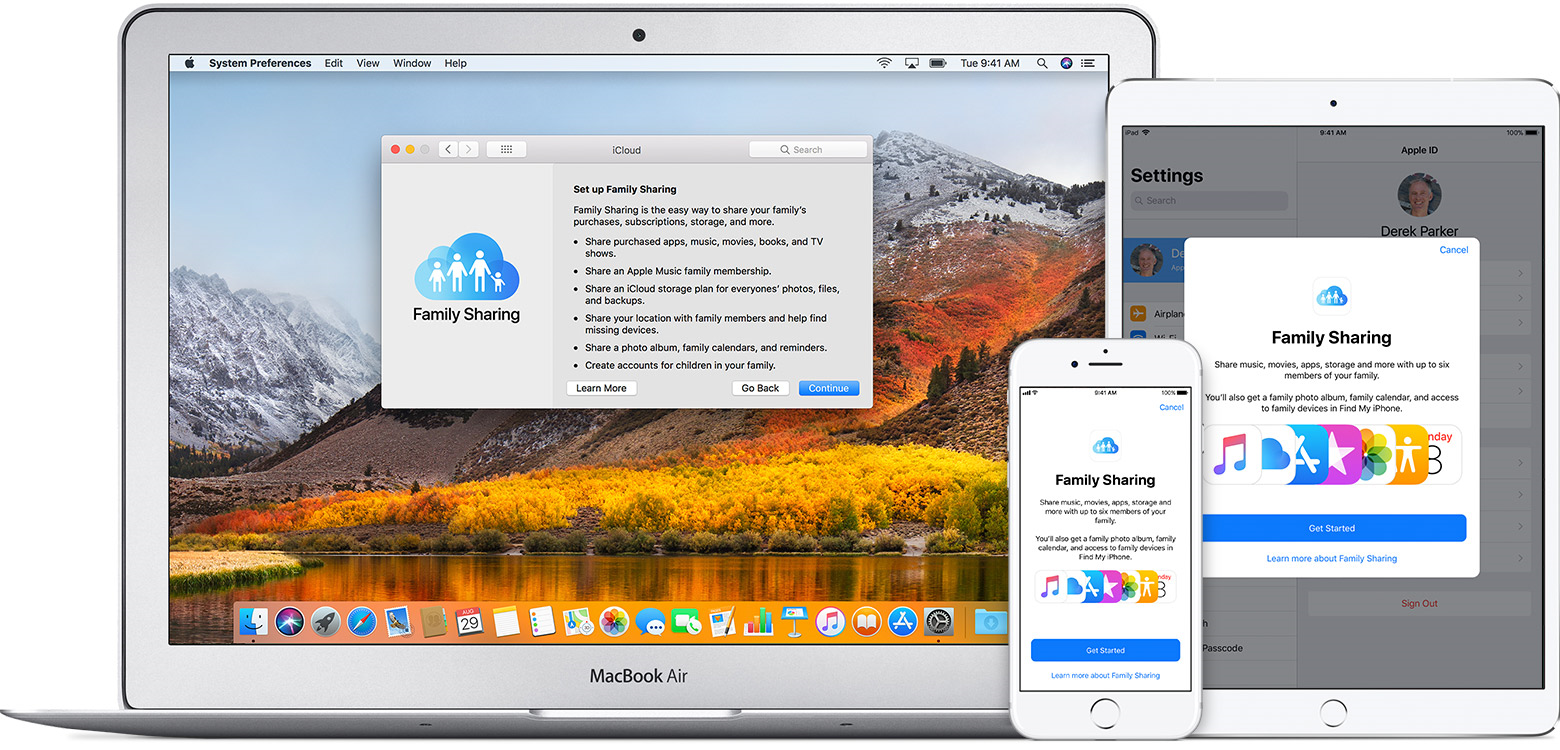
2. Family Sharing
With Family Sharing, you can not only share all your iTunes and App Store purchases with your family, but you can set it so that parents require that younger children ask permission before purchasing content. You can then receive a request and either accept or deny it right from your own iPhone or iPad.
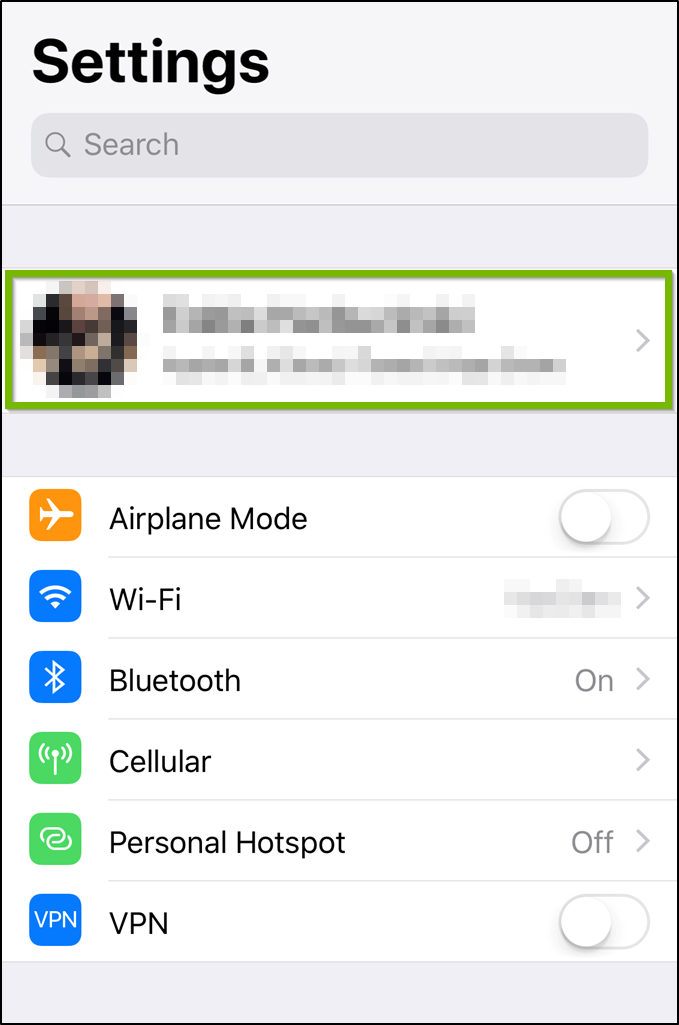
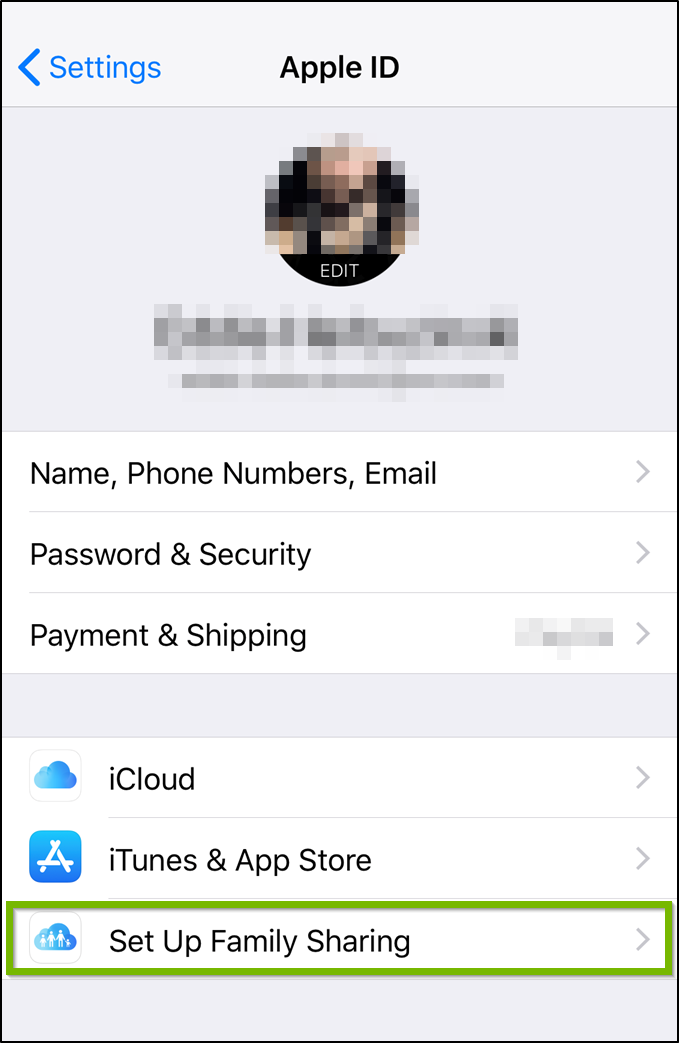
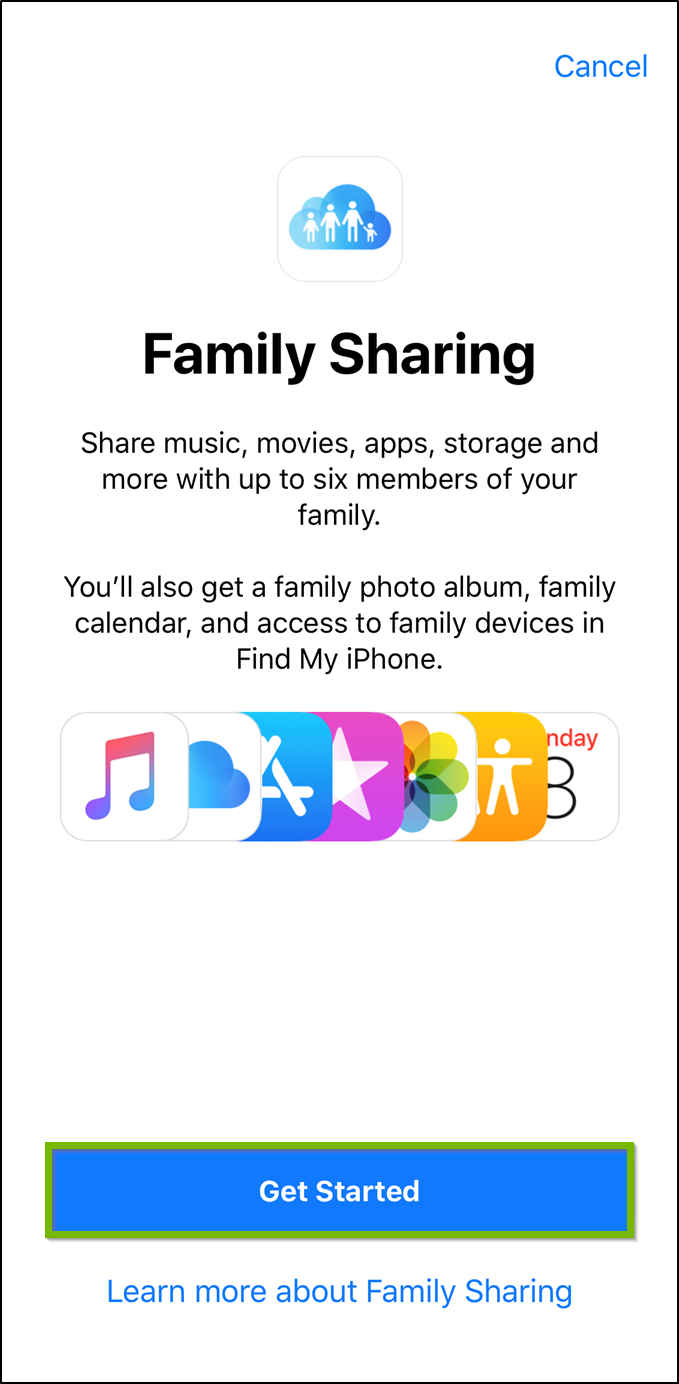
To start a Family Group:
Select Settings.
Select your Apple ID.
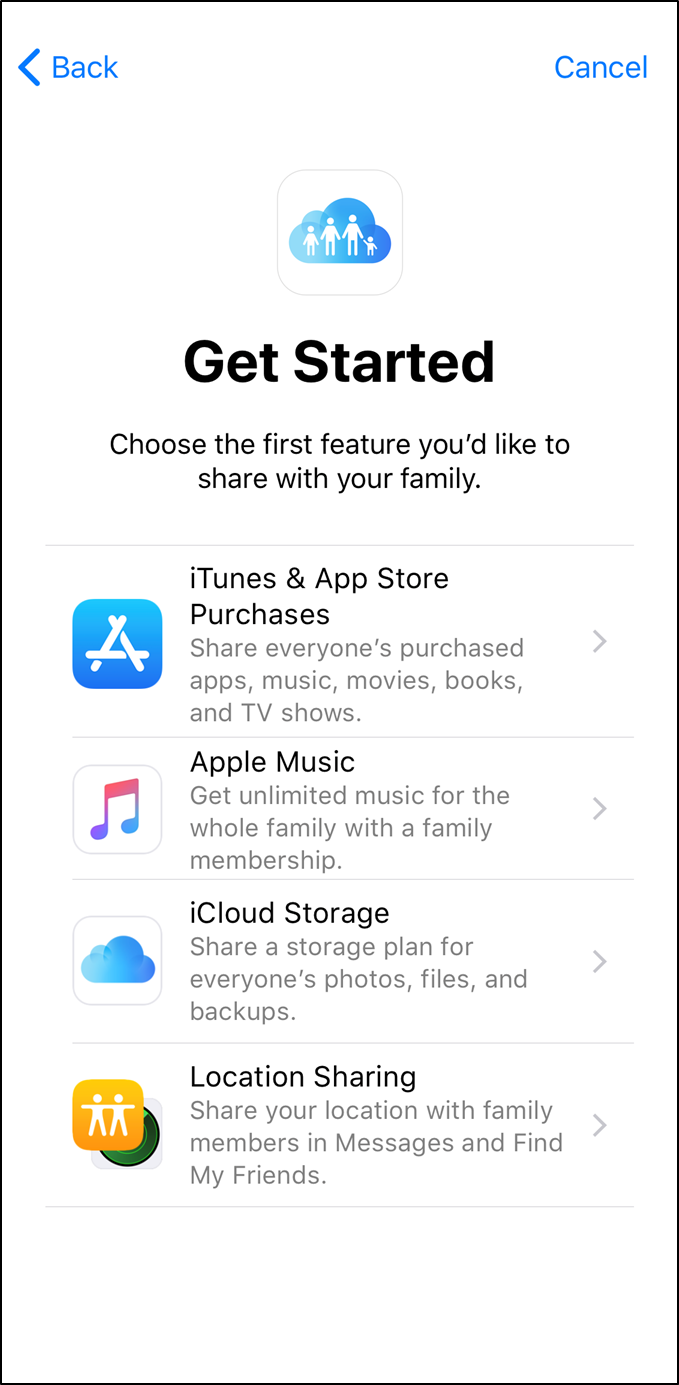
Select Set Up Family Sharing.
Select Get Started.
Select a feature you would like to enable within Family Sharing.
To invite people to join your Family Sharing group:
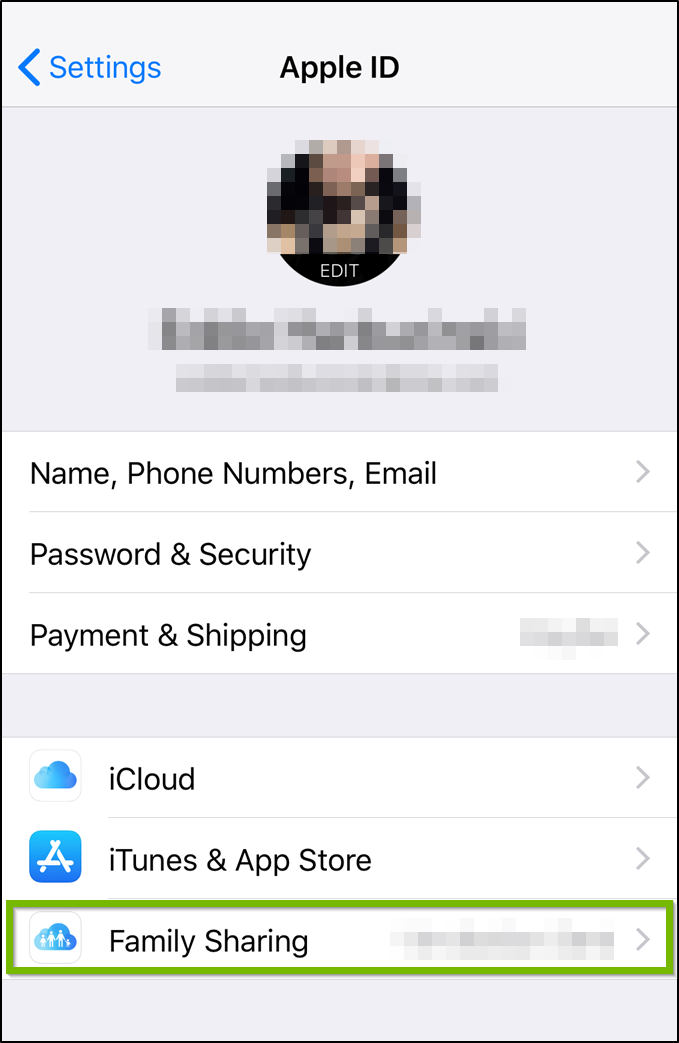
Select Settings.
Select your Apple ID.
Select Family Sharing.
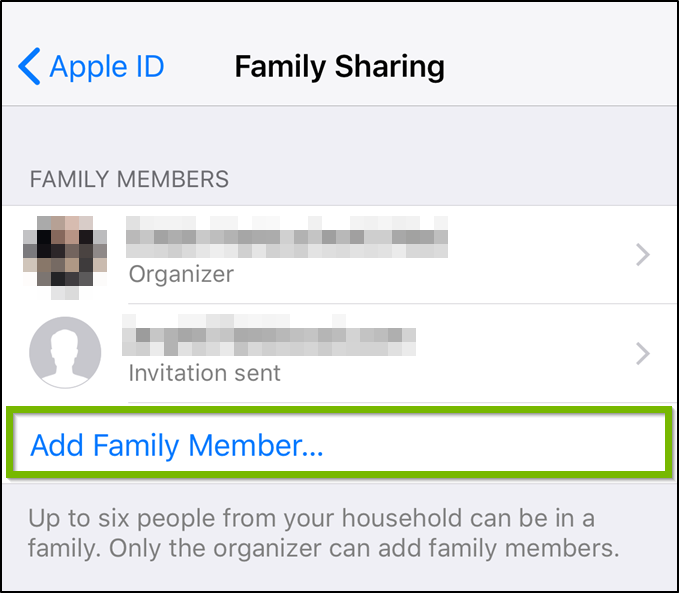
Select Add Family Member.
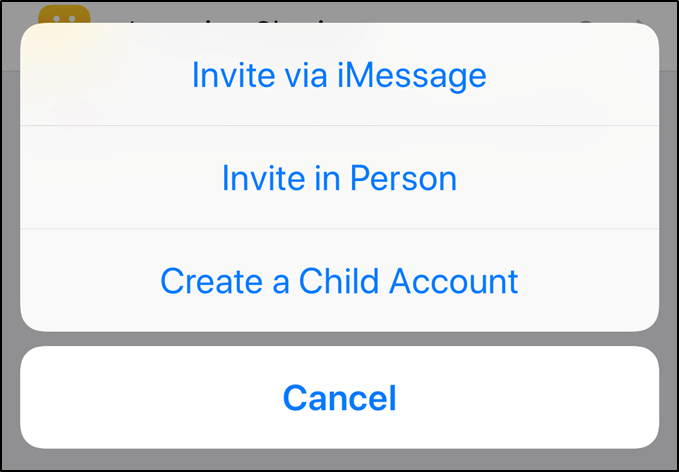
Options for adding a new family member to family sharing will appear. Select an option to begin sending an invitation to join your family sharing group.
Invite via iMessage: This will allow you to send an iMessage invitation from your iOS device to one of your contacts.
Invite in Person: This will allow you to send a Family Sharing invite via Email address, iOS Game Center ID, or will allow you to select someone from your contact list who may not use iMessage.
Create a Child Account: This will allow you to create an iCloud account for a minor child which will be tied to your Family Sharing account. Parental Controls and other permission-based features can be enforced on a Child Account. This is great for minor children in your home who may also use iOS devices.
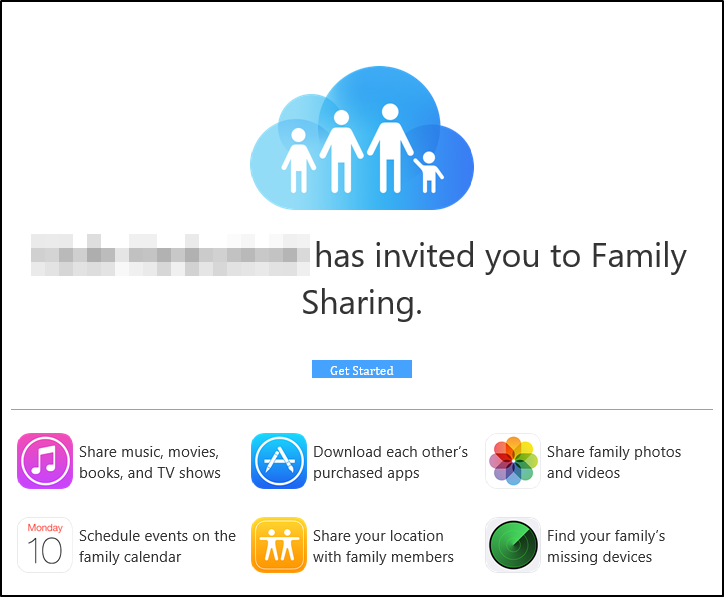
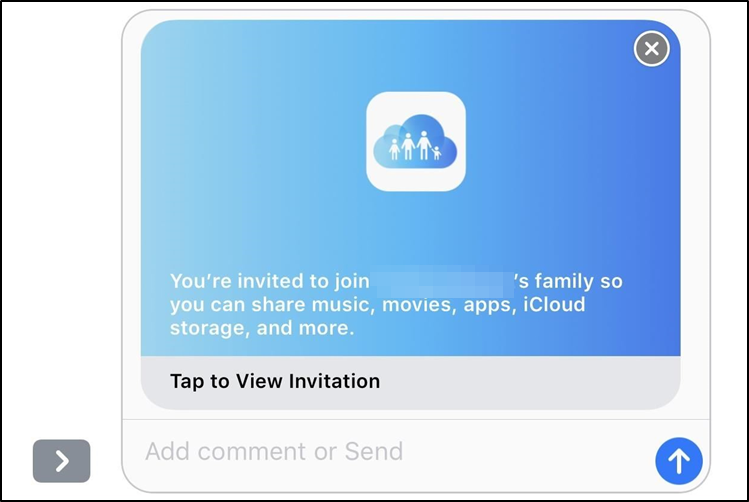
To accept a Family Sharing invitation:
If you are invited to join a Family Sharing Group, your invitation may come in one of two forms:
Invitation via Email:
Select Get Started to proceed with accepting your Family Sharing invite.
Invitation via iMessage:
Select Tap to View Invitation to proceed with accepting your Family Sharing invite.
3. Set Up Screen Time
With Screen Time, you can access real-time reports about how much time you spend on your iPhone, iPad, or iPod touch, and set limits for what you want to manage.
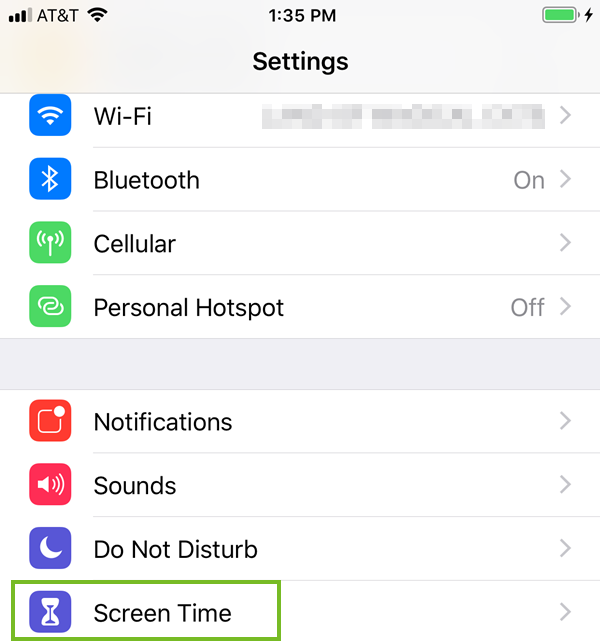
Open Settings on your device.
Tap Screen Time.
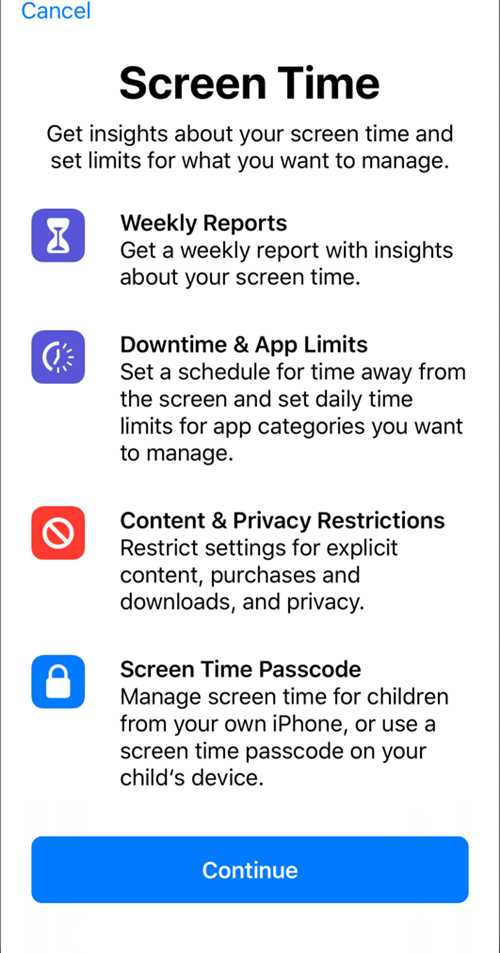
Screen Time will introduce itself. Tap Continue.
>
You can set a time when your device will not be used. Select your time and tap SetDowntime or tap NotNow.
App time limits can be set now or you can set them later. Tap Set App Limit or NotNow.
Tap Continue.
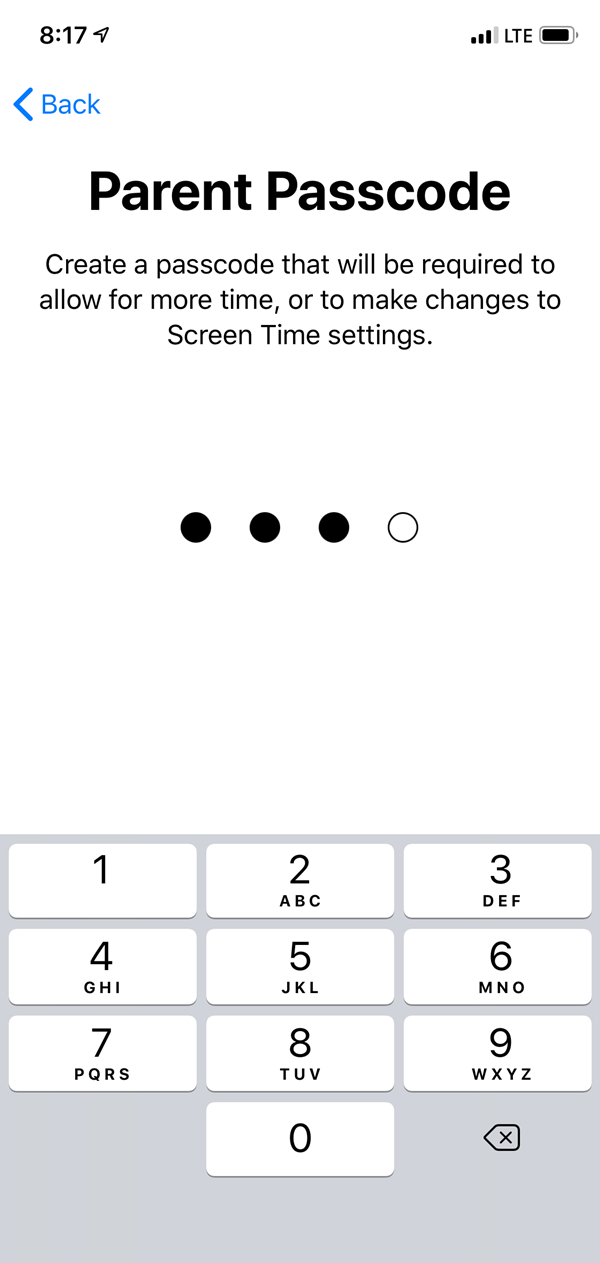
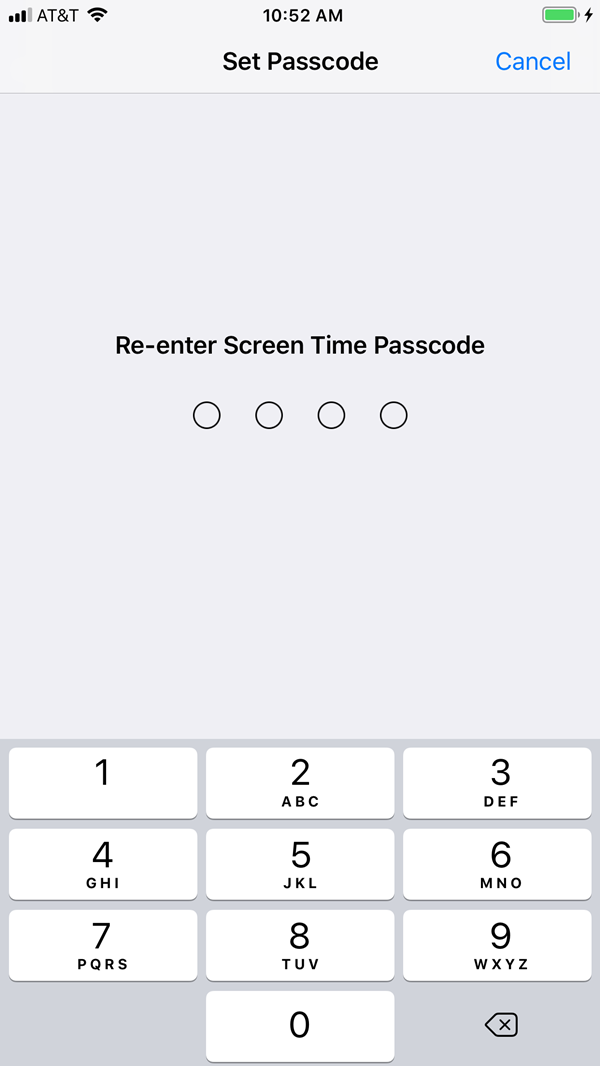
Create your Passcode.
Make sure to choose a passcode that's different from the passcode you use to unlock your device.
Re-enter your Passcode to confirm it.
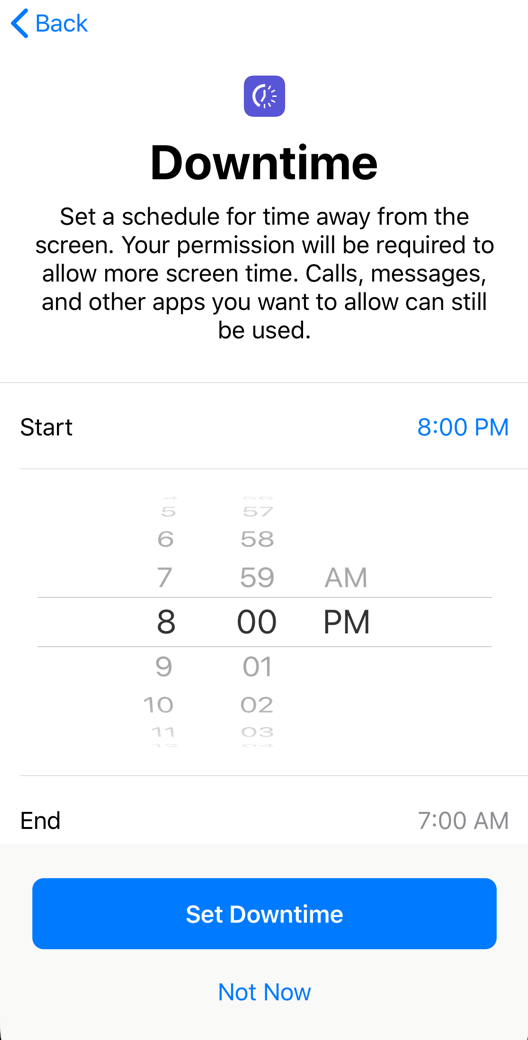
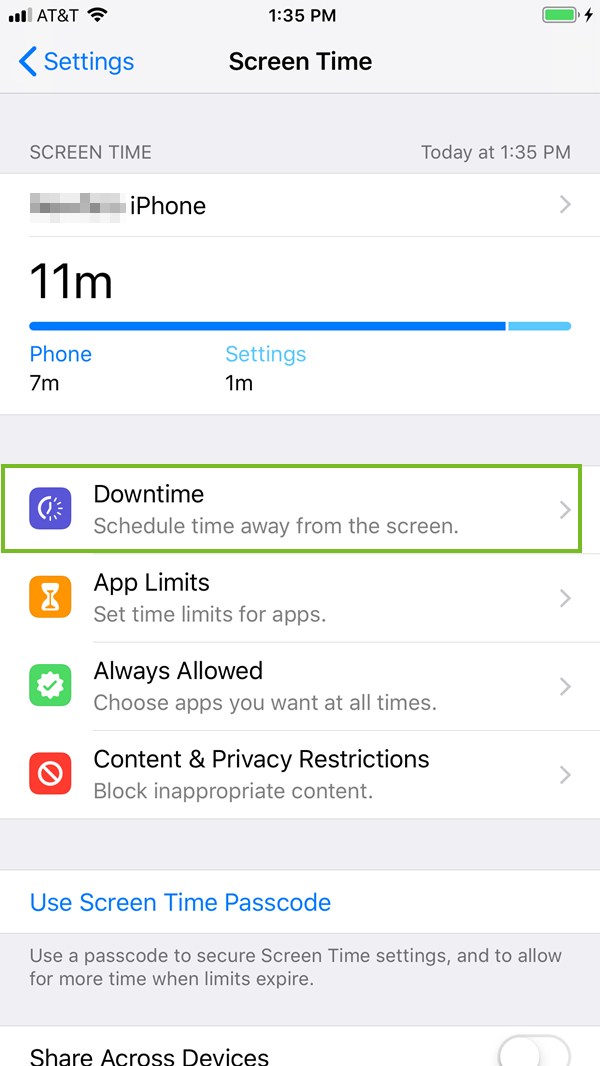
4. Set Downtime
Downtime effectively shuts down your phone for a specific length of time, allowing access only to calls and apps you authorize. You simply choose a start time and an end time, which is useful if you want to restrict your child's access at bedtime or during family time.
Open Settings on your device.
Tap Screen Time.
Tap Downtime.
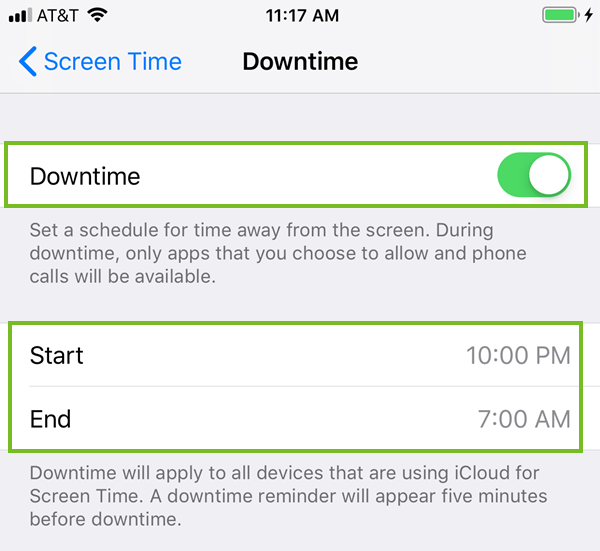
Enter your Screen Time Passcode.
Enable and set your Downtime schedule.
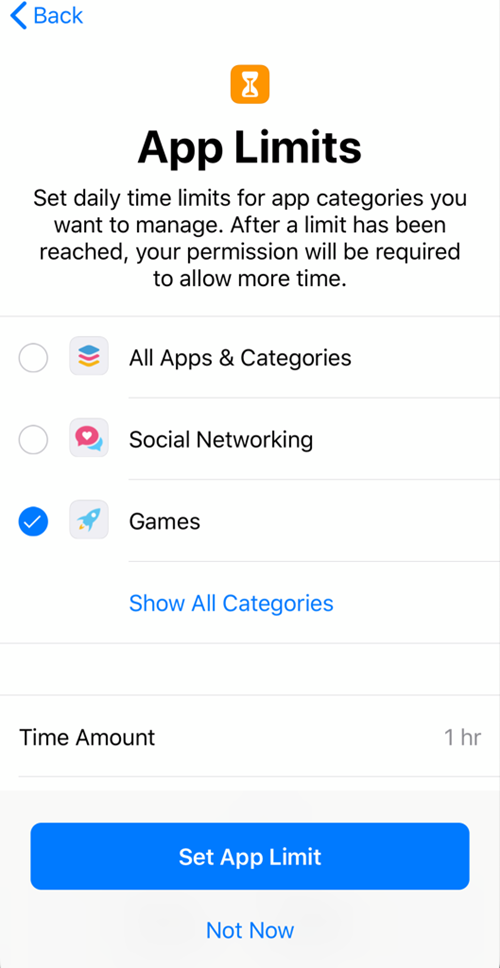
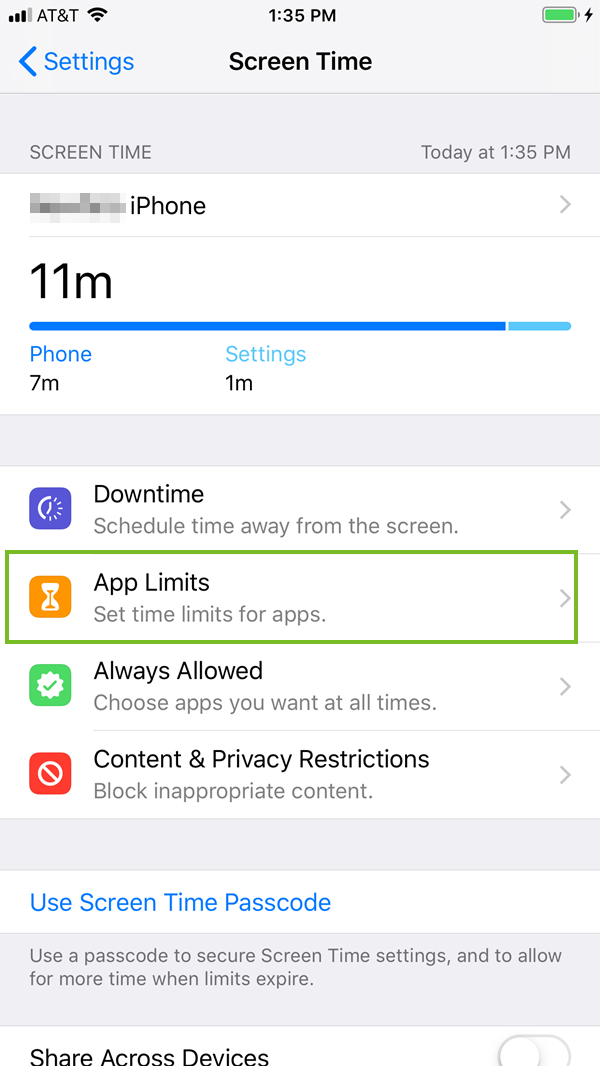
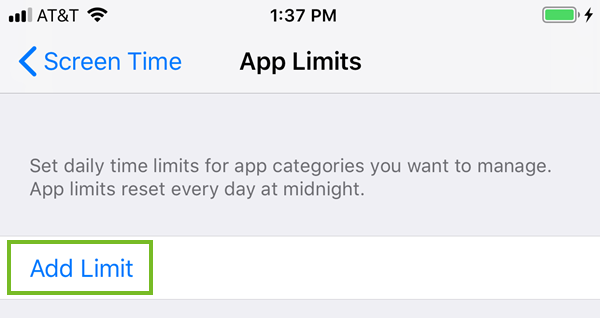
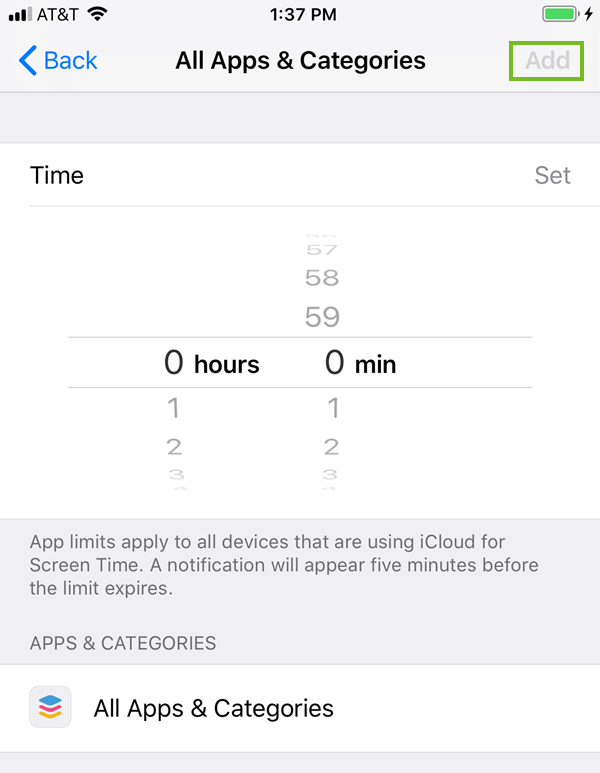
5. Set App Limits
App Limits lets you restrict access to apps in certain categories for a specific set of time per day.
Open Settings on your device.
Tap Screen Time.
Tap App Limits.
Enter your Screen Time Passcode.
Tap Add Limit.
Select what you would like to limit.
Choose the limited time and tap Add.
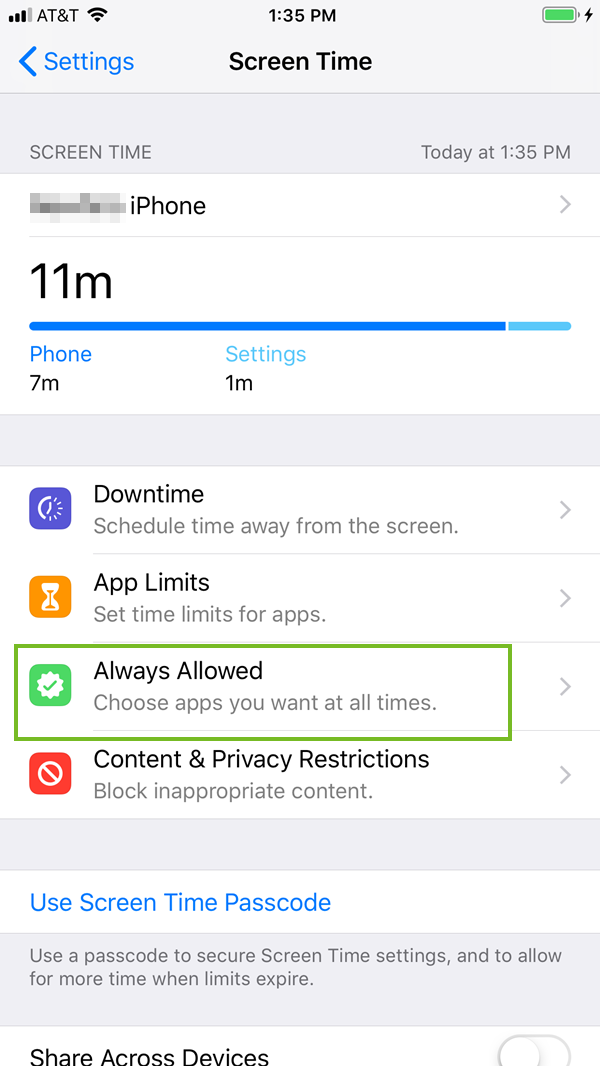
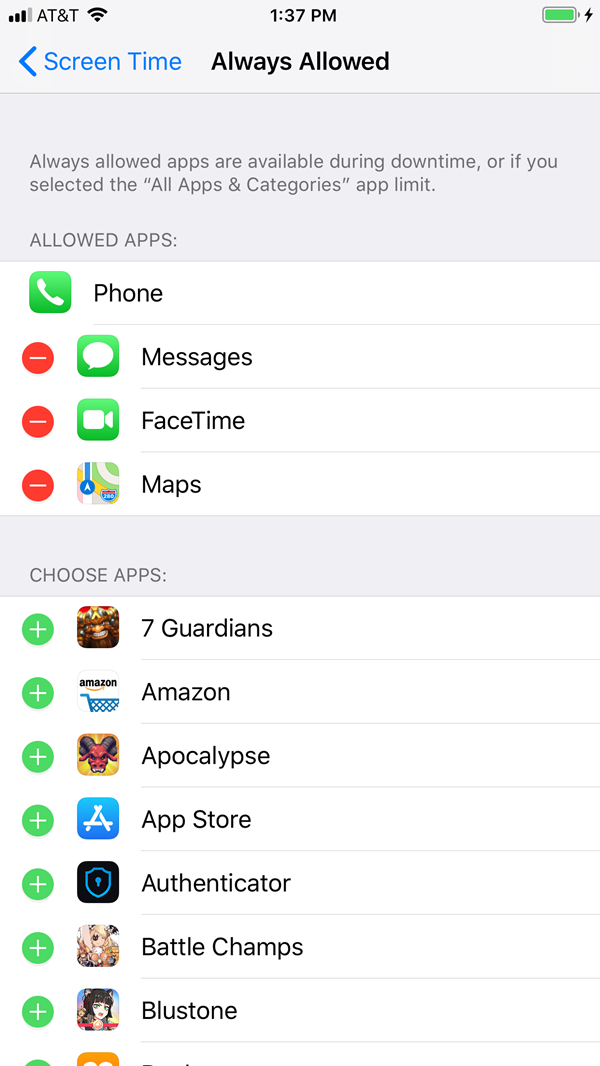
6. Set What Is Always Allowed
Always Allowed lets you make exemptions to your rules. What you choose here is always available regardless of restrictions.
Open Settings on your device.
Tap Screen Time.
Tap AlwaysAllowed.
Enter your Screen Time Passcode.
Choose what you want to allow by tapping the + button on the left side.
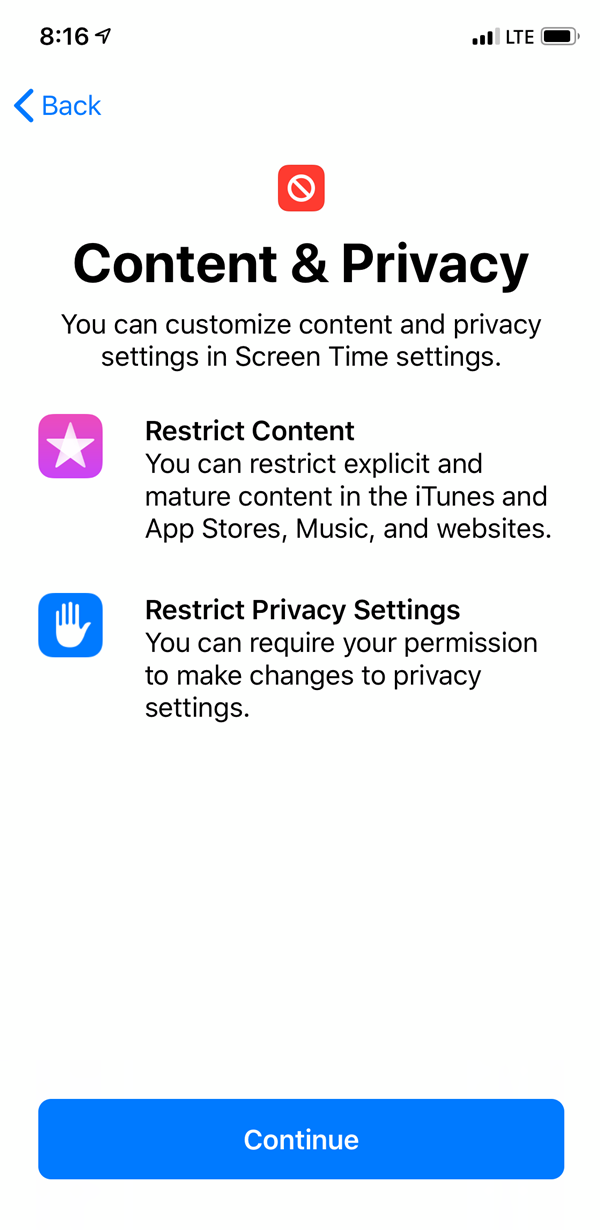
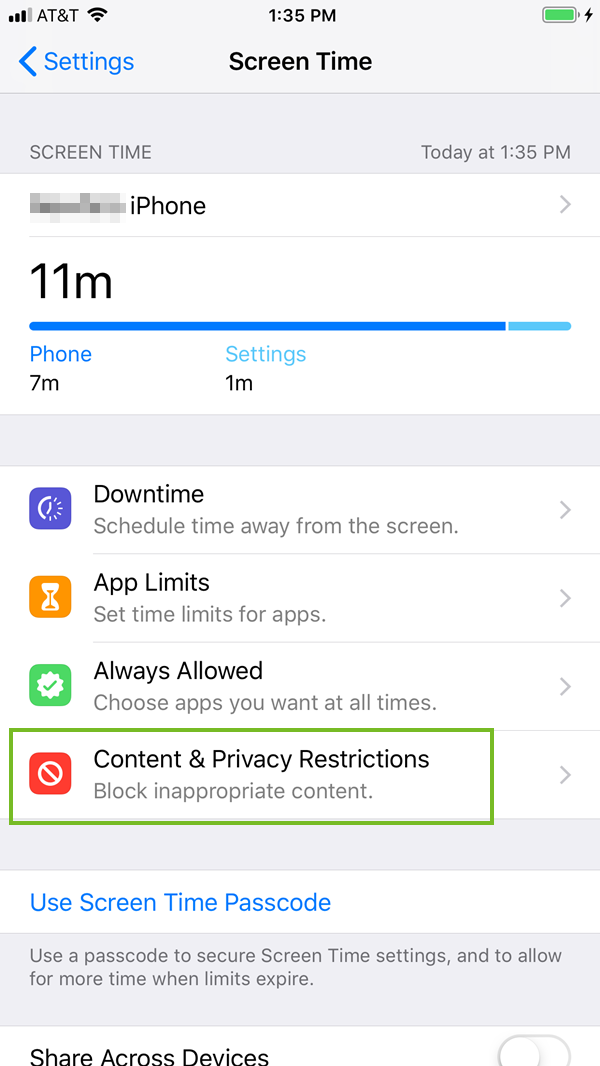
7. Enable and Set Content and Privacy Restrictions
With Content & Privacy Restrictions in Screen Time, you can block or limit specific apps and features on your child's device. And restrict the settings on your iPhone, iPad, or iPod touch for explicit content, purchases and downloads, and privacy.
Open Settings on your device.
Tap Screen Time.
Select Content and Privacy Restrictions.
Enter your Screen Time Passcode.
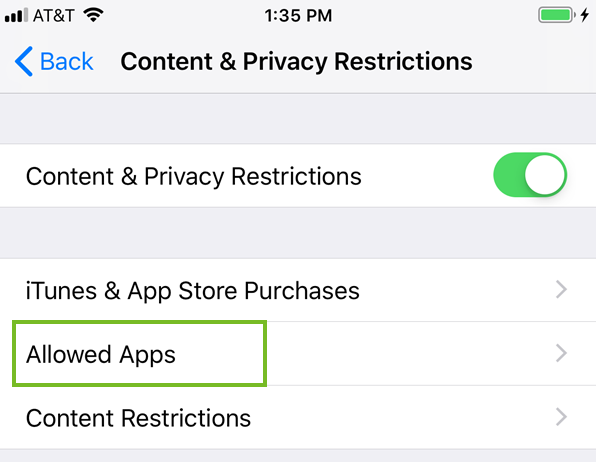
Enable Content and Privacy Restrictions by tapping the Switch.
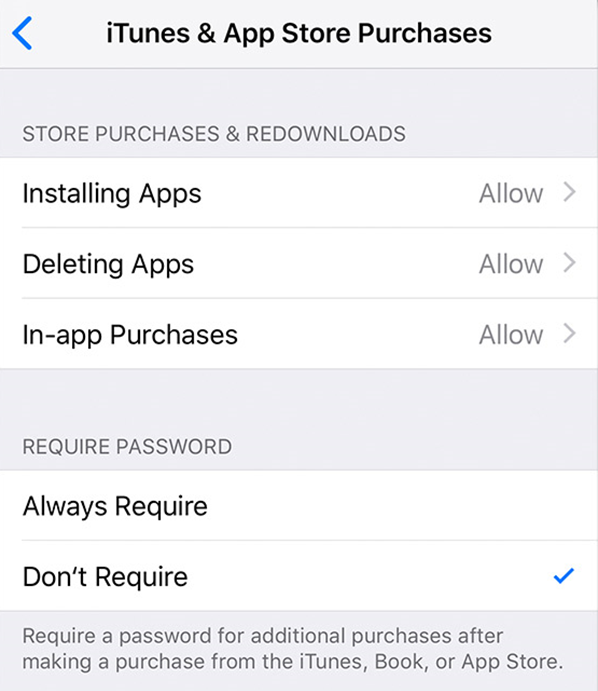
Tap iTunes and App Store Purchases.
Select what you want to restrict and whether you want to require a password for in-app purchases.
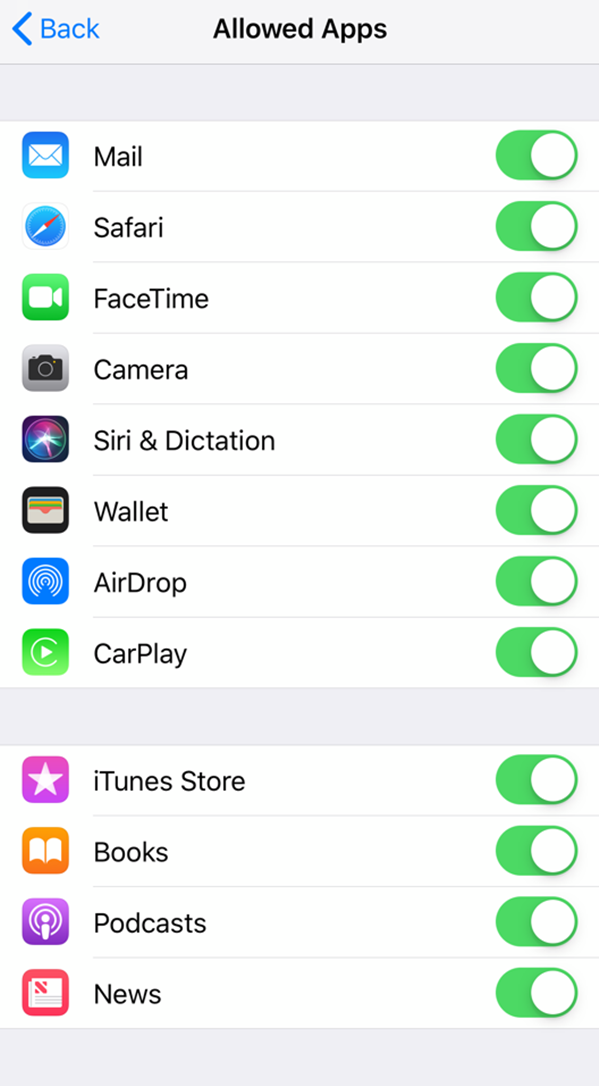
Return to the previous menu and tap AllowedApps.
Select the built in apps allowed to be used.
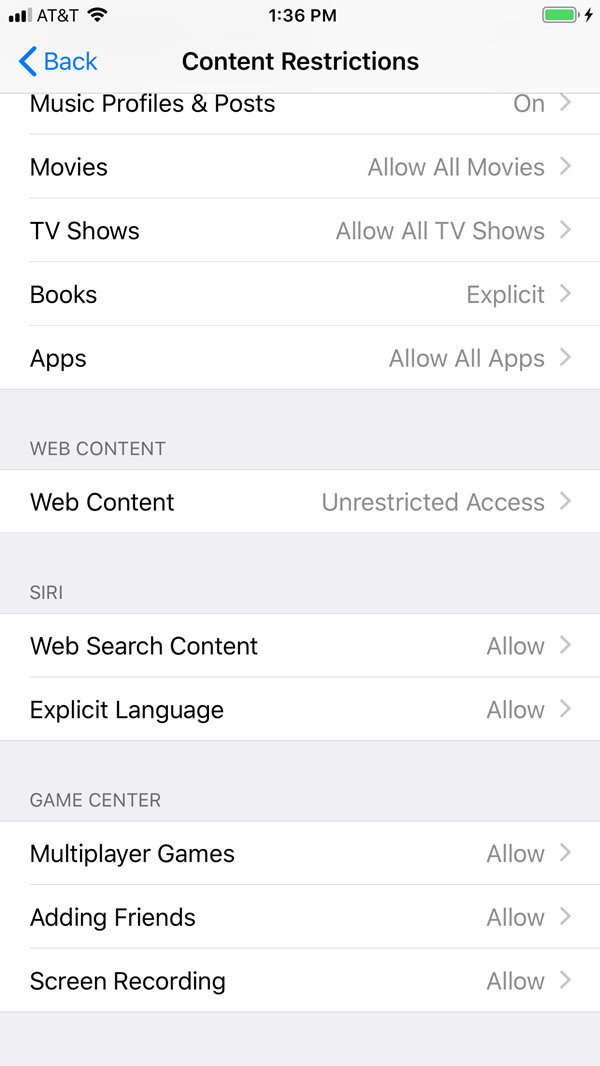
Return to the previous menu and tap ContentRestrictions.
From here you can restrict:
Ratings For: Select the country or region in the ratings section to automatically apply the appropriate content ratings for that region.
Music, Podcasts & News: Prevent the playback of music, music videos, podcasts, and news containing explicit content.
Music Profiles & Posts: Prevent sharing what you're listening to with friends and seeing what they are listening to.
Movies: Prevent movies with specific ratings.
TV shows: Prevent TV shows with specific ratings.
Books: Prevent content with specific ratings.
Apps: Prevent apps with specific ratings.
Web Content: Prevent any webpages or browser apps from working.
Siri: Prevent Siri from searching the web or saying anything explicit.
Game Center: Restrict the use of multiplayer games, adding friends, or recording the screen.
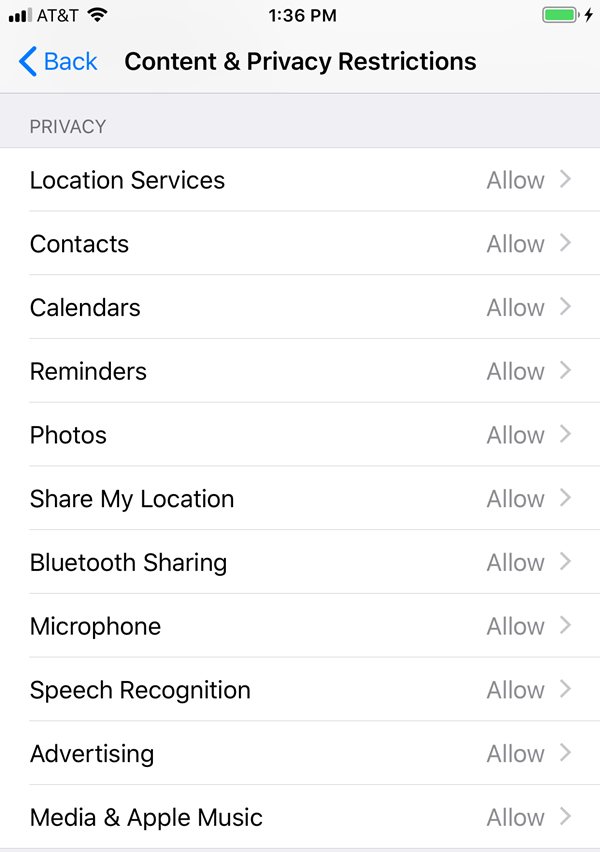
Return to the previous menu and scroll down to Privacy. Choose whether to allow these settings by tapping them.
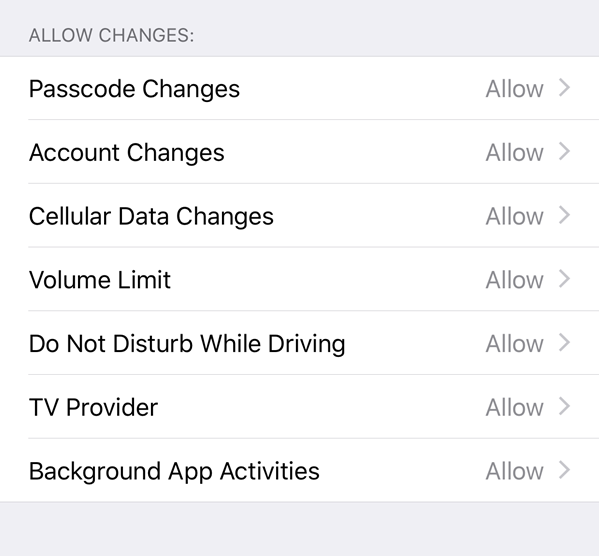
Continue scrolling down to Allow Changes and choose what you will allow this device to change.
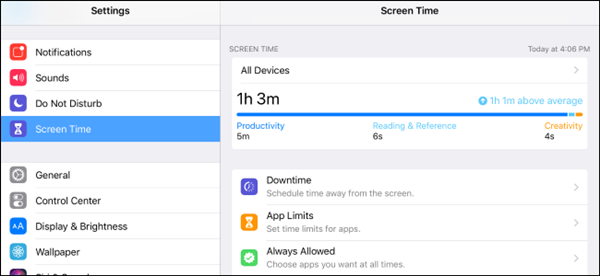
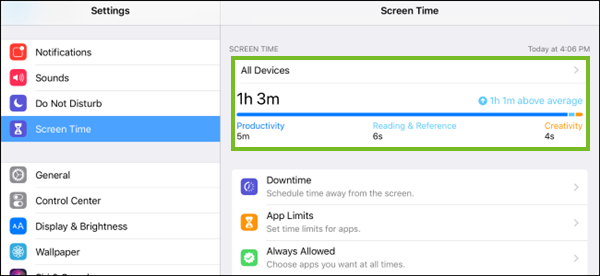
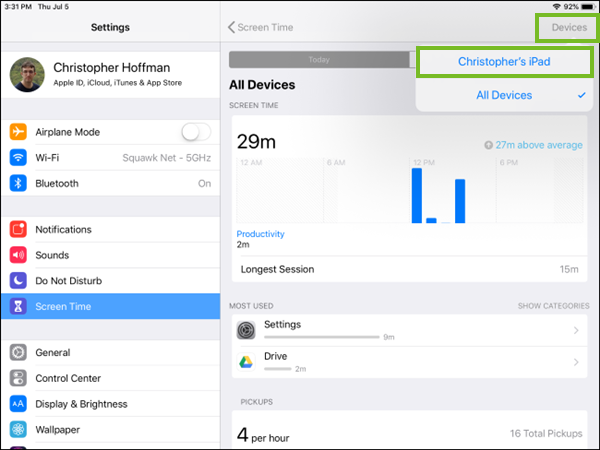
8. Review Screen Time
Screen Time gives you a detailed report about how your device is used, apps you've opened, and websites you've visited, any time that you want to see it.
Open Settings on your device.
Tap Screen Time.
If you have only this device set up in Screen Time you can view your report here.
If you want to view another device's report, tap anywhere in the report.
Tap Devices. Then Tap the device you want to view. In order to view another device you will need to have it set up in Family Sharing.
.png)